@Indexed原理与实战
文章目录
- 前言
- 一、@Indexed使用案例
- 二、spring.components文件的写入
- 2.1、收集元素
- 2.2、写入文件
- 三、@Indexed的扫描
- 3.1、ClassPathScanningCandidateComponentProvider
- 3.2、findCandidateComponents
- 3.2.1、AnnotationTypeFilter案例工程
- 3.2.2、AssignableTypeFilter案例工程
- 3.3、addCandidateComponentsFromIndex
- 四、传统方式与@Indexed扫描的对比
- 总结
前言
@Indexed是Spring提供的注解,主要作用是为了**加快Spring工程的启动速度。**会在编译后的target目录下的META-INF文件夹下生成spring.components索引文件,必须要配合spring-context-indexer依赖使用。
一、@Indexed使用案例
首先在pom文件中添加依赖:
<dependency><groupId>org.springframework</groupId><artifactId>spring-context-indexer</artifactId><version>5.0.6.RELEASE</version><scope>provided</scope></dependency>
案例工程:
public class MainApp {public static void main(String[] args) {AnnotationConfigApplicationContext context = new AnnotationConfigApplicationContext(Config.class);}}@Configuration
@ComponentScan
@Indexed
class Config{}@Component
class A{}@Component
class B{}
进行编译,在对应的目录下增加了索引文件:

索引文件中的每一项,key是包名+类名,value是类上的注解:
com.itbaima.a31.Controller2=org.springframework.stereotype.Component
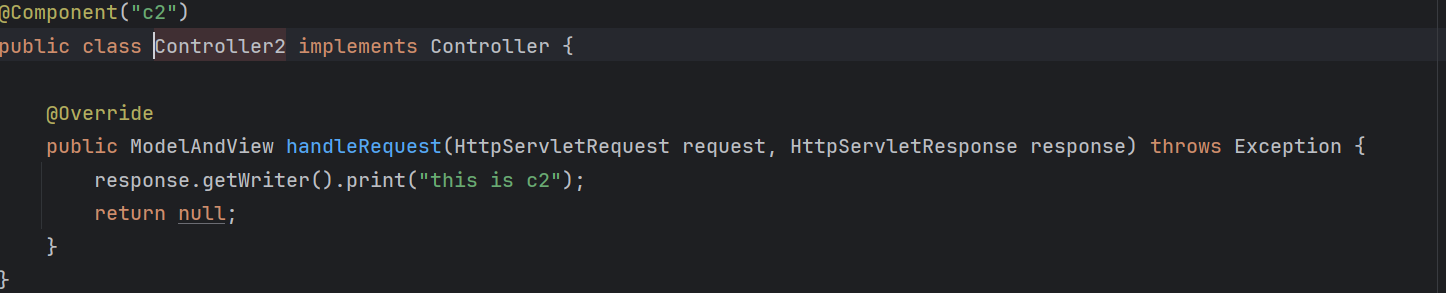
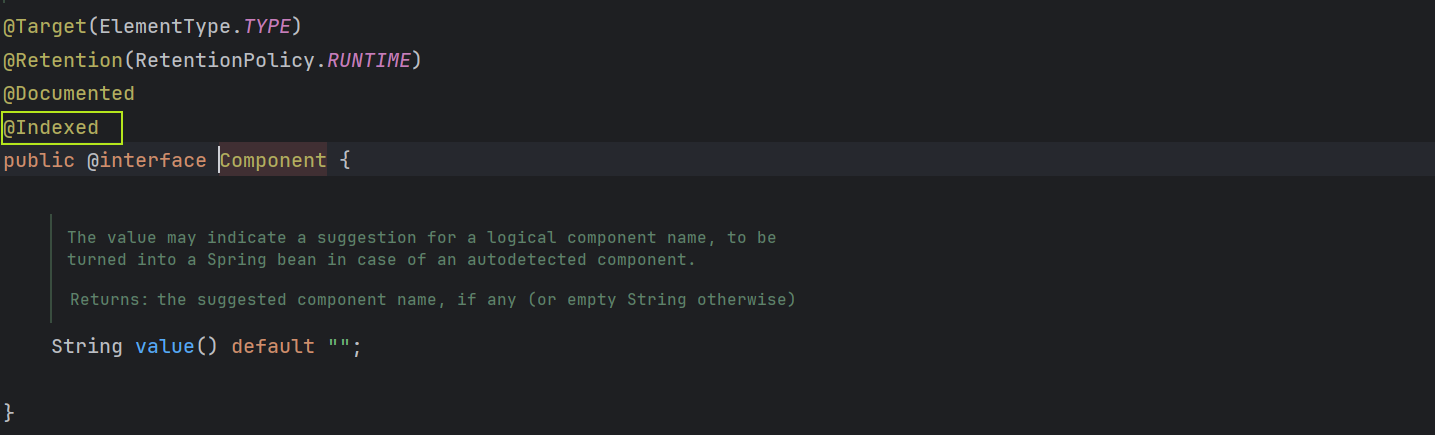
为什么我没有加上@Indexed注解,上面的类也被加到了索引文件中? 是因为@Component上自身已经包含了@Indexed注解:
二、spring.components文件的写入
spring.components文件的写入,关键在于引入的spring-context-indexerjar包中的CandidateComponentsIndexer#process方法:
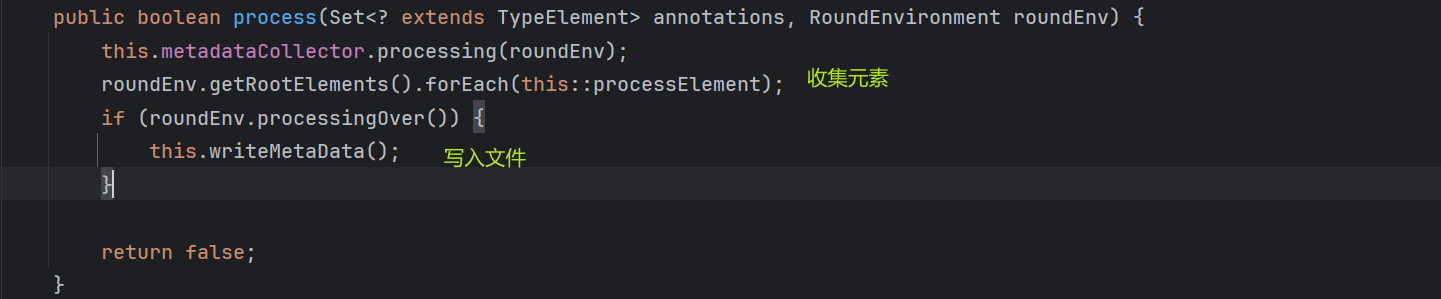
主要分为收集元素和写入文件两个部分
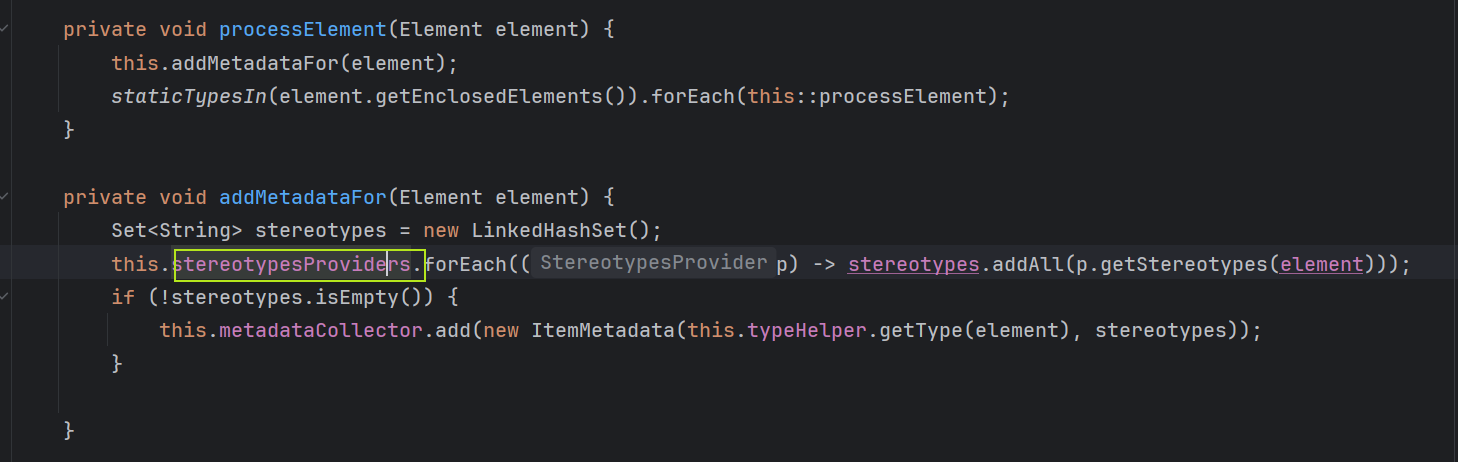
2.1、收集元素
收集元素主要依靠的是stereotypesProviders,它有三个实现,用来处理 @Indexed 注解的是IndexedStereotypesProvider

2.2、写入文件
写入成键值对的格式。

三、@Indexed的扫描
在源码中,体现在ClassPathBeanDefinitionScanner#doScan:

3.1、ClassPathScanningCandidateComponentProvider
ClassPathScanningCandidateComponentProvider有一个非常重要的属性:

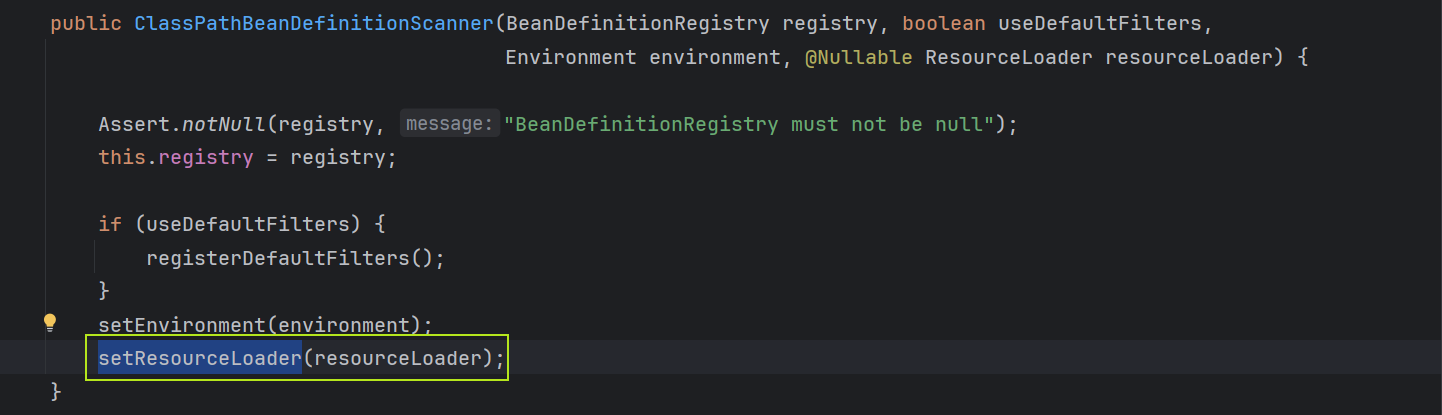
在构造ClassPathBeanDefinitionScanner时,会调用setResourceLoader方法:
componentsIndex属性在这里被赋值:

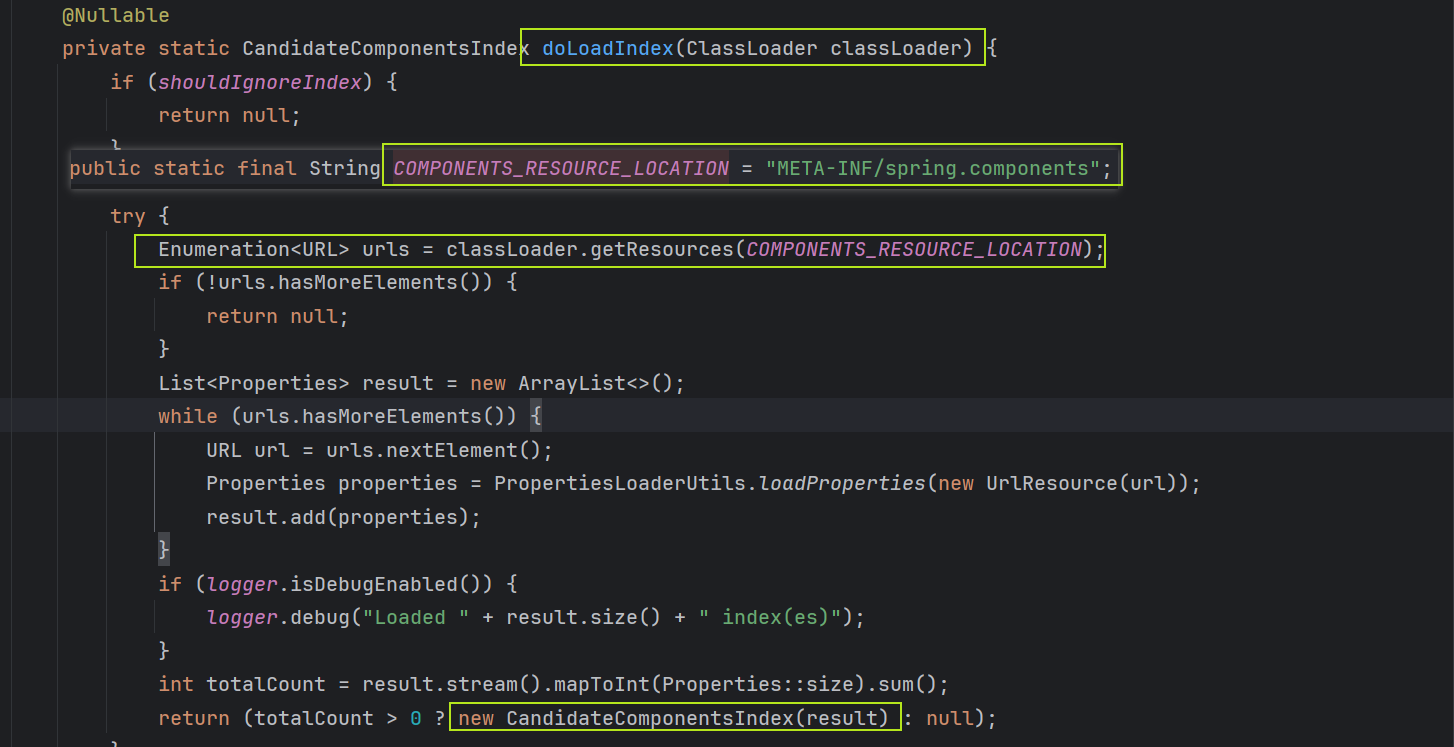
在doLoadIndex中,会寻找并扫描META-INF/spring.components文件,并且收集成键值对的形式,赋值给CandidateComponentsIndex的index属性:
其中的index是CandidateComponentsIndex中的关键属性,它的结构:

3.2、findCandidateComponents
findCandidateComponents是ClassPathScanningCandidateComponentProvider中的一个方法。
如果满足indexSupportsIncludeFilters方法的逻辑,就会去扫描加入了@Indexed注解的bean,然后放到索引文件中。

这里的includeFilter默认有两个:
@Component是开发中最常见的,表示该类是一个 组件(bean),可以被自动扫描并注册到 Spring 容器中。@ManagedBean是 Java EE 提供的注解,用于声明一个由容器管理的 Bean,Spring也支持它。

在indexSupportsIncludeFilter方法中,会真正地进行判断,第一段的判断逻辑是,找所有标注了某个注解@XXX的类,如果找到了,就去检查该注解中是否加入了@Indexed,或者是javax.* 开头的标准注解。

第二段的逻辑是,找所有继承或实现了某个类/接口的类,如果有,就检查这个类是否明确加入了@Indexed。

3.2.1、AnnotationTypeFilter案例工程
可以通过一个案例工程说明:
public class ScanTest {public static void main(String[] args) {ClassPathScanningCandidateComponentProvider provider =new ClassPathScanningCandidateComponentProvider(false);provider.addIncludeFilter(new AnnotationTypeFilter(IndexedAnno.class));provider.addIncludeFilter(new AnnotationTypeFilter(PlainAnno.class));Set<BeanDefinition> beans = provider.findCandidateComponents("com.itbaima.indexed.demo1");for (BeanDefinition bean : beans) {System.out.println("发现组件:" + bean.getBeanClassName());}}
}@Target(ElementType.TYPE)
@Retention(RetentionPolicy.RUNTIME)
@Indexed //  可以被索引
@interface IndexedAnno {
}@Target(ElementType.TYPE)
@Retention(RetentionPolicy.RUNTIME)
//没加 @Indexed,不能被索引
@interface PlainAnno {
}@IndexedAnno
class ServiceA {
}@PlainAnno
class ServiceB {
}
虽然两个文件都会被发现,但是在索引文件中只能找到标注了@IndexedAnno的ServiceA。
发现组件:com.itbaima.indexed.demo1.ServiceA
发现组件:com.itbaima.indexed.demo1.ServiceB

3.2.2、AssignableTypeFilter案例工程
第二种场景的案例工程
public class MainApp{public static void main(String[] args) {ClassPathScanningCandidateComponentProvider provider =new ClassPathScanningCandidateComponentProvider(false);provider.addIncludeFilter(new AssignableTypeFilter(BaseService.class));Set<BeanDefinition> components = provider.findCandidateComponents("com.itbaima.indexed.demo2");for (BeanDefinition bd : components) {System.out.println("发现的实现类: " + bd.getBeanClassName());}}
}@Indexed
interface BaseService{}class ExtendService implements BaseService{}
子类也可以被扫描到
发现的实现类: com.itbaima.indexed.demo2.ExtendService

3.3、addCandidateComponentsFromIndex
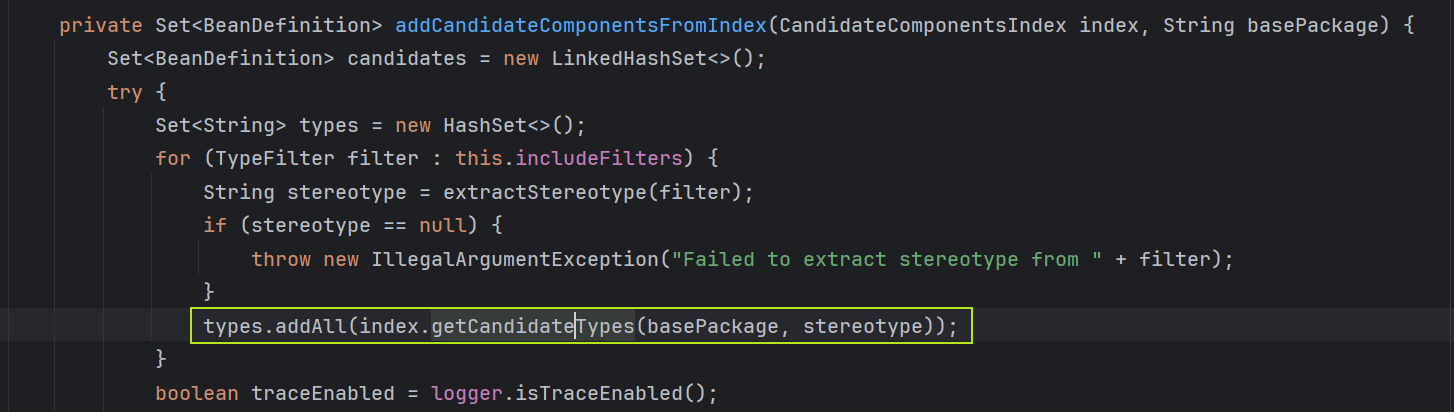
符合要求的会进入addCandidateComponentsFromIndex方法:

在addCandidateComponentsFromIndex方法中,会根据当前类路径,从上一步预加载的index中获取结果,生成bean定义,而非进行传统的 classpath 扫描。
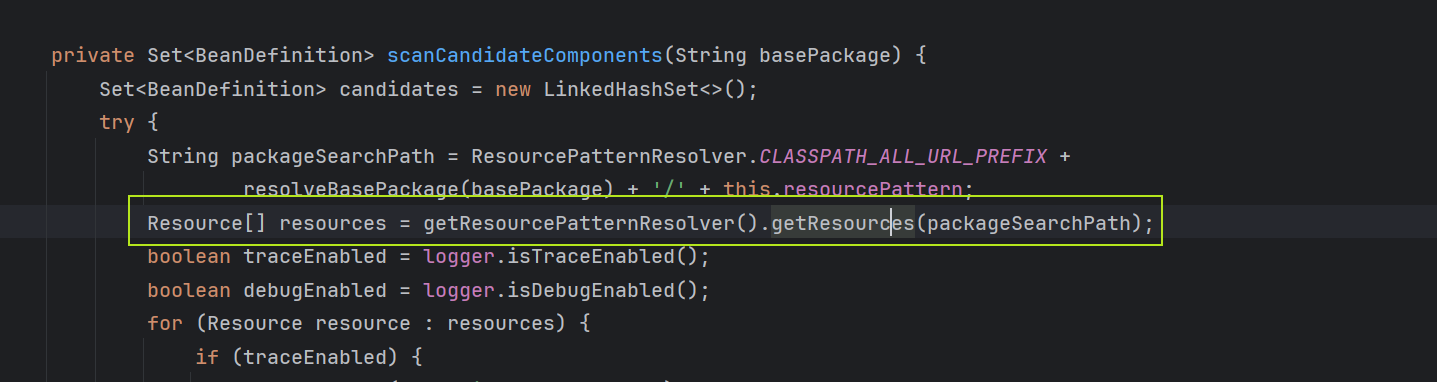
与scanCandidateComponents的对比:
四、传统方式与@Indexed扫描的对比
假设 com.example 包下有 10 个类:
情况一:使用 scanCandidateComponents(传统扫描)
- Spring 启动时,
ClassPathScanningCandidateComponentProvider会:- 递归扫描该包及其子包下所有的 .class 文件
- 通过 ASM 或反射方式读取每个类的字节码
- 判断是否存在如
@Component、@Service等注解 - 若匹配,则包装为
BeanDefinition放入容器
无任何提前缓存,完全依赖运行时扫描,开销较大。
情况二:使用 addCandidateComponentsFromIndex(索引优化)
- 如果目标注解(如
@MyComponent)自身被标注了@Indexed - 编译阶段,
spring-context-indexer会将被该注解标注的类写入META-INF/spring.components - Spring 启动时:
- 直接加载
spring.components索引文件 - 查找是否有类在
com.example包下,并且是目标注解标注的 - 直接构建
BeanDefinition返回
- 直接加载
无需 classpath 扫描、无需字节码分析,直接通过预处理文件定位,性能明显提升
总结
使用@Indexed注解,可以提高Spring启动过程中扫描配置类的速度。需要手动引入spring-context-indexer的jar包。其工作原理主要分为三个阶段:
- 在编译期间,扫描所有加入了
@Index注解的类,在target目录下的MATA-INF下生成spring.components文件,以键值对的形式进行记录。 - 在Spring启动期间,
doLoadIndex中,寻找并扫描META-INF/spring.components文件,赋值给CandidateComponentsIndex的index属性。 - 在调用
findCandidateComponents()方法查找候选类时,Spring 会优先判断当前的TypeFilter是否满足索引支持条件,如果满足,则会从上一步预加载的index中获取结果,生成bean定义,而非进行传统的 classpath 扫描。