LangGraph - API多种访问方式
本文介绍了Langgraph服务的四种调用方式:
1. 通过LangGraph Studio UI界面手动测试;
2. 使用Python SDK进行同步/异步调用;
3. 通过REST API测试;
4. 使用JavaScript SDK接入。
Langgraph 服务端代码 graph.py
from langchain_openai import ChatOpenAI
from langgraph.prebuilt import create_react_agentllm = ChatOpenAI(model='qwq-32b',temperature=0.8,api_key='sk-****',streaming=True,base_url="https://dashscope.aliyuncs.com/compatible-mode/v1",# extra_body={'chat_template_kwargs': {'enable_thinking': False}},
)
#
def get_weather(city: str) -> str:"""Get weather for a given city."""return f"在 {city},今天天气不错!"graph = create_react_agent(llm,tools=[get_weather],prompt="你是一个智能助手"
)
通过命令langgraph dev 启动服务,可以看到控制台返回的API地址

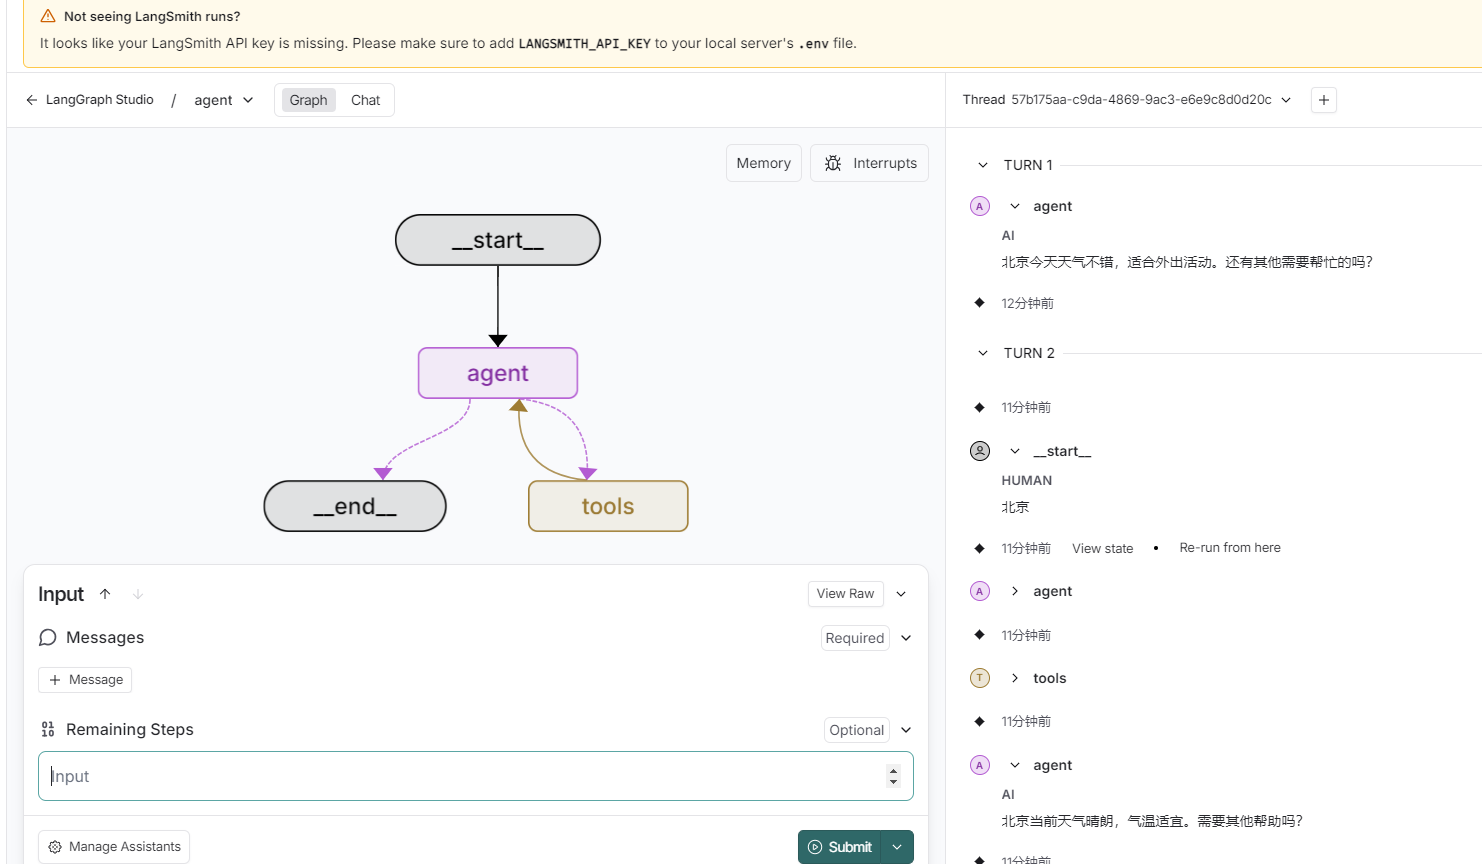
1.第一种访问方式:LangGraph Studio
当启动服务后,浏览器中会自动打开 Studio UI的地址,页面如下
可手动输入message,完成调用
2.第二种访问方式:PythonSDK测试
先安装依赖:pip install langgraph-sdk
1)异步测试
langgraph_async_test.py文件内容:
from langgraph_sdk import get_client
import asyncioclient = get_client(url="http://localhost:2024")async def main():async for chunk in client.runs.stream(None,  # Threadless run"agent", # Name of assistant. Defined in langgraph.json.input={"messages": [{"role": "human","content": "上海今天的天气",}],},stream_mode="messages-tuple",):# print(f"Receiving new event of type: {chunk.event}...")# print(chunk.data)if isinstance(chunk.data,list) and 'type' in chunk.data[0] and chunk.data[0]['type'] == 'AIMessageChunk':print(chunk.data[0]['content'], end='', flush=True)asyncio.run(main())
运行结果:

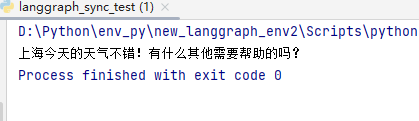
2)同步测试
langgraph_sync_test.py文件内容:
from langgraph_sdk import get_sync_clientclient = get_sync_client(url="http://localhost:2024")for chunk in client.runs.stream(None, # Threadless run"agent", # Name of assistant. Defined in langgraph.json.input={"messages": [{"role": "human","content": "上海今天的天气",}],},stream_mode="messages-tuple",):# print(f"Receiving new event of type: {chunk.event}...")# print(chunk.data)if isinstance(chunk.data,list) and 'type' in chunk.data[0] and chunk.data[0]['type'] == 'AIMessageChunk':print(chunk.data[0]['content'], end='', flush=True)运行结果:
后面2种方式,可自动测试,参考如下
3.第三种访问方式:REST API测试
curl -s --request POST \--url "http://localhost:2024/runs/stream" \--header 'Content-Type: application/json' \--data "{\"assistant_id\": \"agent\",\"input\": {\"messages\": [{\"role\": \"human\",\"content\": \"上海的天气?\"}]},\"stream_mode\": \"messages-tuple\"}"
4.第四种访问方式:JavaScript SDK测试
安装 LangGraph JS SDK:npm install @langchain/langgraph-sdk
向LangGraph服务区发送消息:
const { Client } = await import("@langchain/langgraph-sdk");// only set the apiUrl if you changed the default port when calling langgraph dev
const client = new Client({ apiUrl: "http://localhost:2024"});const streamResponse = client.runs.stream(null, // Threadless run"agent", // Assistant ID{input: {"messages": [{ "role": "user", "content": "上海的天气?"}]},streamMode: "messages-tuple",}
);for await (const chunk of streamResponse) {console.log(`Receiving new event of type: ${chunk.event}...`);console.log(JSON.stringify(chunk.data));console.log("\n\n");
}
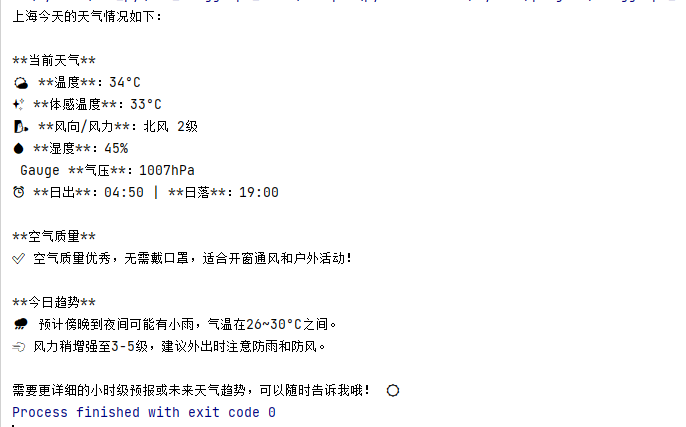
graph.py中的get_weather方法可替找成工具
TAVILY_API_KEY='tvly-dev-***'def get_weather(city: str) -> str:"""Get real-time weather for a given city using Tavily search."""from langchain_community.tools import TavilySearchResultsimport re# 创建 Tavily 搜索工具实例search_tool = TavilySearchResults(max_results=1,search_depth="advanced",include_answer=True,api_key=TAVILY_API_KEY)# 构造搜索查询query = f"{city} 当前天气 温度 湿度 风力 风向 天气状况"try:# 执行搜索results = search_tool.invoke({"query": query})# 解析结果if isinstance(results, list) and len(results) > 0:result = results[0]content = result.get('content', '暂无详细信息')# 修复编码问题的函数def fix_encoding(text):if not isinstance(text, str):return text# 尝试多种编码修复方法encodings_to_try = [('latin1', 'utf-8'),('cp1252', 'utf-8'),]for from_enc, to_enc in encodings_to_try:try:# 将字符串以from_enc编码方式重新编码,再以to_enc解码return text.encode(from_enc).decode(to_enc)except (UnicodeEncodeError, UnicodeDecodeError):continue# 如果上面的方法都不行,尝试直接使用raw_unicode_escapetry:return text.encode('raw_unicode_escape').decode('utf-8')except (UnicodeEncodeError, UnicodeDecodeError):pass# 如果所有方法都失败,返回原始内容return text# 修复编码fixed_content = fix_encoding(content)print(f"处理后内容: {fixed_content}")# 从修复后的内容中提取天气信息def extract_weather_info(text):info = {}# 提取天气状况(如晴、多云、阴等)weather_conditions = ['晴', '多云', '阴', '雨', '雪', '雾', '霾', '雷阵雨', '小雨', '中雨', '大雨', '暴雨']for condition in weather_conditions:if condition in text:info['condition'] = conditionbreak# 如果没找到中文天气状况,尝试用正则表达式if 'condition' not in info:condition_match = re.search(r'天气[:\s]*([^\s,,。\.]+)', text)if condition_match:info['condition'] = condition_match.group(1)# 提取温度 (寻找数字+度/℃)temp_match = re.search(r'(\d+\.?\d*)[度℃]', text)if temp_match:info['temperature'] = temp_match.group(1) + "℃"# 提取湿度humidity_match = re.search(r'湿度[:\s]*([0-9]+\.?[0-9]*)[%%]', text)if humidity_match:info['humidity'] = humidity_match.group(1) + "%"# 提取风向wind_dir_match = re.search(r'风向[:\s]*([东南西北风]+)', text)if wind_dir_match:info['wind_direction'] = wind_dir_match.group(1)# 提取风力wind_speed_match = re.search(r'风力[:\s]*([0-9]+\.?[0-9]*[级m/s])', text)if wind_speed_match:info['wind_speed'] = wind_speed_match.group(1)return info# 提取天气信息weather_info = extract_weather_info(fixed_content)# 构建最终输出格式if weather_info:output_parts = [f"{city} 天气"]if 'condition' in weather_info:output_parts.append(f"{weather_info['condition']}")output_parts.append("实时天气情况")if 'temperature' in weather_info:output_parts.append(f"温度{weather_info['temperature']}")if 'humidity' in weather_info:output_parts.append(f"湿度{weather_info['humidity']}")if 'wind_direction' in weather_info:output_parts.append(f"风向{weather_info['wind_direction']}")if 'wind_speed' in weather_info:output_parts.append(f"风力{weather_info['wind_speed']}")return " ".join(output_parts)else:# 如果无法提取结构化信息,则返回修复后的内容return f"{city}天气信息: {fixed_content}"else:return f"无法获取{city}的天气信息"except Exception as e:# 异常处理return f"查询{city}天气时出现错误: {str(e)}"
替换后再次测试,结果如下: