部署若依项目到服务器遇到的问题
以下是本次部署遇到的问题及解决方法
1、问题:docker一直出现“=> ERROR [internal] load metadata for docker.io/library/xxx“的问题
ERROR: failed to solve: openjdk:8-jdk-alpine: failed to resolve source metadata for docker.io/libran
y/openidk:8-idk-alpine
failed commit on ref
"unknown-sha256:607b09fd44f91f3a530d70fa4773273df312ce13139bfcc657f451e73a5d858"; "un
nown-sha256: 607ba9fd44f9lf3a530d70fa4773273df312ce13138bfcc657f45le73a5d858" failed size validation
1364 != 1199:failed preconditior
解决方法:国内很多镜像源不可用了,更换镜像源即可https://zhuanlan.zhihu.com/p/32004414428
测试:docker pull docker.m.daocloud.io/hello-world
出现以下内容表示成功
>Using default tag: latest
>latest: Pulling from hello-world
>e6590344b1a5: Pull complete
>Digest: sha256:c41088499908a59aae84b0a49c70e86f4731e588a737f1637e73c8c09d995654
>Status: Downloaded newer image for docker.m.daocloud.io/hello-world:latest
>docker.m.daocloud.io/hello-world:latest
成功后在daemon.json中永久更换镜像源sudo tee /etc/docker/daemon.json <<-'EOF'{"registry-mirrors": ["https://docker.m.daocloud.io","https://docker.imgdb.de","https://docker-0.unsee.tech","https://docker.hlmirror.com","https://docker.1ms.run","https://func.ink","https://lispy.org","https://docker.xiaogenban1993.com"]}更换成功后测试
sudo systemctl daemon-reload && sudo systemctl restart dockersudo docker pull hello-world测试成功后
#删除测试的helloworlddocker rmi -f 镜像名/镜像ID # 删除一个镜像docker rmi -f 74cc54e27dc4 # 删除一个镜像(74cc54e27dc4是hello-world的镜像id)2、问题:部署jar包后运行jar包会出现远程连接报错ERROR 1130: Host xxx.xxx.xxx.xxx is not allowed to connect to this MySQL server

配置文件Dockerfile
FROM openjdk:8-jdk-alpine
VOLUME /tmp
#时区
RUN echo "Asia/Shanghai" > /etc/timezone#captcher 字体包
RUN set -xe \
&& apk --no-cache add ttf-dejavu fontconfigCOPY *.jar manhour-admin.jar
ENTRYPOINT ["java","-jar","/manhour-admin.jar"]
#根据jar包创建后台docker容器
docker build -t workhoursystem1:v1 /usr/local/workhoursystem1#运行系统后台
docker run --name workhoursystem1 --restart=always -d -v /home/file:/home/file -v /home/workhoursystem1/logs:/home/manhour-management/logs -p 8094:8094 workhoursystem1:v1#打印报错日志
docker logs -f workhoursystem1# 停止docker stop workhoursystem1
docker rm 816b5f922496解决方法:
需要做以下mysql配置docker exec -it mysql /bin/bash
mysql -uroot -p1234
use mysql;
select host from user where user ='root';
update user set host ='%' where user ='root';
FLUSH PRIVILEGES;
3、问题:部署redis
docker pull redis:5.0.14docker run --restart=always -p 6380:6380 --name myredis -v /home/redis/data:/data -v /home/redis/conf/redis.conf:/etc/redis/redis.conf -v /home/redis/log:/var/log/redis -d redis:5.0.14 redis-server /etc/redis/redis.conf --bind 0.0.0.0 --protected-mode noredis.conf文件
# Redis服务器配置 # 绑定IP地址
#解除本地限制 注释bind 127.0.0.1
bind 0.0.0.0 #docker run -itd --name redis \
#-v /home/redis/conf/redis.conf:/home/redis/conf/redis.conf \
#-p 6379:6379 \
#redis:5.0.14 redis-server /home/redis/conf/redis.conf --appendonly yes# 服务器端口号
port 6380# 数据库索引数量(默认 16)
databases 16#配置密码,不要可以删掉
#requirepass #这个配置不要会和docker -d 命令 冲突
# 服务器运行模式,Redis以守护进程方式运行,默认为no,改为yes意为以守护进程方式启动,可后台运行,除非kill进程,改为yes会使配置文件方式启动redis失败,如果后面redis启动失败,就将这个注释掉
daemonize noprotected-mode no#当Redis以守护进程方式运行时,Redis默认会把pid写入/var/run/redis.pid文件,可以通过pidfile指定(自定义)
#pidfile /data/dockerData/redis/run/redis6379.pid #默认为no,redis持久化,可以改为yes
appendonly yes#当客户端闲置多长时间后关闭连接,如果指定为0,表示关闭该功能
timeout 10
# 服务器系统默认配置参数影响 Redis 的应用
maxclients 10000
tcp-keepalive 300#指定在多长时间内,有多少次更新操作,就将数据同步到数据文件,可以多个条件配合(分别表示900秒(15分钟)内有1个更改,300秒(5分钟)内有10个更改以及60秒内有10000个更改)
save 900 1
save 300 10
save 60 10000# 按需求调整 Redis 线程数
tcp-backlog 511# 启用 AOF, AOF常规配置
#appendonly yes
#appendfsync everysec
#no-appendfsync-on-rewrite no
#auto-aof-rewrite-percentage 100
#auto-aof-rewrite-min-size 64mb# 慢查询阈值
slowlog-log-slower-than 10000
slowlog-max-len 128# 是否记录系统日志,默认为yes
syslog-enabled yes #指定日志记录级别,Redis总共支持四个级别:debug、verbose、notice、warning,默认为verbose
loglevel notice# 日志输出文件,默认为stdout,也可以指定文件路径
logfile stdout
#logfile /home/redis/log# 日志文件
#logfile /var/log/redis/redis-server.log# 系统内存调优参数
# 按需求设置
hash-max-ziplist-entries 512
hash-max-ziplist-value 64
list-max-ziplist-entries 512
list-max-ziplist-value 64
set-max-intset-entries 512
zset-max-ziplist-entries 128
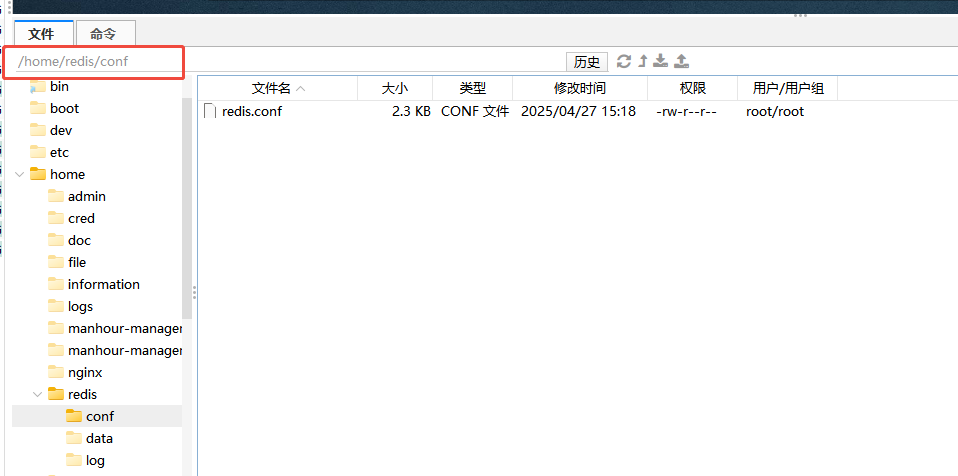
zset-max-ziplist-value 64redis.conf文件的路径
使用 curl 测试 TCP 连接(简单探测)虽然 curl 主要用于 HTTP,但可以通过 telnet 协议模拟 TCP 连接尝试
curl -v telnet://服务器地址:6380
>成功连接:会显示 Connected to 本服务器地址 (本服务器地址) port 6380。
验证 Redis 配置生效:
docker exec -it myredis redis-cli config get bind 或 docker exec -it myredis redis-cli config get bind # 应返回 "bind 0.0.0.0"
4、问题:如果部署上redis之后,还是显示连接本地的redis端口
解决方法:
这次是因为更改了jar包,但没有重新bulid,重新走一遍这个步骤就可以了
失败:显示 Failed to connect 或超时。#删除
docker stop workhoursystem1
docker rm  workhoursystem1
#build
docker build -t workhoursystem1:v1 /usr/local/workhoursystem1
#运行java项目
docker run --name workhoursystem1 --restart=always -d -v /home/file:/home/file -v /home/workhoursystem1/logs:/home/manhour-management/logs -p 8094:8094 workhoursystem1:v1
#打印
docker logs -f  workhoursystem1
5、问题:前端若依部署之后,显示请求后端接口有问题
解决方法:需要在nginx里面加上这个配置
location /prod-api/{proxy_set_header Host $http_host;proxy_set_header X-Real-IP $remote_addr;proxy_set_header REMOTE-HOST $remote_addr;proxy_set_header X-Forwarded-For $proxy_add_x_forwarded_for;proxy_pass http://localhost:8094/zgzcwy/;//服务器地址+jar包端口号
}
完整版nginx

在nginx.conf# user  nginx;
worker_processes  4;error_log  /var/log/nginx/error.log notice;
pid        /var/run/nginx.pid;events {worker_connections  1024;
}http {include       /etc/nginx/mime.types;default_type  application/octet-stream;log_format  main  '$remote_addr - $remote_user [$time_local] "$request" ''$status $body_bytes_sent "$http_referer" ''"$http_user_agent" "$http_x_forwarded_for"';access_log  /var/log/nginx/access.log  main;sendfile        on;#tcp_nopush     on;keepalive_timeout  65;gzip  on;# 开启gzipgzip_buffers 4 16k;# 设置缓冲区大小gzip_comp_level 6;#压缩级别官网建议是6,压缩级别(级别越高,压的越小,越浪费CPU计算资源)gzip_min_length 100;#允许被压缩的页面最小字节数gzip_types text/plain application/javascript text/css application/xml text/javascript application/x-httpd-php image/png;#压缩的类型gzip_disable "MSIE [1-6]\.";#配置禁用gzip条件,支持正则。此处表示ie6及以下不启用gzip(因为ie低版本不支持)gzip_vary on;#是否传输gzip标识gzip_http_version 1.1;# 使用 GZIP 压缩的最小 HTTP 版本#gzip  on;include /etc/nginx/conf.d/*.conf;
}
在本项目的nginx里面加上以下配置

server {listen       8003;listen  [::]:8003;server_name  localhost;#access_log  /var/log/nginx/host.access.log  main;location / {root   /usr/local/workhoursystem1web/dist;index  index.html index.htm;# 这个非常重要,采用vue-router的时候,必须配置这个try_files $uri $uri/ /index.html;}location /prod-api/{proxy_set_header Host $http_host;proxy_set_header X-Real-IP $remote_addr;proxy_set_header REMOTE-HOST $remote_addr;proxy_set_header X-Forwarded-For $proxy_add_x_forwarded_for;proxy_pass http://localhost:8094/zgzcwy/;//服务器地址+jar包端口
}#error_page  404              /404.html;# redirect server error pages to the static page /50x.html#error_page   500 502 503 504  /50x.html;location = /50x.html {root   /usr/share/nginx/html;}
#    location /dev-api/{
#	proxy_set_header Host $http_host;
#	proxy_set_header X-Real-IP $remote_addr;
#	proxy_set_header REMOTE-HOST $remote_addr;
#	proxy_set_header X-Forwarded-For &proxy_add_x_forwarded_for;
#	proxy_pass http://localhost/zgzcwy;
##	http://localhost:9000/;
#	}
#	location /prod-api/{
#	proxy_set_header Host $http_host;
#	proxy_set_header X-Real-IP $remote_addr;
#	proxy_set_header REMOTE-HOST $remote_addr;
#	proxy_set_header X-Forwarded-For &proxy_add_x_forwarded_for;
#	proxy_pass http://localhost:8094/zgzcwy;
##	http://localhost:9000/;
#	}# proxy the PHP scripts to Apache listening on 127.0.0.1:80##location ~ \.php$ {#    proxy_pass   http://127.0.0.1;#}# pass the PHP scripts to FastCGI server listening on 127.0.0.1:9000##location ~ \.php$ {#    root           html;#    fastcgi_pass   127.0.0.1:9000;#    fastcgi_index  index.php;#    fastcgi_param  SCRIPT_FILENAME  /scripts$fastcgi_script_name;#    include        fastcgi_params;#}# deny access to .htaccess files, if Apache's document root# concurs with nginx's one##location ~ /\.ht {#    deny  all;#}
}
以上就是本次服务器部署若依项目遇到的问题!!!