Netty从0到1系列之Channel
文章目录
- 二、Channel
- 2.1 为什么需要 Channel?传统 IO 的局限
- 2.2 Channel核心特性
- 2.3 Channel的主要实现类
- 2.4 核心原理:Channel 与操作系统的关系
- 2.5 FileChannel代码示例
- 2.5.1 读取数据
- 2.5.2 写入数据
- 2.5.3 使用 FileChannel 复制文件
- 2.5.4 Transfer
- 2.6 ⚙️Path和Paths
- 2.7 🔧File类Files
- 2.7.1 常用方法
- 2.7.2 基本使用代码
- 2.7.3 遍历文件目录
- 2.7.4 删除目录
- 2.7.5 拷贝文件
- 2.8 Channel与Stream对比
- 2.9 Channel优缺点总结
- 2.9.1 ✅ 优点
- 2.9.2 ❌ 缺点
- 2.10 最佳实践与经验总结
二、Channel
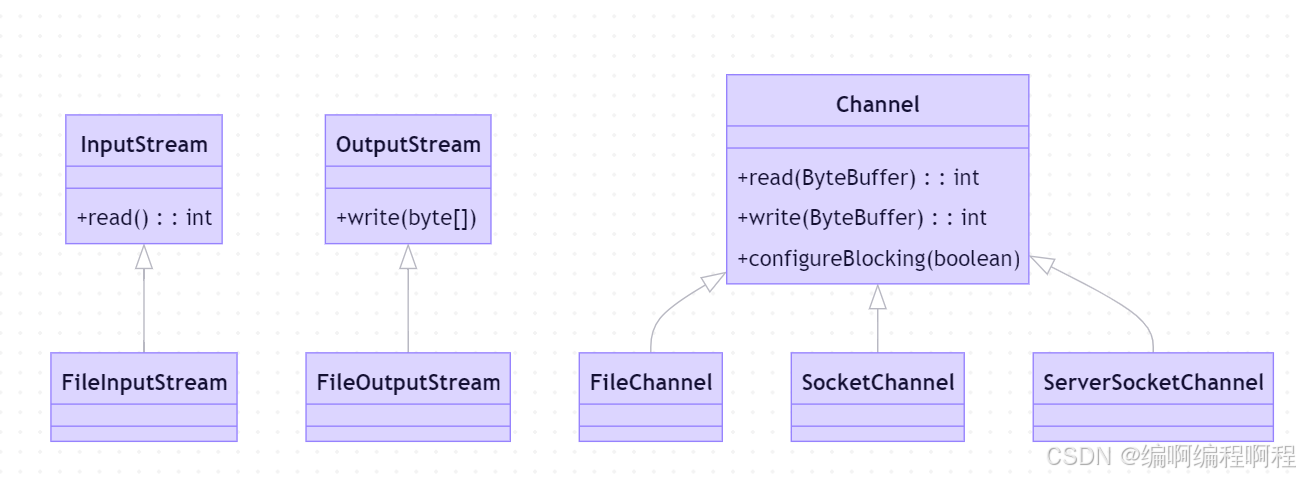
Channel 是 Java NIO 的核心组件之一,它是数据传输的“管道”,用于在 Java 应用程序与 I/O 设备(如文件、网络套接字)之间高效地传输数据。与传统的 InputStream 和 OutputStream 不同,Channel 是双向的、非阻塞的,并且总是与 Buffer 配合使用。
2.1 为什么需要 Channel?传统 IO 的局限
❌ 传统 IO(Stream)的问题
| 特性 | 问题 |
|---|---|
| 单向性 | InputStream 只能读,OutputStream 只能写 |
| 阻塞式 | 读写操作会阻塞线程,直到完成 |
| 逐字节处理 | 效率低,不适合大数据量传输 |
| 无缓冲集成 | 无法直接与 Buffer 协作 |
✅ Channel 的优势
| 特性 | 优势 |
|---|---|
| 双向性 | 同一个 Channel 可读可写(如 SocketChannel) |
| 支持非阻塞模式 | 可配合 Selector 实现 I/O 多路复用 |
| 批量传输 | 与 Buffer 配合,一次读写多个字节 |
| 支持文件传输优化 | 如 FileChannel.transferTo() 实现零拷贝 |
🎯 目标:构建高性能、高并发的 I/O 系统。
2.2 Channel核心特性
✅ 1. 双向通信
- 与 Stream 不同,大多数 Channel(如
SocketChannel)支持 读和写。 - 可以从中读取数据,也可以向其中写入数据(但需要结合缓冲区 Buffer)。一个
FileChannel可以同时读写,而无需像流那样创建FileInputStream和FileOutputStream两个对象。
channel.read(buffer); // 读数据
channel.write(buffer); // 写数据
✅ 2. 非阻塞模式
- 可通过
configureBlocking(false)设置为非阻塞。 - 在非阻塞模式下,
read()或write()立即返回,不会阻塞线程。 - 在此模式下,调用读写方法会立刻返回,线程不会被挂起。这使得网络编程可以实现单线程管理多通道,这是实现高并发的关键。
✅ 3. 与 Buffer 协作
- 所有数据必须通过
Buffer传输。 - 不支持直接读写字节数组。
- 数据总是从通道读到缓冲区,或从缓冲区写入通道。这种基于块(Block)的操作效率远高于流的逐字节操作。
核心关系图:数据通过 Channel 与 Buffer 进行交互
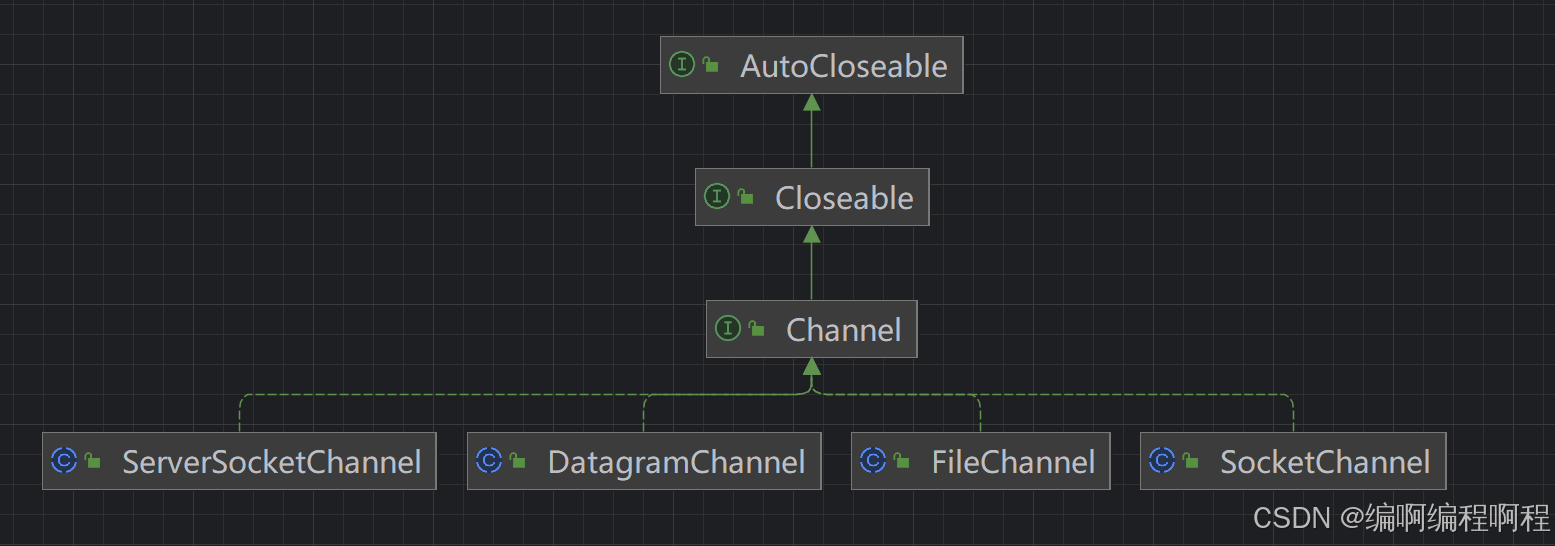
2.3 Channel的主要实现类
| Channel 类 | 用途 | 是否可注册到 Selector |
|---|---|---|
| FileChannel | 文件读写 | ❌(不支持非阻塞) |
| SocketChannel | TCP 客户端 | ✅ |
| ServerSocketChannel | TCP 服务端 | ✅ |
| DatagramChannel | UDP 通信 | ✅ |
| Pipe.SinkChannel / Pipe.SourceChannel | 线程间通信 | ✅ |
2.4 核心原理:Channel 与操作系统的关系
🖥️ 底层实现原理
Java 的 Channel 是对操作系统 文件描述符(File Descriptor) 的封装。每个 Channel 对应一个内核级的 fd。
当调用 channel.read(buffer) 时:
-
JVM 调用系统调用
read(fd, buf, len) -
内核从设备读取数据到内核缓冲区
-
数据从内核缓冲区拷贝到用户空间的
ByteBuffer -
返回读取字节数
2.5 FileChannel代码示例
2.5.1 读取数据
直接调用Channel当中提供的read()方法.其读取的实现逻辑由其子类实现: FileChannelImpl
public int read(ByteBuffer dst) throws IOException {ensureOpen(); // 确保文件已经打开if (!readable) // 是否可读throw new NonReadableChannelException();synchronized (positionLock) { // 阻塞式读取操作if (direct)Util.checkChannelPositionAligned(position(), alignment);int n = 0;int ti = -1;try {beginBlocking();ti = threads.add();if (!isOpen())return 0;do {n = IOUtil.read(fd, dst, -1, direct, alignment, nd);} while ((n == IOStatus.INTERRUPTED) && isOpen());return IOStatus.normalize(n);} finally {threads.remove(ti);endBlocking(n > 0);assert IOStatus.check(n);}}
}
2.5.2 写入数据
推荐使用如下姿势进行写入操作.
ByteBuffer buffer =  ;
buffer.put(data); // 存入数据
buffer.flip(); // 切换读取模式while(buffer.hasRemaining()){// 如果buffer当中还有数据,此时要将数据写入.因为有些时候,并不能将数据一次性的写入到buffer当中, 所以得调用: write方法buffer.write(buffer)
}
不管是读取还是写入,则必须要进行关闭操作调用相关的close方法即可;
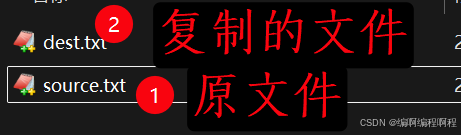
2.5.3 使用 FileChannel 复制文件
package cn.tcmeta.nio;import java.io.IOException;
import java.io.RandomAccessFile;
import java.nio.ByteBuffer;
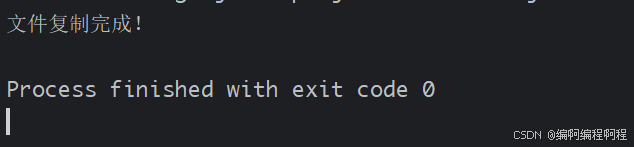
import java.nio.channels.FileChannel;public class FileChannelExample {public static void main(String[] args) {// 定义源文件和目标文件路径String srcFile = "source.txt";String destFile = "dest.txt";// 使用 try-with-resources 确保资源正确关闭try (RandomAccessFile sourceFile = new RandomAccessFile(srcFile, "r");RandomAccessFile destFile2 = new RandomAccessFile(destFile, "rw");// 1. 获取源文件和目标文件的 FileChannelFileChannel sourceChannel = sourceFile.getChannel();FileChannel destChannel = destFile2.getChannel()) {// 2. 分配一个字节缓冲区 (这里大小是 1024 字节)ByteBuffer buffer = ByteBuffer.allocate(1024);// 3. 循环读取和写入while (sourceChannel.read(buffer) != -1) {// 切换缓冲区为读模式(limit=position, position=0)buffer.flip();// 将缓冲区中的数据写入目标通道destChannel.write(buffer);// 清空缓冲区,为下一次读取做准备(position=0, limit=capacity)// 注意:compact() 方法也可以,它会保留未读数据buffer.clear();}// 4. 强制将数据刷到磁盘destChannel.force(true);System.out.println("文件复制完成!");} catch (IOException e) {e.printStackTrace();}}
}
日志输出
2.5.4 Transfer
public abstract long transferTo(long position, long count,WritableByteChannel target)throws IOException;
public abstract long transferFrom(ReadableByteChannel src,long position, long count)throws IOException;
Transfer实现文件复制
/*** 使用Channel进行文件复制操作* TransferFrom, 拷贝* TransferTo* 效率高一些.比传统的文件输入输出流高.利用了操作系统的零拷贝进行了优化.* 此种方式,最大只能传输2G的数据.*/
@Test
public void copyFileTest() {try (FileChannel fromChannel = new FileInputStream(WORLD_PATH_02).getChannel();FileChannel toChannel = new FileOutputStream(WORLD_PATH_03).getChannel()) {fromChannel.transferTo(0, fromChannel.size(), toChannel);} catch (Exception e) {e.printStackTrace();}
}
Transfer实现文件分段传输
/*** 优化一下,可以传输更多的数据,采用的是分批传输的思想.*/
@Test
public void copyFileTestMore() {try (FileChannel fromChannel = new FileInputStream(WORLD_PATH_02).getChannel();FileChannel toChannel = new FileOutputStream(WORLD_PATH_03).getChannel()) {long size = fromChannel.size(); // 获取待传输文件的大小for (long left = size; left > 0; ){// transferTo, 返回值表示,已经传输的数据的字节数.left -= fromChannel.transferTo(size - left, left, toChannel);}fromChannel.transferTo(0, fromChannel.size(), toChannel);} catch (Exception e) {e.printStackTrace();}
}
2.6 ⚙️Path和Paths
可用于在文件系统中查找文件的对象。它通常表示与系统相关的文件路径。
A Path 表示分层路径,该路径由一系列目录和文件名元素组成,这些元素由特殊分隔符或分隔符分隔。还可能存在标识文件系统层次
构的根组件。距离目录层次结构根目录最远的 name 元素是文件或目录的名称。其他 name 元素是目录名称。A Path 可以表示根
根和名称序列,也可以表示一个或多个名称元素。如果 A Path 仅由一个空的 name 元素组成,则认为该路径为空路径。使用空路
径访问文件等同于访问文件系统的默认目录。
这里着重聊一下Paths工具类的使用, 以下是常用的方法总结
| 方法名 | 描述 |
|---|---|
getFileName() | 获取文件名 |
getFileName().toString() | 获取文件名,作为字符串 |
getRoot() | 获取根路径 |
getParent() | 获取父路径 |
getFileName(int index) | 获取指定索引的文件名 |
getNameCount() | 获取文件名的数量 |
toAbsolutePath() | 获取绝对路径 |
toUri() | 获取 URI |
normalize() | 规范化路径 |
resolve(Path other) | 解析另一个路径 |
relativize(Path other) | 将当前路径相对化另一个路径 |
startsWith(Path other) | 判断当前路径是否以另一个路径开头 |
endsWith(Path other) | 判断当前路径是否以另一个路径结尾 |
isAbsolute() | 判断路径是否是绝对路径 |
isDirectory() | 判断路径是否是目录 |
isRegularFile() | 判断路径是否是普通文件 |
exists() | 判断路径是否存在 |
isHidden() | 判断路径是否是隐藏文件 |
toFile() | 获取文件对象 |
toRealPath() | 获取真实路径 |
createFile() | 创建文件 |
createDirectory() | 创建目录 |
delete() | 删除文件或目录 |
copyTo(Path target) | 复制文件或目录 |
move(Path target) | 移动文件或目录 |
append(String text) | 追加文本到文件 |
write(String text) | 写入文本到文件 |
readAllLines() | 读取文件中的所有行 |
readAllBytes() | 读取文件中的所有字节 |
示例代码
public class PathExample {public static void main(String[] args) {// 创建 Path 对象Path path = Paths.get("/home/user/file.txt");// 获取文件名String fileName = path.getFileName().toString();System.out.println("文件名:" + fileName);// 获取扩展名String extension = path.getFileName().toString().substring(fileName.lastIndexOf(".") + 1);System.out.println("扩展名:" + extension);// 判断文件是否存在boolean exists = Files.exists(path);System.out.println("文件是否存在:" + exists);// 创建文件try {Files.createFile(path);} catch (IOException e) {e.printStackTrace();}// 删除文件try {Files.delete(path);} catch (IOException e) {e.printStackTrace();}}
}
2.7 🔧File类Files
2.7.1 常用方法
Files常用方法总结
| 方法名 | 描述 |
|---|---|
createFile(Path path) | 创建文件 |
createDirectory(Path path) | 创建目录 |
delete(Path path) | 删除文件或目录 |
copy(Path source, Path target) | 复制文件或目录 |
move(Path source, Path target) | 移动文件或目录 |
readAllLines(Path path) | 读取文件中的所有行 |
readAllBytes(Path path) | 读取文件中的所有字节 |
write(Path path, String content) | 写入字符串到文件 |
write(Path path, byte[] bytes) | 写入字节数组到文件 |
walk(Path start, int maxDepth) | 遍历文件树 |
2.7.2 基本使用代码
public class FilesExample {public static void main(String[] args) {// 创建文件try {Files.createFile(Paths.get("/home/user/file.txt"));} catch (IOException e) {e.printStackTrace();}// 创建目录try {Files.createDirectory(Paths.get("/home/user/dir"));} catch (IOException e) {e.printStackTrace();}// 删除文件try {Files.delete(Paths.get("/home/user/file.txt"));} catch (IOException e) {e.printStackTrace();}// 删除目录try {Files.delete(Paths.get("/home/user/dir"));} catch (IOException e) {e.printStackTrace();}// 复制文件try {Files.copy(Paths.get("/home/user/source.txt"), Paths.get("/home/user/target.txt"));} catch (IOException e) {e.printStackTrace();}// 移动文件try {Files.move(Paths.get("/home/user/source.txt"), Paths.get("/home/user/target.txt"));} catch (IOException e) {e.printStackTrace();}// 读取文件中的所有行try {List<String> lines = Files.readAllLines(Paths.get("/home/user/file.txt"));for (String line : lines) {System.out.println(line);}} catch (IOException e) {e.printStackTrace();}// 写入字符串到文件try {Files.write(Paths.get("/home/user/file.txt"), "Hello, world!".getBytes());} catch (IOException e) {e.printStackTrace();}// 写入字节数组到文件try {Files.write(Paths.get("/home/user/file.txt"), "Hello, world!".getBytes(), StandardOpenOption.APPEND);} catch (IOException e) {e.printStackTrace();}// 遍历文件树try {Files.walk(Paths.get("/home/user"), 1).forEach(System.out::println);} catch (IOException e) {e.printStackTrace();}}
}
2.7.3 遍历文件目录
public static Path walkFileTree(Path start, FileVisitor<? super Path> visitor)throws IOException
{return walkFileTree(start,EnumSet.noneOf(FileVisitOption.class),Integer.MAX_VALUE,visitor);
}
FileVisitor接口:
public interface FileVisitor<T> {FileVisitResult visitFile(T file, BasicFileAttributes attrs)throws IOException;FileVisitResult preVisitDirectory(T dir, BasicFileAttributes attrs)throws IOException;FileVisitResult visitFileFailed(T file, IOException exc)throws IOException;FileVisitResult postVisitDirectory(T dir, IOException exc)throws IOException;
}

String rootPath = "D:\\tom";
Files.walkFileTree(Paths.get(rootPath), new SimpleFileVisitor<Path>(){/*** 进入遍历的目录之前调用*/@Overridepublic FileVisitResult preVisitDirectory(Path dir, BasicFileAttributes attrs) throws IOException {System.out.println(dir);return super.preVisitDirectory(dir, attrs);}/*** 访问文件成功*/@Overridepublic FileVisitResult visitFile(Path file, BasicFileAttributes attrs) throws IOException {System.out.println("\t\t" + file.getFileName());return super.visitFile(file, attrs);}/*** 访问文件失败*/@Overridepublic FileVisitResult visitFileFailed(Path file, IOException exc) throws IOException {return super.visitFileFailed(file, exc);}/*** 退出目录之时的回调函数* @return* @throws IOException*/@Overridepublic FileVisitResult postVisitDirectory(Path dir, IOException exc) throws IOException {return super.postVisitDirectory(dir, exc);}
});
}
2.7.4 删除目录
目录如果包含了文件,则不能直接进行删除的.必须先删除掉目录的文件,再将目清除掉.以往我们使用递归进行删除,此时我们可以使用工具类Files当中提供的进行删除操作.
/*** 批量删除文件和目录.利用Files工具当中提供的方法.* 注册删除的时候,不会走回收站.所以慎重一些.删除的文件无法恢复.*/
@Test
public void batchDeleteFolderTest() throws IOException {String root = "C:\\Users\\ldcig\\Desktop\\mybatis-flex-test-master";Files.walkFileTree(Paths.get(root), new SimpleFileVisitor<Path>(){/*** 直接访问文件操作* @throws IOException*/@Overridepublic FileVisitResult visitFile(Path file, BasicFileAttributes attrs) throws IOException {Files.delete(file);System.out.printf("删除 文件 [%s] 成功 \n", file.getFileName());return super.visitFile(file, attrs);}/*** 访问文件之后的操作.* @throws IOException*/@Overridepublic FileVisitResult postVisitDirectory(Path dir, IOException exc) throws IOException {System.out.printf("----------- 删除 目录 [%s] 成功 \n", dir.getFileName());Files.delete(dir);return super.postVisitDirectory(dir, exc);}});
}
2.7.5 拷贝文件
利用Files类提供的api可以快速的实现文件拷贝操作.
// 该方法的返回值是: Stream流.可以方便快速的操作了.利用Stream提供的相关api.
public static Stream<Path> walk(Path start, FileVisitOption... options) throws IOException {return walk(start, Integer.MAX_VALUE, options);
}
拷贝文件示例代码
/*** 拷贝文件* 简单方便.*/
@Test
public void copyTest() throws IOException {String srcPath = "你的路径\\mybatis-flex-test-master";String targetPath = "你的路径\\mybatis-flex-test-master-copy";Files.walk(Paths.get(srcPath)).forEach(p -> {// 获取目标目录String targetName = p.toString().replace(srcPath, targetPath);Path target = Paths.get(targetName); // 拷贝的目标目录.if(Files.isDirectory(p)){// 如果是目录,则直接创建目录, 如果目录不存在,则直接创建目录即可;try {// 创建目录Files.createDirectory(target);} catch (IOException e) {throw new RuntimeException(e);}}else if(Files.isRegularFile(p)){System.out.printf(" ----------- 当前文件是: %s \n", p);try {Files.copy(p, target);} catch (IOException e) {throw new RuntimeException(e);}}});
}
2.8 Channel与Stream对比
2.9 Channel优缺点总结
2.9.1 ✅ 优点
| 优点 | 说明 |
|---|---|
| 高性能 | 批量传输,减少系统调用 |
| 支持非阻塞 | 可用于高并发网络编程 |
| 双向通信 | 同一个连接可读可写 |
| 零拷贝支持 | transferTo() 提升文件传输性能 |
| 内存映射 | 大文件处理更高效 |
2.9.2 ❌ 缺点
| 缺点 | 说明 |
|---|---|
| 编程复杂 | 需手动管理 Buffer 状态 |
| 不能直接操作字节数组 | 必须通过 Buffer 中转 |
FileChannel 不支持非阻塞 | 无法注册到 Selector |
| 资源管理严格 | 必须显式关闭 Channel |
2.10 最佳实践与经验总结
| 实践 | 说明 |
|---|---|
使用 try-with-resources | 自动关闭 Channel |
| 合理设置 Buffer 大小 | 通常 4KB ~ 64KB |
| 避免频繁小数据写入 | 合并写操作 |
使用 force() 确保落盘 | 重要数据调用 fileChannel.force(true) |
优先使用 transferTo() | 大文件复制性能最佳 |
| 结合 Selector 使用 | 网络编程中实现单线程多连接 |
⚠️ 常见错误
// ❌ 错误:忘记 flip()
buffer.put(data);
channel.write(buffer); // 写的是 position 到 limit,可能是空的// ✅ 正确:
buffer.put(data);
buffer.flip(); // 切换为读模式
channel.write(buffer);
Channel 的核心价值
| 维度 | 说明 |
|---|---|
| 核心作用 | 数据传输的“高速公路” |
| 关键优势 | 双向、非阻塞、高效、可扩展 |
| 适用场景 | 文件处理、网络通信、高性能服务 |
| 底层本质 | 操作系统文件描述符的封装 |
| 性能优化 | 零拷贝、内存映射、批量传输 |
💡 一句话总结:
- Channel 是 Java NIO 的“数据管道”,它通过 与 Buffer 协作、支持非阻塞、实现零拷贝,为构建高性能 I/O 系统提供了底层支撑。掌握 Channel 是深入理解 Netty、Redis、Kafka 等高性能系统的基础。