GitPython02-Git使用方式
GitPython02-Git使用方式
- 使用gitpython 批量克隆
- Git的使用教程

在 Python 中操作 Git 主要有两种方式:命令行调用和Git 专用库
一、通过subprocess调用 Git 命令行(原生方式)
最直接的方法,适合熟悉 Git 命令的用户。
import subprocess# 基础执行函数
def run_git(command: list, cwd: str = "."):result = subprocess.run(["git"] + command,cwd=cwd,stdout=subprocess.PIPE,stderr=subprocess.PIPE,text=True,check=True  # 遇到错误抛出异常)return result.stdout.strip()# 常用操作示例
# ---------------
# 1. 克隆仓库
clone_output = run_git(["clone", "https://github.com/user/repo.git", "local_dir"])# 2. 添加文件
run_git(["add", "file.py"], cwd="local_dir")# 3. 提交更改
commit_msg = "Added new feature"
run_git(["commit", "-m", commit_msg], cwd="local_dir")# 4. 推送代码
run_git(["push", "origin", "main"], cwd="local_dir")# 5. 拉取更新
pull_output = run_git(["pull"], cwd="local_dir")# 6. 查看状态
status_output = run_git(["status", "--short"], cwd="local_dir")# 7. 切换分支
run_git(["checkout", "-b", "new-feature"], cwd="local_dir")# 8. 查看日志(最近3条)
log_output = run_git(["log", "-3", "--oneline"], cwd="local_dir")
print(log_output)# 错误处理示例
try:run_git(["merge", "non-existent-branch"])
except subprocess.CalledProcessError as e:print(f"Error: {e.stderr}")
二、使用 Git 专用库(推荐)
1.GitPython(最流行)
安装:pip install GitPython
from git import Repo, GitCommandError# 克隆仓库
Repo.clone_from("https://github.com/user/repo.git", "local_dir")# 打开现有仓库
repo = Repo("local_dir")# 常用操作
# ---------------
# 添加文件
repo.index.add(["file.py"])# 提交
repo.index.commit("Commit message")# 推送
origin = repo.remote("origin")
origin.push()# 拉取
origin.pull()# 分支管理
repo.create_head("new-branch")  # 创建分支
repo.heads.new-branch.checkout()  # 切换分支# 查看差异
diff = repo.git.diff("HEAD~1")  # 与上一次提交比较# 日志查询
for commit in repo.iter_commits("main", max_count=3):print(commit.message)# 错误处理
try:repo.git.merge("invalid-branch")
except GitCommandError as e:print(f"Merge failed: {e}")2.PyGit2(高性能,需安装 libgit2)
安装:pip install pygit2
import pygit2# 克隆仓库
pygit2.clone_repository("https://github.com/user/repo.git", "local_dir")# 打开仓库
repo = pygit2.Repository("local_dir")# 添加文件
index = repo.index
index.add("file.py")
index.write()# 提交
author = pygit2.Signature("Your Name", "email@example.com")
repo.create_commit("HEAD",  # 引用author,  # 作者author,  # 提交者"Commit message",  # 消息index.write_tree(),  # 树对象[repo.head.target]  # 父提交
)# 推送
remote = repo.remotes["origin"]
remote.credentials = pygit2.UserPass("username", "password")
remote.push(["refs/heads/main"])
三、关键功能对比
| 操作 | subprocess | GitPython | PyGit2 |
|---|---|---|---|
| 克隆仓库 | git clone命令 | Repo.clone_from() | clone_repository() |
| 提交 | git commit -m | index.add()+index.commit() | index.add()+create_commit() |
| 分支操作 | git checkout -b | create_head()+checkout() | 直接操作引用 |
| 远程操作 | git push/pull | remote.push()/pull() | remote.push()+ 手动合并 |
| 日志查询 | 解析git log输出 | repo.iter_commits() | 遍历提交对象 |
| 性能 | 中等 | 中等 | 高(C 库绑定) |
| 学习曲线 | 低(需知 Git 命令) | 中 | 高 |
四、实践建议
-
简单任务→ 用
subprocess(快速直接) -
复杂操作→ 用GitPython(接口友好)
-
高性能需求→ 用PyGit2(但需处理底层细节)
-
认证处理:
# GitPython 使用 SSH 密钥 repo.remotes.origin.push(credentials=git.SshKeyAuthenticator("~/.ssh/id_rsa")) # PyGit2 使用 HTTPS remote.credentials = pygit2.UserPass("user", "pass") -
异常处理:务必包裹
try/except捕获GitCommandError等异常
五、完整工作流示例(GitPython)
1-从0创建项目并提交
from git import Repo# 初始化仓库
repo = Repo.init("my_project")# 创建文件并提交
with open("my_project/hello.txt", "w") as f:f.write("Hello GitPython!")repo.index.add(["hello.txt"])
repo.index.commit("Initial commit")# 连接远程仓库
origin = repo.create_remote("origin", url="https://gitee.com/enzoism/test_git.git")# 推送代码
origin.push(all=True)  # 推送所有分支# 模拟协作:其他人修改后拉取更新(这个地方可能会报错)
# origin.pull()# 查看历史
for commit in repo.iter_commits():print(f"{commit.hexsha[:8]} by {commit.author}: {commit.message}")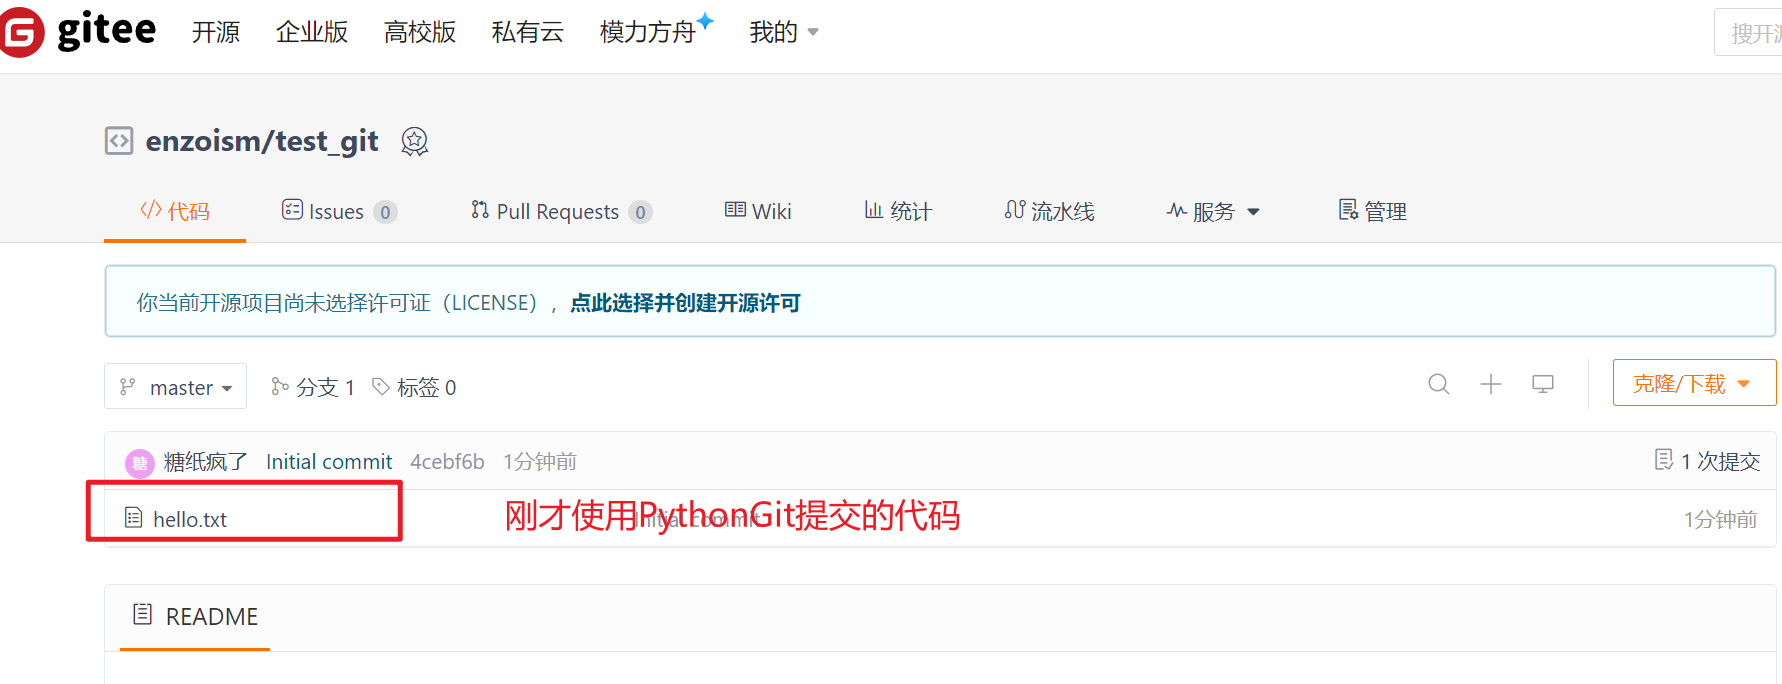
2-已有项目查看
from git import Repo# 打开本地仓库(指定路径项目或者本项目)
repo = Repo.init("my_project")
# repo = Repo.init(".")# 执行 git status 命令
status = repo.git.status()
print(status)# 尝试拉取代码
origin = repo.remote(name='origin')
# origin.pull()
print("代码拉取成功")# 查看历史
for commit in repo.iter_commits():print(f"{commit.hexsha[:8]} by {commit.author}: {commit.message}")