Linux系统之----客户端服务器设计(共享内存)
我们还是分为三个文件,shm.hpp,client.cpp,和server.cpp
1.shm.hpp
基本思路和前面的差不多,就是先创建类,之后再进行构造初始化还有析构,随后再写一些常见的函数,(多数函数就是库函数进行一些封装即可,并不难理解)
这里直接给出代码:
#ifndef __SHM_HPP__
#define __SHM_HPP__#include <iostream>
#include <cstdio>
#include <string>
#include <sys/types.h>
#include <sys/ipc.h>
#include <sys/shm.h>
#include <unistd.h>using namespace std;
string gpathname = ".";
int gproj_id = 0x66;
int gdefaultsize = 4096; // 共享内存的大小,4kb的整数倍,4KB对齐(内核层面)struct data
{int numl;char buffer[4092];
};// 共享内存
class SharedMemory
{
public:SharedMemory(int size = gdefaultsize): _size(size), _key(0), _shmid(-1), _start_addr(nullptr), _windex(0), _rindex(0), _datastart(nullptr), _num(nullptr){}~SharedMemory(){}bool Create(){// 如果共享内存不存在 创建之,如果已经存在 出错返回!如果成功,返回的就是全新的shm!return CreateHelper(IPC_CREAT | IPC_EXCL | 0666);}bool Get(){return CreateHelper(IPC_CREAT); // 如果创建的共享内存不存在,创建之。如果存在,直接获取它}bool Attach(){   _start_addr = shmat(_shmid, nullptr, 0);if ((long long)_start_addr == -1){perror("shmat");return false;}cout << "将指定的共享内存挂接到自己进程的地址空间" << endl;printf("_start_addr : %p\n", _start_addr);_num = (int *)_start_addr;_datastart = (char *)_start_addr + sizeof(int); // 起始地址return true;}void SetZero(){*_num = 0;}bool Detach(){int n = shmdt(_start_addr);if (n < 0){perror("shmdt");return false;}cout << "将指定的共享内存从进程的地址空间移除" << endl;return true;}void AddChar(char ch){if (*_num == _size){return;}((char *)_datastart)[_windex++] = ch;((char *)_datastart)[_windex] = '\0';cout << "debug: " << _windex << ", " << ch << endl;_windex %= _size;(*_num)++;}void PopChar(char *ch){if (*_num == 0)return;*ch = ((char *)_datastart)[_rindex++];_rindex %= _size;(*_num)--;printf("%s\n", _datastart);}bool RemoveShm(){int n = shmctl(_shmid, IPC_RMID, nullptr);if (n < 0){perror("shmctl");return false;}cout << "删除shm成功" << endl;return true;}void PrintArr(){struct shmid_ds ds;int n = shmctl(_shmid, IPC_STAT, &ds);if (n < 0){perror("shmctl");return;}// 打印输出shm相关属性printf("key:0x%x\n", ds.shm_perm.__key);printf("size: %ld\n", ds.shm_segsz);printf("atime: %lu\n", ds.shm_atime);printf("nattach: %ld\n", ds.shm_nattch);}private:key_t _key;int _size;int _shmid;void *_start_addr;int *_num;char *_datastart;int _windex;int _rindex;bool CreateHelper(int flags){_key = ftok(gpathname.c_str(), gproj_id);if (_key < 0){perror("ftok");return false;}printf("形成键值成功: 0x%x\n", _key); // 键值的内容_shmid = shmget(_key, _size, flags); // 创建全新的shmif (_shmid < 0){perror("shmget");return false;}printf("shmid: %d\n", _shmid);return true;}
};#endif
2. client.cc
主要想法就是获取,连接,通信就Ok了,下面给出代码:
#include "shm.hpp"
int main()
{SharedMemory shm;shm.Get();// 获取已经存在的共享内存shm.Attach();//到这里为止,我们一直都没建立通信,只是在建立通信管道for(char c='A';c<='Z';c++){shm.AddChar(c);sleep(1);}shm.Detach();return 0;
}
3.server.cc
主要想法就是连接,使用,这里给出代码:
#include "shm.hpp"
int main()
{printf("hellowrold");printf("hellowrold");printf("hellowrold");printf("hellowrold");printf("hellowrold");printf("hellowrold");SharedMemory shm;shm.Create();shm.Attach();shm.PrintArr();sleep(3);// 使用while (true){char c;shm.PopChar(&c);printf("server get char: %c\n", c);sleep(1);}shm.Detach();shm.RemoveShm();//检验共享内存是否被删除cout<<"helloworld"<<endl;cout<<"helloworld"<<endl;cout<<"helloworld"<<endl;cout<<"helloworld"<<endl;return 0;
}
4.Makefile
.PHONY:all
all:server clientserver:server.ccg++ -g -o $@ $^ -std=c++11client:client.cc	g++ -g -o $@ $^ -std=c++11.PHONY:clean
clean:rm -f clientrm -f server
5.运行程序
我们make一下,之后查看一下共享内存的信息~

之后我们运行一下:
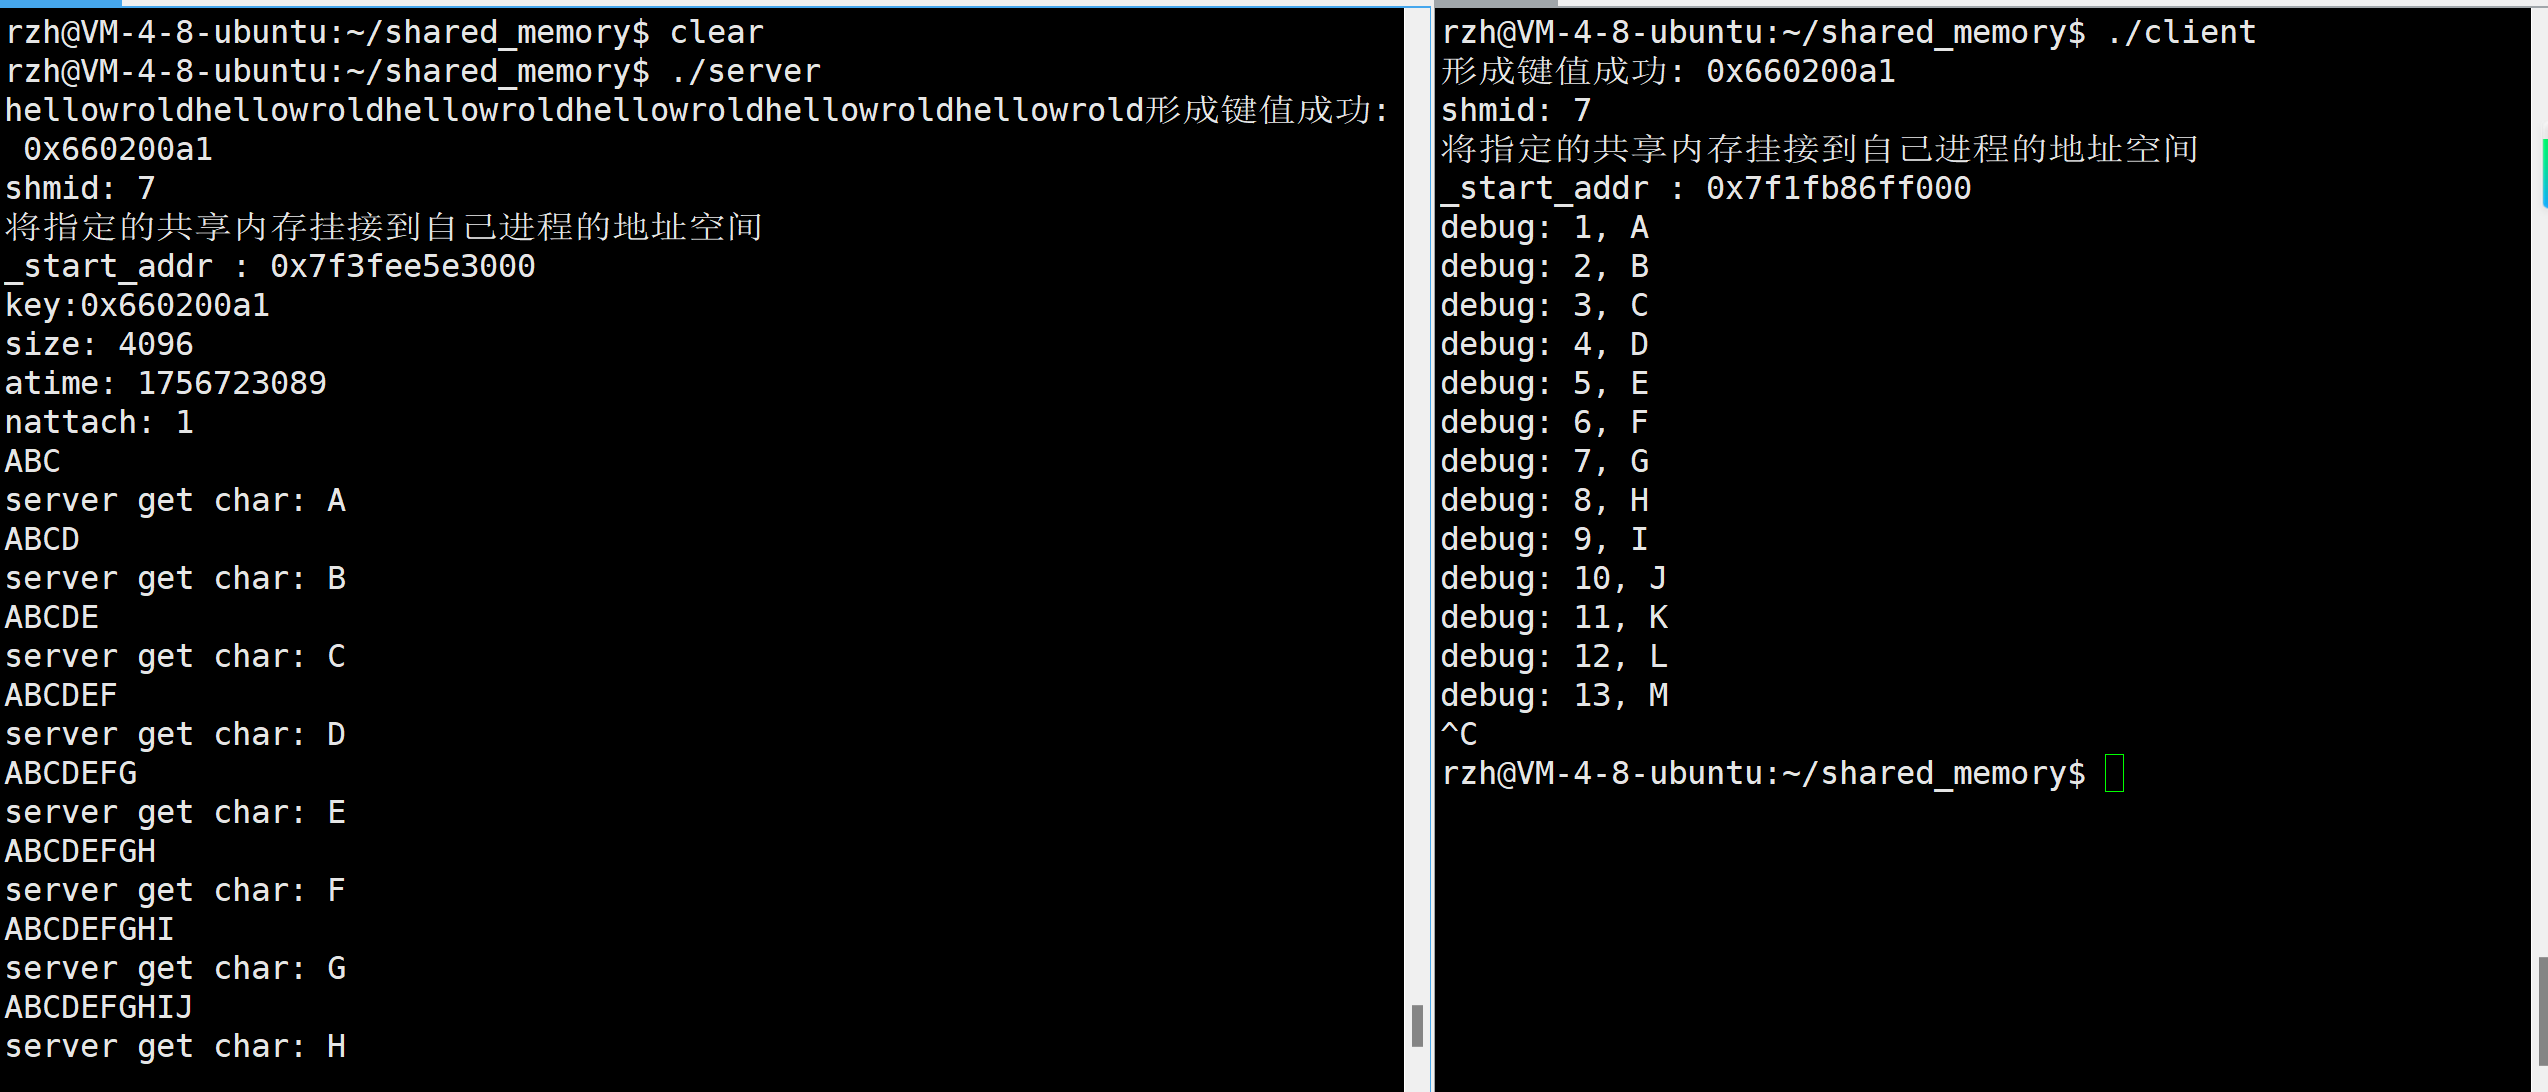
通信完成~
但是当我们将其结束后在重新运行时就会报错:

原因就是这个共享内存已经存在了,我们需要将其删掉~
使用命令ipcrm -m (shmid)
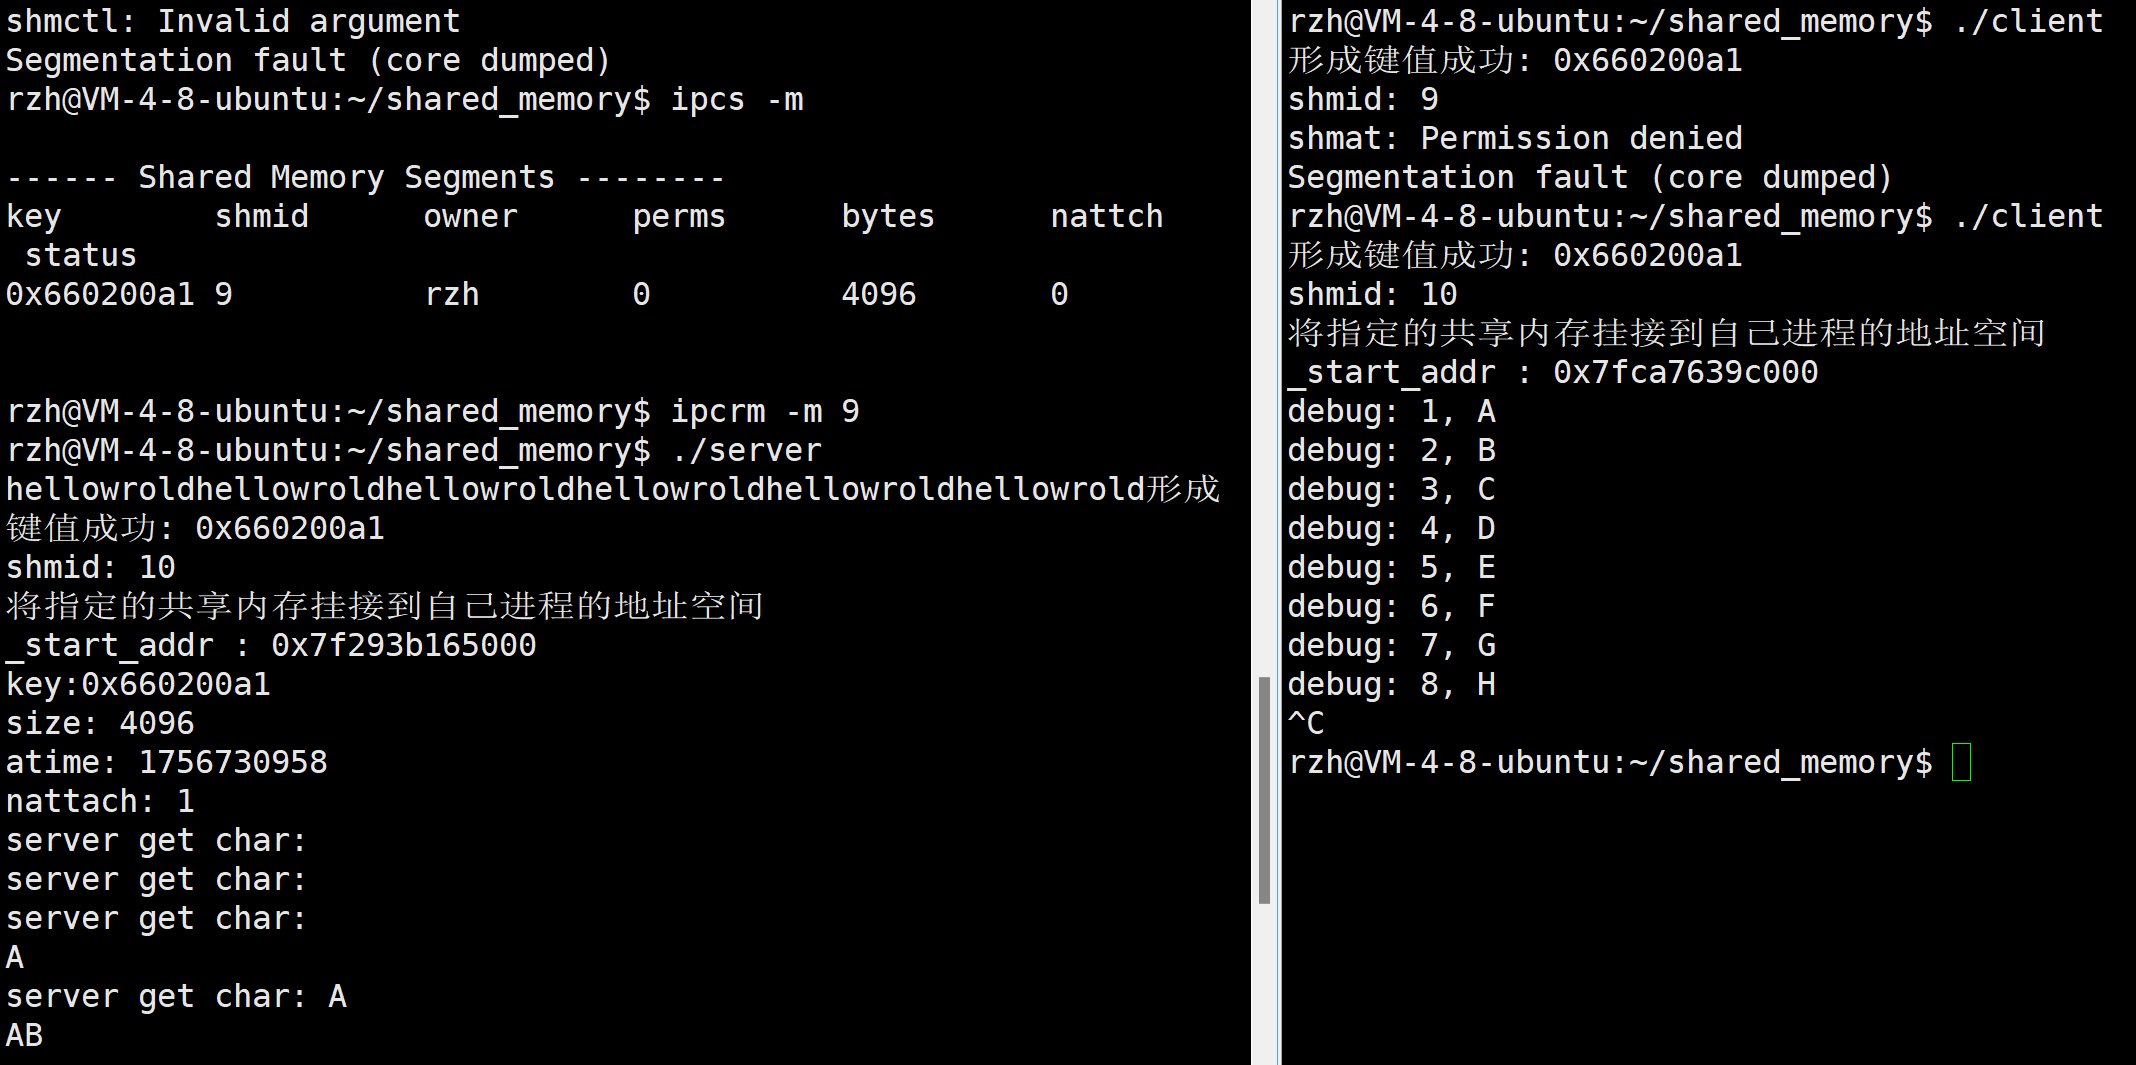
操作完成,两个进程可以通信了~