< 自用文 OS有关 新的JD云主机> 国内 京东云主机 2C4G 60G 5Mb 498/36月 Ubuntu22
攒了这么久,废话一些:
前几周很多事儿,打算回北京,开个清真的德克萨斯烤肉店,写了一篇 :
< 自用文 Texas style Smoker > 美式德克萨斯烟熏炉 从设计到实现 (第一部分:烹饪室与燃烧室)这文章发表几小时后已经设为只有我自己可见。
毕竟在自己的农场里疯了8年,周末、过节周围邻居们(其实就这么几家,地大人少)会去聚会,Farmers/Ranchers 烧菜方式就这些,从吃会,到看会,最后上手去做,已经轻车熟路,拿手就来的。他们这些不爱吃羊肉的,喜欢我去做中式的烤串,炒烤肉,孜然羊肉,包饺子什么的。 我喜欢吃他们用各种动物做的烤肉,如:Brisket Sausage Patties 还有酱汁。 做为交换,互相为师。
但是,发现北京不让用明火,丈母娘家的村里也不行。烤肉不做了,做香肠吧,我很喜欢这种实肉的,一没淀粉,二是肉有颗粒,三是朴实纯粹的做法,喜欢,简单,我爱吃。
回家自己做吧,可能太孤单,找个发小一起。他想做早餐、夜市。 我告诉他,以我的标准用料 73克牛肉肠要 3元, 鸡肉+牛油的要1.4元, 这还不算人工,加工成本。 他推荐做汉堡,它能卖得贵。 恩,计算后,纯黄油,纯奶酪、全脂奶粉,一个80克面包包 bun,原料 1.2-1.5, 肉饼变化不大。万事总要有个开头儿。
Project-46 餐馆+小程序
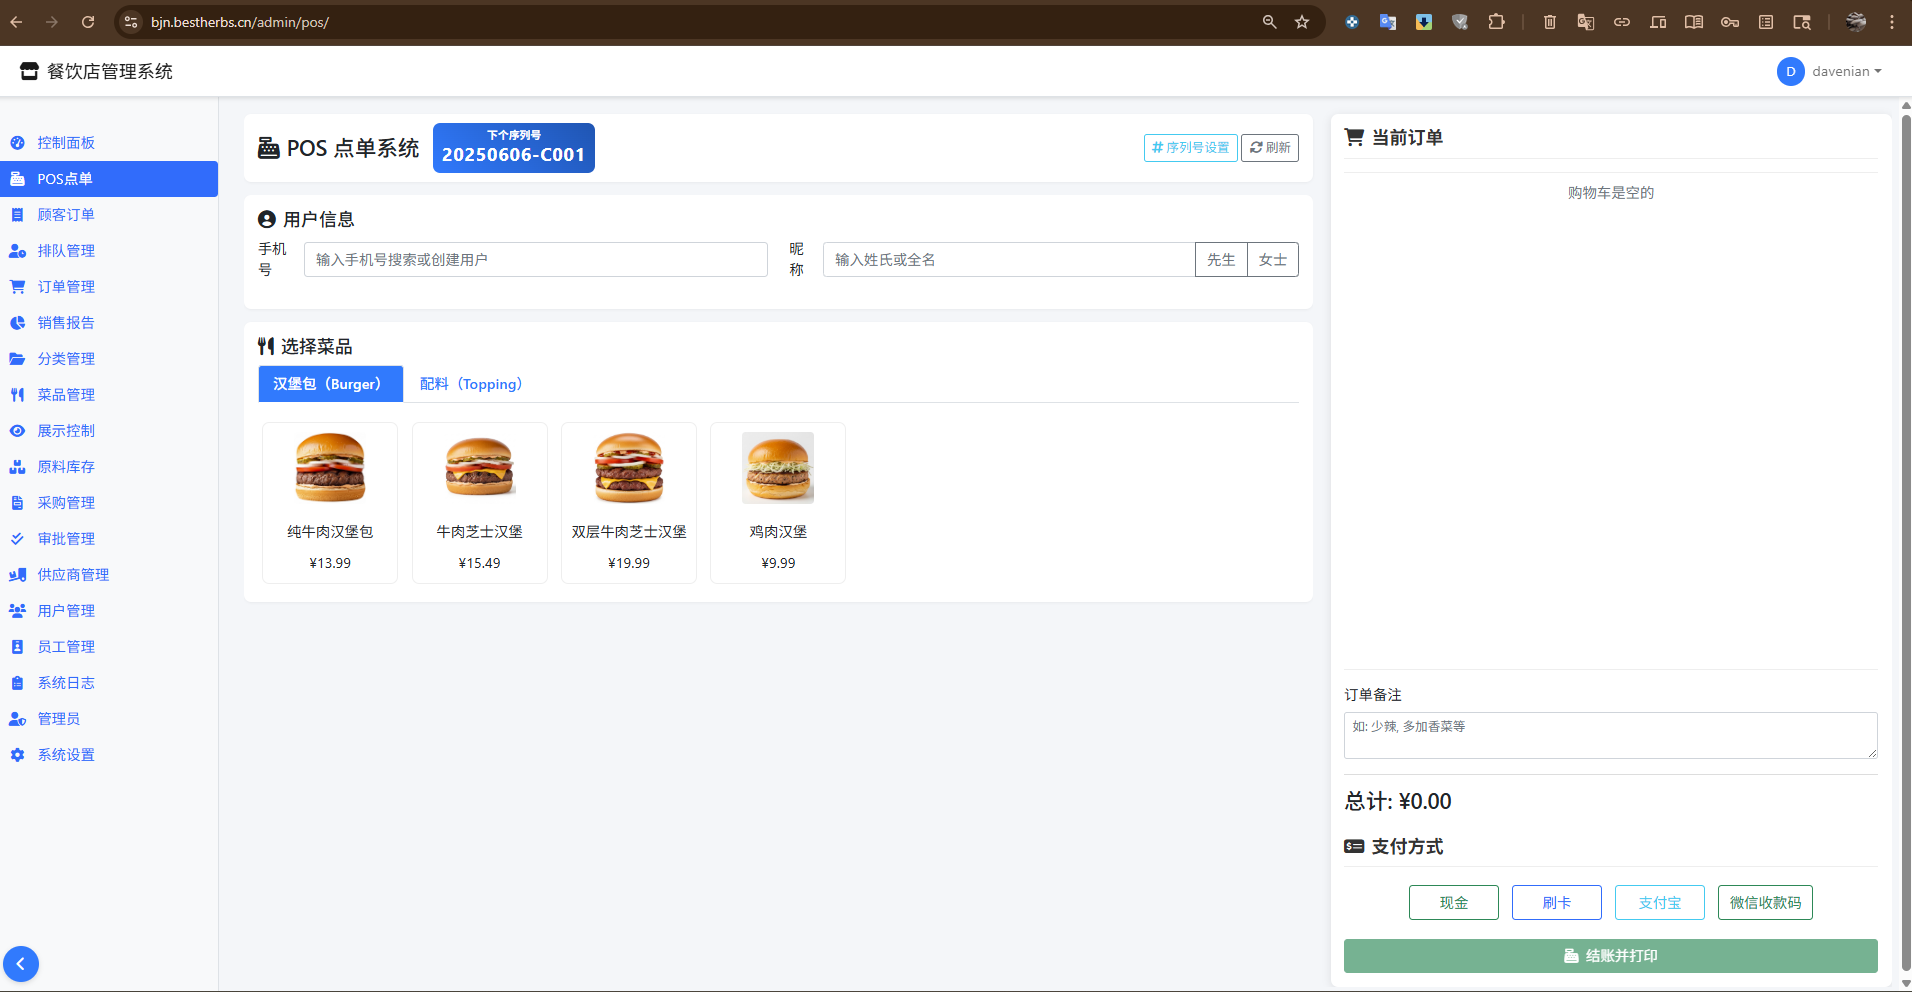
用几周写学着写一个 微信下单小程序 <Project 46>,感觉要有店,写了店内的餐馆系统,让客户自己在触摸屏点单+支持,把系统增加了用户分级,单独做了客人点单界面。内测了一段,支付因为要有经营执照,只能沙箱模拟。
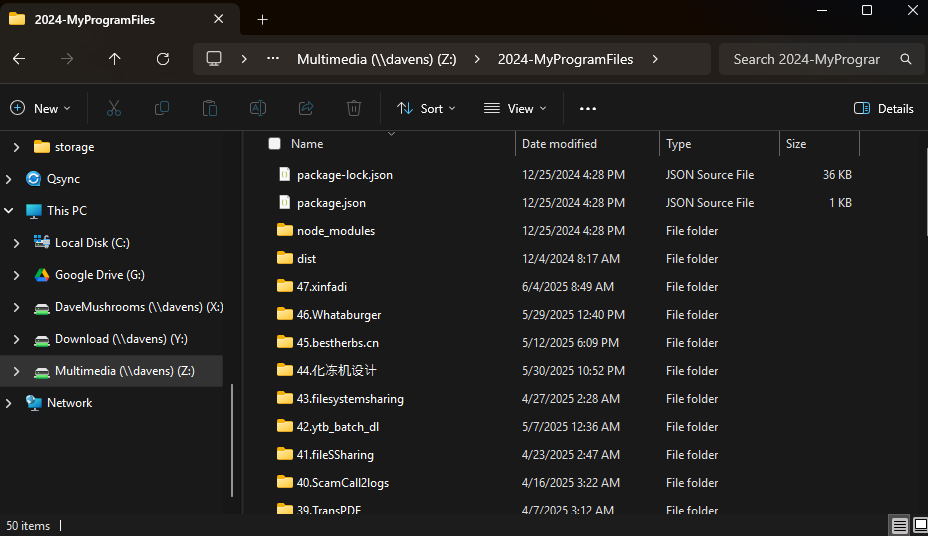
感叹一下,如果没有 AI 帮助,我以前根本不可能想象到,独处能完成这么一个由 200 多个文件构成,用 TCB + SQLite 两个数据库组建的云上应用程序。
系统的入口:登录 - 餐饮店管理系统 https://bjn.bestherbs.cn/admin/ client/123456789 可以进入客人点单界面。下面是横板截图,竖版的更好看。

店员、店长、管理员也是用同样入口进入,在创建用户时分配的权限不同,菜单与上面的是不一样。他们的界面是这样:
折腾了3周,停留在支付上。没有经营许可,卡住了。
Project-47 新发地价格抓取
然后用了几天,做了 <Project 47> 获取新发地(蔬菜、水果、肉、水产)的价格。
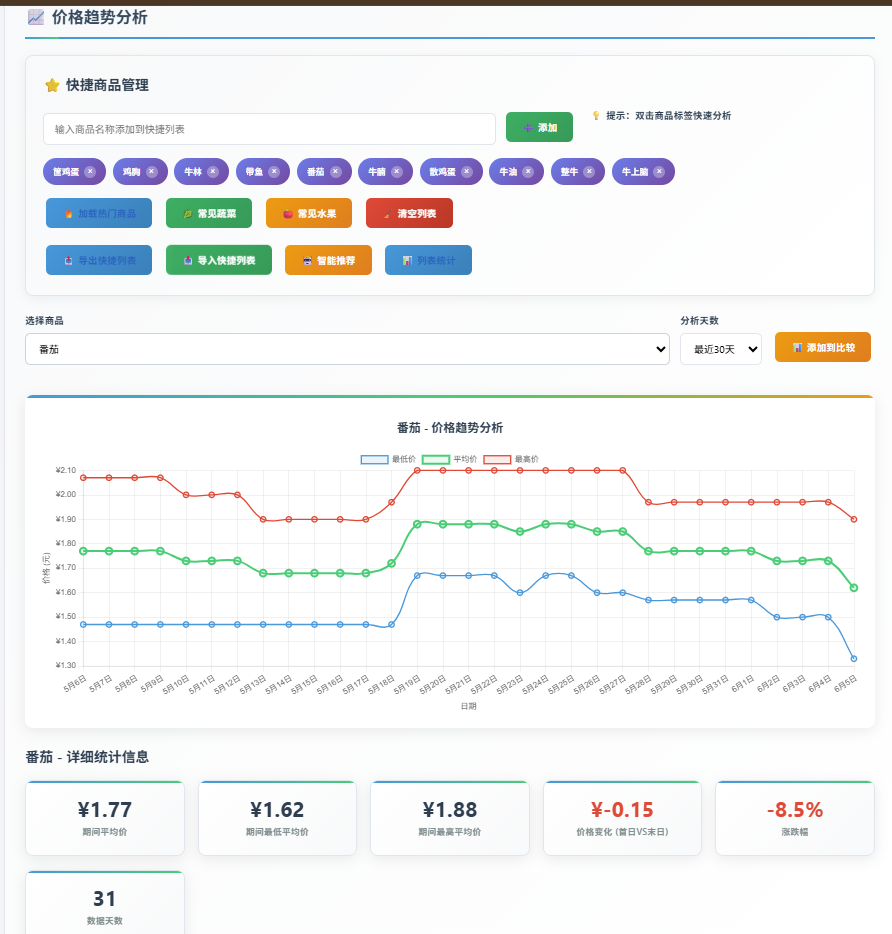
入口: 新发地价格数据抓取系统 - 增强版 https://xfd.bestherbs.cn/
可以随意浏览抓取的数据,主要是为了做价格趋势图。发现 筐鸡蛋有重名, 还没去仔细研究,不想在这上面花更多时间。
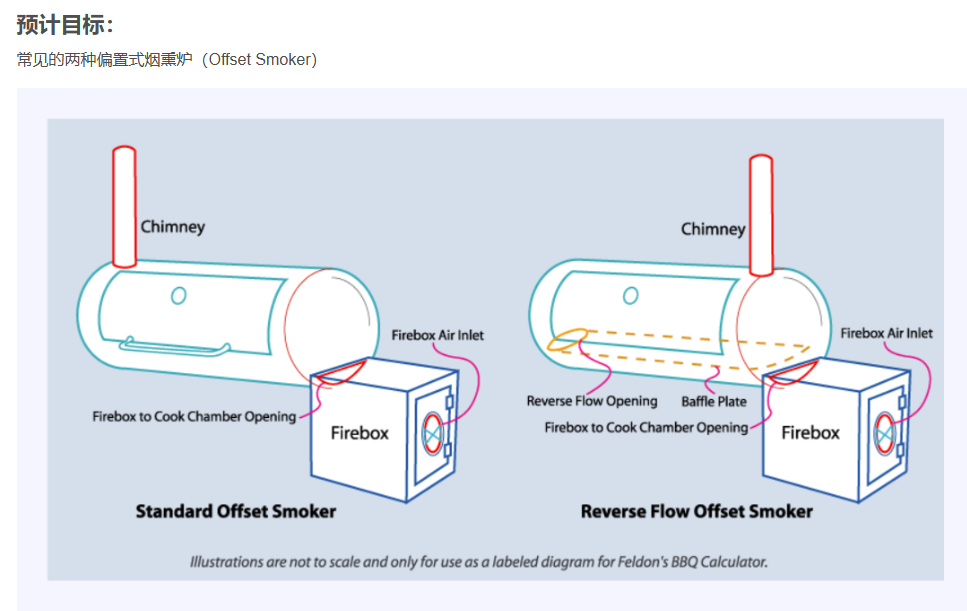
德克萨斯烟熏
当然,为了做餐饮,还设计了一款化冻机(池)<见 目录 Porject 44>,只能用于密封真空的的冻肉,浸泡在无菌水中以低温 1-4摄氏度来缓慢化冻,保持肉质品质。现在是纸面工作完成,回京后租个10平左右的小平房当工作室,按图纸完成原型机。 还是想焊接那个Project- 卧式的烟熏炉,近 200KG 总重。可能大妈们会来阻止,不同意在胡同里焊接,村里行不行? 200KG 运输也是成本。裤兜比脸干净,没钱啊。
618 的轻量服务器 3 家比较
话说回来,餐馆系统与新发地价格数据抓取系统 在腾讯北京云上的运行,明显在带宽上有卡顿,后者会移到东京主机上,但这4Mb带宽 2GB内存,gunicorn 有3、5个进行很容易顶满内存,I/O性能别指望。 最烦的是,SSH连着连着就断。调试时,没少骂他娘的。

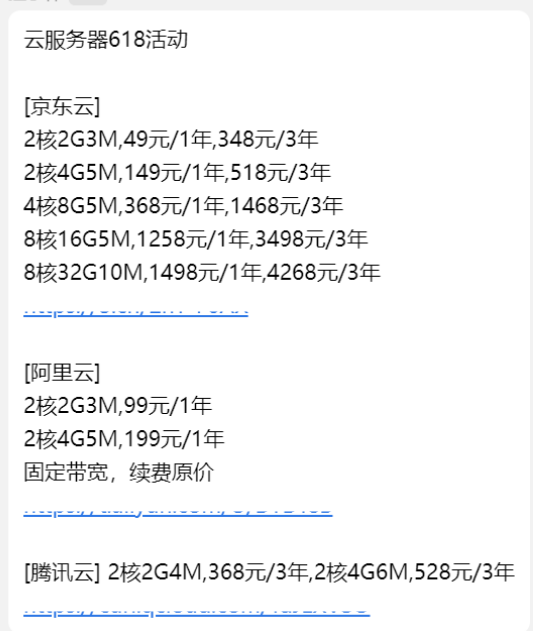
朋友李总,发来个 618 有腾讯、阿里、京东的价格表:
我现在用的是 腾讯云,以面是其中一个:
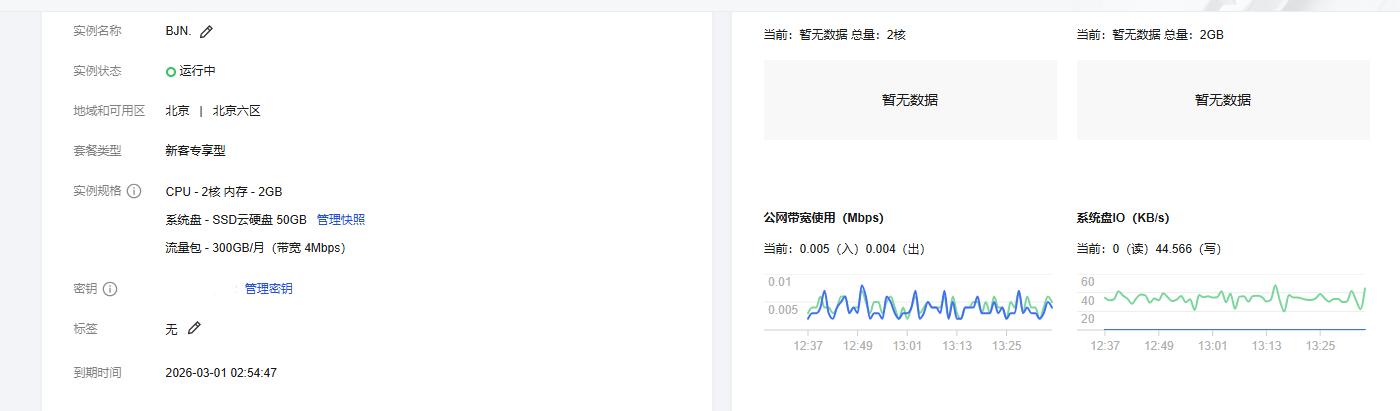
已经用了3个月,除了会经常断开连接,SFTP 250KB/s + ,在科学使用时不看视频,还行。考虑到下一年续费要 500
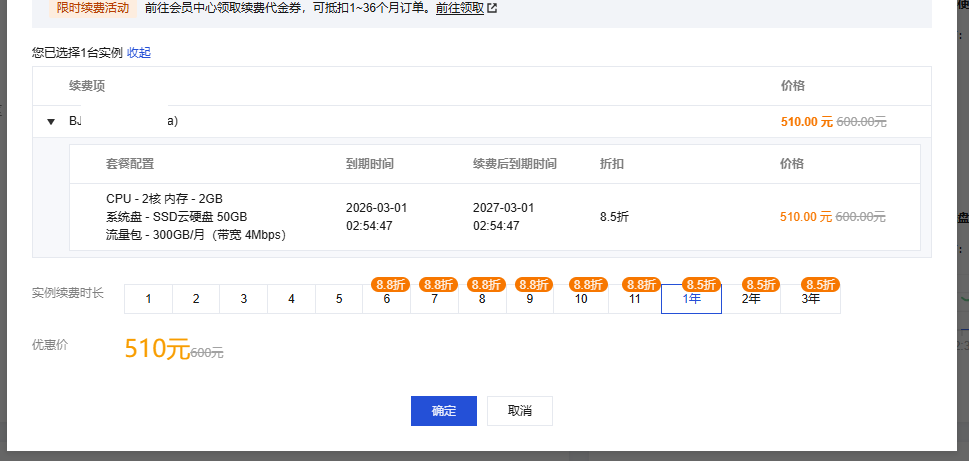
寝食难安啊!!!
腾讯云 618
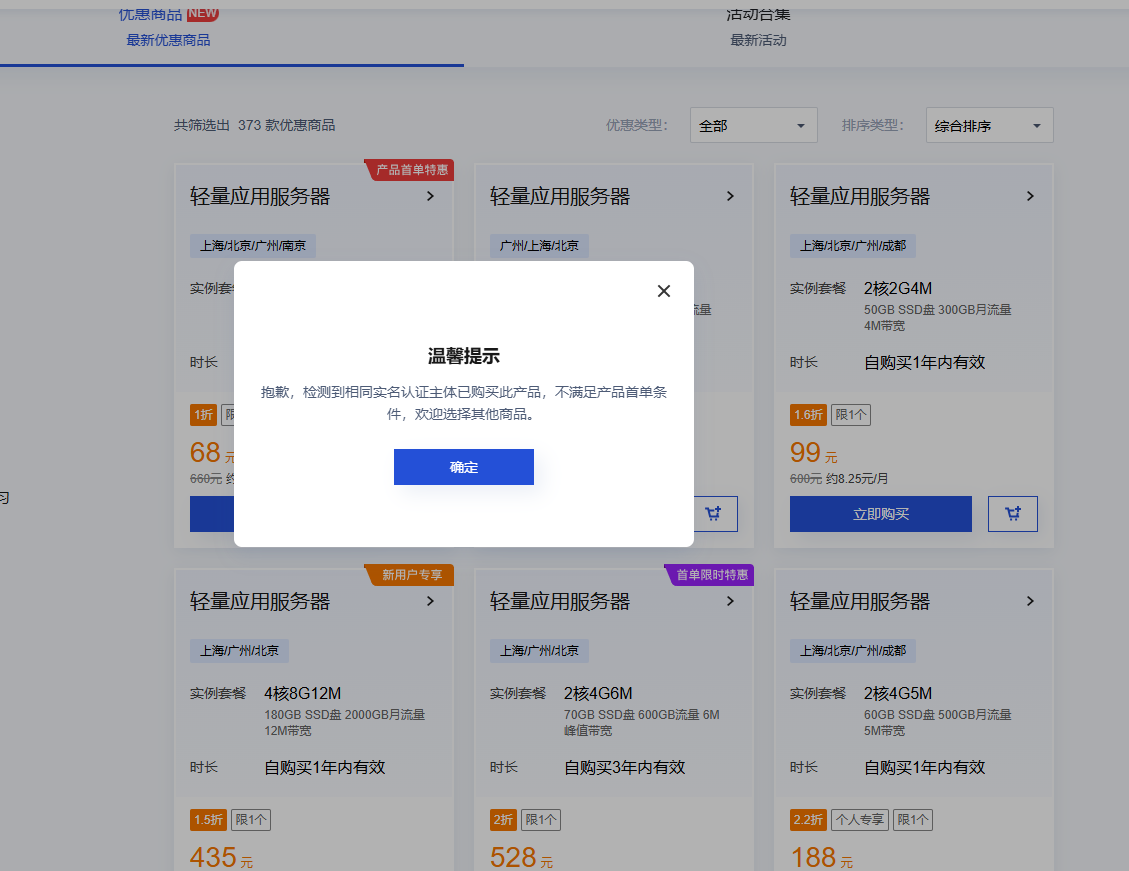
所有的低价都是对新用户的:
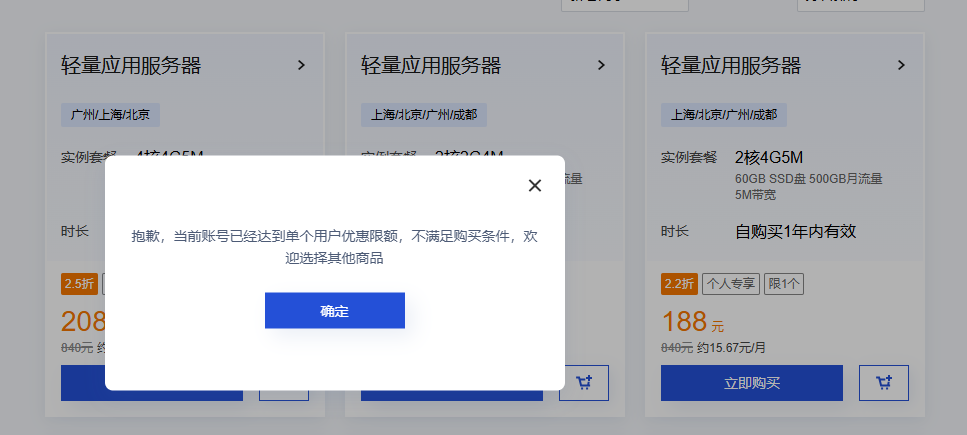
老用户不配。既然是腾讯!
阿里云 618
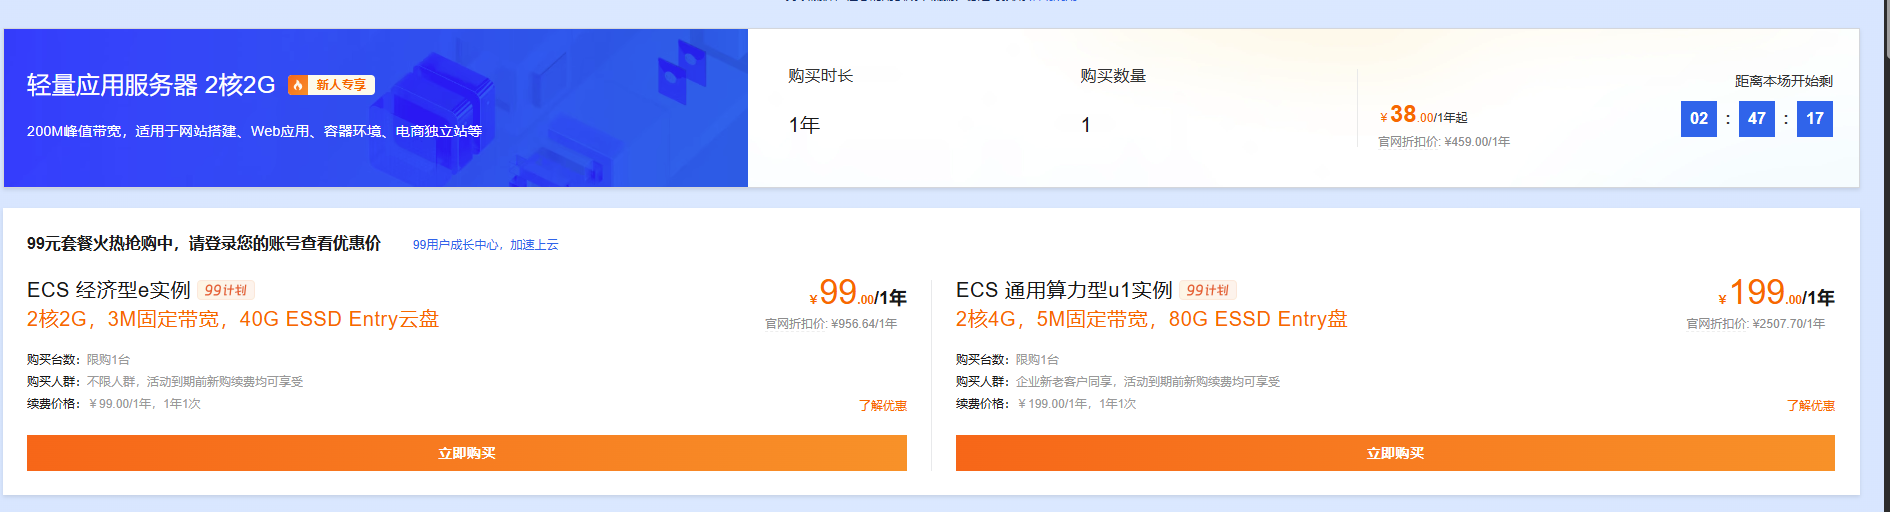
阿里是不分 新老用户的, 而且次年续费同价。 比 腾讯 强多了,没套路。 我本想续那个 :2核4G,5M固定带宽,80G ESSD 199/年。
京东云 618

618上京东云-京东云 https://www.jdcloud.com/cn/pages/cloudpromotion
上面没有返利链接。
518 配置: 2核4G,5M固定带宽,60G SSD 518/36月 , 比阿里少了20GB硬盘,但在国内的主机,这带宽才 5Mb, 想通过SFTP 之类的把硬盘写满,也是个人才。
硬盘少 20GB,但价格每年也少20块。
三家比较
数据流量计算:
腾讯云的流量计费是只计算出的数据。 狗东与阿猫是双向的,如果不准或有改变请告知我,我会修改这文章。
特惠:
腾讯新人有好的OFFER,对应实名的。
阿里是新人,与老用户都友好。
京东我的第一次用。 刚才重启一下 VPS,等了3-5分钟,还以为京东挂了。
特别注意:
1)带宽
带宽是 Mb = 1,000,000 bit/s = 125,000 BYTE/S = 125KB/s
京东这个 5Mb 比 腾讯的 4Mb 在 SFTP 时要差别极小:

241.58MB 文件,从同一主机 US,顺序复制。没想到吧,4Mbps 带宽的腾讯, 比京东5Mbps 快了67秒。
多的这个1Mbps 在哪儿?
2)重启时间不同
京东的主机,重启一次要等 3-5分钟。
腾讯与阿里主机,在半分钟左右。
3)人工服务
因为京东主机重启原因,我看到页面上的电话: +86 400-098-8505 -2 ,直接去咨询。 很好,是人工速接。 非常赞!
阿里要下工单,等工程师回电,没有电话提供。
腾讯是AI客服,转人工。要留工单,等回电。
4)移除运营商监控程序
这也是我想换腾讯的原因,自编的程序,有用到 Token Keys,这些都是使用单独付费的。 前几天收到:
【腾讯云】尊敬的用户,您好!为了给您的腾讯云账号(账号ID:100000670687,昵称:大尉农场)提供更完善的服务,腾讯云计划于2025年5月22日(周四)至2025年6月25日(周三)19:00-23:00对主机安全进行服务升级。新增 Linux 和 Windows 主机安全客户端默认开启 Agent 卸载保护功能。恶意卸载会激活进程守护,自动重新安装 Agent ,提升安全防护能力。此次版本升级对业务无影响。感谢您的支持!详情请查看站内信:https://mc.tencent.com/88WtUww9
我是拿到 VPS 会卸载、删除运营商的监控程序。用到科学软件来使用对中国限制的应用,比如 GEMINI AI
明显,这腾讯 AGENT 是被卸载的,它要回来安装,让我心烦。还有漏洞???没补上?
以下都是 Ubuntu OS
腾讯 VPS 中的 AGENT卸载就是删除目录
阿里云 VPS 见我之前文章 < OS 有关 > 阿里云:轻量应用服务器 的使用 :轻量化 阿里云 vpm 主机 _qt5-gtk-platformtheme-CSDN博客
5) Ubuntu OS image
| Ubuntu 24 | Ubuntu 22 | Ubuntu 22 | |
| 京东云 | 无 | 无 | 有 |
| 腾讯云 | 有 | 有 | 有 |
| 阿里云 | 有 | 有 | 有 |
6)京东云没有免费的快照
是的,京东云是收费快照。 阿里之前是给2个免费快照, 腾讯云每个 VPS 有一个免费的。 弄得我都不想迁移。
以下是记录配置京东云 VPS 主机:
配置京东云 VPS 主机
1 卸载/删除 京东云监控程序
rm -rf /usr/bin/jdcloudservice
rm -rf /usr/local/share/jcloud/
2 清理不必要的服务
1)无线网络相关
# WiFi服务
systemctl stop wpa_supplicant
systemctl disable wpa_supplicant# 卸载相关
apt remove --purge wpasupplicant wireless-tools
2)调制解调器管理
# 停止并禁用 ModemManager
systemctl stop ModemManager
systemctl disable ModemManager# 卸载
apt remove --purge modemmanager
3)磁盘管理服务
systemctl stop udisks2
systemctl disable udisks2
apt remove --purge udisks2
4)多路径存储
systemctl stop multipathd
systemctl disable multipathd
apt remove --purge multipath-tools
5)清理包的缓存
apt autoremove --purge
apt autoclean
apt clean
3. 更换安装源
mkdir -p ~/scripts/
vi ~/scripts/changer_source.sh
# 下面的内容复制保存到文件里
chmod +x ~/script/changer_source.sh
# 运行这个脚本
换源脚本:changer_source.sh
#!/bin/bash# Ubuntu 22.04 换源脚本echo "Ubuntu 22.04 换源脚本"
echo "====================="# 检查是否为root用户
if [ "$EUID" -ne 0 ]; thenecho "请使用sudo运行此脚本"exit 1
fi# 备份原始sources.list
if [ ! -f /etc/apt/sources.list.backup ]; thencp /etc/apt/sources.list /etc/apt/sources.list.backupecho "已备份原始sources.list到sources.list.backup"
fiecho "请选择镜像源:"
echo "1) 阿里云镜像(推荐)"
echo "2) 清华大学镜像"
echo "3) 中科大镜像"
echo "4) 华为云镜像"
echo "5) 网易镜像"
echo "6) 恢复原始镜像"
echo "0) 退出"read -p "请输入选择 (0-6): " choicecase $choice in1)mirror_url="https://mirrors.aliyun.com/ubuntu/"mirror_name="阿里云";;2)mirror_url="https://mirrors.tuna.tsinghua.edu.cn/ubuntu/"mirror_name="清华大学";;3)mirror_url="https://mirrors.ustc.edu.cn/ubuntu/"mirror_name="中科大";;4)mirror_url="https://repo.huaweicloud.com/ubuntu/"mirror_name="华为云";;5)mirror_url="https://mirrors.163.com/ubuntu/"mirror_name="网易";;6)cp /etc/apt/sources.list.backup /etc/apt/sources.listecho "已恢复原始镜像源"apt updateexit 0;;0)echo "退出"exit 0;;*)echo "无效选择"exit 1;;
esacecho "正在配置${mirror_name}镜像源..."# 写入新的sources.list
cat > /etc/apt/sources.list << EOF
# ${mirror_name}镜像源
deb ${mirror_url} jammy main restricted universe multiverse
deb-src ${mirror_url} jammy main restricted universe multiversedeb ${mirror_url} jammy-security main restricted universe multiverse
deb-src ${mirror_url} jammy-security main restricted universe multiversedeb ${mirror_url} jammy-updates main restricted universe multiverse
deb-src ${mirror_url} jammy-updates main restricted universe multiversedeb ${mirror_url} jammy-backports main restricted universe multiverse
deb-src ${mirror_url} jammy-backports main restricted universe multiverse
EOFecho "镜像源配置完成!"
echo "正在更新软件包列表..."# 更新软件包列表
apt updateif [ $? -eq 0 ]; thenecho "✓ 镜像源更换成功!"echo "当前使用:${mirror_name}镜像源"
elseecho "✗ 更新失败,正在恢复原始配置..."cp /etc/apt/sources.list.backup /etc/apt/sources.listapt update
fi
4 升级 Ubuntu 22 到 24 LTS
1)查看当前版本
lsb_release -a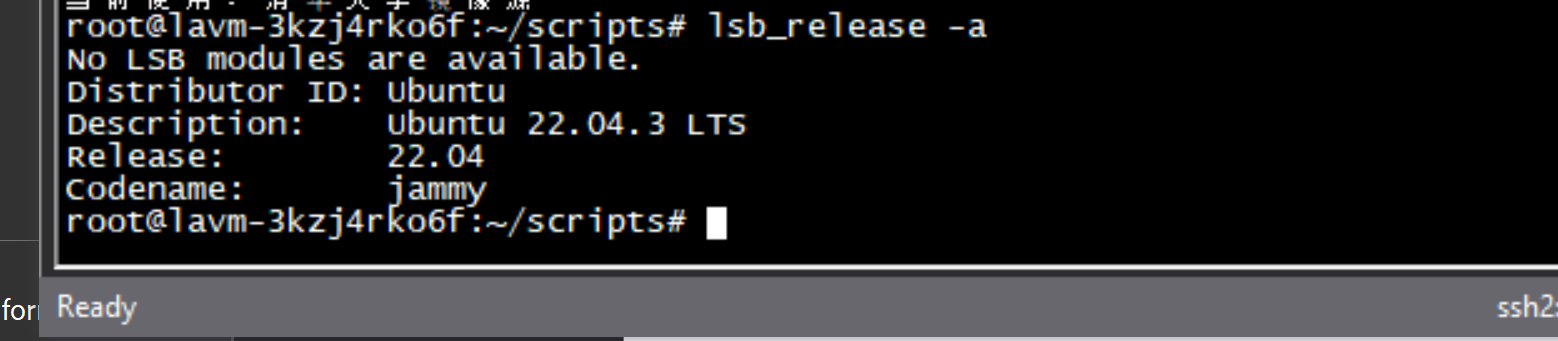
2)检查系统更新
apt update
apt list --upgradable
3)安装 22.04 全部更新
apt upgrade -y
apt dist-upgrade -y
apt autoremove -y
这个过程要十分钟或更久, 第一次下载就用了6-7分钟,安装时间也不短。
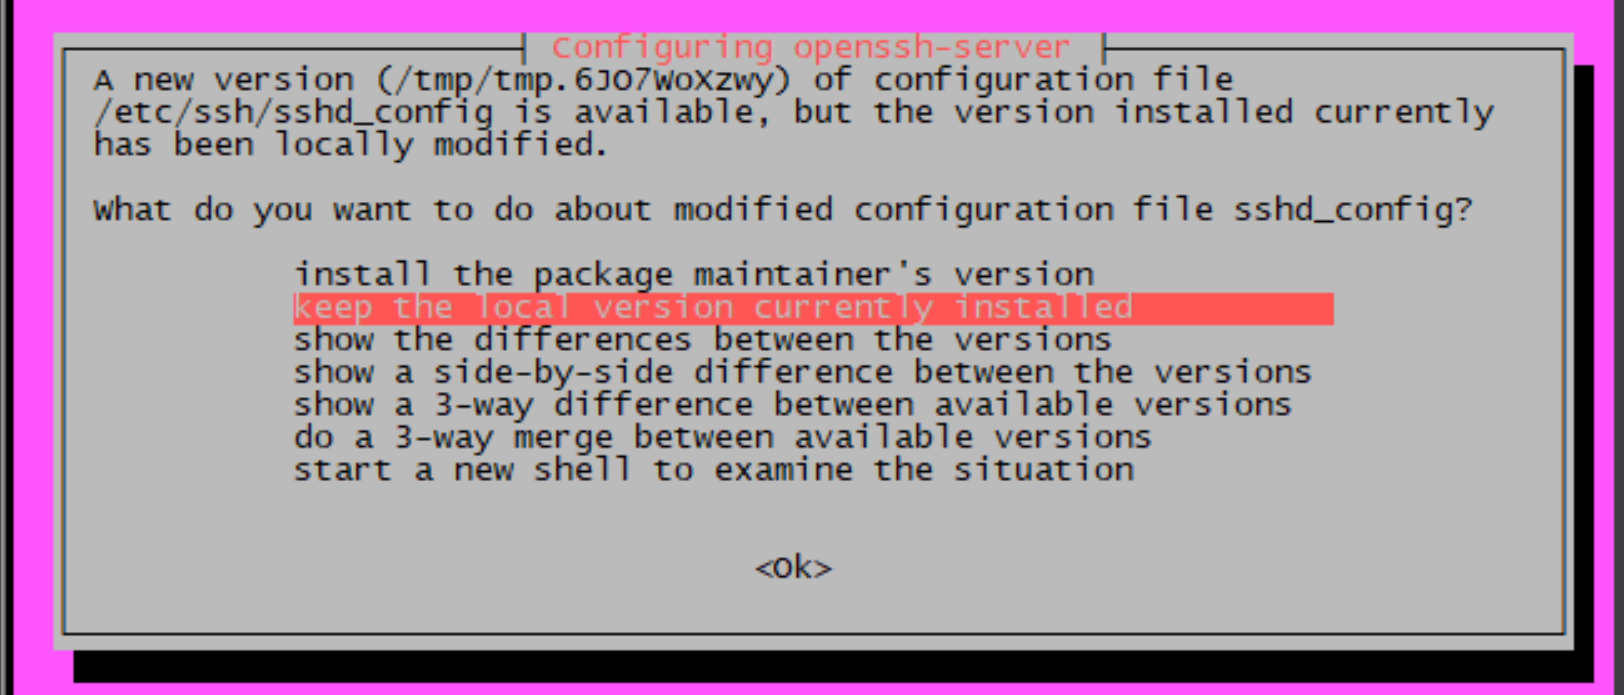
升级过程会有配置文件冲突,通常选择:
Y- 安装包维护者的版本N- 保留当前版本D- 显示差异
如果是SSH ,一定要选择 N ,也是第二项:保留当前版本, keep 什么什么的,没记住
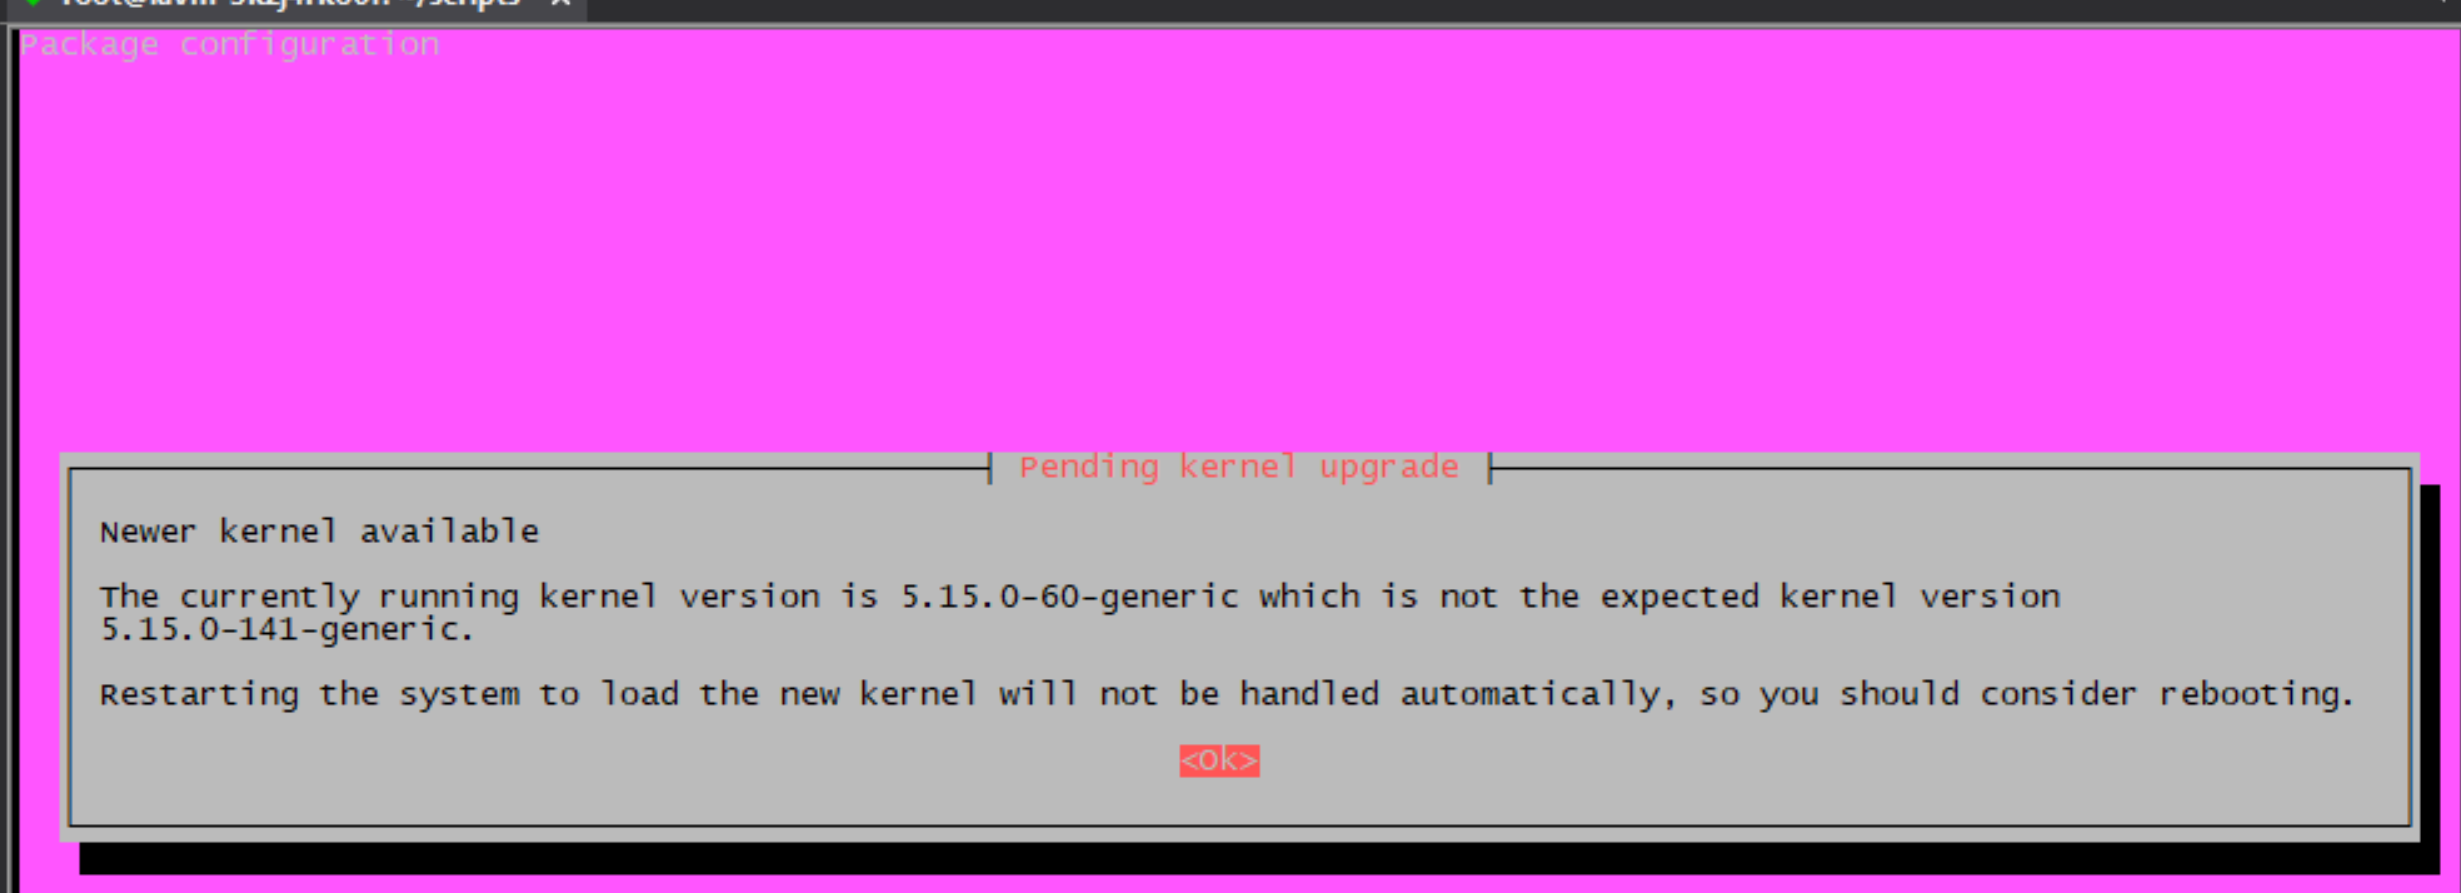
22 是3年前产品,还遇到内核升级,服务重启提示:
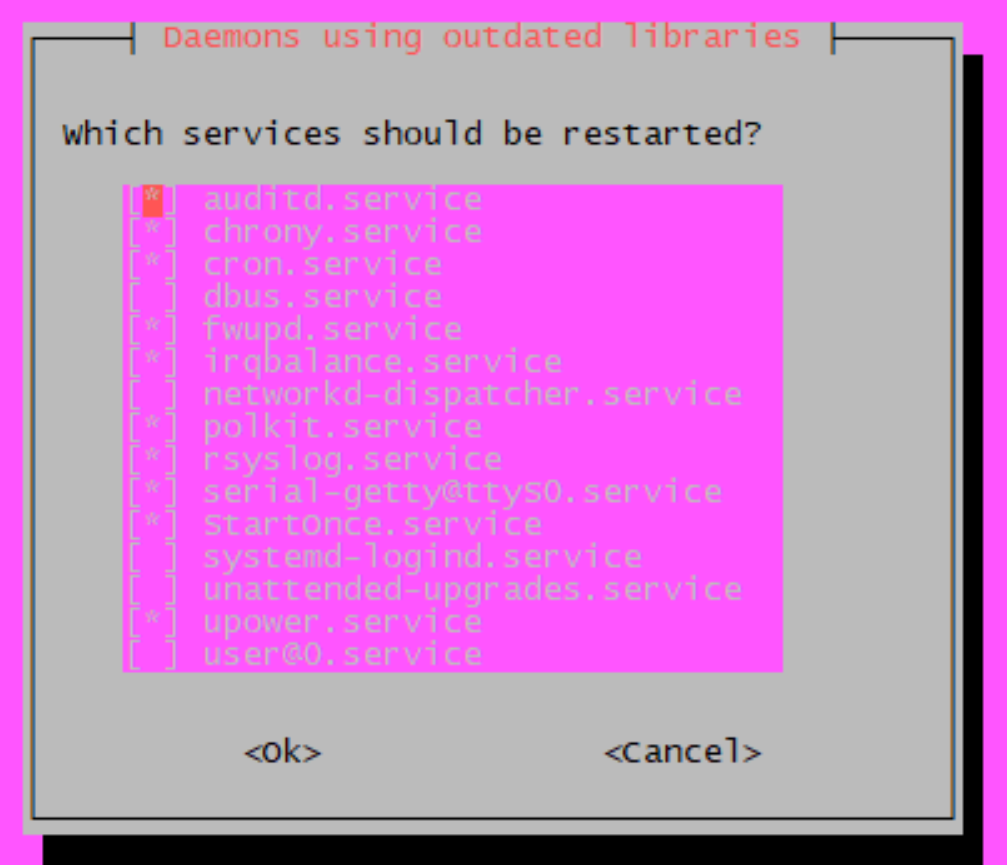
看来这些服务的库文件有更新,个人来说,应该选择所有的服务来重启, 这个是类似 systemctl reload/restart,下面是我的操作:
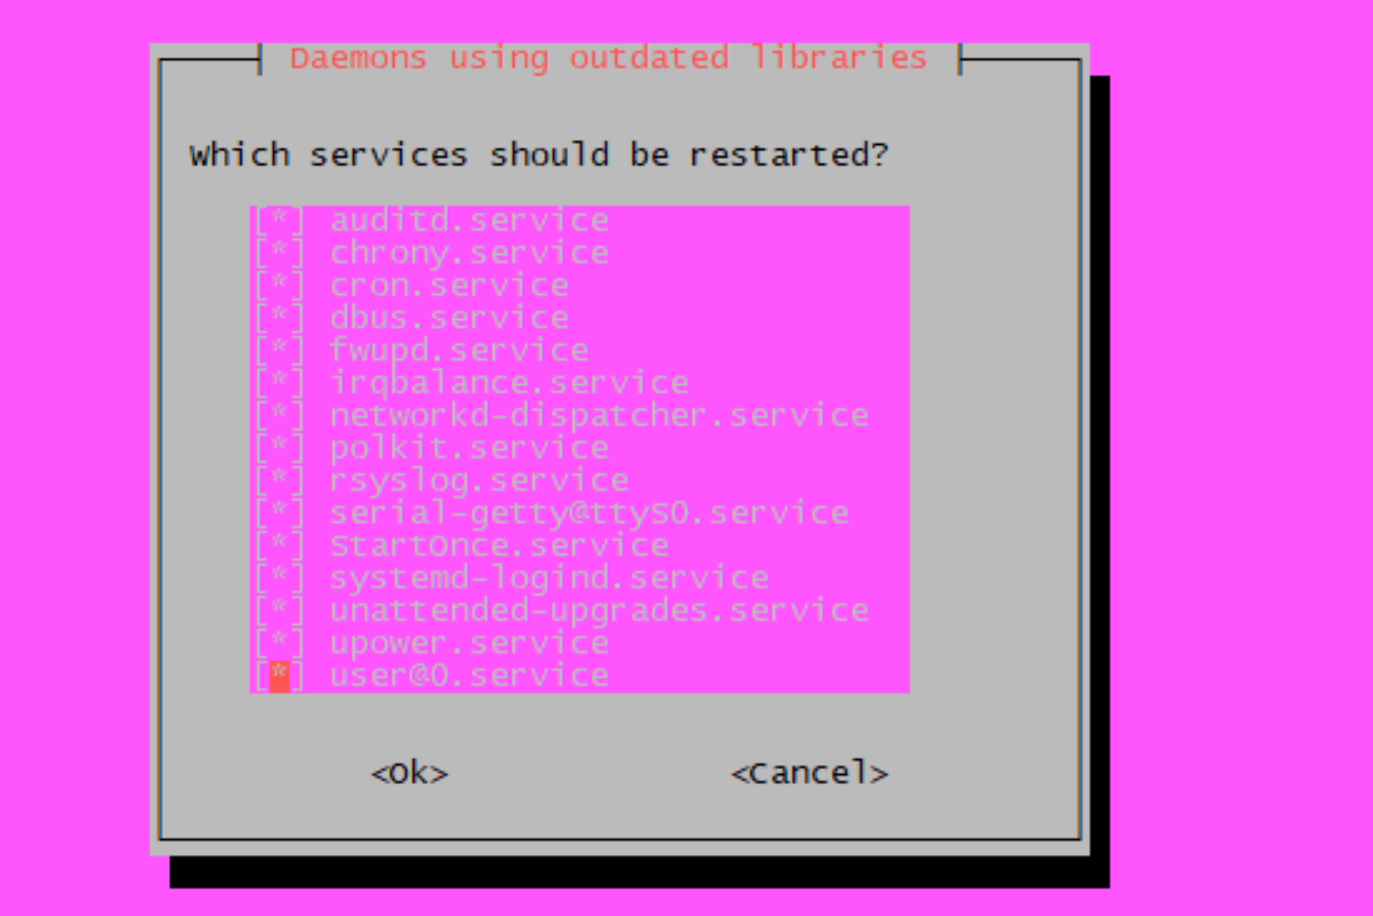
这种重启 SSH 是不会断开的。
4)检查是否有第三方PPA可能影响升
ls -la /etc/apt/sources.list.d/
临时禁用第三方源(当有问题)
cd /etc/apt/sources.list.d/
for file in *.list; do mv "$file" "$file.bak"; done
我这里是空的。
5)使用 do-release-upgrade 升级OS版本
i. 安装升级工具
apt install update-manager-core
ii. 检查升级配置
cat /etc/update-manager/release-upgrades
确保 Prompt=normal 或 Prompt=lts
root@lavm-3kzj4rko6f:~/scripts# cat /etc/update-manager/release-upgrades
# Default behavior for the release upgrader.[DEFAULT]
# Default prompting and upgrade behavior, valid options:
#
# never - Never check for, or allow upgrading to, a new release.
# normal - Check to see if a new release is available. If more than one new
# release is found, the release upgrader will attempt to upgrade to
# the supported release that immediately succeeds the
# currently-running release.
# lts - Check to see if a new LTS release is available. The upgrader
# will attempt to upgrade to the first LTS release available after
# the currently-running one. Note that if this option is used and
# the currently-running release is not itself an LTS release the
# upgrader will assume prompt was meant to be normal.
Prompt=lts
iii. 开始升级
do-release-upgraderoot@lavm-3kzj4rko6f:~/scripts# do-release-upgrade
Checking for a new Ubuntu release
You have not rebooted after updating a package which requires a reboot. Please reboot before upgrading.
root@lavm-3kzj4rko6f:~/scripts# reboot
按提示,先重启再升级
这系统重启的间隔,比我在用的 7 年前 Laptop 还慢,它还是用的 Windows 11。
do-release-upgrade好像等了1小时
iv. 如果提示没有新版本,强制检查LTS版本
do-release-upgrade -dLast login: Sat Jun 7 06:36:22 2025 from 18.88.0.95
root@bjn:~# lsb_release -a
No LSB modules are available.
Distributor ID: Ubuntu
Description: Ubuntu 24.04.2 LTS
Release: 24.04
Codename: noble
root@bjn:~# do-release-upgrade -d
Checking for a new Ubuntu release
There is no development version of an LTS available.
To upgrade to the latest non-LTS development release
set Prompt=normal in /etc/update-manager/release-upgrades.
root@bjn:~# do-release-upgrade
Checking for a new Ubuntu release
There is no development version of an LTS available.
To upgrade to the latest non-LTS development release
set Prompt=normal in /etc/update-manager/release-upgrades.
root@bjn:~#
现在的版本是 24.04.2 LTS 系统已经升级。
5 修改主机名为:BJN
vi /etc/hostname
bjn
vi /etc/hosts127.0.0.1 localhost
127.0.0.1 bjn# The following lines are desirable for IPv6 capable hosts
::1 ip6-localhost ip6-loopback
fe00::0 ip6-localnet
ff00::0 ip6-mcastprefix
ff02::1 ip6-allnodes
ff02::2 ip6-allrouters
6 更新软件包
之前做了升级,现在都是最新的。但正常状态下,新的主机要执行以下三条命令:
apt update
apt upgrade
apt purge
6.1 修改 root 口令
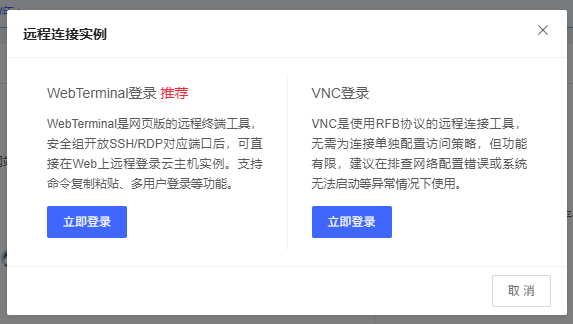
在控制台,可以用上面这两各式登录,属于底层虚拟化访问,密码是以邮件发来。 建议更换。
京东云的 Web VNC 控制台有特殊的访问权限。即使你禁用了所有网络服务,云控制台依然可以访问。
如果你与我一样担心安全性:
- 数据加密 - 对敏感数据进行加密存储
- 最小权限原则 - 不在云主机上存储过于敏感的数据
- 审计日志 - 定期检查系统访问日志
这仨儿,技术趋同,就看哪个是更小人。 所以只能找个有多点儿的性价比,其它一样。
7 修改 SSH 配置
vi /etc/ssh/sshd_config替换文件为以下内容:
Port 9922
Protocol 2
AddressFamily anyHostKey /etc/ssh/ssh_host_rsa_key
HostKey /etc/ssh/ssh_host_ecdsa_key
HostKey /etc/ssh/ssh_host_ed25519_keySyslogFacility AUTH
LogLevel INFOPermitRootLogin yes
PubkeyAuthentication yes
AuthorizedKeysFile .ssh/authorized_keys
PasswordAuthentication no
PermitEmptyPasswords no
ChallengeResponseAuthentication no
UsePAM yesX11Forwarding no
PrintMotd no
ClientAliveInterval 300
ClientAliveCountMax 2
MaxAuthTries 3
MaxSessions 3PermitUserEnvironment no
StrictModes yes
IgnoreRhosts yes
HostbasedAuthentication noGSSAPIAuthentication yes
GSSAPICleanupCredentials yesAcceptEnv LANG LC_*Subsystem sftp /usr/lib/openssh/sftp-server
重启服务
systemctl daemon-reload
systemctl restart ssh
8 替换主机密钥 Host Keys
1) 删除 key files
rm /etc/ssh/ssh_host_*_key*2) 重新生成 key files
sudo ssh-keygen -t rsa -b 4096 -f /etc/ssh/ssh_host_rsa_key
sudo ssh-keygen -t ecdsa -b 521 -f /etc/ssh/ssh_host_ecdsa_key
sudo ssh-keygen -t ed25519 -f /etc/ssh/ssh_host_ed25519_key
sudo ssh-keygen -t dsa -b 1024 -f /etc/ssh/ssh_host_dsa_key
Enter passphrase (empty for no passphrase):
Enter same passphrase again:见这个按回车,除非需要密码
3) 检查是否成功
ll /etc/sshroot@lavm-3kzj4rko6f:~# ll /etc/ssh
total 680
drwxr-xr-x 4 root root 4096 Jun 7 11:29 ./
drwxr-xr-x 108 root root 12288 Jun 7 11:22 ../
-rw-r--r-- 1 root root 620042 Apr 29 22:57 moduli
-rw-r--r-- 1 root root 1649 Apr 29 22:57 ssh_config
drwxr-xr-x 2 root root 4096 Nov 23 2022 ssh_config.d/
-rw-r--r-- 1 root root 686 Jun 7 11:26 sshd_config
drwxr-xr-x 2 root root 4096 Dec 13 2023 sshd_config.d/
-rw-r--r-- 1 root root 3502 Jun 7 11:00 sshd_config.ucf-dist
-rw------- 1 root root 1393 Jun 7 11:29 ssh_host_dsa_key
-rw-r--r-- 1 root root 610 Jun 7 11:29 ssh_host_dsa_key.pub
-rw------- 1 root root 748 Jun 7 11:29 ssh_host_ecdsa_key
-rw-r--r-- 1 root root 274 Jun 7 11:29 ssh_host_ecdsa_key.pub
-rw------- 1 root root 411 Jun 7 11:29 ssh_host_ed25519_key
-rw-r--r-- 1 root root 102 Jun 7 11:29 ssh_host_ed25519_key.pub
-rw------- 1 root root 3389 Jun 7 11:29 ssh_host_rsa_key
-rw-r--r-- 1 root root 746 Jun 7 11:29 ssh_host_rsa_key.pub
-rw-r--r-- 1 root root 342 Dec 8 2020 ssh_import_id
_key / .pub 共 8 个文件生成时间一至。
9 更改时区设置
查看时区:
timedatectlroot@lavm-3kzj4rko6f:~# timedatectlLocal time: Sat 2025-06-07 11:32:59 CSTUniversal time: Sat 2025-06-07 03:32:59 UTCRTC time: Sat 2025-06-07 03:32:59Time zone: Asia/Shanghai (CST, +0800)
System clock synchronized: yesNTP service: activeRTC in local TZ: no更改:
sudo timedatectl set-timezone Asia/Shanghai10 DNS修改
系统使用的是 systemd-resolved 管理 DNS
执行:
- 查看详细 DNS 配置
- 查看 DNS 查询统计
- 测试DNS解析
resolvectl status
resolvectl statistics
nslookup google.com
dig google.com
返回如下:
Global
Protocols: -LLMNR -mDNS -DNSOverTLS DNSSEC=no/unsupported
resolv.conf mode: stub
Current DNS Server: 103.224.222.222
DNS Servers: 103.224.222.222 103.224.222.223Link 2 (eth0)
Current Scopes: DNS
Protocols: +DefaultRoute -LLMNR -mDNS -DNSOverTLS DNSSEC=no/unsupported
Current DNS Server: 169.254.169.240
DNS Servers: 169.254.169.240
Transactions
Current Transactions: 0
Total Transactions: 100
Cache
Current Cache Size: 2
Cache Hits: 12
Cache Misses: 92
Failure Transactions
Total Timeouts: 0
Total Timeouts (Stale Data Served): 0
Total Failure Responses: 0
Total Failure Responses (Stale Data Served): 0
DNSSEC Verdicts
Secure: 0
Insecure: 0
Bogus: 0
Indeterminate: 0
Server: 127.0.0.53
Address: 127.0.0.53#53Non-authoritative answer:
Name: google.com
Address: 93.46.8.90
; <<>> DiG 9.18.30-0ubuntu0.24.04.2-Ubuntu <<>> google.com
;; global options: +cmd
;; Got answer:
;; ->>HEADER<<- opcode: QUERY, status: NOERROR, id: 48186
;; flags: qr rd ra; QUERY: 1, ANSWER: 1, AUTHORITY: 0, ADDITIONAL: 1;; OPT PSEUDOSECTION:
; EDNS: version: 0, flags:; udp: 65494
;; QUESTION SECTION:
;google.com. IN A;; ANSWER SECTION:
google.com. 41 IN A 93.46.8.90;; Query time: 0 msec
;; SERVER: 127.0.0.53#53(127.0.0.53) (UDP)
;; WHEN: Sat Jun 07 11:37:24 CST 2025
;; MSG SIZE rcvd: 55root@lavm-3kzj4rko6f:~#
问题:
- 使用的可能是云服务商 DNS 服务器
103.224.222.222/223和169.254.169.240 - Google.com 解析到
93.46.8.90这个IP地址怀疑不是 Google 的IP - DNSSEC未启用
- 可能存在DNS劫持或者使用了有问题的 DNS 服务器
1)配置可信的DNS服务器
vi /etc/systemd/resolved.conf换为以下内容:
[Resolve]
DNS=223.5.5.5 223.6.6.6 8.8.8.8 1.1.1.1
Fallback=114.114.114.114 8.8.4.4
Domains=~.
DNSSEC=yes
Cache=yes
DNSStubListener=yes
因为没有安装 DELETED
文件内容暂时为:禁用 DNSSEC
[Resolve]
DNS=8.8.8.8 1.1.1.1
Fallback=114.114.114.114 8.8.4.4
Domains=~.
DNSSEC=no
DNSOver=no
Cache=yes
DNSStubListener=yes
重启 DNS 服务
systemctl restart systemd-resolved清空 DNS 缓存
resolvectl flush-caches验证配置生效
resolvectl statusGlobal
Protocols: -LLMNR -mDNS -DNSOverTLS DNSSEC=yes/supported
resolv.conf mode: stub
Current DNS Server: 223.5.5.5
DNS Servers: 223.5.5.5 223.6.6.6 8.8.8.8 1.1.1.1
DNS Domain: ~.Link 2 (eth0)
Current Scopes: DNS
Protocols: +DefaultRoute -LLMNR -mDNS -DNSOverTLS DNSSEC=yes/supported
Current DNS Server: 169.254.169.240
DNS Servers: 169.254.169.240
问题
Link 2 (eth0)
Current Scopes: DNS
Protocols: +DefaultRoute -LLMNR -mDNS -DNSOverTLS DNSSEC=yes/supported
Current DNS Server: 169.254.169.240
DNS Servers: 169.254.169.240
- eth0网卡仍在使用云服务商的DNS:169.254.169.240
- 这会导致DNS查询可能仍然被劫持
先留着,这个问题。
11 安装 NGINX
apt install nginx -y