MyBatis————入门
MyBatis呢是一个持久层框架,就是对之前学习的JDBC进行了封装,MyBatis大大提升了我们写Dao层代码的效率,下面我们来学习它;
1,单元测试的学习
先别问,直接看:
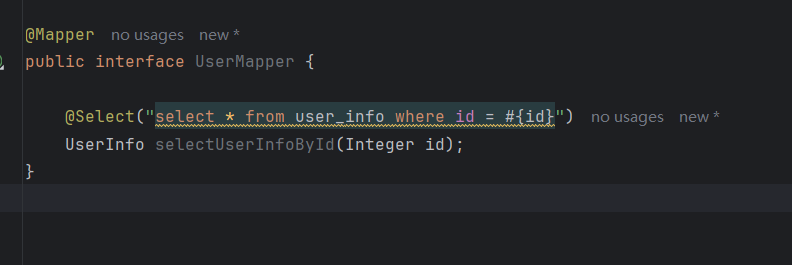
选中Mapper接口,右键这个方法:
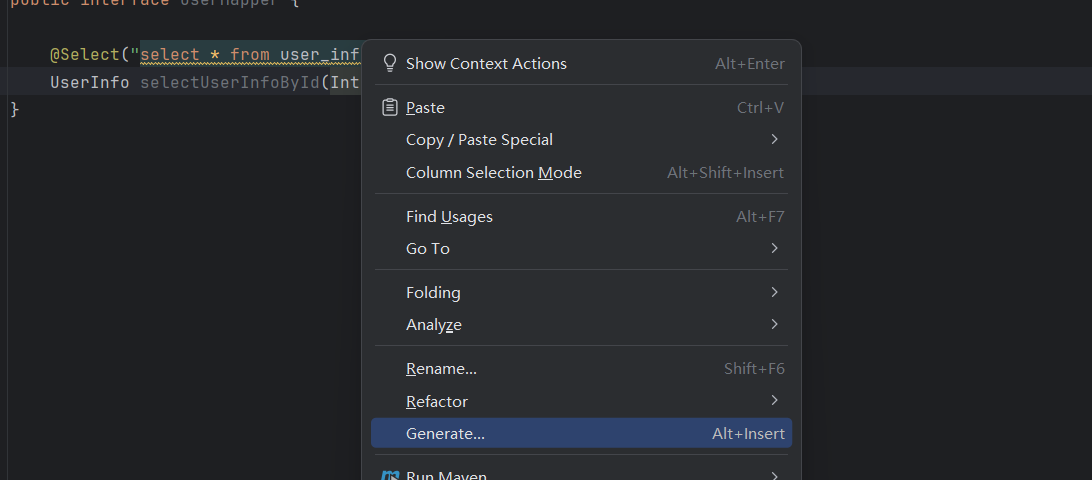 选generate,
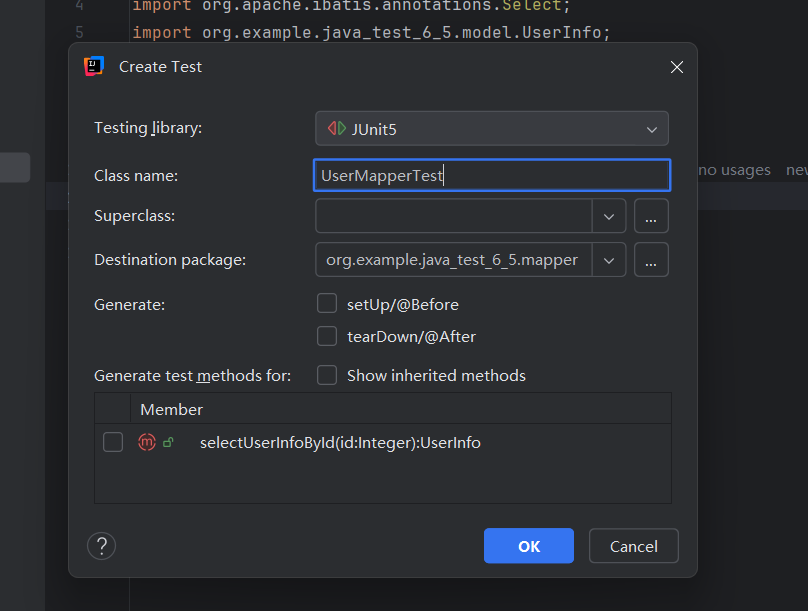
点击test,勾选那个红m,
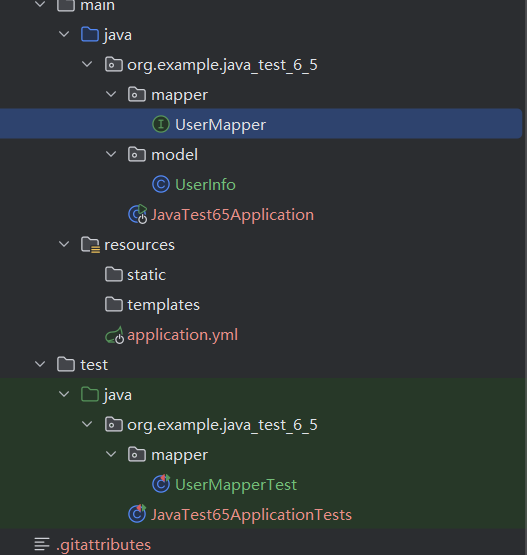
这样在test包下面就出现了mapper代码
@SpringBootTest
class UserMapperTest {@Autowiredprivate UserMapper userMapper;@Testvoid selectUserInfoById() {userMapper.selectUserInfoById(1);}
}
这个就是测试代码了,我们看这三个注解,@SpringBootTest注解就是如果需要Spring的东西的话就加,比如这个@Autowired注解就是Spring的想使用就需要@SpringBootTest注解,注入了UserMapper就可以直接使用了,@Test注解就是可以选择来运行那个Test,可以看做简易的Spring运行环境,我们就不需要用Controller呀,来用postman和浏览器访问了,很方便;
2,配置相关
1,Springboot项目配置
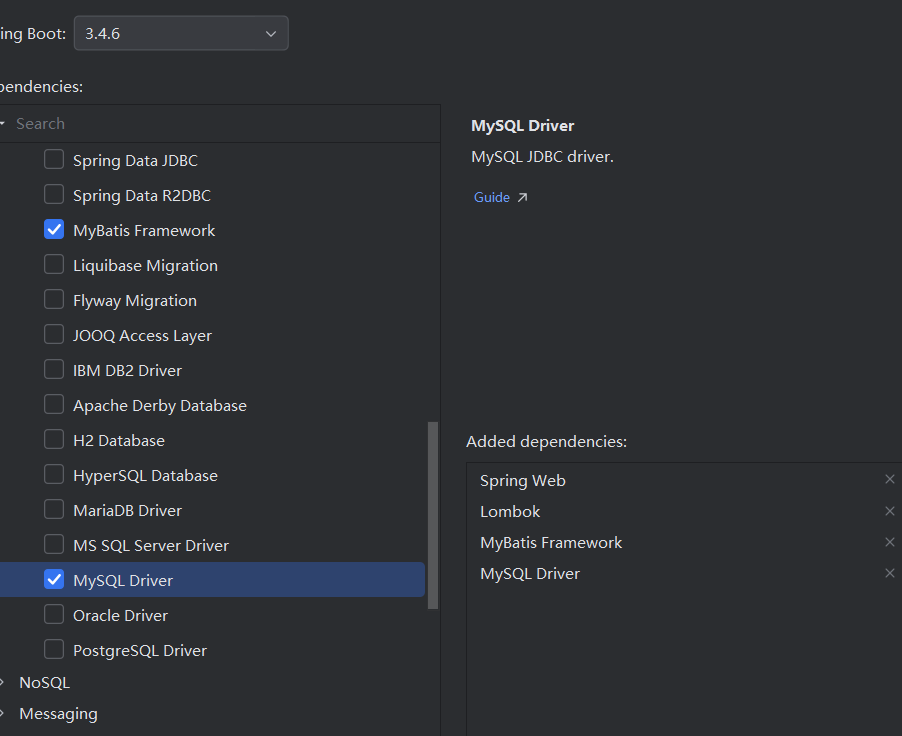
我们选择这四个,如果MyBatis Farmework勾选不了,就选择兼容的版本,创建项目,
2,yml配置
2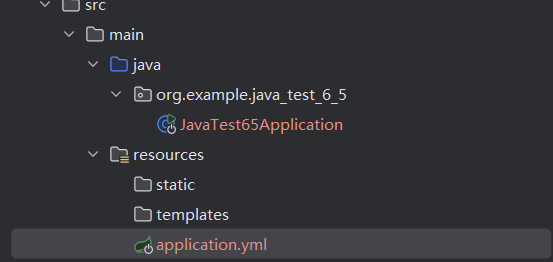
之后把这个Application文件改为yml格式,喜欢用其他的格式也行:
yml格式的配置
spring:application:name: java_test_6_5# 数据库连接配置datasource:url: jdbc:mysql://127.0.0.1:3306/book_test?characterEncoding=utf8&useSSL=falseusername: rootpassword: 123456driver-class-name: com.mysql.cj.jdbc.Driver
mybatis:configuration:map-underscore-to-camel-case: true #配置驼峰⾃动转换log-impl: org.apache.ibatis.logging.stdout.StdOutImpl #打印sql语句# 设置⽇志⽂件的⽂件名
logging:file:name: spring-book.log
3,注解方式学习MyBatis
url中的?号之前book_test就是我们选择的数据库,username和password是我们设置的用户名和密码,驼峰自动转换就是标准,
比如一行,对应java中的属性就是id,bookName,author,count,price,publish,status,createTime,updateTime,这就是一个规范,如果对应不上的话,这两个属性是关联不上的,那如果真的没关联上怎么办,总会有不遵守规则的,我们一会儿来说,先来创建model类代码和mapper层代码,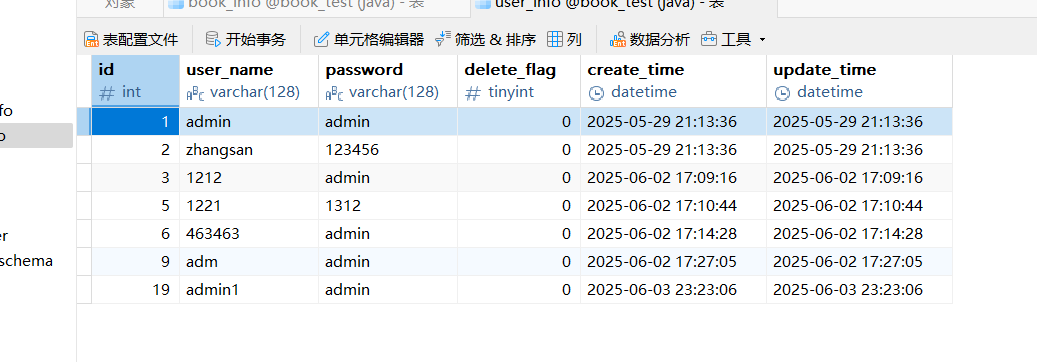
我们来根据这个用户表来创建一个类,
@Data
public class UserInfo {private Integer id;private String userName;private String password;private Integer deleteFlag;private Date createTime;private Date updateTime;
}
来实现Mapper接口:
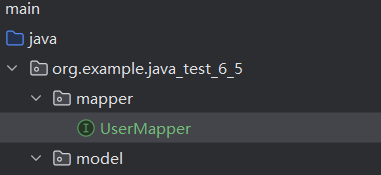
@Mapper
public interface UserMapper {@Select("select * from user_info where id = #{id}")UserInfo selectUserInfoById(Integer id);
}
我们直接使用单元测试:
@SpringBootTest
class UserMapperTest {@Autowiredprivate UserMapper userMapper;@Testvoid selectUserInfoById() {userMapper.selectUserInfoById(1);}
}
来查询id为1的字段

测试通过,并且查到了刚才的字段,那如果
void selectUserInfoById() {UserInfo userInfo = userMapper.selectUserInfoById(1);System.out.println(userInfo);}打印一下他呢,![]() 我们看到啊只要是数据库字段和java的属性不一样的话就会发生问题,都没有接收到,就是刚才的那个问题,那么怎么解决呢,一个办法就是使用驼峰自动转换,除了这个还有三种,
我们看到啊只要是数据库字段和java的属性不一样的话就会发生问题,都没有接收到,就是刚才的那个问题,那么怎么解决呢,一个办法就是使用驼峰自动转换,除了这个还有三种,
我们先来说一下这个mapper传参,这个也是必须要对应上的,比如我们拿id去查,如果我们想要
给参数起其他的名字就需要使用其他的注解:
@Select("select * from user_info where id = #{id2}")UserInfo selectUserInfoById(@Param("id2") Integer id);为啥要这么麻烦呢, 我直接把参数改成Integer id2不行?这里肯定是可以的,但是我们这么写呢
@Select("select * from user_info where id = #{id} and user_name = #{userName}")UserInfo selectUserInfoById(String userName,Integer id); void selectUserInfoById() {UserInfo userInfo = userMapper.selectUserInfoById("admin",1);System.out.println(userInfo);} ![]()
这不也能查吗,这玩意有啥用呀,这纯纯巧合,java编译的机制是不保留参数的,就是说我们java编译之后就会它的参数就会变成arg1,arg2,arg3的情况,那么sql语句根本就不知道id是谁了,这3个arg什么玩意这是,但是为啥我们能运行呢,这个是java8的新特性, 支持-parameters 编译参数,就是说就是说编译时会保留方法参数到字节码文件,还有就是MyBatis的智能处理,它会先匹配参数名,这里重点就是我们有-parameters ,不支持参数名匹配的话就是根据位置,把arg1给第一个参数。。。。如果没有-parameters,这段代码就出错了,赋值的类型都是错的;
接下来来说赋值失败的问题,我们之前拿到的userInfo对象好多的内容都是空的,有三种方法来解决:
1,SqL 语句来解决,
还记得as吗,来试试,
@Select("select id, user_name as userName, password, delete_flag as deleteFlag, " +"create_time as createTime, update_time as updateTime from user_info where id = #{id}")UserInfo selectUserInfoById2(Integer id); @Testvoid selectUserInfoById2() {UserInfo userInfo = userMapper.selectUserInfoById2(1);System.out.println(userInfo);} 
全部打印OK了,
2,结果映射
第二种方法,
@Select("select id, user_name, password, delete_flag, create_time, update_time from user_info")@Results(id = "resultMap",value = {@Result(column = "user_name",property = "userName"),@Result(column = "delete_flag",property = "deleteFlag"),@Result(column = "create_time",property = "createTime"),@Result(column = "update_time",property = "updateTime")})UserInfo testSelect();先定义一个基础接口,目的是要这个Result,
@Select("select id, user_name, password, delete_flag, create_time, update_time from user_info where id = #{id}")@ResultMap("resultMap")UserInfo selectUserInfoById3(Integer id); @Testvoid selectUserInfoById3() {UserInfo userInfo = userMapper.selectUserInfoById3(1);System.out.println(userInfo);}
ok了;
3,驼峰自动转换
还是推荐使用驼峰自动转换,java的属性和sql的字段都遵守命名规则,就能自动转换了,
mybatis:configuration:map-underscore-to-camel-case: true #配置驼峰⾃动转换来试试:
@Select("select * from user_info where id = #{id}")UserInfo selectUserInfoById4(Integer id); @Testvoid selectUserInfoById4() {UserInfo userInfo = userMapper.selectUserInfoById4(1);System.out.println(userInfo);} 
全拿到了;
下面我们来看看CURD,
1,insert增
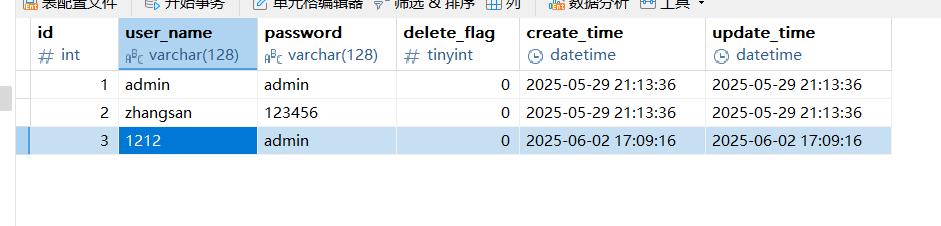
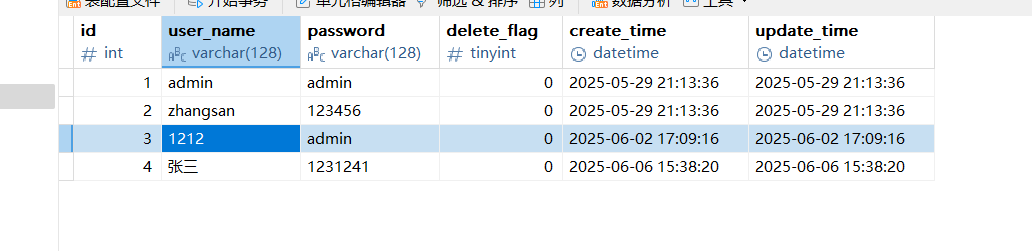
我们来新增一个数据
@Insert("insert into user_info (user_name,password,delete_flag) values (#{userName},#{password},#{deleteFlag})")void InsertUserInfo(UserInfo userInfo); @Testvoid insertUserInfo() {UserInfo userInfo = new UserInfo();userInfo.setUserName("张三");userInfo.setPassword("1231241");userInfo.setDeleteFlag(0);userMapper.InsertUserInfo(userInfo);} 
 这里字段都是不为null的
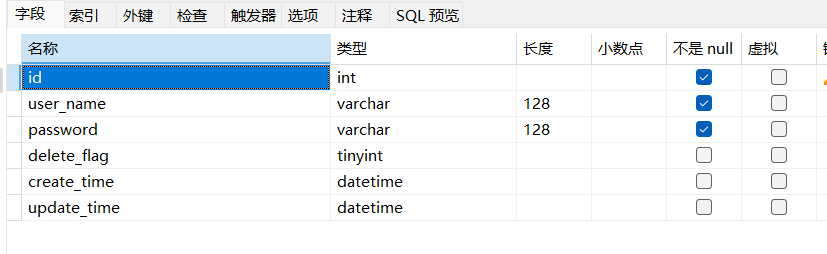
那这个delete_flag是不为null的,我们是可以选择不传递的,我们试试:
@Insert("insert into user_info (user_name,password) values (#{userName},#{password})")void InsertUserInfo2(UserInfo userInfo); @Testvoid insertUserInfo2() {UserInfo userInfo = new UserInfo();userInfo.setUserName("张三");userInfo.setPassword("1231241");
// userInfo.setDeleteFlag(0);userMapper.InsertUserInfo(userInfo);}
运行结果是有问题的,我使用注解是不可以不传这个参数的,但是如果它有默认值的话就可以不用传递,有同学可能有问题了,你delete_flag凭啥报错呀那个create_time和update_time就没是,它也可以不为空,而且人家还有值呢,因为它有默认值,默认为当前的时间; 那怎么办呀,可能业务需求就不让填这个呢,我们就要使用动态SQL了,这个我们不用注解来讲,太麻烦了,我们用XML学习动态SQL;
还有,如果使用@Param注解时:
@Insert("insert into user_info (user_name,password,delete_flag) values (#{user.userName},#{user.password},#{user.deleteFlag})")void InsertUserInfo2(@Param("user") UserInfo userInfo); @Testvoid insertUserInfo2() {UserInfo userInfo = new UserInfo();userInfo.setUserName("张三2");userInfo.setPassword("1231241");userInfo.setDeleteFlag(0);userMapper.InsertUserInfo(userInfo);}这样也是可以插入成功的,还可以不使用#{}来获取参数,还记得${}吗,使用这个的话就是字符串拼接了,我们后面讲这个;
2,delete删
@Delete("delete from user_info where id = #{id}")void deleteUserInfoById(Integer id); @Testvoid deleteUserInfoById() {userMapper.deleteUserInfoById(2);}
成功删掉了id为2的数据但是,我们刚才添加的数据怎么是id为10呢,这个大家还记得不如果sql写错了还是会执行,5写错了只能接着6写了,博主写错了好多。。。。
3,select查
这个不说了:水一段;
4,update改
其实我们一般删除并不真的使用delete而是使用update进行标记,就像这个表,如果把delete_flag这个字段设置为1,就代表它被删除了:
现在来修改第一行数据:
@Update("update user_info set user_name = #{userName},password = #{password},delete_flag = #{deleteFlag} where id = #{id}")void updateUserInfo(UserInfo userInfo); @Testvoid updateUserInfo() {UserInfo userInfo = new UserInfo();userInfo.setId(1);userInfo.setUserName("张三12312312");userInfo.setPassword("1231213421241241");userInfo.setDeleteFlag(0);userMapper.updateUserInfo(userInfo);} 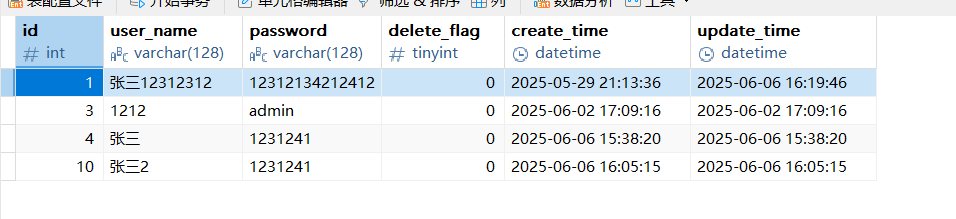
改完了;