瑞莎星睿 O6 (Radxa Orion O6)-ubuntu24.04-ROS2 运行深度估计模型
引言
由Radxa联合此芯科技与安谋科技打造的"星睿O6"迷你ITX主板堪称当前最受期待的开发板之一。该产品搭载的CIX P1(CD8180)12核Armv9处理器配合30TOPS算力的NPU和高性能GPU,结合最高64GB LPDDR内存,非常适合AI开发工作站、边缘计算节点、以及高性能个人计算应用。
在这篇文章中,我将尝试在"星睿O6"上通过ROS2部署depth-anything-v2模型。
硬件要求
- “星睿O6” AI PC开发板
- USB摄像头
软件要求
- Ubuntu 24.04系统
- 安装ROS2
ROS2部署depth-anything-v2模型步骤
创建USB摄像头功能包和图像发布节点
第一步、创建功能包
mkdir -p ros_ws/src
cd ros_ws/src
ros2 pkg create image_publish --build-type ament_python --dependencies rclpy cv_bridge
第二步、编写发布节点代码
import rclpy
from rclpy.node import Node
from sensor_msgs.msg import Image
from cv_bridge import CvBridge
import cv2class CameraPublisher(Node):def __init__(self):super().__init__('camera_publisher')self.publisher_ = self.create_publisher(Image, 'camera/image_raw', 10)self.cap = cv2.VideoCapture(0)self.bridge = CvBridge()self.timer = self.create_timer(0.1, self.timer_callback)def timer_callback(self):ret, frame = self.cap.read()if ret:msg = self.bridge.cv2_to_imgmsg(frame, "bgr8")self.publisher_.publish(msg)def main():rclpy.init()node = CameraPublisher()rclpy.spin(node)node.destroy_node()rclpy.shutdown()if __name__ == '__main__':main()
第三步、编译和执行
colcon build
source install/setup.bash
ros2 run image_publish image
第四步、查看话题
ros2 topic list

看见camera/image_raw话题说明USB摄像数据已经成功封装成ROS2数据格式并发布出来。
创建深度估计功能包和推理结果发布节点
第一步、创建功能包
cd ros_ws/src
ros2 pkg create depth_estimate --build-type ament_python --dependencies rclpy cv_bridge opencv-python numpy
第二步、编写推理节点代码
从CIX modelhub将depth_anything_v2预编译的.cix和NOE_Engine.py复制到ros_ws/src/depth_estimate/depth_estimate文件夹下。
import rclpy
from rclpy.node import Node
from sensor_msgs.msg import Image
from cv_bridge import CvBridge
import cv2
import numpy as np
from .NOE_Engine import EngineInferdef preprocess_image(image,  mean : list = [0.485, 0.456, 0.406], std : list = [0.229, 0.224, 0.225], target_size : tuple = (520, 520), flag : bool = True, rgb : bool = True) -> np.ndarray:mean = np.array(mean).astype(np.float32)std = np.array(std).astype(np.float32)# image = cv2.imread(image_path)if rgb:image = image[:, :, ::-1]  # BGR2RGBimage_resized = cv2.resize(image, target_size)if flag:image_normalized = image_resized.astype(np.float32) / 255.0else:image_normalized = image_resized.astype(np.float32)image_standardized = (image_normalized - mean) / stdimage_transposed = image_standardized.transpose(2, 0, 1)input_tensor = np.expand_dims(image_transposed, axis=0)return input_tensorclass CameraProcessor(Node):def __init__(self):super().__init__('image_processor')self.subscription = self.create_subscription(Image,'camera/image_raw',self.listener_callback,10)self.bridge = CvBridge()self.publisher_ = self.create_publisher(Image, 'processer/image_prcocess', 10)self.model = EngineInfer("/home/cix/ros_ws/src/depth_estimate/depth_estimate/depth_anything_v2.cix")def listener_callback(self, msg):input_image = self.bridge.imgmsg_to_cv2(msg, desired_encoding='bgr8')image = input_imageh, w = image.shape[:2]input = preprocess_image(input_image,[0.485, 0.456, 0.406],[0.229, 0.224, 0.225],(518,518))depth = self.model.forward([input])[0]depth = np.reshape(depth, (1, 518, 518))depth = (depth - depth.min()) / (depth.max() - depth.min()) * 255.0depth = depth.transpose(1, 2, 0).astype("uint8")depth = cv2.resize(depth, (w, h), interpolation=cv2.INTER_CUBIC)depth_color = cv2.applyColorMap(depth, cv2.COLORMAP_INFERNO)ros_image = self.bridge.cv2_to_imgmsg(depth_color, encoding="bgr8")ros_image.header.stamp = self.get_clock().now().to_msg()ros_image.header.frame_id = "camera_frame"self.publisher_.publish(ros_image)def main(args=None):rclpy.init(args=args)camera_processor = CameraProcessor()rclpy.spin(camera_processor)camera_processor.destroy_node()rclpy.shutdown()if __name__ == '__main__':main()
第三步、编译和执行
colcon build
source install/setup.bash
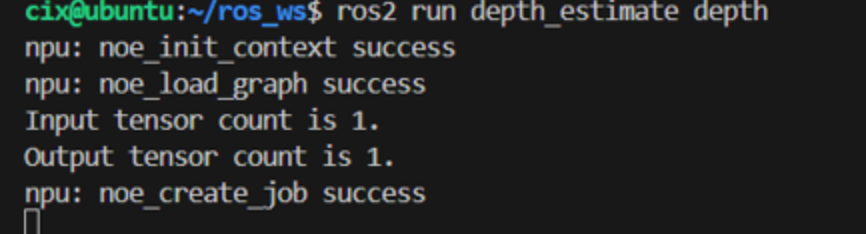
ros2 run depth_estimate depth
查看话题
ros2 topic list
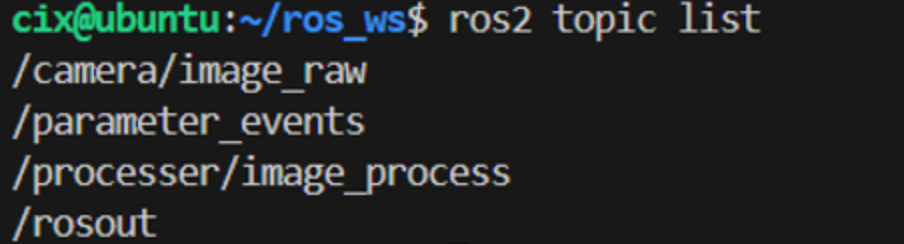
可以看到原始数据和深度估计的话题。
第四步、rviz可视化结果
在rviz订阅相关话题数据即可
ros2 run rviz2 rviz2

结语
总体来说,"星睿O6"在ROS2环境中,能够充分调用CPU和NPU的算了完成AI模型的推理,并通过ROS2的可视化插件展示出来。