【Ansible】模块详解
一、ansible概述
1.1 ansible介绍
Ansible 是一个基于 Python 开发的配置管理和应用部署工具,近年来在自动化管理领域表现突出。它集成了许多传统运维工具的优点,几乎可以实现 Pubbet 和 Saltstack 所具备的功能。
1.2 ansible能做什么
批量处理。Ansible 可以对成千上万的主机进行批量配置、部署和管理。例如,以前需要登录到每一台主机上执行一个或多个操作,而使用 Ansible 时,只需在一个指定的控制节点上操作,便可完成所有主机的任务。
基于模块工作。Ansible 的工作原理基于模块,它提供了一种执行框架,但本身并不执行任务。实际执行操作的是 Ansible 的模块,例如,copy 模块用于将文件复制到远程主机,service 模块用于管理服务的启动、停止和重启等。
1.3 ansible两大特性
(1)无代理。Ansible 的一个显著特点是 Agentless(无代理),它像普通命令一样工作,并不是 C/S 软件。只需在一个控制节点主机上安装一次 Ansible,而远程主机无需安装 Ansible 或其他额外的服务,通常通过 SSH 连接来控制远程主机。
(2)幂等性。Ansible 的另一个突出特性是大多数模块都具备幂等性(idempotence)。幂等性指的是无论执行多少次相同操作,结果始终相同。举例来说,执行 systemctl stop xxx 命令停止服务时,如果目标服务已处于停止状态,命令不会再做任何操作,因此多次执行 stop 命令的结果始终是服务保持停止状态,它是幂等的,而 systemctl restart xxx 则不是。
1.4 ansible架构
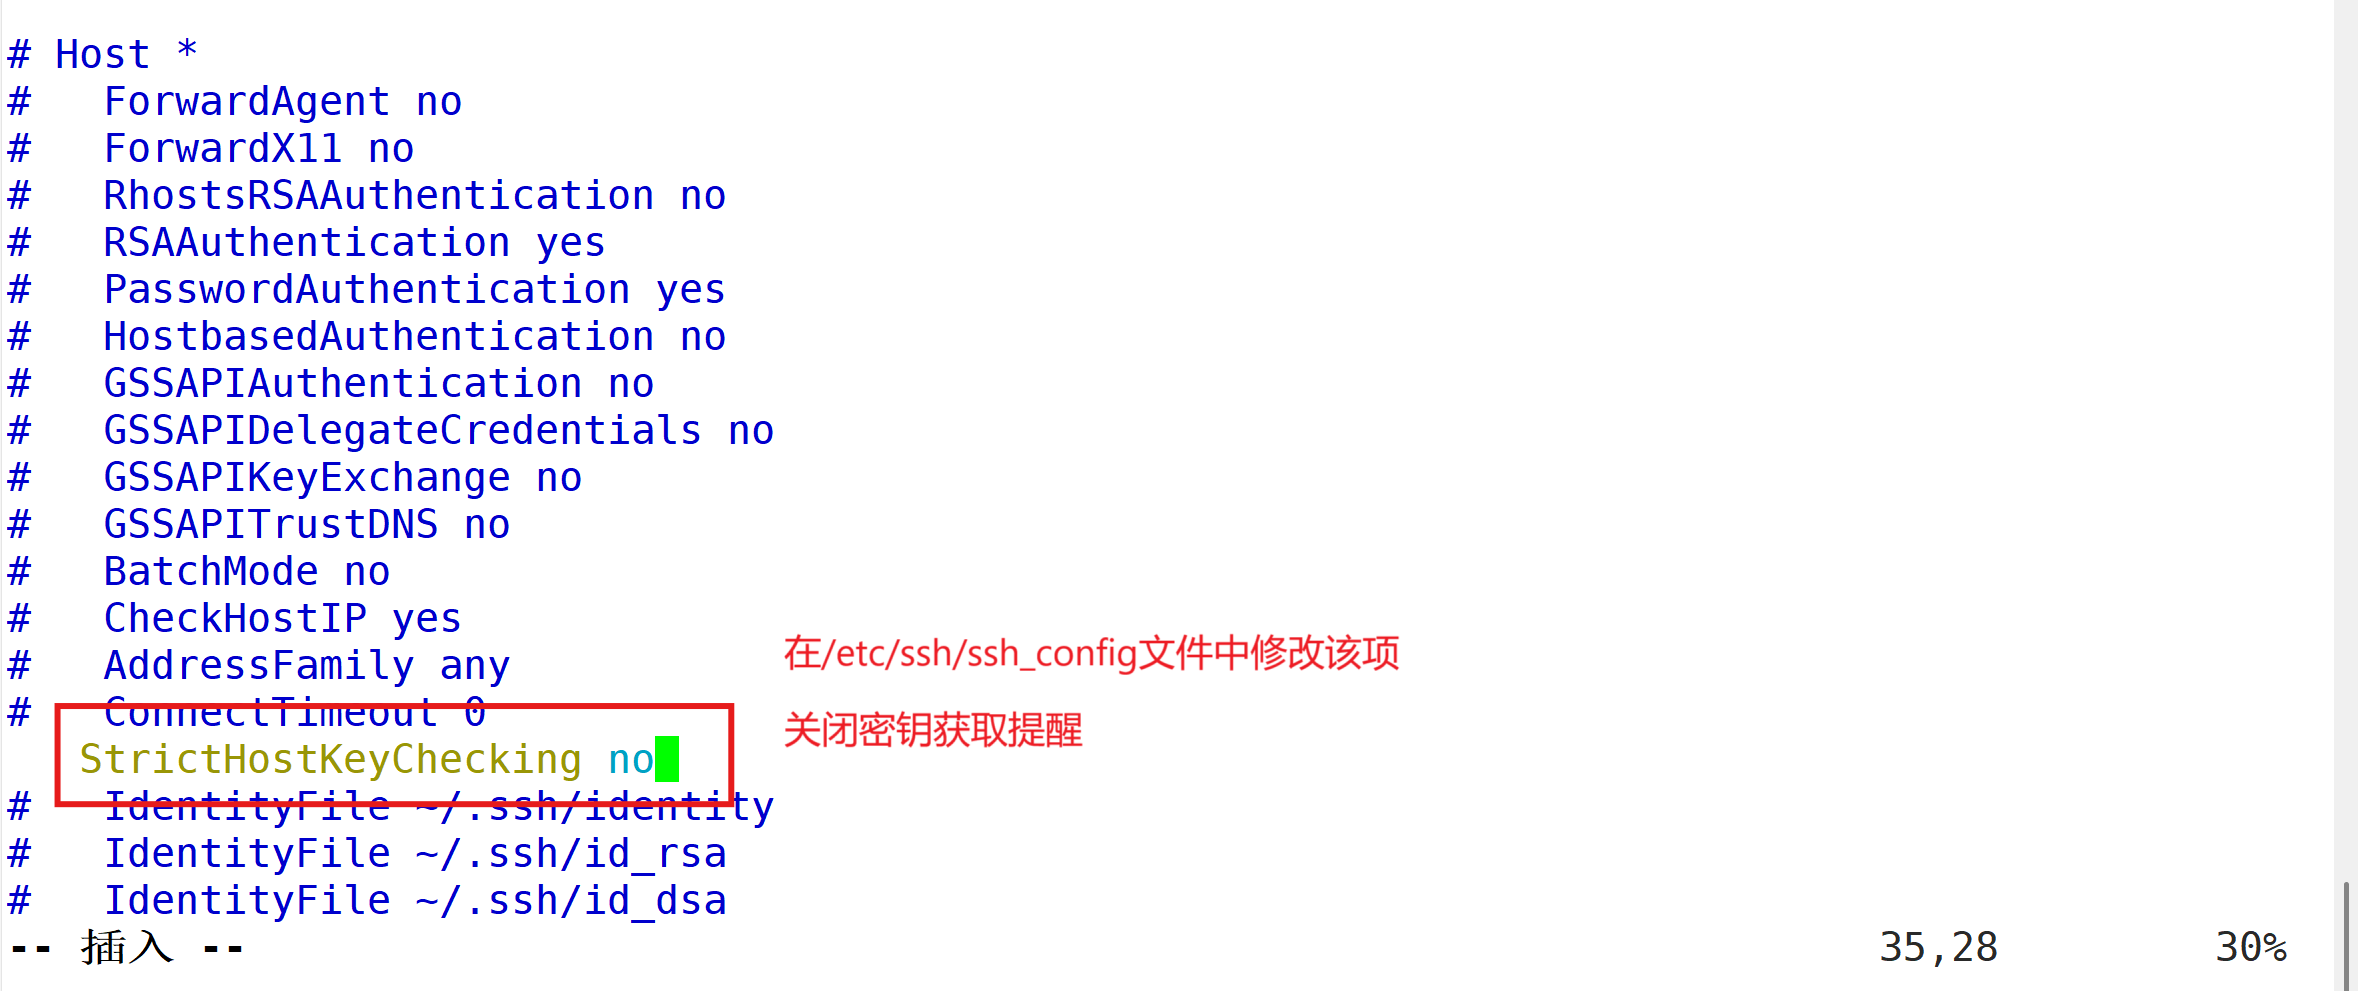
Ansible 管理节点和远程主机节点间通过SSH协议进行通信。所以配置Ansible的时候,只需保证从Ansible 管理节点通过SSH协议能够连接到被管理的远程节点即可。注意,SSH必须配置为公钥认证登录方式,而非密码认证。
Ansible可以同时管理Red Hat系的Linux、Debian系的Linux以及Windows 主机。Ansible的工作原理如图所示: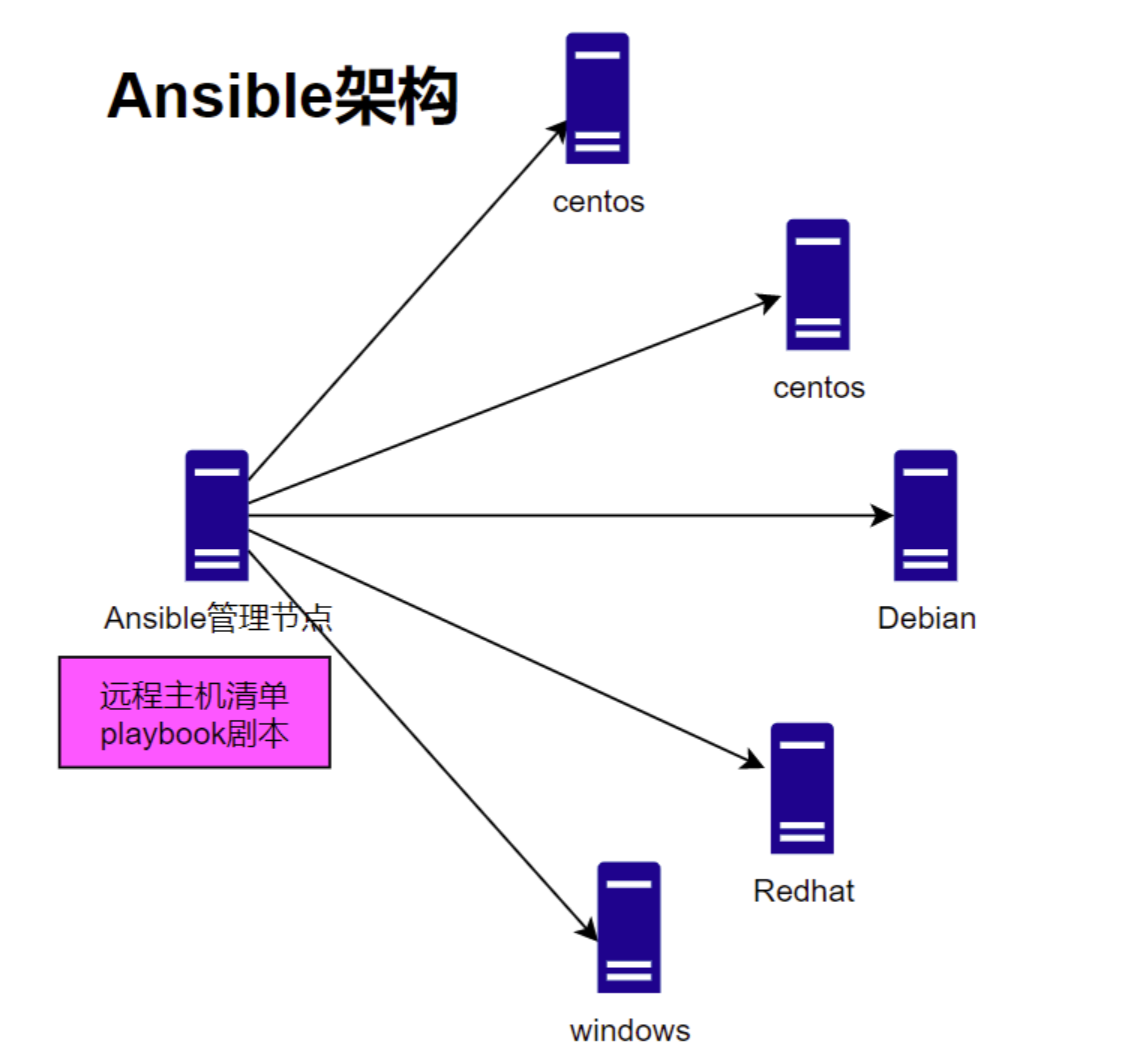
1.5 为什么选择ansible
在使用时,用户通过服务器终端输入命令或 playbook,系统根据预定规则将 playbook 拆解成 play,再组织成 Ansible 可识别的任务,调用模块和插件。
任务通过 SSH 连接发送到远程主机执行,并返回结果,执行完毕后,临时文件会自动删除,可以有效地节省内存。
Ansible 的许多模块在执行时会先检查目标节点是否需要执行某项任务,因此,用户可以放心地让 Ansible 执行任务。大多数情况下,重复执行同一任务不会带来副作用。
二、Ansible部署
| 服务器类型 | IP地址 | 安装软件 |
| Ansible管理服务器 | 192.168.166.11 | Ansible |
| 被管理客户端 | 192.168.166.12 | ...... |
| 被管理客户端 | 192.168.166.13 | ...... |
2.1 服务器安装ansible服务
[root@localhost ~]#yum install -y epel-release
[root@localhost ~]#yum install -y ansible[root@localhost ~]# cd /etc/ansible/
[root@localhost ansible]# ls
ansible.cfg  hosts  roles
----------------------------------------------------------------
ansible.cfg		# ansible的配置文件,一般无需修改
hosts			# ansible的主机清单,用于存储需要管理的远程主机的相关信息
roles			# 公共角色目录

2.2 配置主机清单
vim /etc/ansible/hosts
[webservers]		#配置组名
192.168.166.12		#组里包含的被管理主机IP地址或主机名(主机名需要先修改/etc/hosts文件)
[dbservers]
192.168.166.13
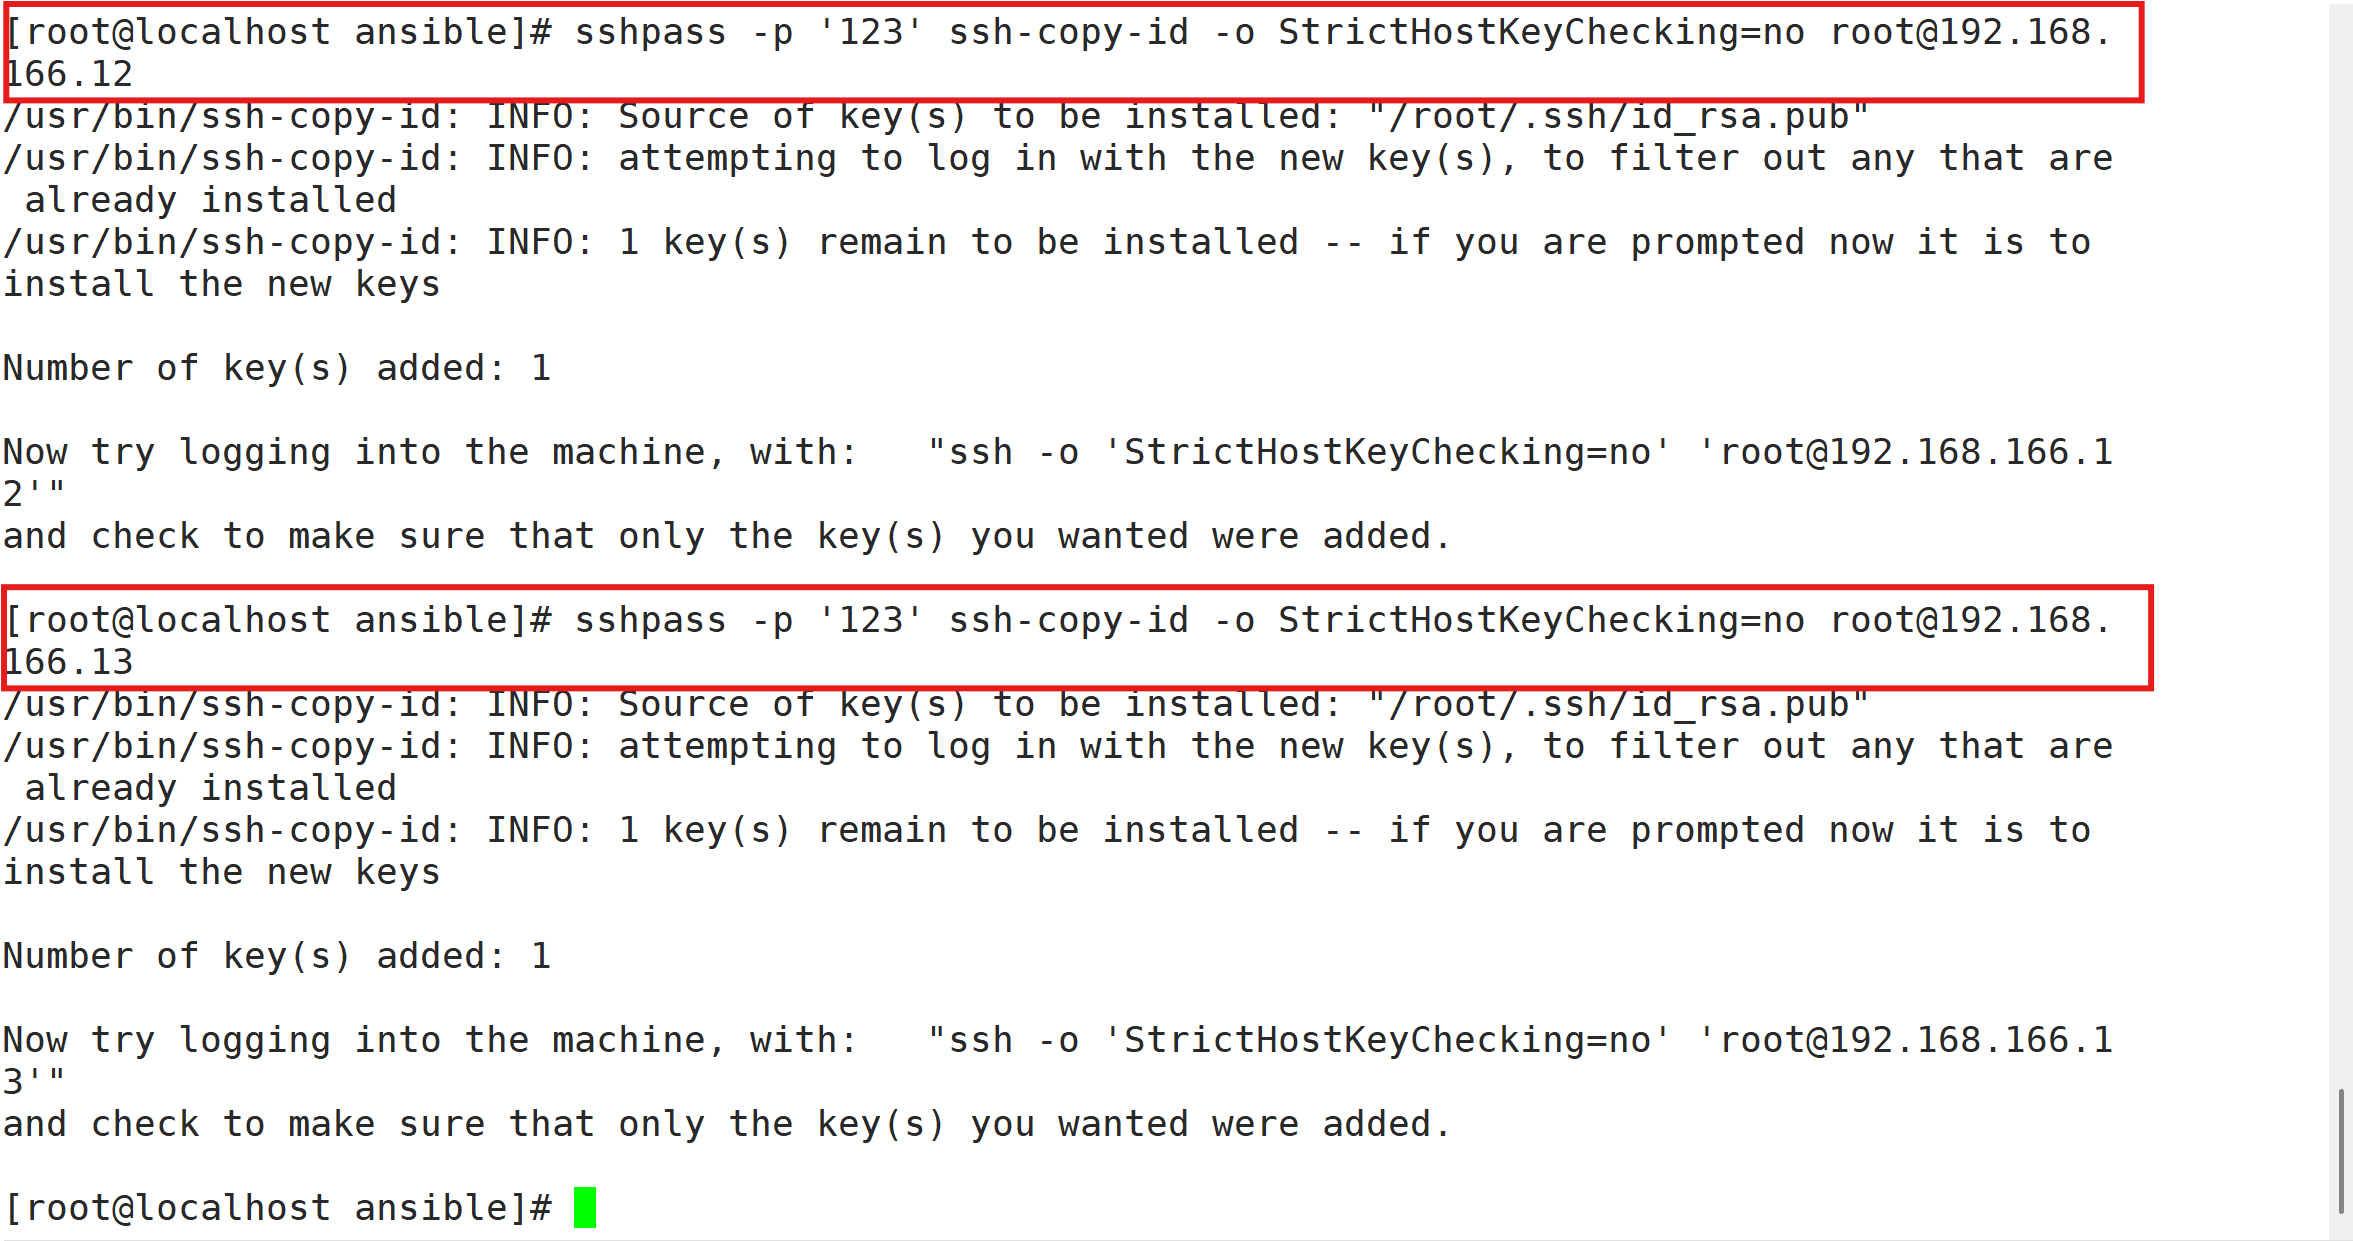
2.3 配置密钥对验证
#生成密钥对(一路回车)
ssh-keygen -t rsa -P '' -f ~/.ssh/id_rsa
#导入对方主机
ssh-copy-id root@192.168.166.12
ssh-copy-id root@192.168.166.13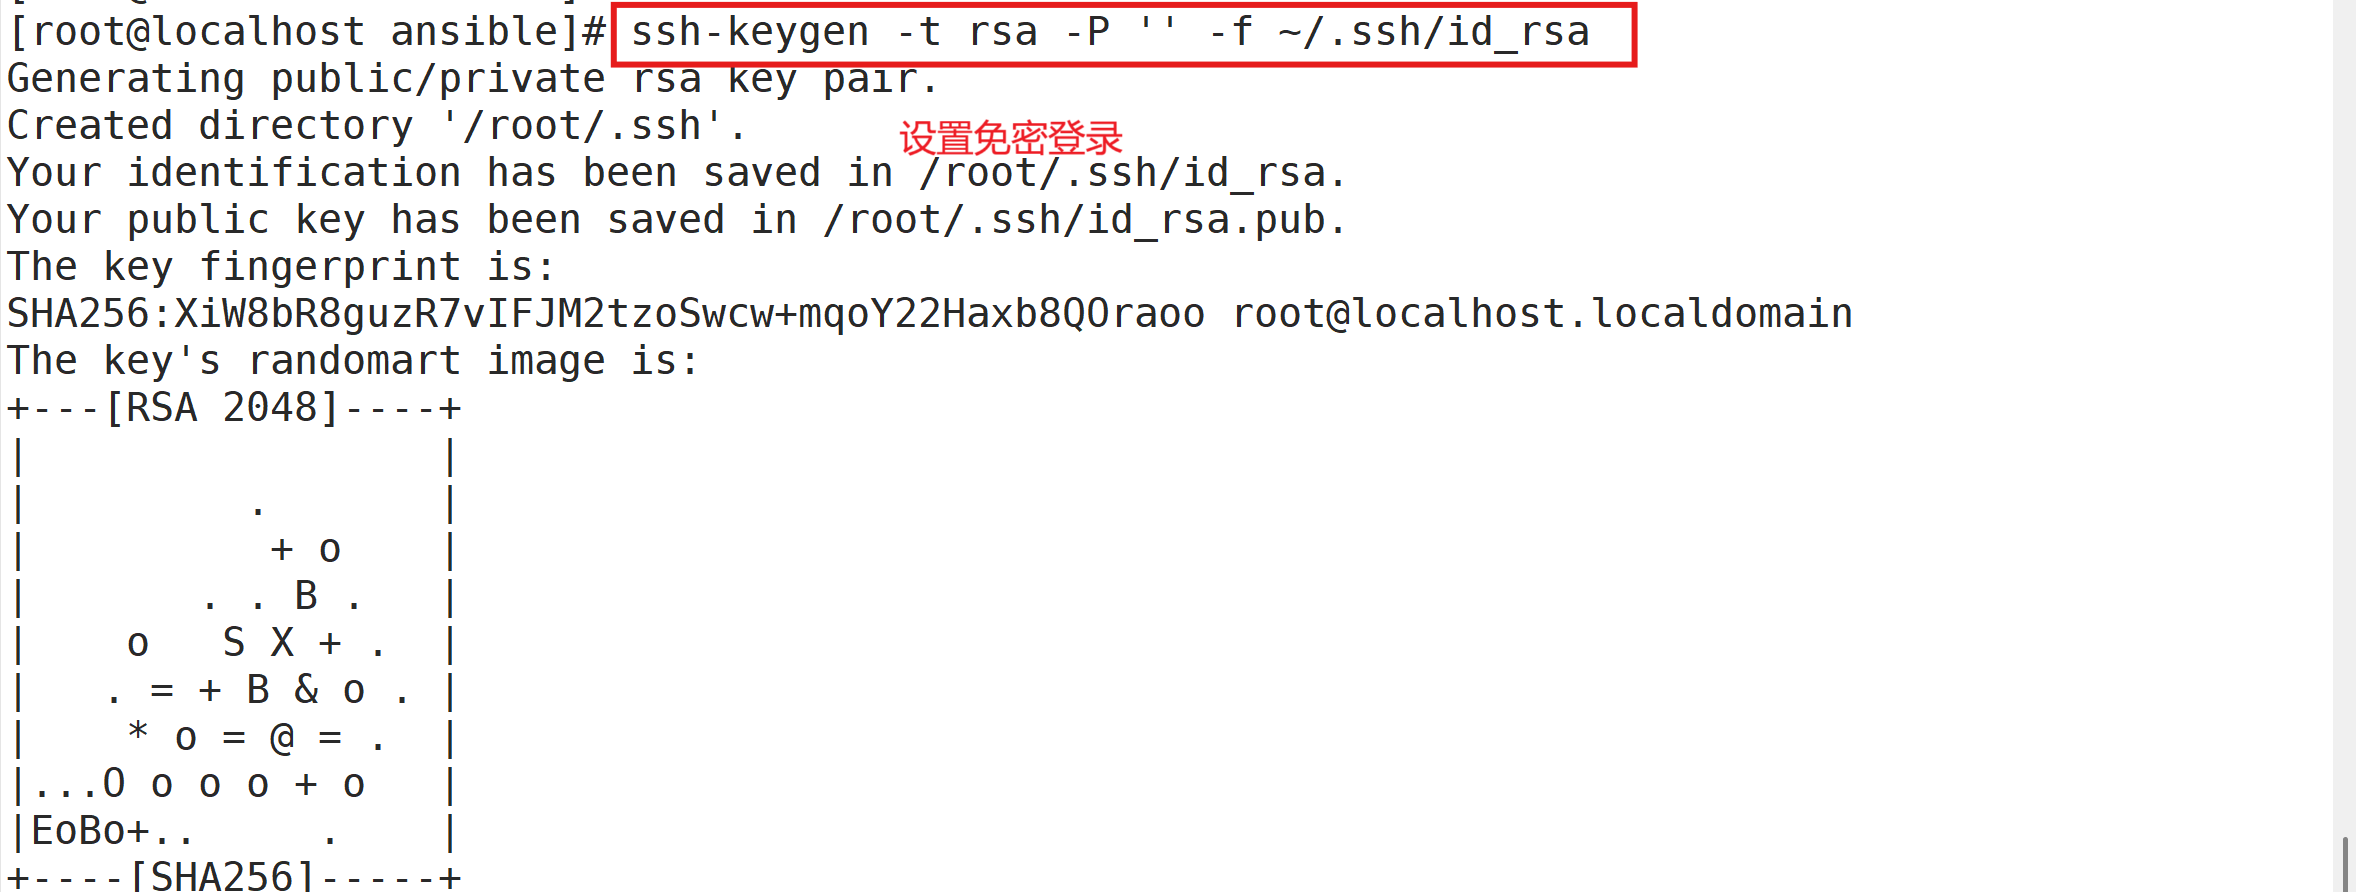
 三、Ansible命令模块
命令格式:ansible  <组名>  -m  <模块>  -a  <参数列表>
ansible-doc -l			#查询所有已安装的模块,按q退出
#总共有三千多个模块,我们只需要学习我们常用的就好了

3.1 command模块
在远程主机执行命令,不支持管道,重定向等shell的特性。
ansible-doc -s command #-s 列出指定模块的描述信息和操作动作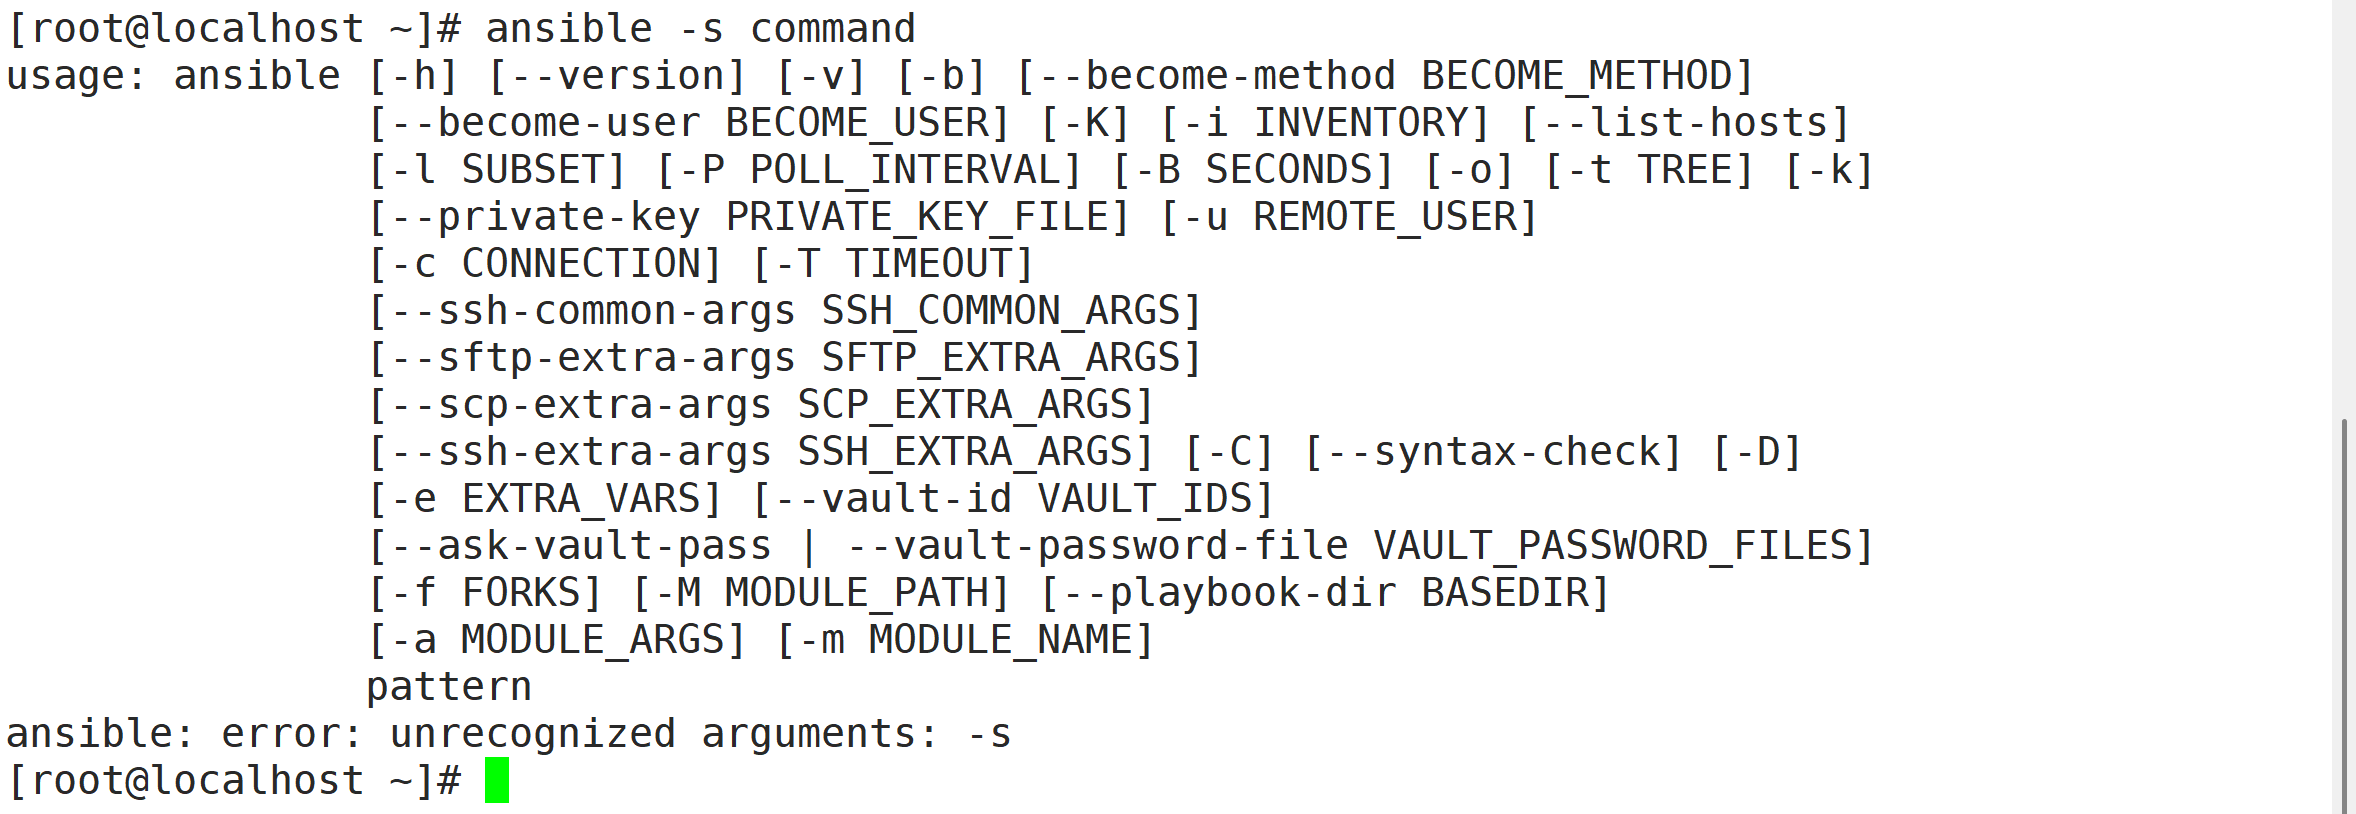
ansible 192.168.80.11 -m command -a 'date' #指定 ip 执行 date
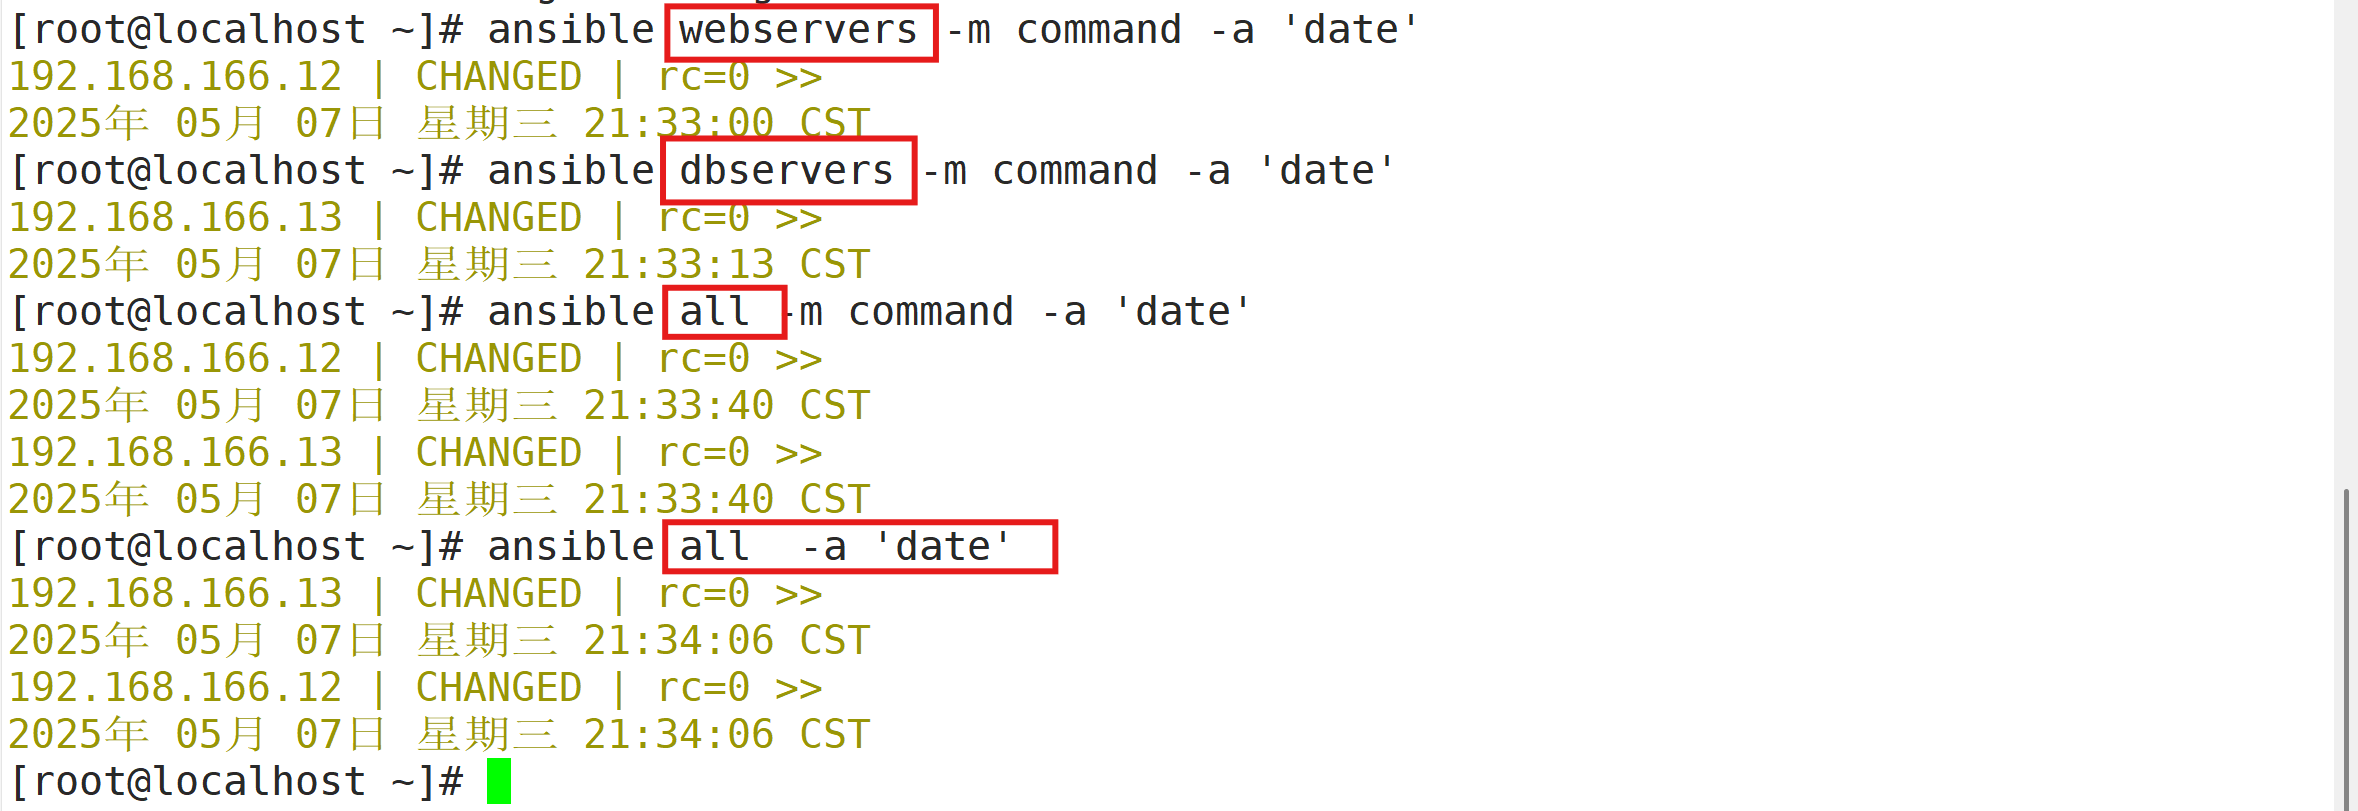
ansible webservers -m command -a 'date' #指定组执行 date
ansible dbservers -m command -a 'date'
ansible all -m command -a 'date' #all 代表所有 hosts 主机
ansible all -a 'date' #如省略 -m 模块,则默认运行 command 模块
3.1.1 示例:chdir
#在远程主机上运行命令前提前进入目录
[root@localhost opt]# ansible dbservers -m command -a 'chdir=/opt ls ./'
192.168.166.13 | CHANGED | rc=0 >>
ceph-release-1-1.el7.noarch.rpm
rh
3.1.2 示例:creates
#判断指定文件是否存在,如果存在,不执行后面的操作
[root@localhost opt]# ansible dbservers -m command -a 'creates=/opt/123.txt echo helloworld >/opt/123.txt '
192.168.166.13 | CHANGED | rc=0 >>
helloworld >/opt/123.txt#切换dbservers查看
[root@dbservers opt]# ls
123.txt  rh


3.1.3 示例:removes
#判断指定文件是否存在,如果存在,执行后而的操作
[root@localhost opt]# ansible dbservers -m command -a 'removes=/opt/123.txt touch /opt/123.txt'
[WARNING]: Consider using the file module with state=touch rather than running 'touch'.  If you need to use command because file is insufficient you can add 'warn: false' to this command task or set 'command_warnings=False' in ansible.cfg to get rid of this message.
192.168.166.13 | CHANGED | rc=0 >>[root@localhost opt]# ansible dbservers -m command -a 'removes=/opt/123.txt rm -f /opt/123.txt'
[WARNING]: Consider using the file module with state=absent rather than running 'rm'.  If you need to use command because file is insufficient you can add 'warn: false' to this command task or set 'command_warnings=False' in ansible.cfg to get rid of this message.
192.168.166.13 | CHANGED | rc=0 >>[root@localhost opt]# ansible dbservers -m command -a 'removes=/opt/123.txt touch /opt/123.txt'
192.168.166.13 | SUCCESS | rc=0 >>
skipped, since /opt/123.txt does not exist


3.2 shell模块
在远程主机执行命令,相当于调用远程主机的shell进程,然后在该shell 下打开一个子shell运行命令(支持管道符号等功能)
ansible-doc -s shell
#写入helloworld到123.txt
[root@localhost opt]# ansible dbservers -m shell -a 'echo helloworld >/opt/123.txt '
192.168.166.13 | CHANGED | rc=0 >>
#过滤IP地址
[root@localhost ~]# ansible dbservers -m shell -a 'echo $(ifconfig ens33 | awk "NR==2{print $2}") | cut -d " " -f2'
192.168.166.13 | CHANGED | rc=0 >>
192.168.166.13

 3.3 cron模块
在远程主机定义任务计划,其中有两种状态(state):present表示添加(可以省略),absent表示移除。
ansible-doc -s cron #查看相关说明,按q退出常用参数:
minute/hour/day/month/weekday:分/时/日/月 /周
job:任务计划要执行的命令
name :任务计划的名称#每两个月的10号的早上和晚上十点的第十分钟执行一次复制系统内核日志到/opt/
linux:10 10,22 10 */2 * /usr/bin/cp /var/log/messages /opt
ansible:
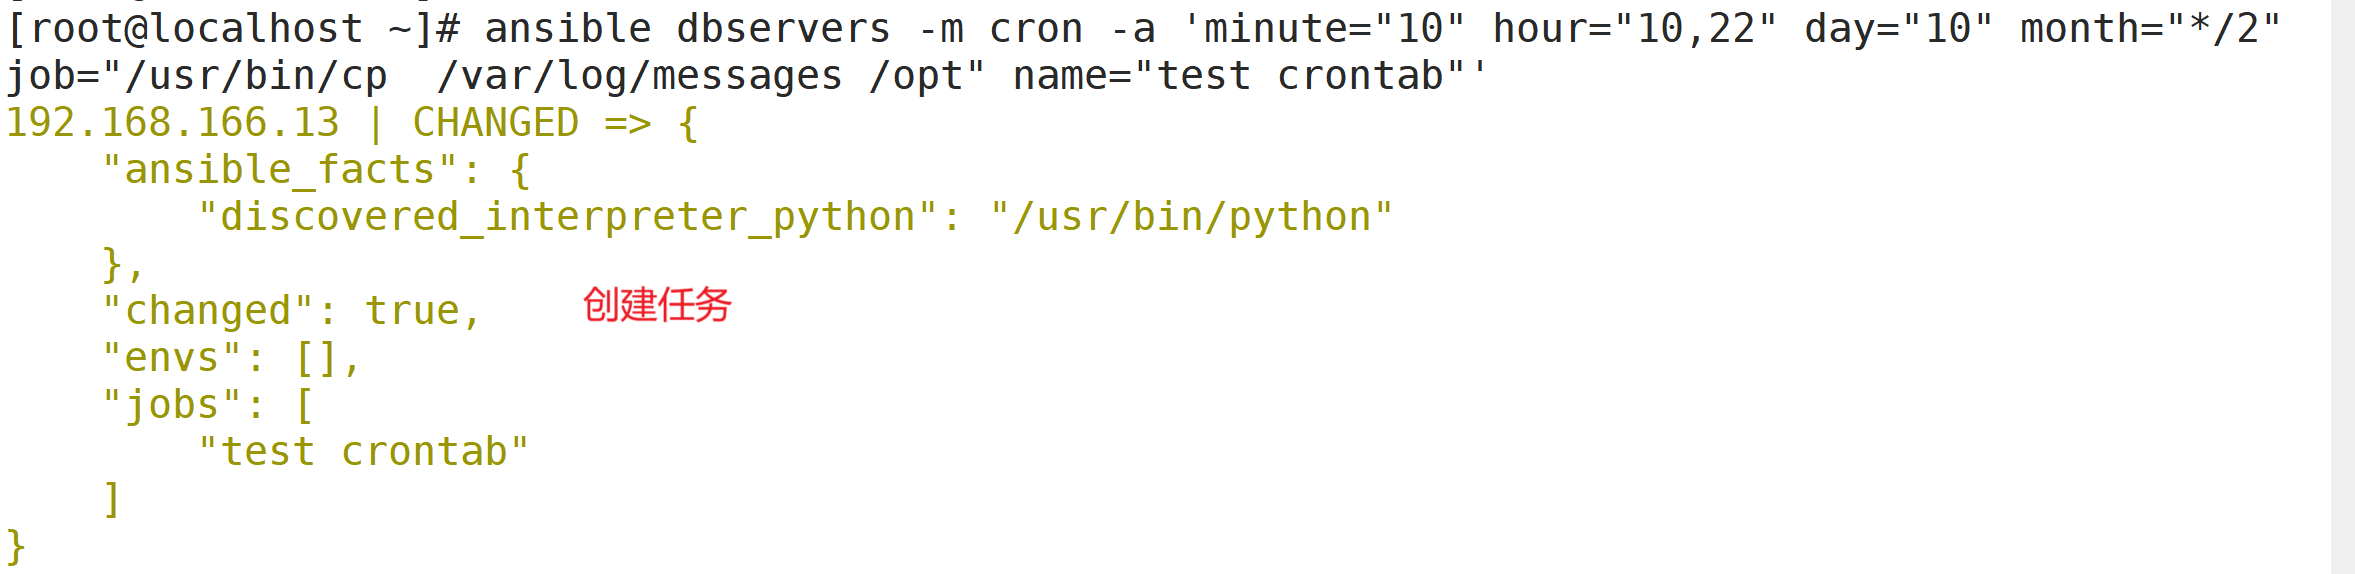
[root@localhost opt]# ansible dbservers -m cron -a 'minute="10" hour="10,20" day="10" month="*/2" job="/usr/bin/cp /var/log/messages /opt" name="test crontab"'
192.168.166.13 | CHANGED => {"ansible_facts": {"discovered_interpreter_python": "/usr/bin/python"}, "changed": true, "envs": [], "jobs": ["test crontab"]
}
#查看任务列表
[root@localhost opt]# ansible dbservers -a 'crontab -l'
192.168.166.13 | CHANGED | rc=0 >>
#Ansible: test crontab
10 10,20 10 */2 * /usr/bin/cp /var/log/messages /opt
[root@localhost opt]#
#切换到dbservers上传查看
[root@localhost opt]# crontab -l
#Ansible: test crontab
10 10,20 10 */2 * /usr/bin/cp /var/log/messages /opt

 3.4 user模块
用户管理模块
ansible-doc -s user常用的参数:
name :用户名,必选参数
state=present|absent:创建账号或者删除账号,present表示创建,absent 表示删除
system=yes|no:是否为系统账号
uid: 用户uid
group:用户基本组
groups:附加组
shell:默认使用的shell
move_home=yse|no:如果设置的家日录已经存在,是否将已经存在的家日录进行移动
password:用户的密码,建议使用加密后的字符串
comment:用户的注释信息
remove=yes|no:当state=absent时, 是否删除用户的家目录ansible webservers -m user -a 'name="test001"'						#创建
ansible webservers -m command -a 'tail -1 /etc/passwd'				#查看确认
ansible webservers -m user -a 'name="test001" state=absent'			#删除
ansible webservers -m command -a 'tail -1 /etc/passwd'				#查看确认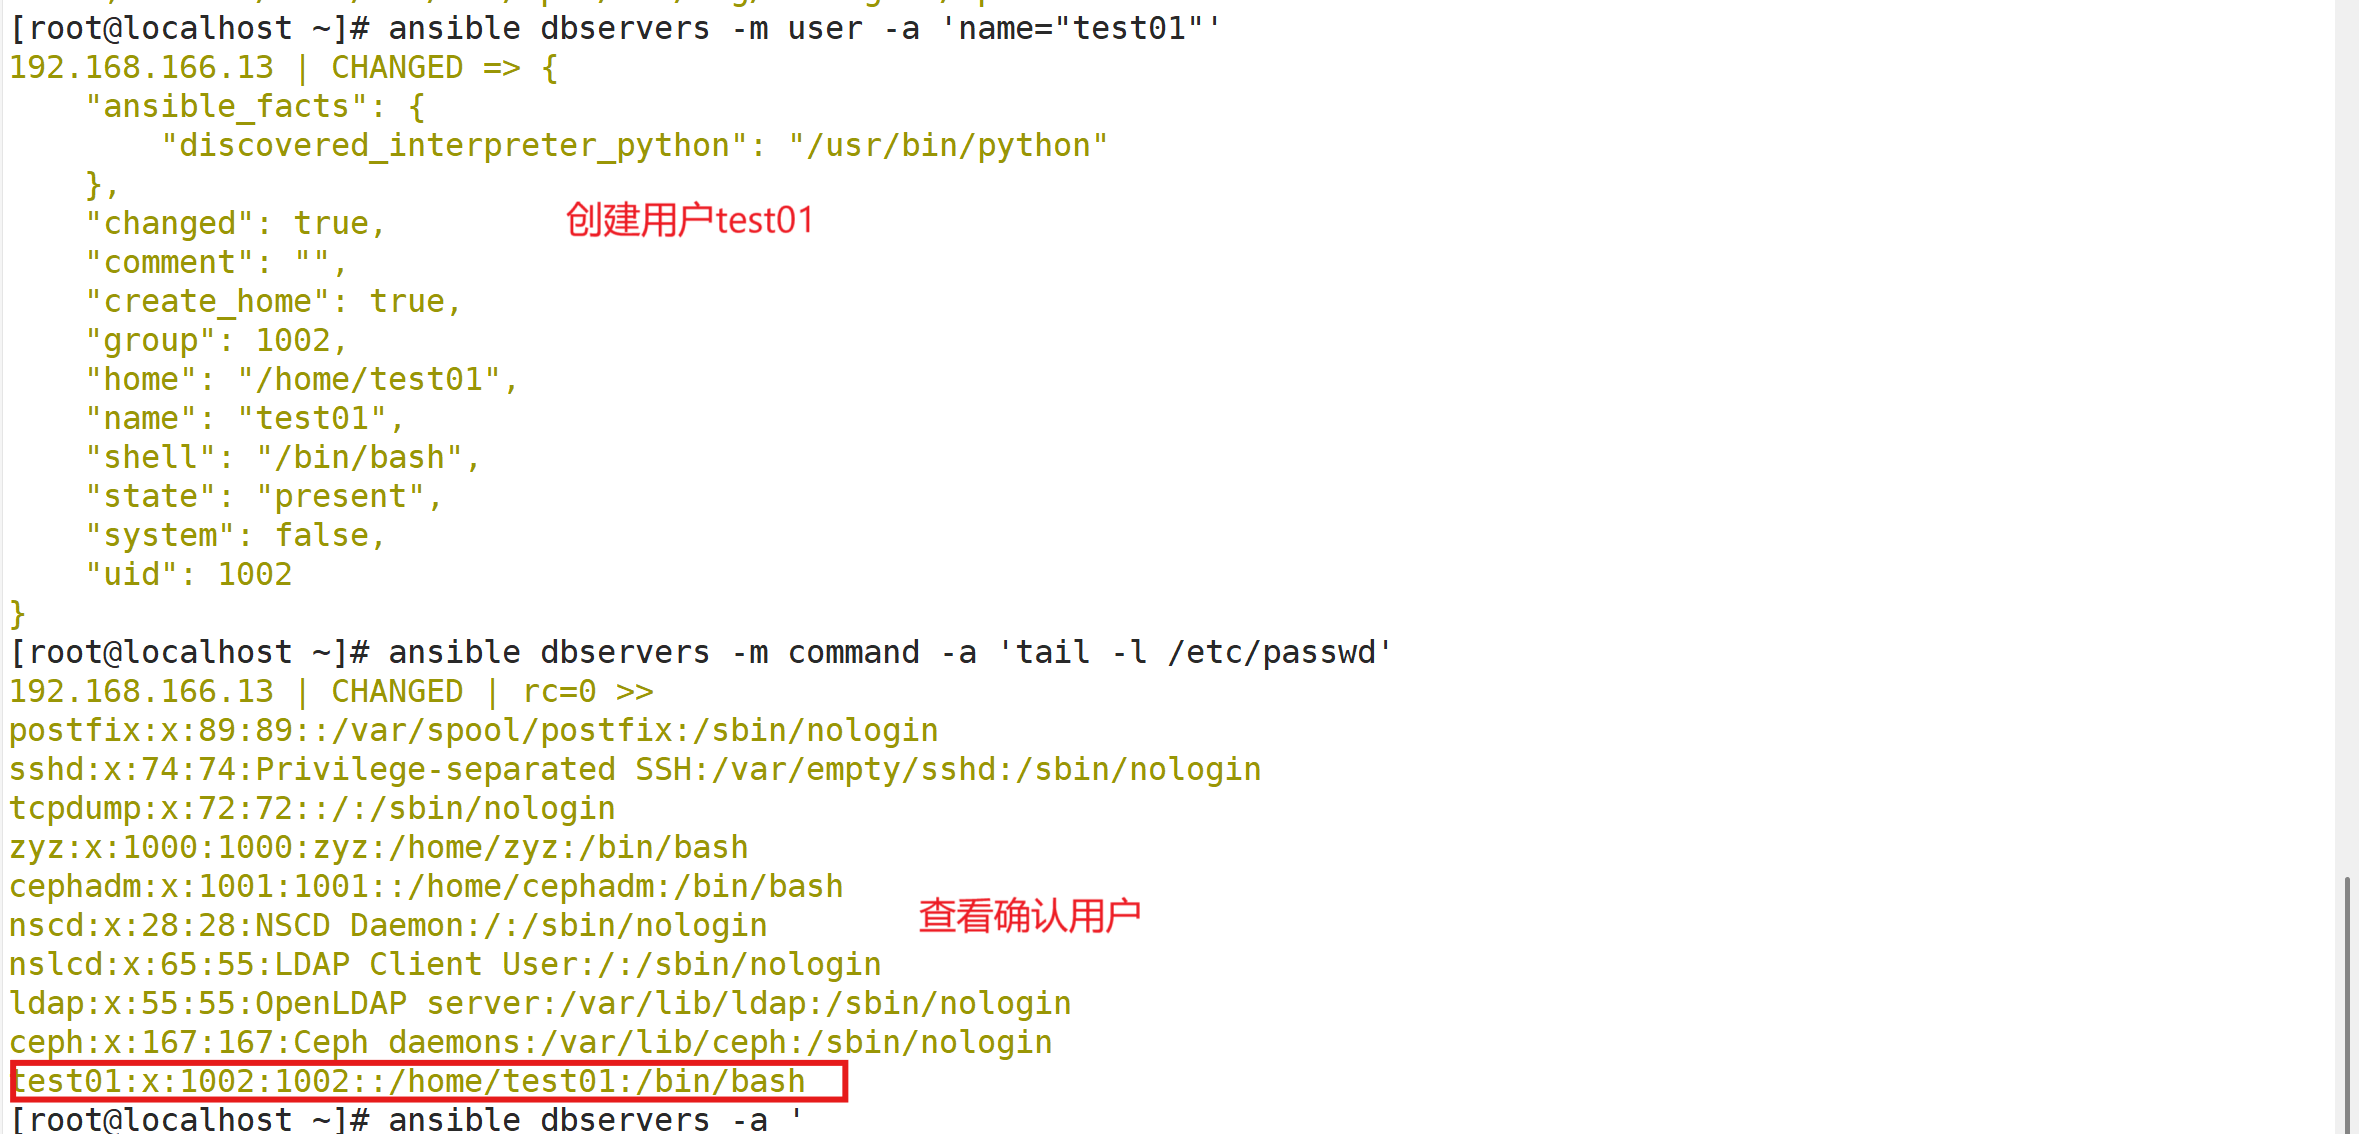


3.5 group模块
用户组管理的模块
ansible-doc -s group			#查看相关文档ansible dbservers -m group -a 'name=mysql gid=300 system=yes'
ansible dbservers -m command -a 'tail -1 /etc/group'
ansible dbservers -m user -a 'name="test002" uid=300 system=yes group=mysql'
ansible dbservers -m command -a 'tail -2 /etc/passwd'
ansible dbservers -a 'id test002'
#创建mysql组
[root@localhost ~]# ansible dbservers -m group -a 'name=mysql gid=306 system=yes'
192.168.166.13 | CHANGED => {"ansible_facts": {"discovered_interpreter_python": "/usr/bin/python"}, "changed": true, "gid": 306, "name": "mysql", "state": "present", "system": true
}
#查看已创建的组
[root@localhost ~]# ansible dbservers -a 'tail /etc/group'
192.168.166.13 | CHANGED | rc=0 >>
postfix:x:89:
sshd:x:74:
tcpdump:x:72:
zyz:x:1000:zyz
cephadm:x:1001:
nscd:x:28:
screen:x:84:
ldap:x:55:
ceph:x:167:
mysql:x:306:
#将test02用户添加到mysql组中
[root@localhost ~]# ansible dbservers -m user -a 'name=test02 uid=306 system=yes group=mysql'
192.168.166.13 | CHANGED => {"ansible_facts": {"discovered_interpreter_python": "/usr/bin/python"}, "changed": true, "comment": "", "create_home": true, "group": 306, "home": "/home/test02", "name": "test02", "shell": "/bin/bash", "state": "present", "system": true, "uid": 306
}
#查看用户所属组
[root@localhost ~]# ansible dbservers -a 'tail /etc/passwd'
192.168.166.13 | CHANGED | rc=0 >>
postfix:x:89:89::/var/spool/postfix:/sbin/nologin
sshd:x:74:74:Privilege-separated SSH:/var/empty/sshd:/sbin/nologin
tcpdump:x:72:72::/:/sbin/nologin
zyz:x:1000:1000:zyz:/home/zyz:/bin/bash
cephadm:x:1001:1001::/home/cephadm:/bin/bash
nscd:x:28:28:NSCD Daemon:/:/sbin/nologin
nslcd:x:65:55:LDAP Client User:/:/sbin/nologin
ldap:x:55:55:OpenLDAP server:/var/lib/ldap:/sbin/nologin
ceph:x:167:167:Ceph daemons:/var/lib/ceph:/sbin/nologin
test02:x:306:306::/home/test02:/bin/bash
[root@localhost ~]# ansible dbservers -a 'id test02'
192.168.166.13 | CHANGED | rc=0 >>
uid=306(test02) gid=306(mysql) 组=306(mysql)
[root@localhost ~]#
3.6 copy模块
用于复制指定主机文件到远程主机上
ansible-doc -s copy				#查看相关文档##常用参数
dest:指出复制文件的日标及位置,使用绝对路径,如果是源目录,指目标也要是目录,如果目标文件已经存在会覆盖原有的内容
src:指出源文件的路径,可以使用相对路径或绝对路径,支持直接指定目录,如果源是目录则目标也要是目录
mode:指出复制时,目标文件的权限
owner:指出复制时,目标文件的属主
group:指出复制时,目标文件的属组
content:指出复制到目标主机上的内容,不能与src一起使用##测试创建文件并修改权限
ansible dbservers -a 'mkdir /test'
ansible dbservers -m copy -a 'src=/etc/passwd dest=/test/passwd.bak owner=root mode=640'
ansible dbservers -a 'ls -l /test'##测试创建文件并写入内容
ansible dbservers -m copy -a 'content="this is test txt" dest=/test/test.txt'
ansible dbservers -a 'ls -l /test'
ansible dbservers -a 'cat /test/test.txt'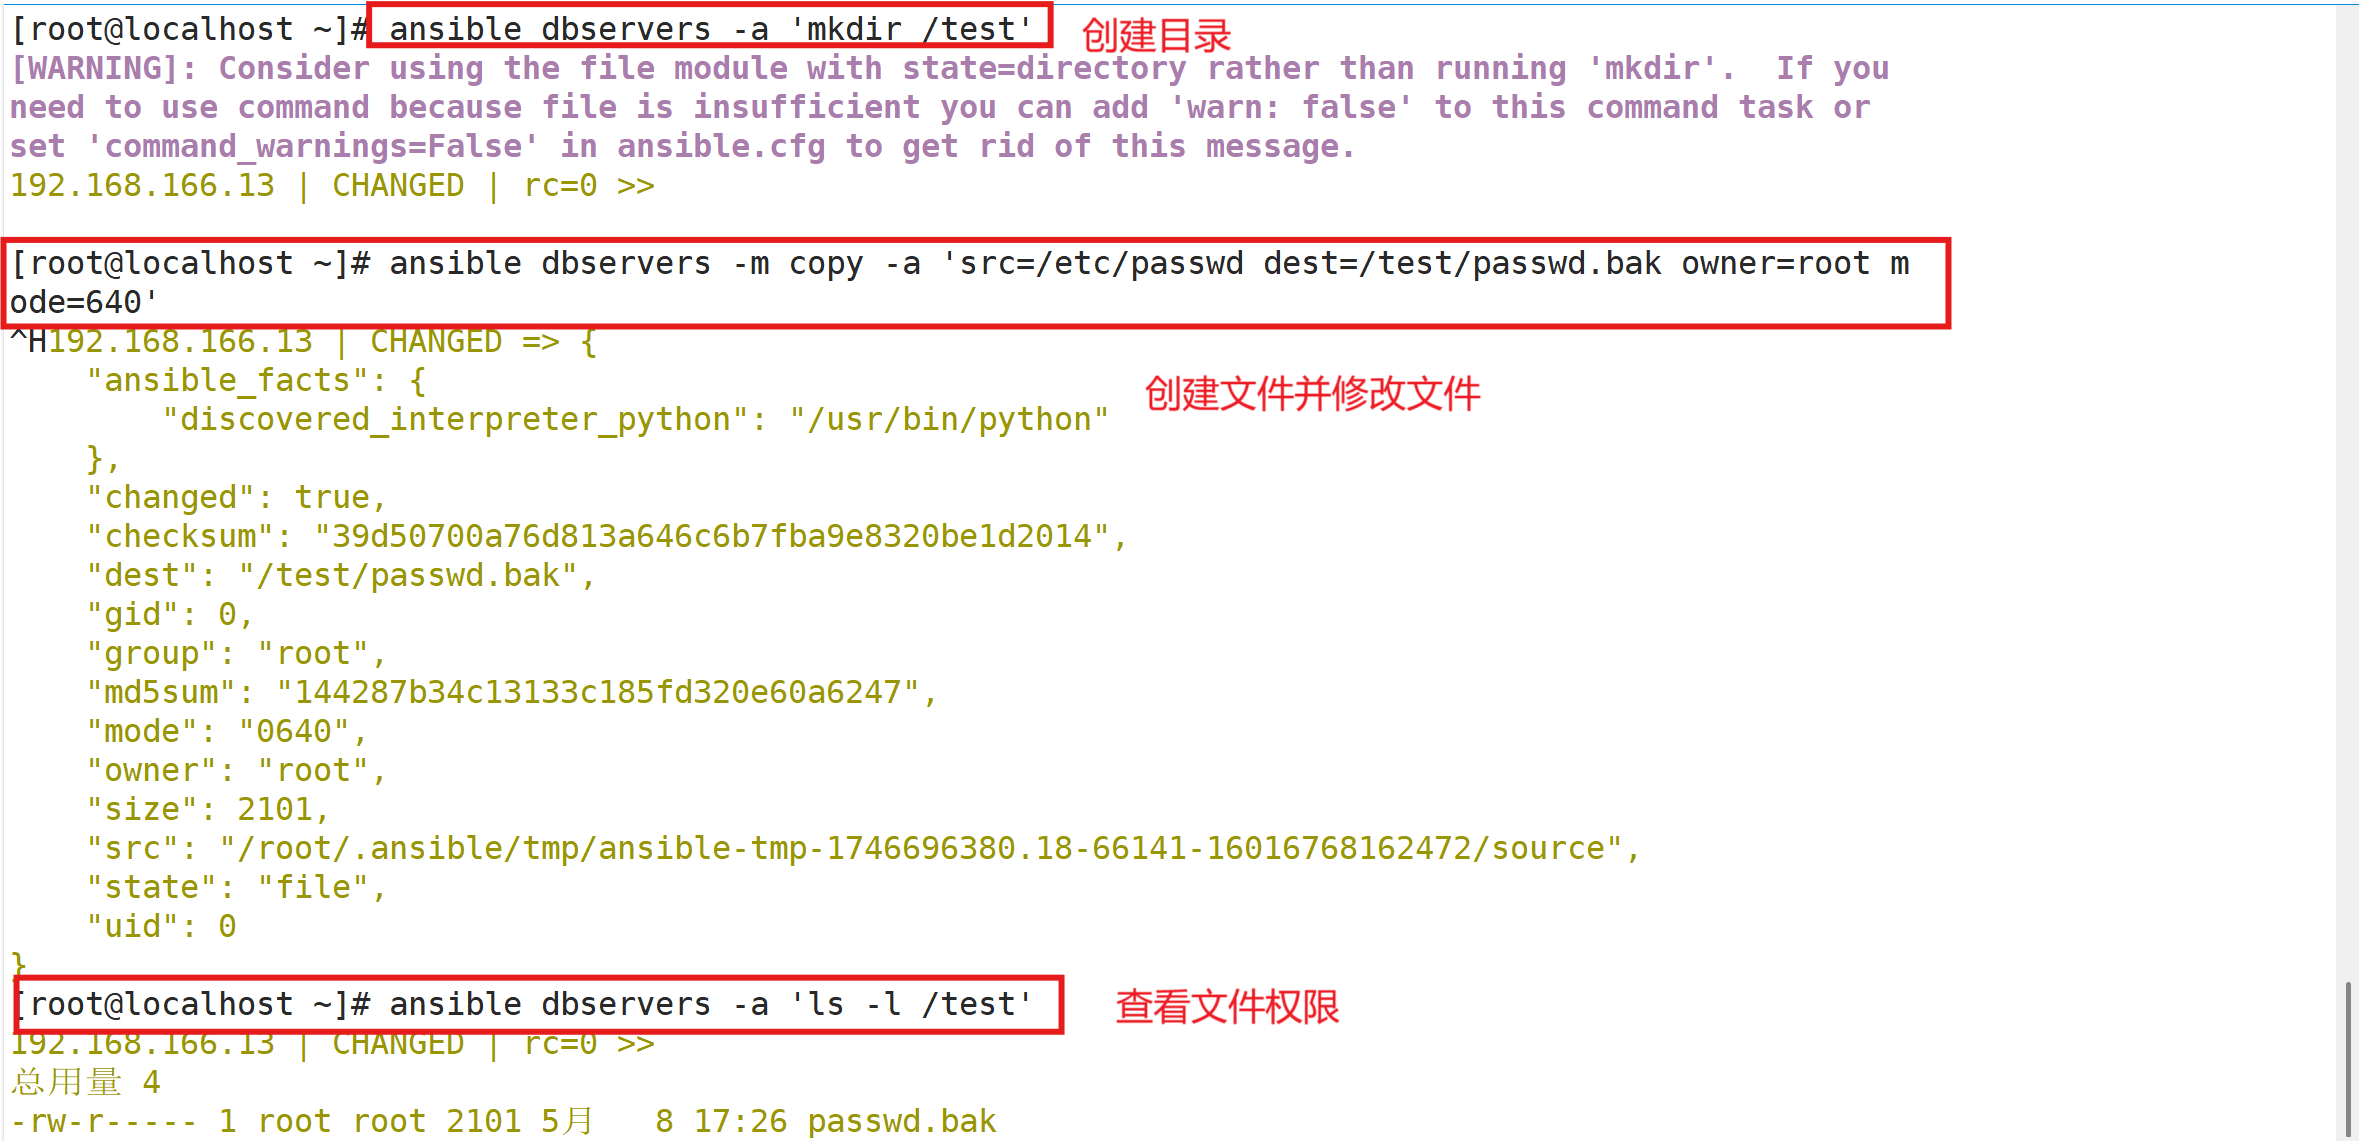

3.7 file模块
设置文件属性
ansible-doc -s file#修改文件的属主属组权限等
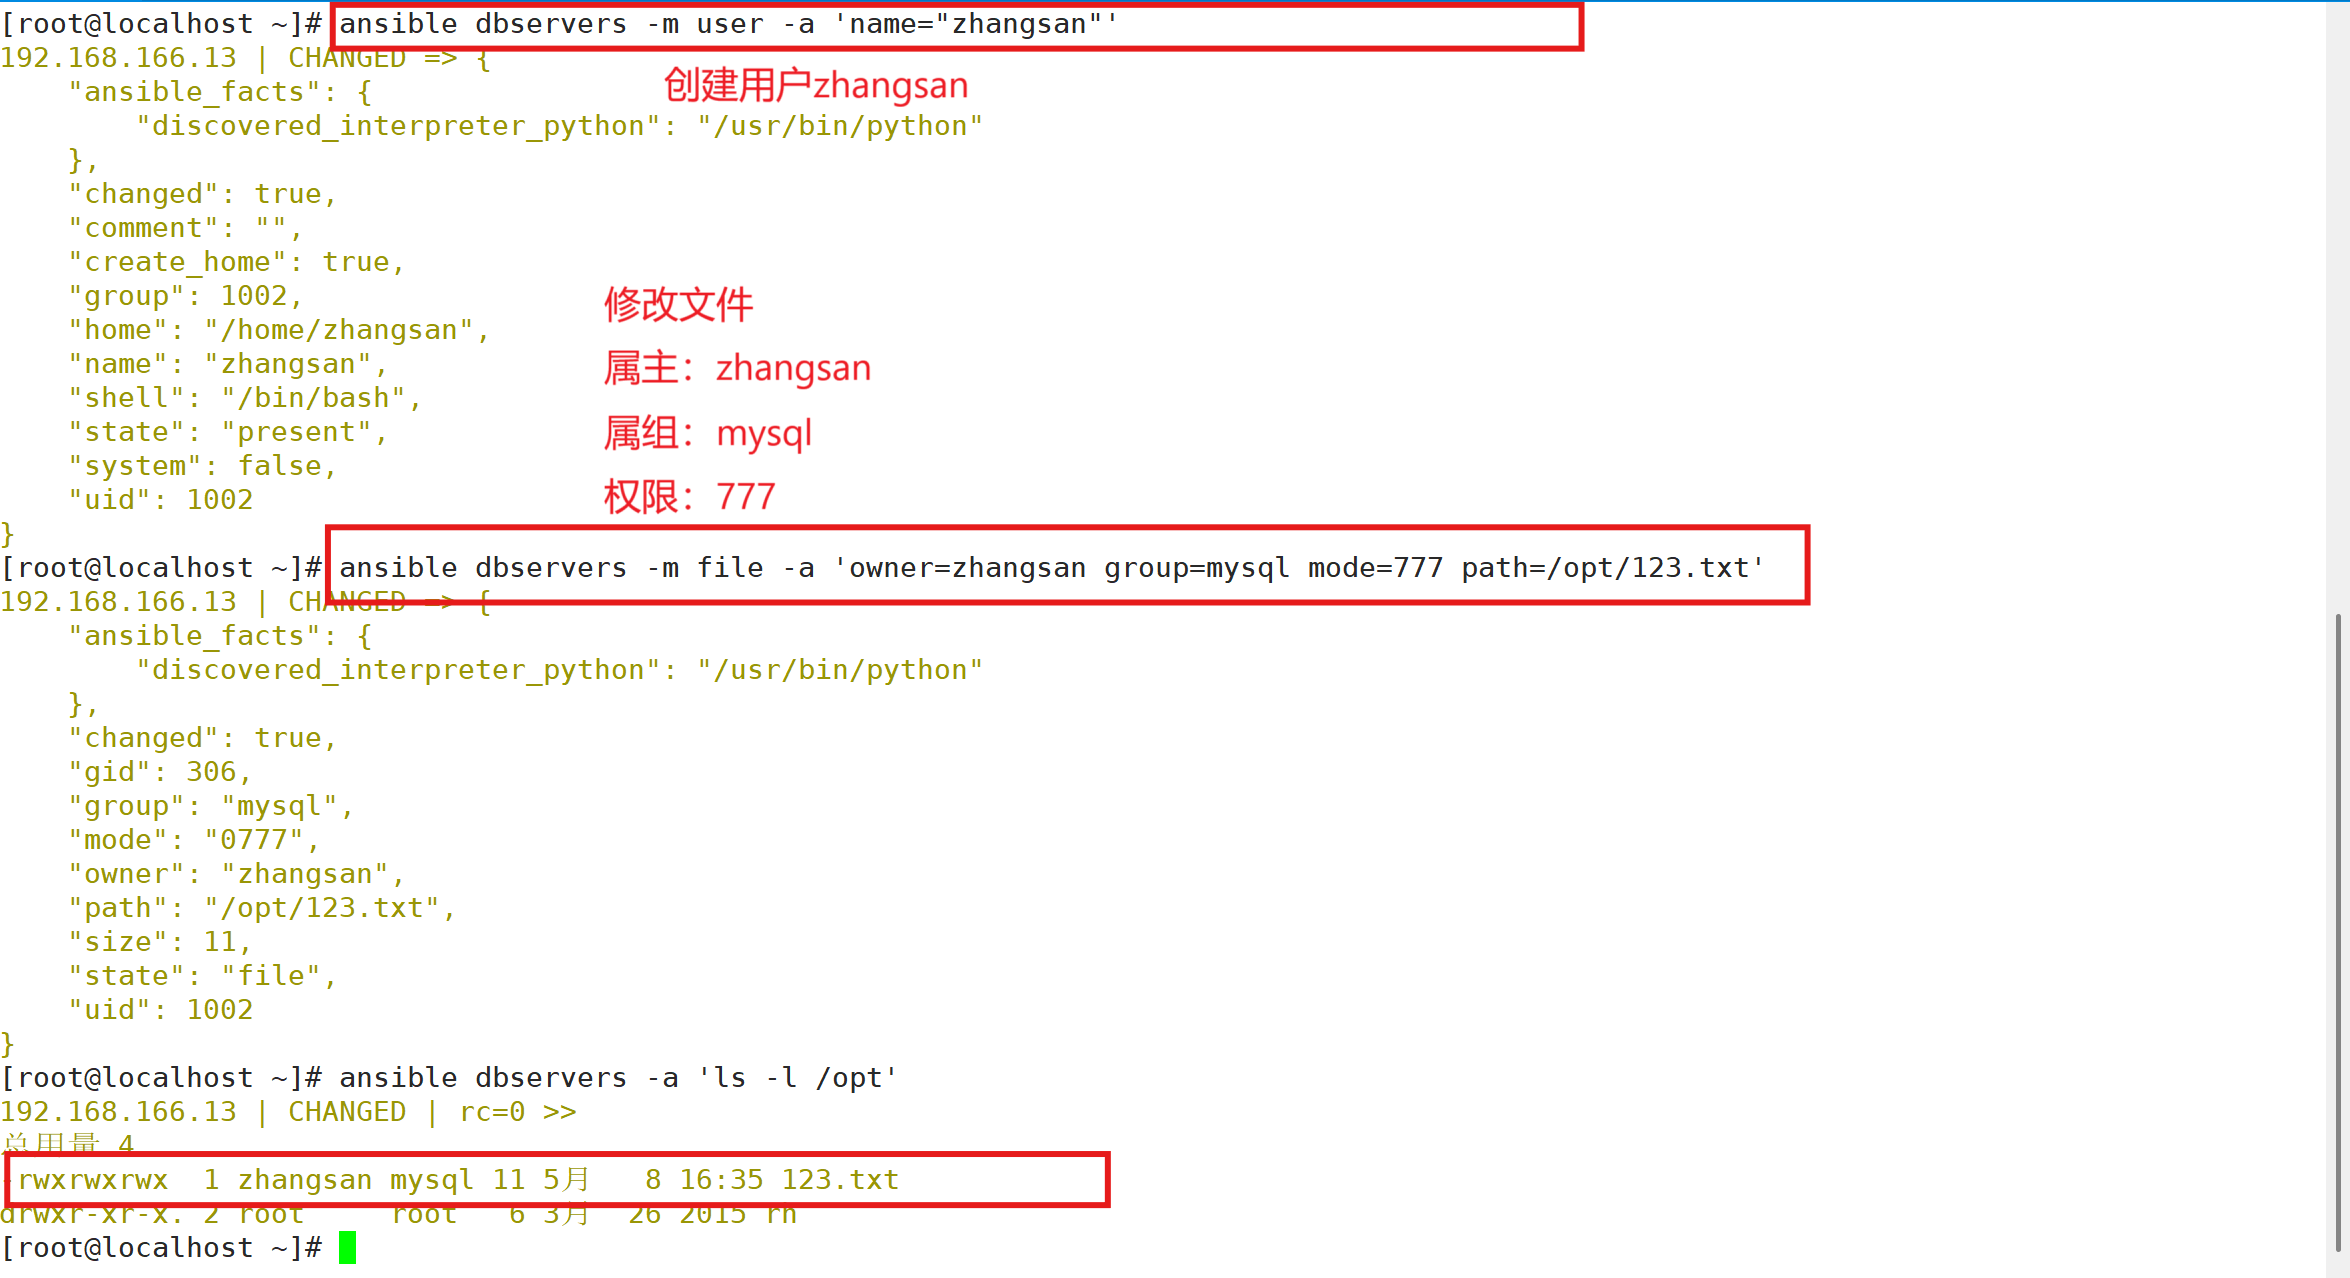
ansible dbservers -m file -a 'owner=zhangsan group=mysql mode=777 path=/opt/123.txt'
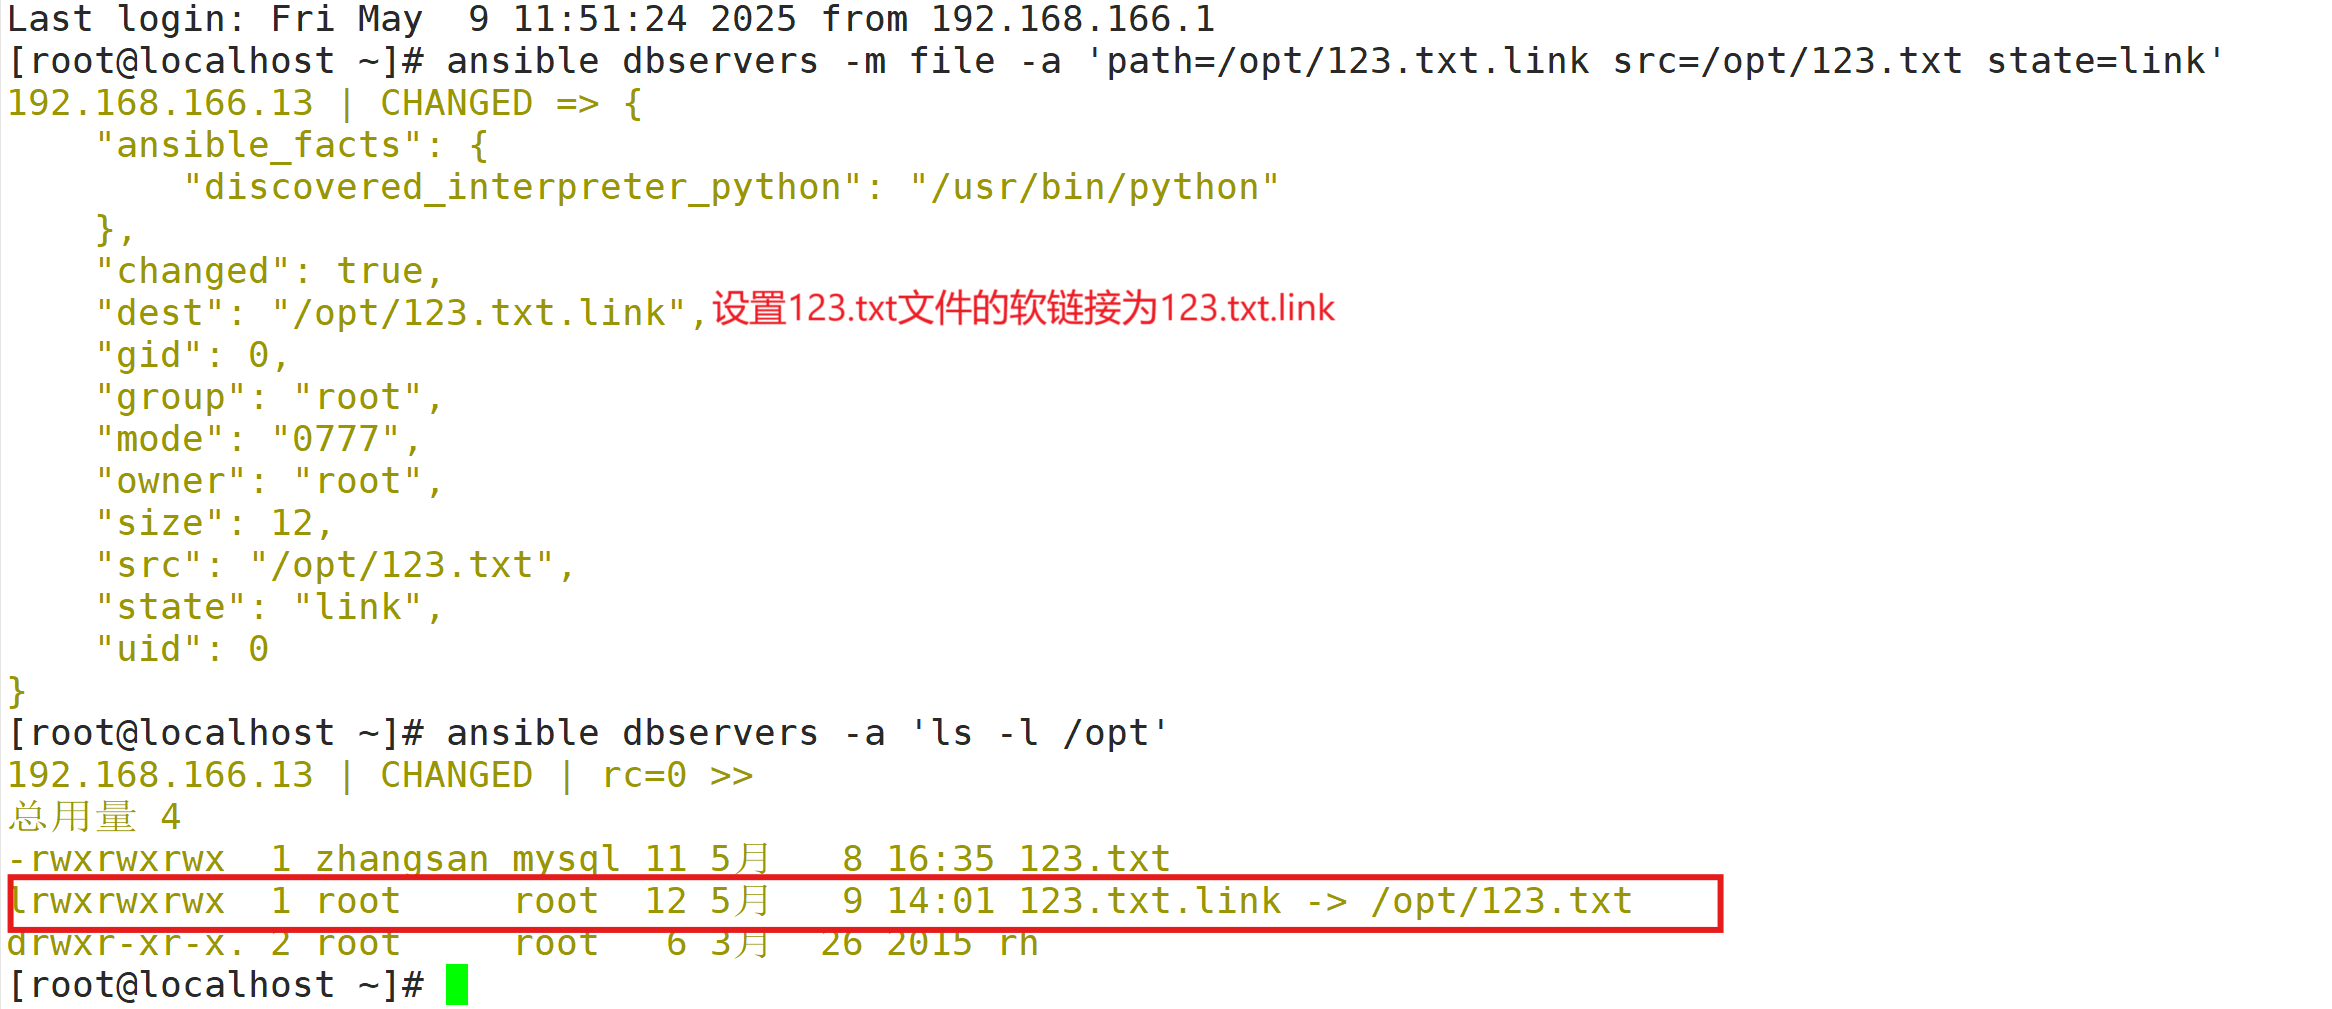
ansible dbservers -a 'ls -l /opt'##设置/opt/123.txt.bak 为 /opt/123.txt 的链接文件
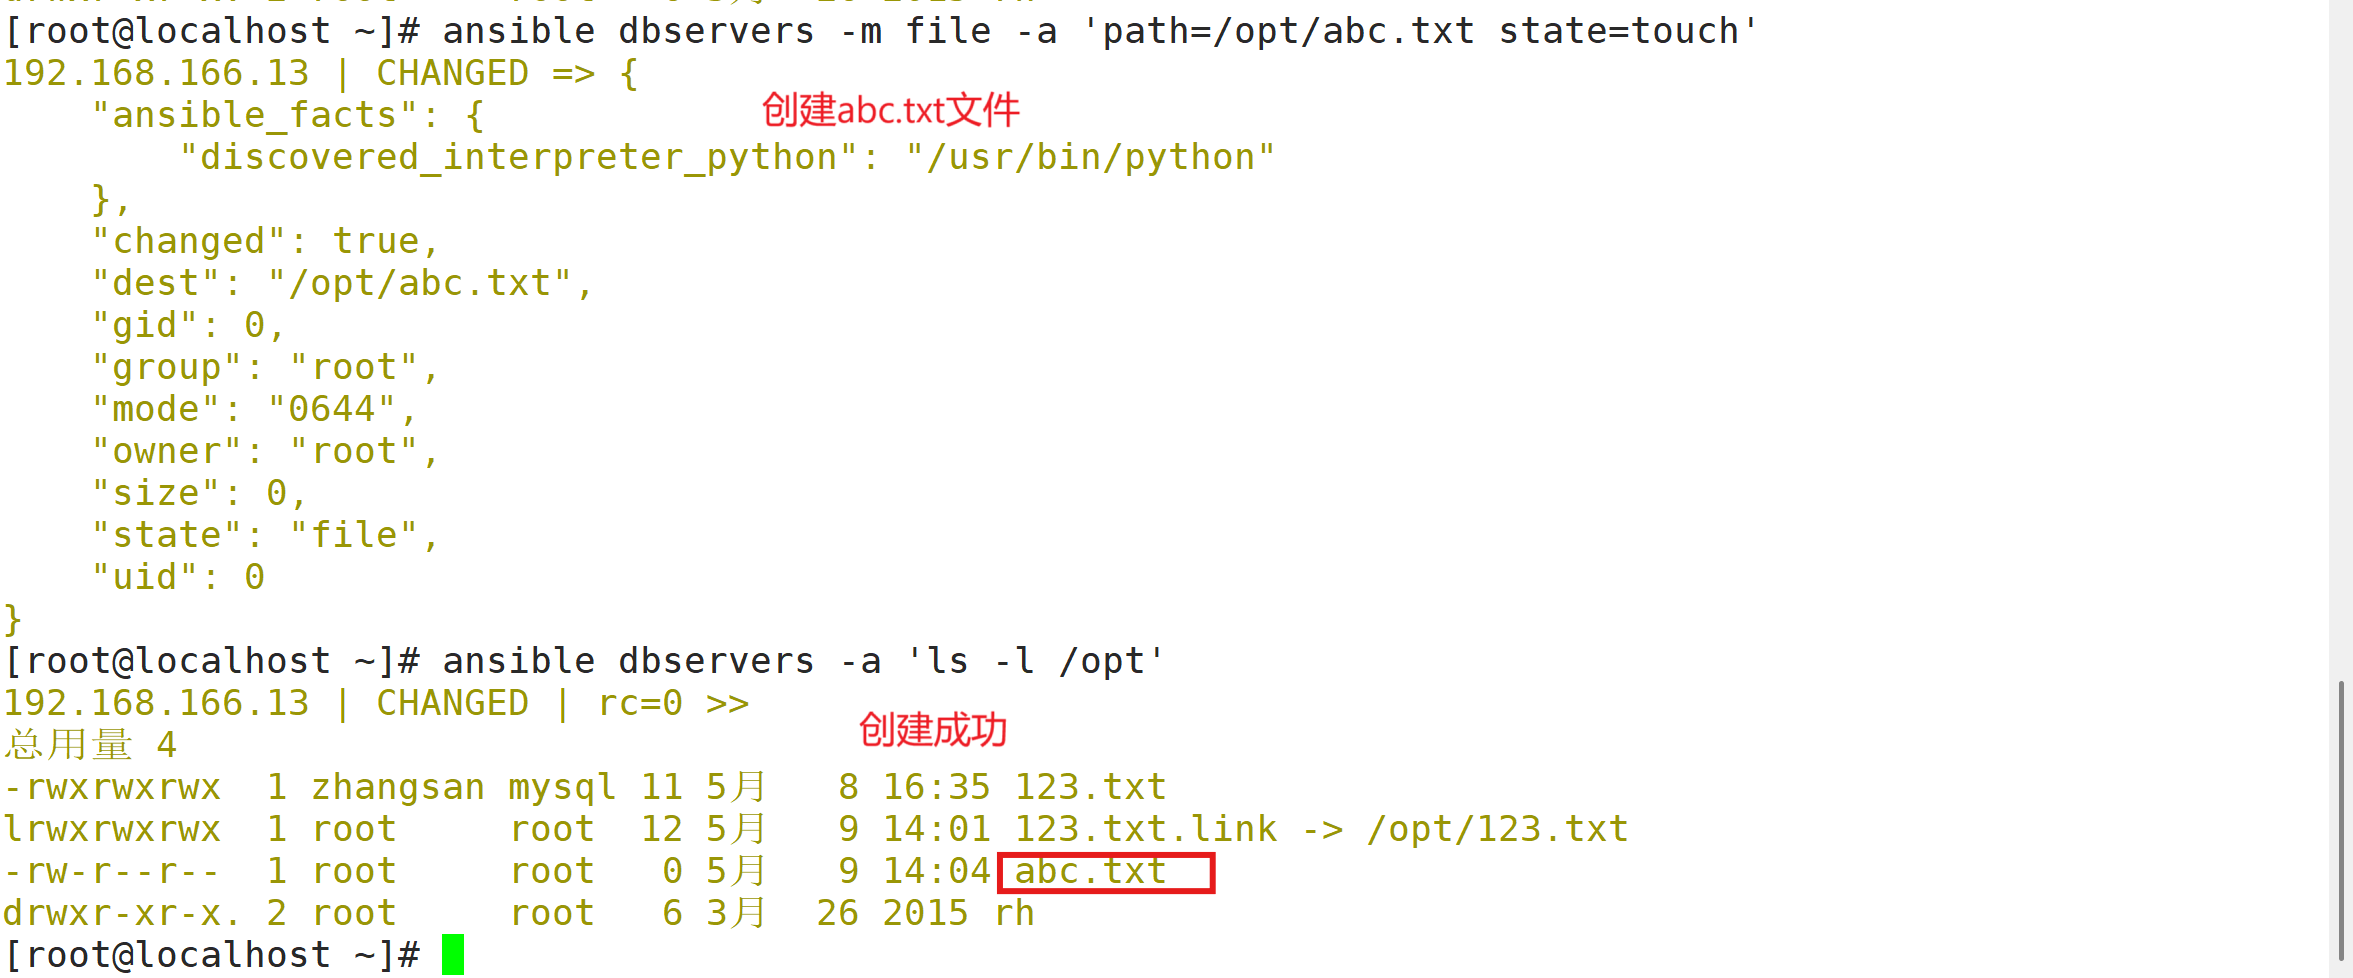
ansible dbservers -m file -a 'path=/opt/123.txt.link src=/opt/123.txt state=link'ansible dbservers -m file -a 'path=/opt/abc.txt state=touch' #创建一个文件
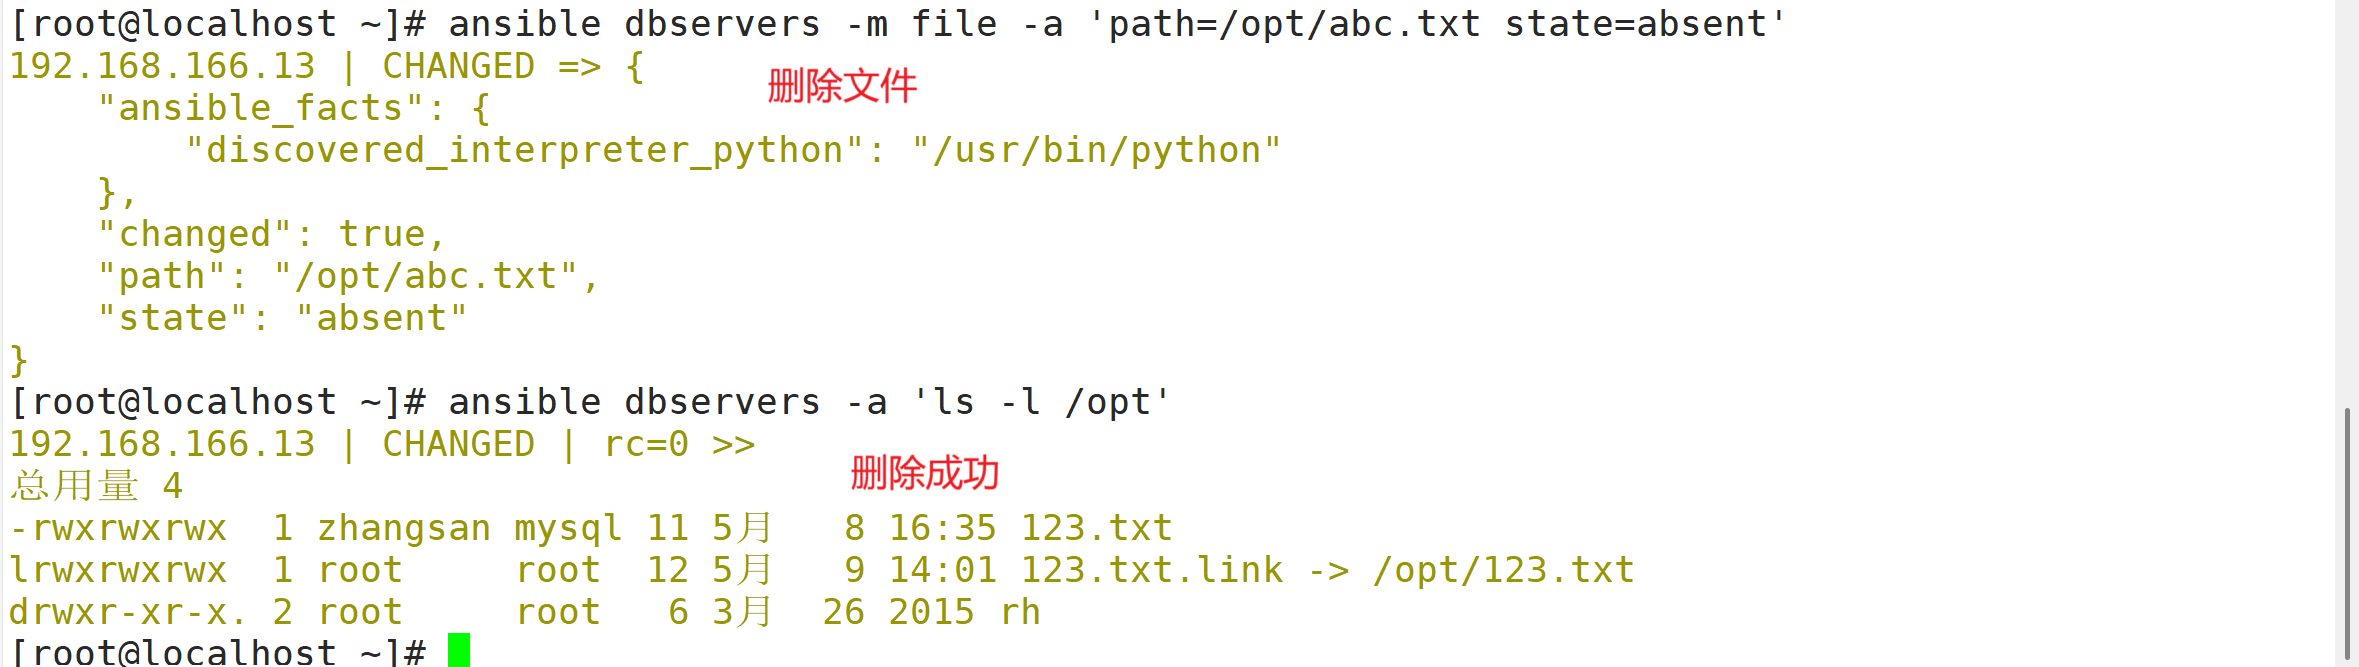
ansible dbservers -m file -a 'path=/opt/abc.txt state=absent' #删除一个文件3.7.1 修改属主和属组及权限
3.7.2 创建软链接
3.7.3 创建文件,并删除文件
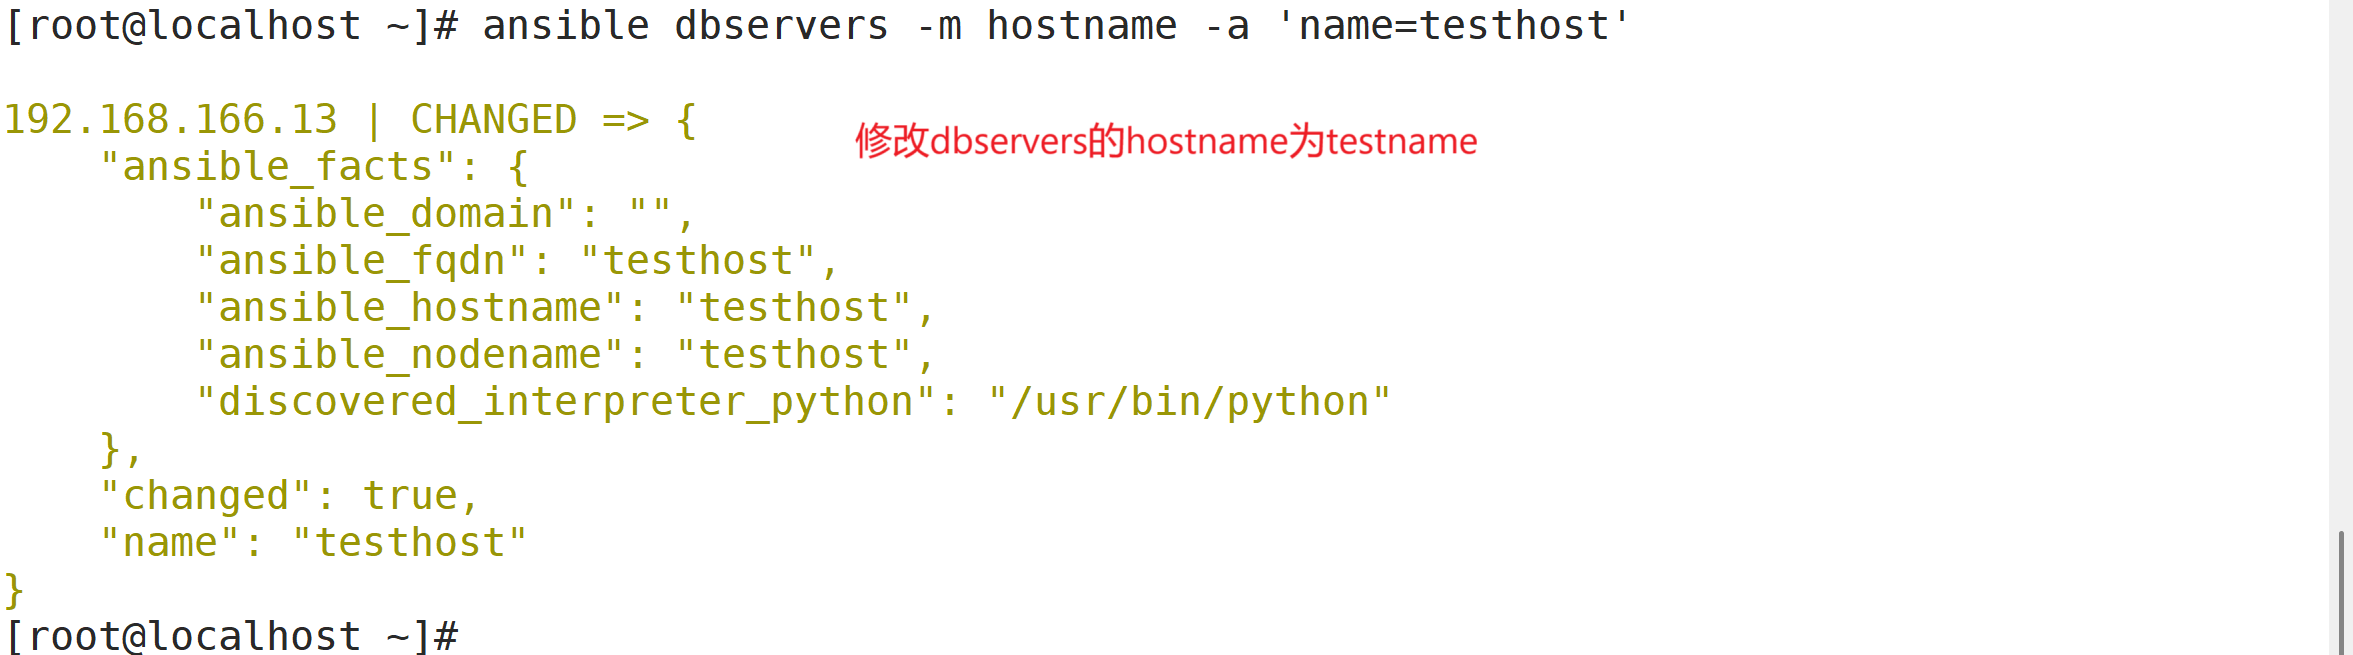
3.8 hostname 模块
用于管理远程主机上的主机名
ansible dbservers -m hostname -a 'name=testhost'
 3.9 ping 模块
ansible all -m ping 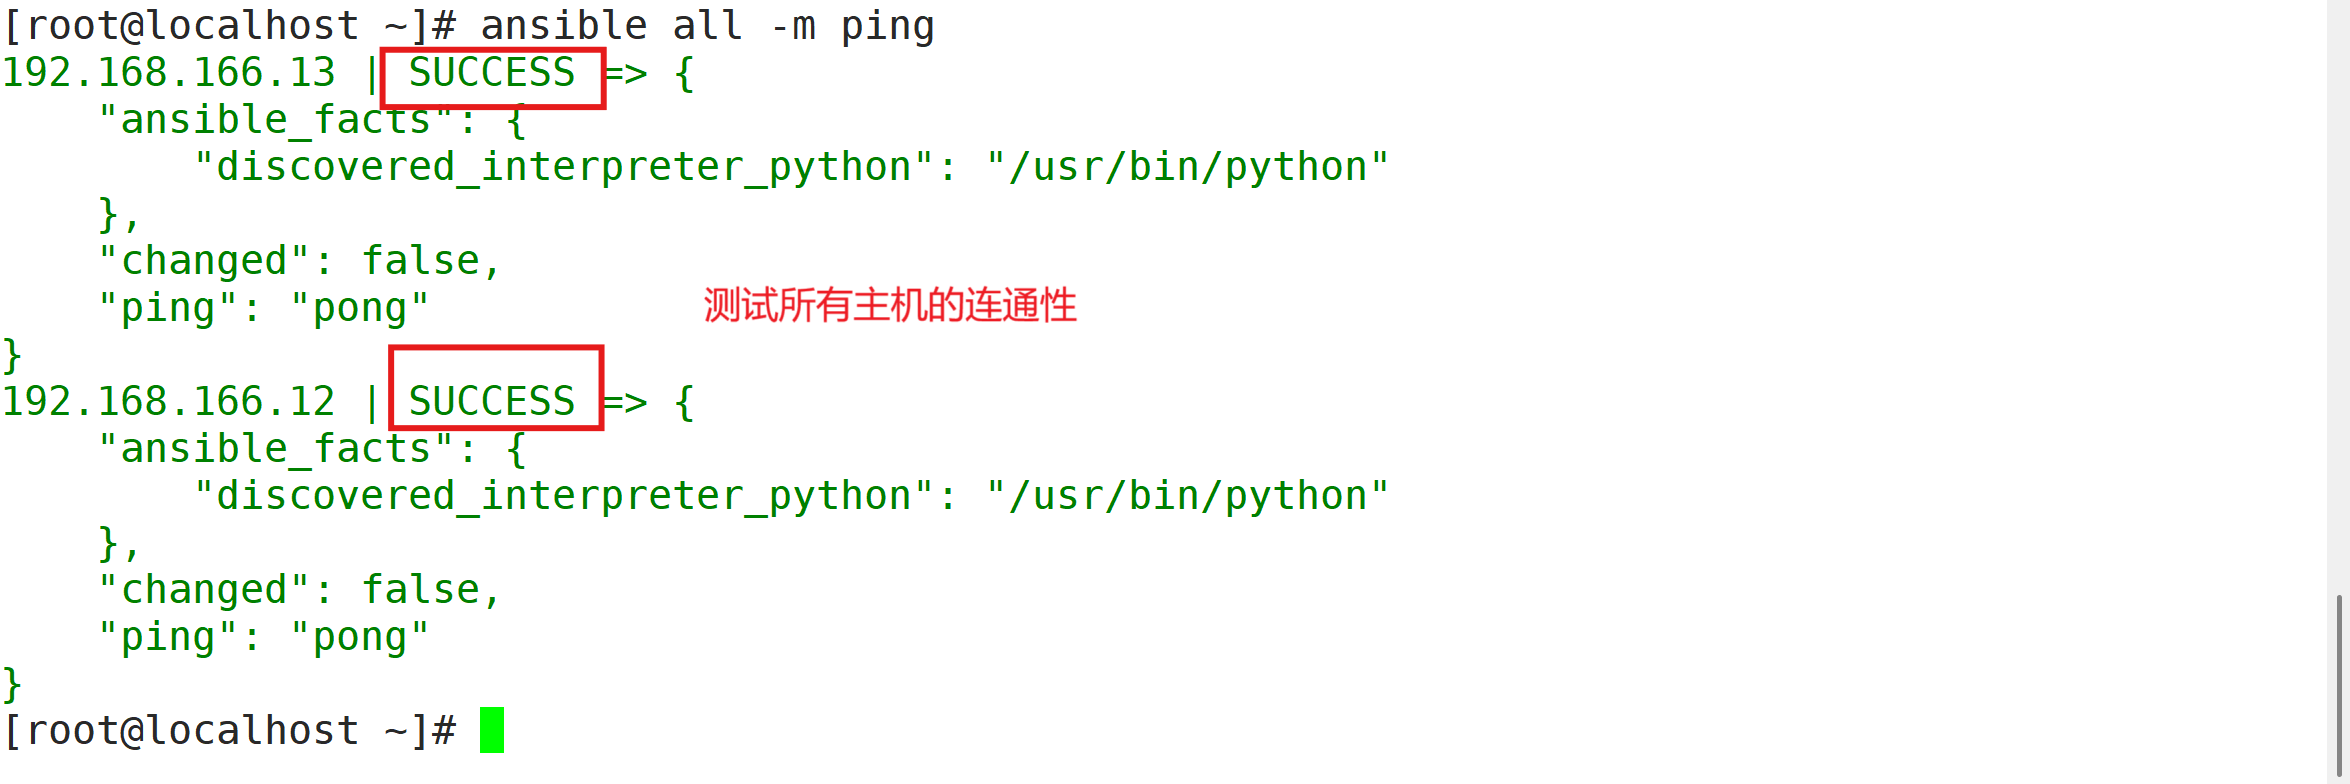
3.10 yum 模块
在远程主机上安装与卸载软件包
ansible-doc -s yumansible webservers -m yum -a 'name=httpd'						#安装服务
ansible webservers -m yum -a 'name=httpd state=absent'			#卸载服务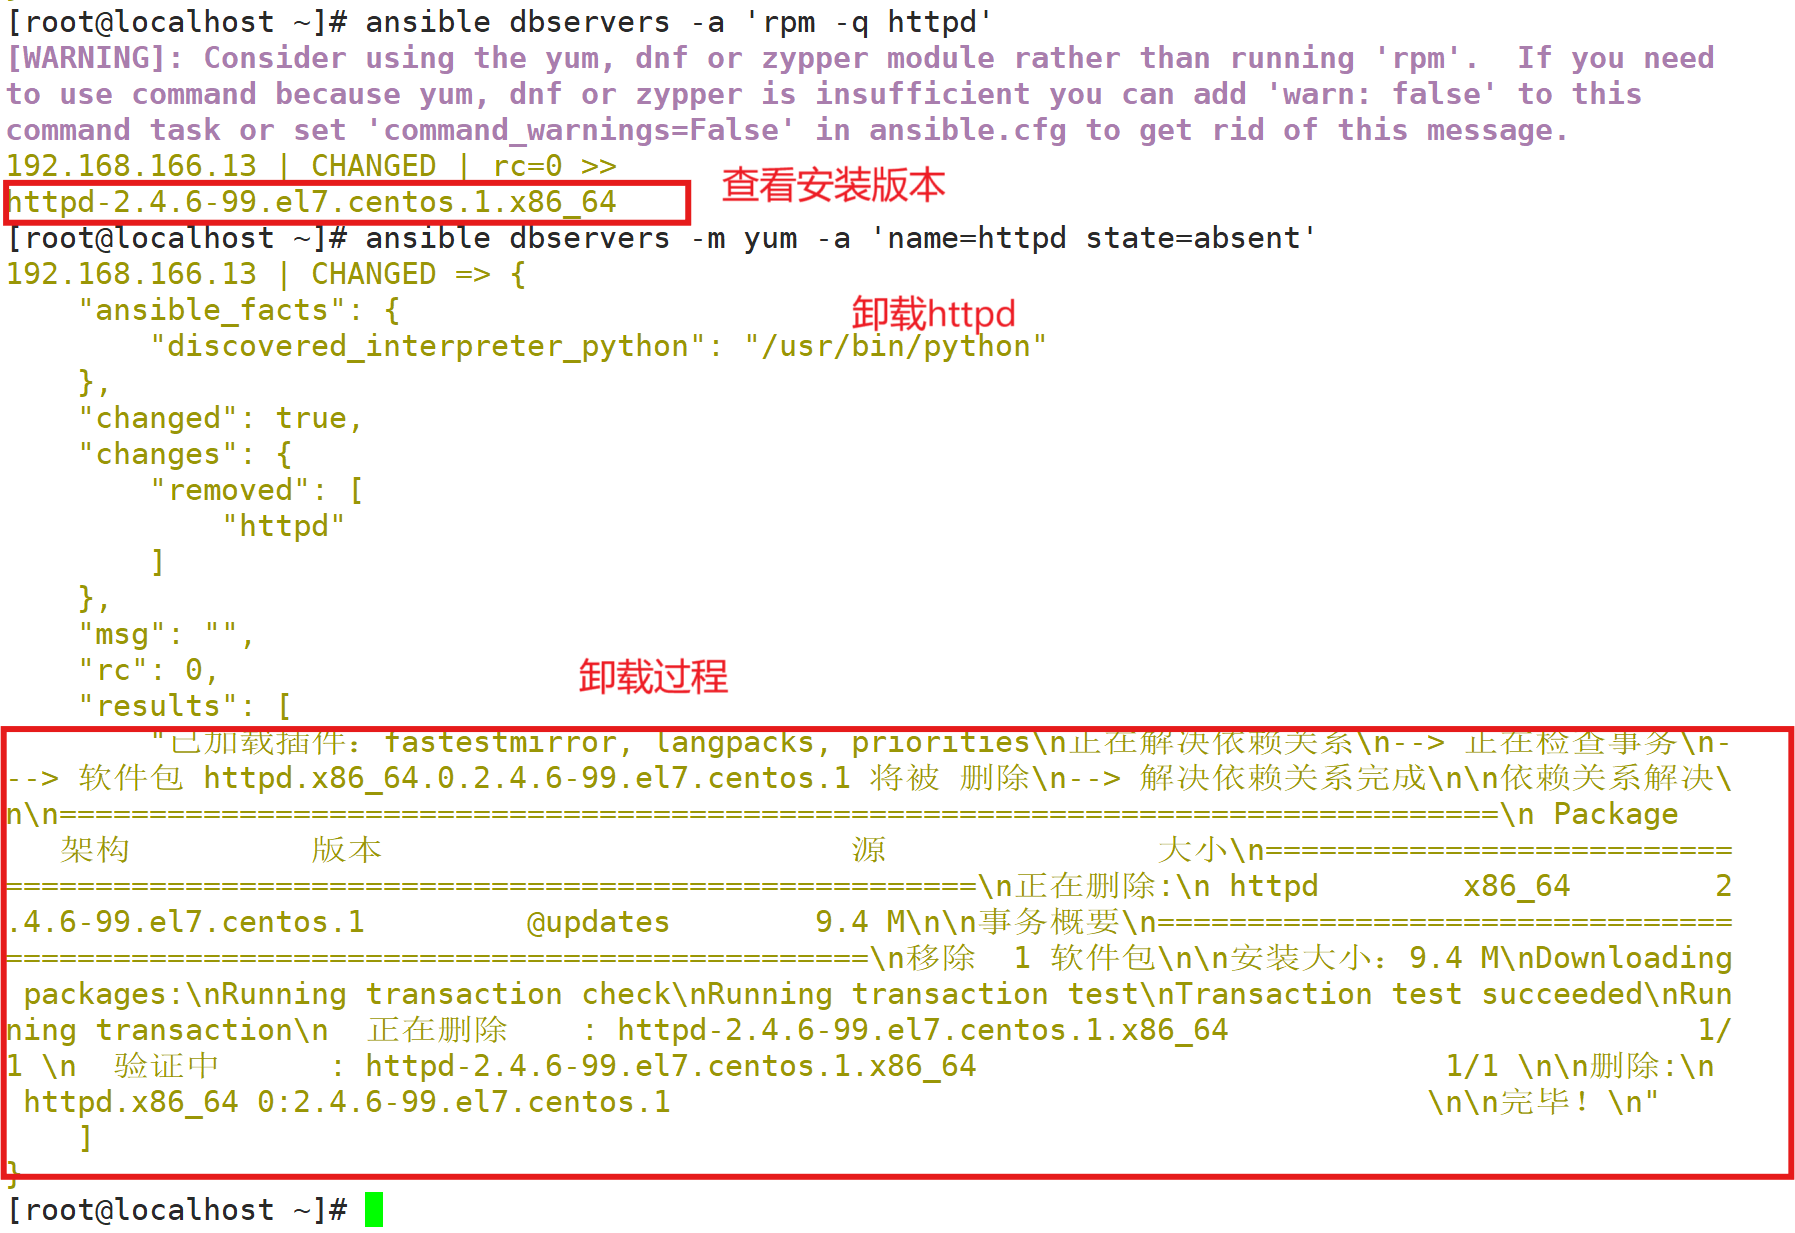
3.11 service/systemd 模块
用于在远程主机上管理服务的运行状态
ansible-doc -s service##常用的参数
name:被管理的服务名称。
state=started | stopped | restarted:动作包含启动关闭或者重启。
enabled=yes | no:表示是否设置该服务开机自启。
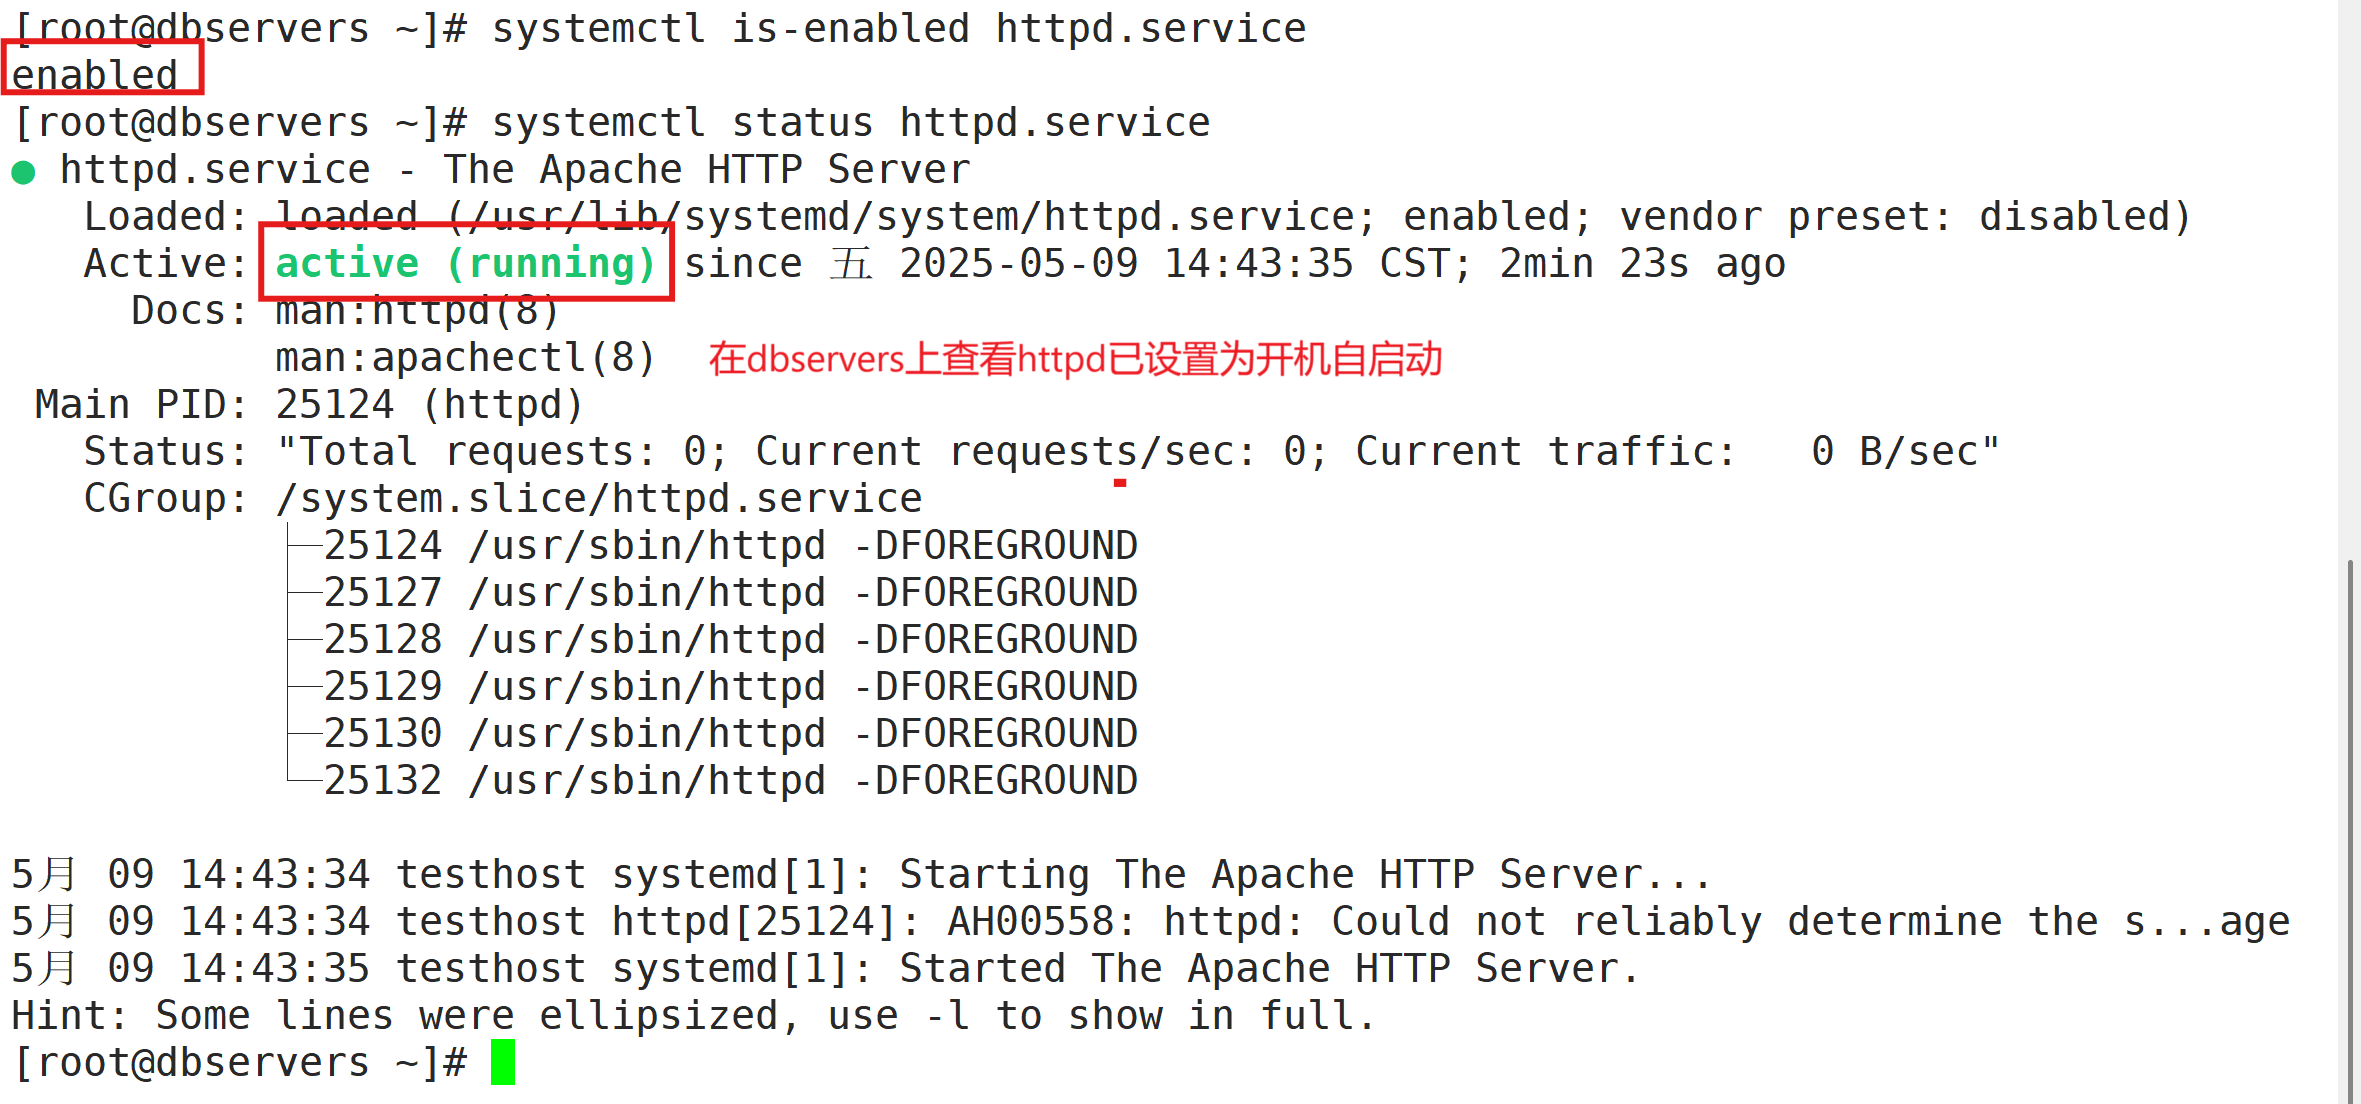
runlevel:如果设定了enabled开机自启去,则要定义在哪些运行目标下自启动。ansible webservers -m service -a 'name=httpd enabled=true state=started' #安装服务并设为开机自启
systemctl is-enabled httpd.service #被控制端查看是否设为开机自启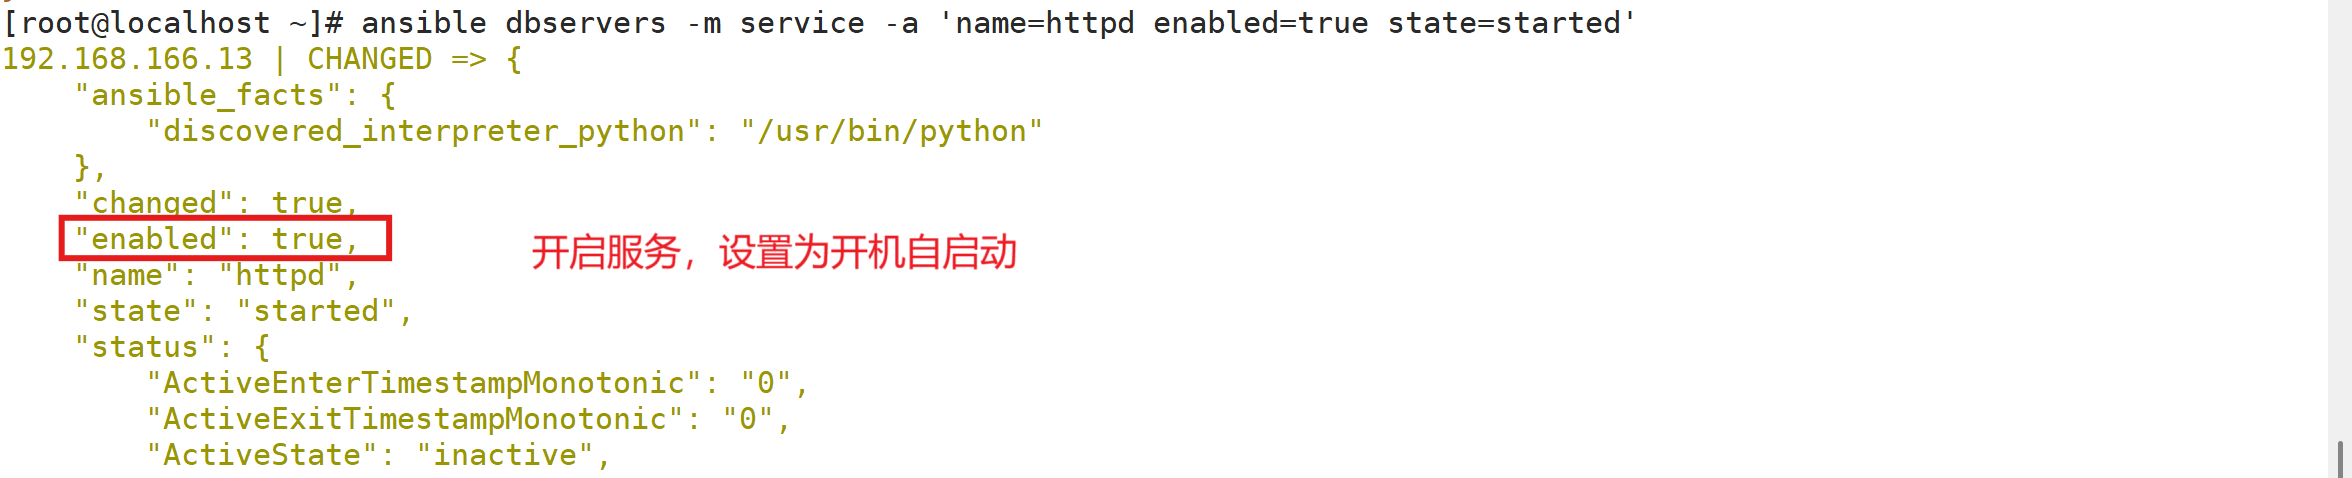
3.12 script 模块
实现远程批量运行本地 shell 脚本
ansible-doc -s scriptvim test.sh						#编写一个脚本
#!/bin/bash
echo "hello ansible from script" > /opt/script.txt		#在script.txt中写入指定内容chmod +x test.sh 										#赋予权限
ansible dbservers -m script -a 'test.sh'				#实现远程运行本地的脚本
ansible dbservers -a 'cat /opt/script.txt'				#查看生成的文档内容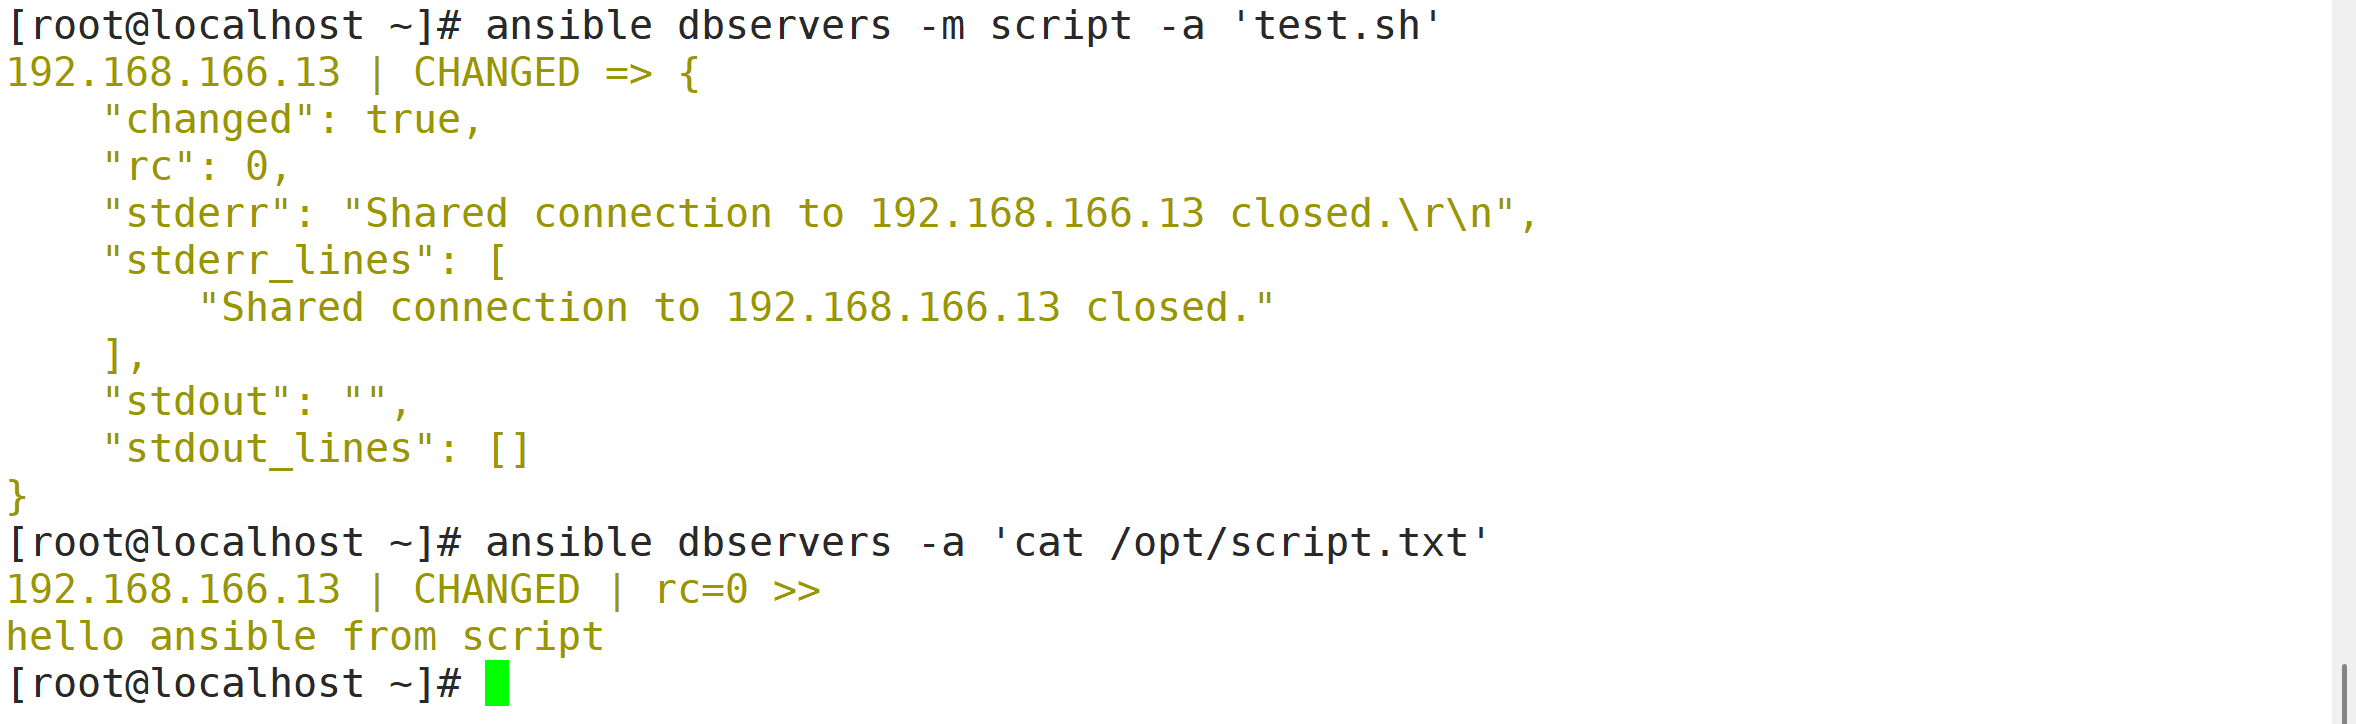
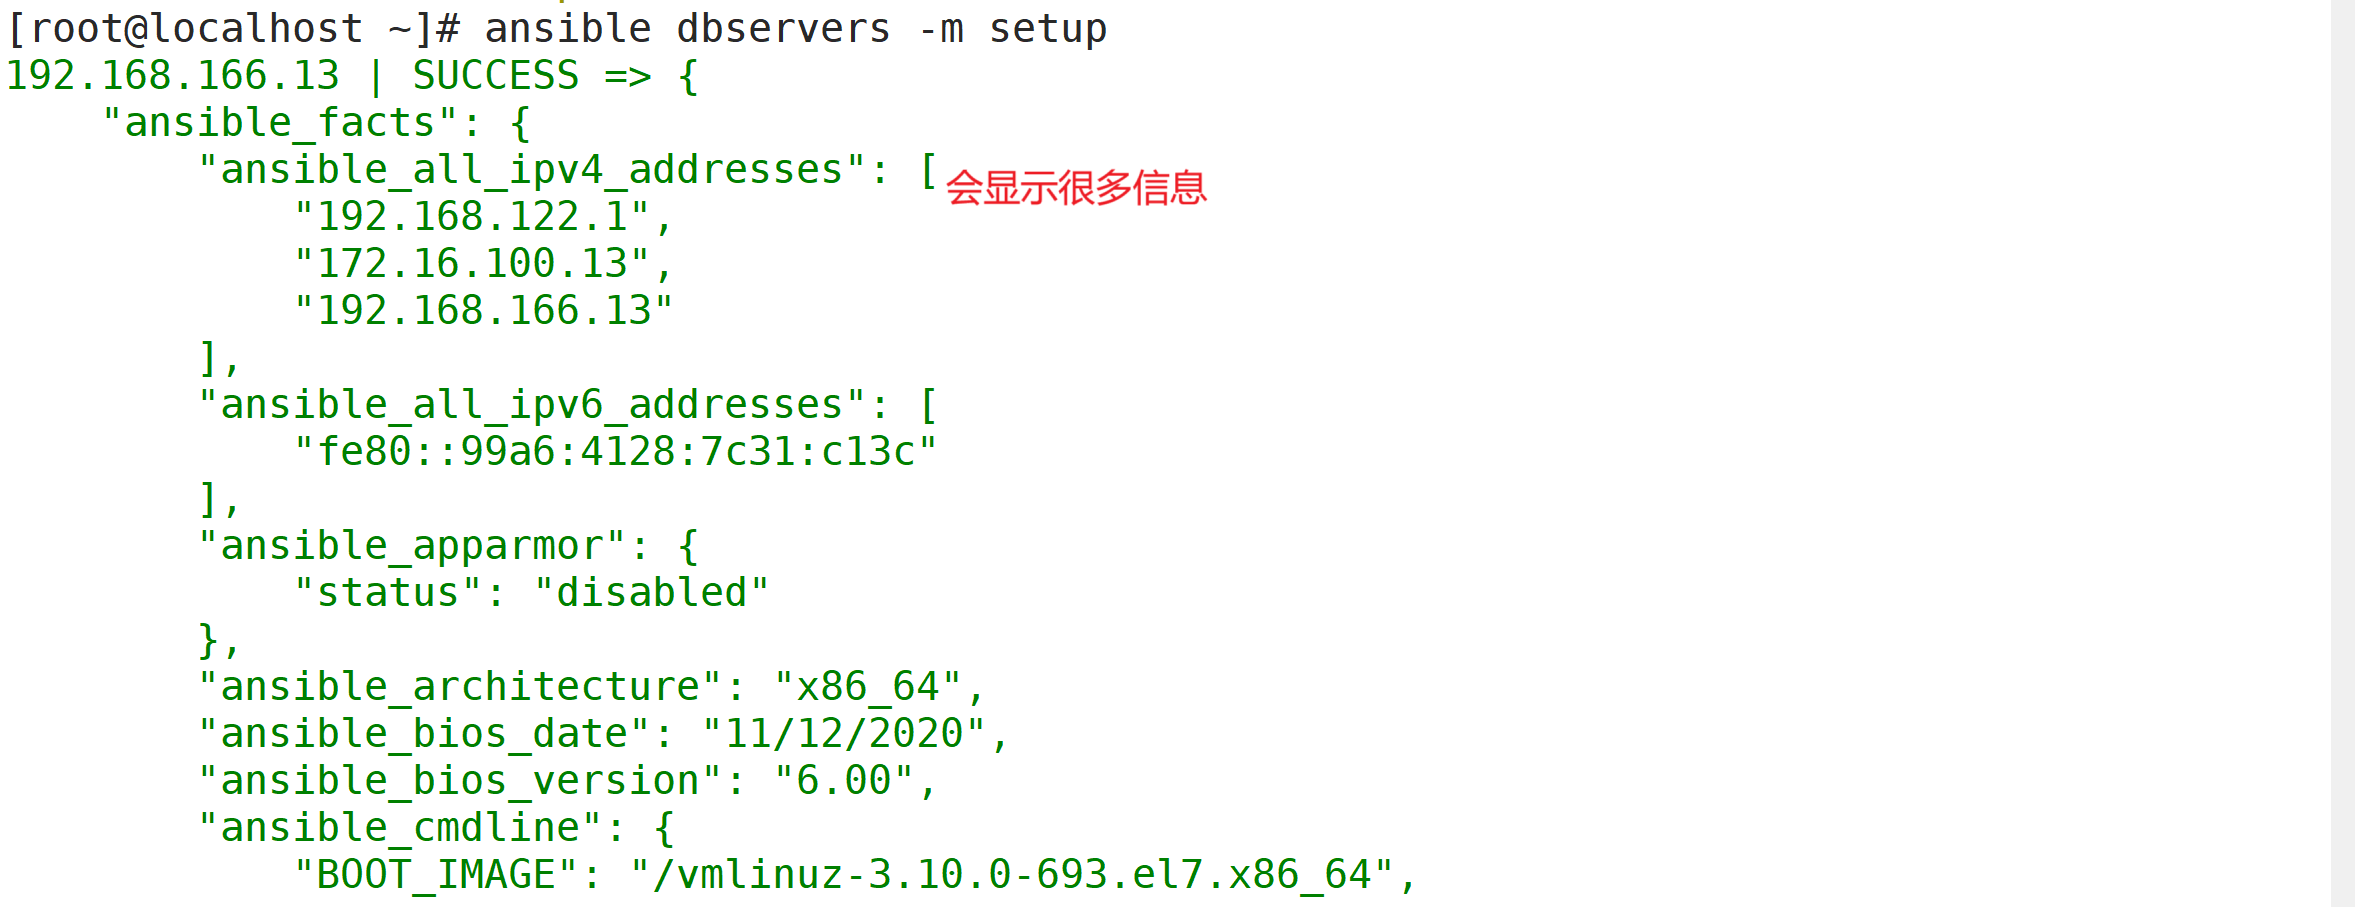
3.13 setup 模块
facts组件是用来收集被管理节点信息的,使用 setup 模块可以获取这些信息
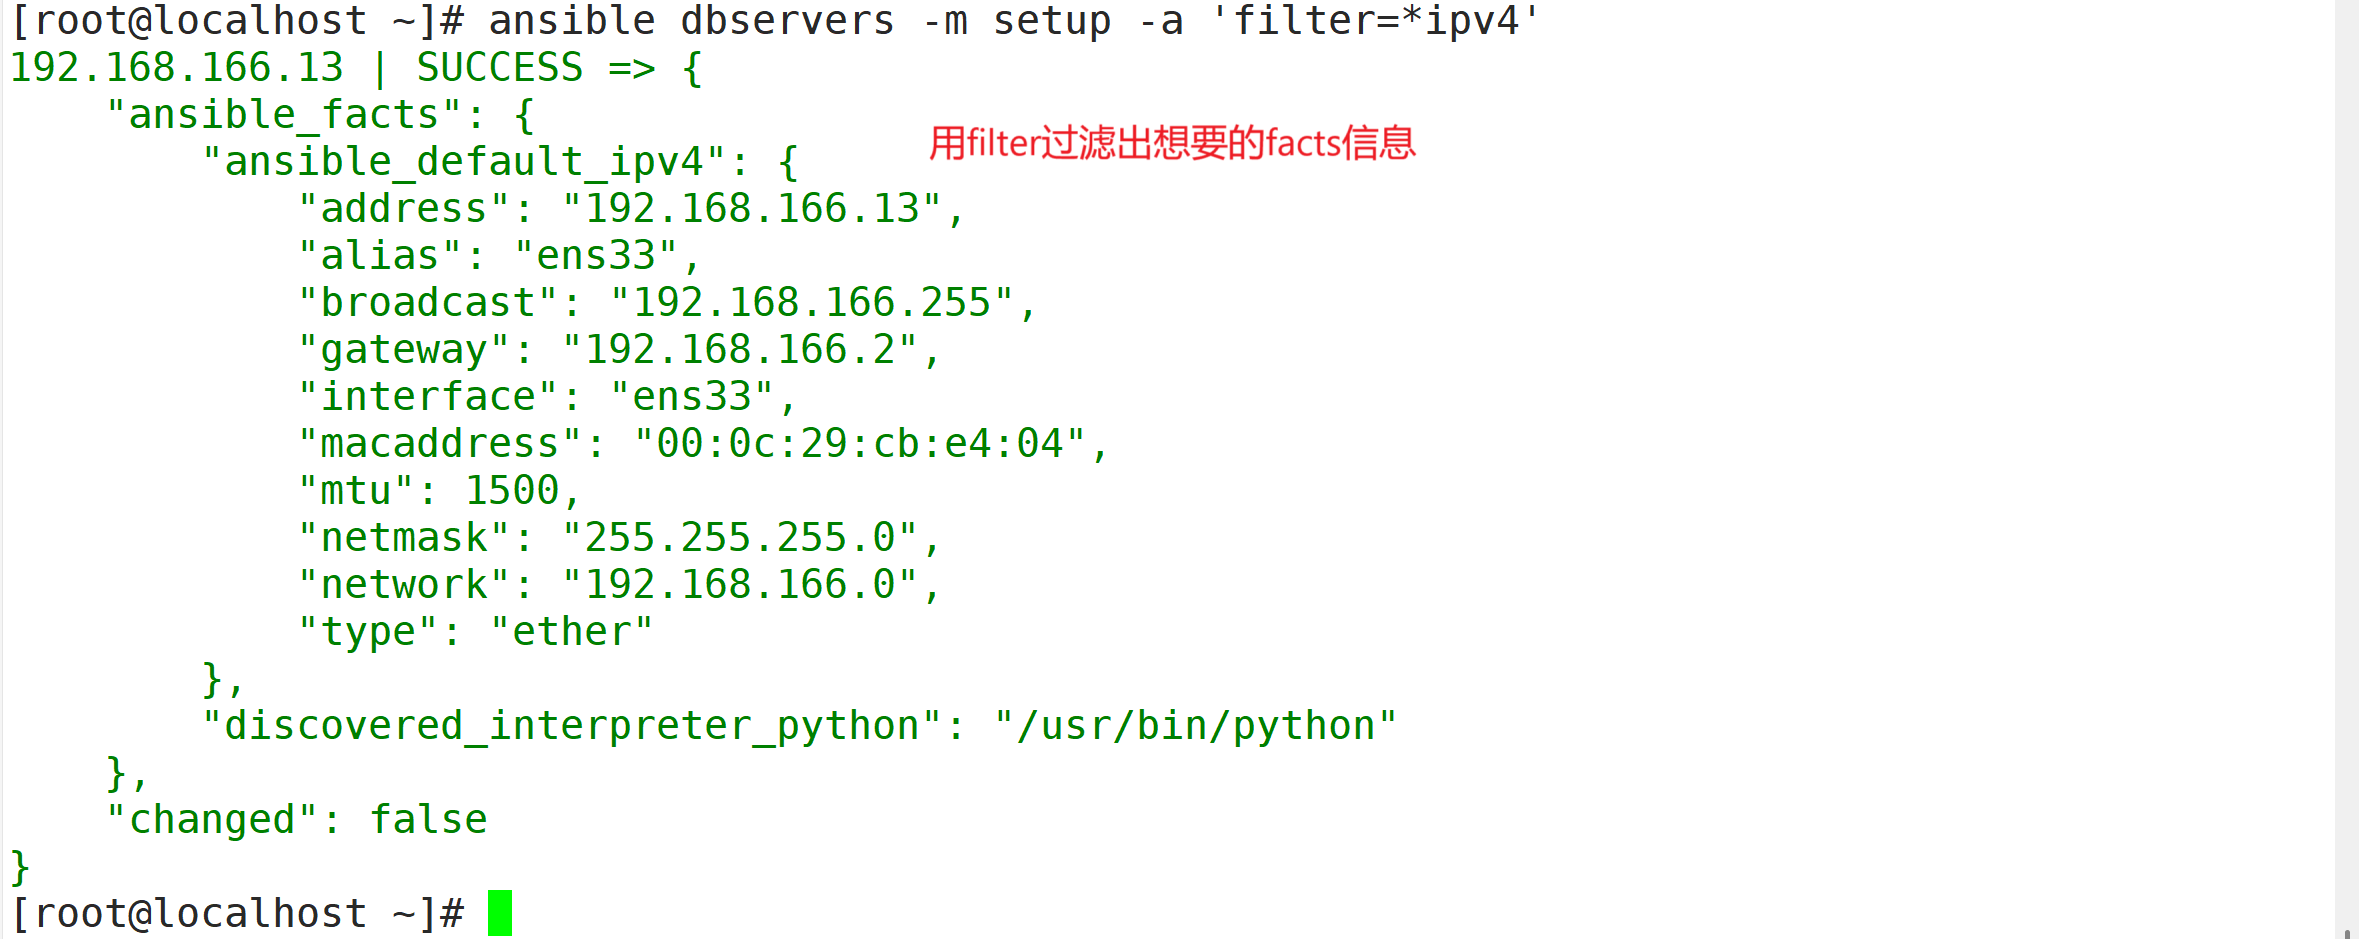
ansible-doc -s setupansible webservers -m setup							#获取webservers组主机的facts信息
ansible webservers -m setup -a 'filter=*ipv4'		#使用filter可以筛选指定的facts信息