使用PocketFlow构建Web Search Agent
前言
本文介绍的是PocketFlow的cookbook中的pocketflow-agent部分。
回顾一下PocketFlow的核心架构:
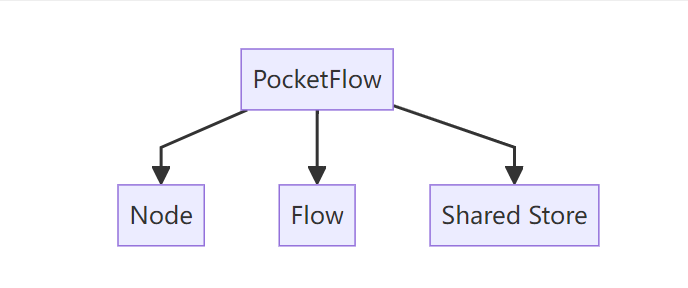
每一个节点的架构:
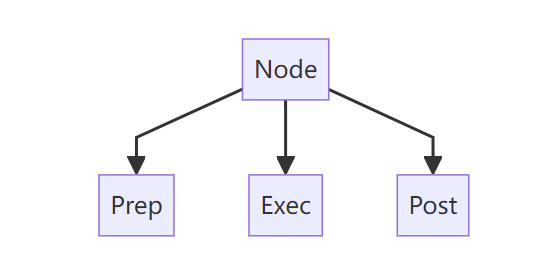
具体介绍可以看上一篇文章:
“Pocket Flow,一个仅用 100 行代码实现的 LLM 框架”
实现效果
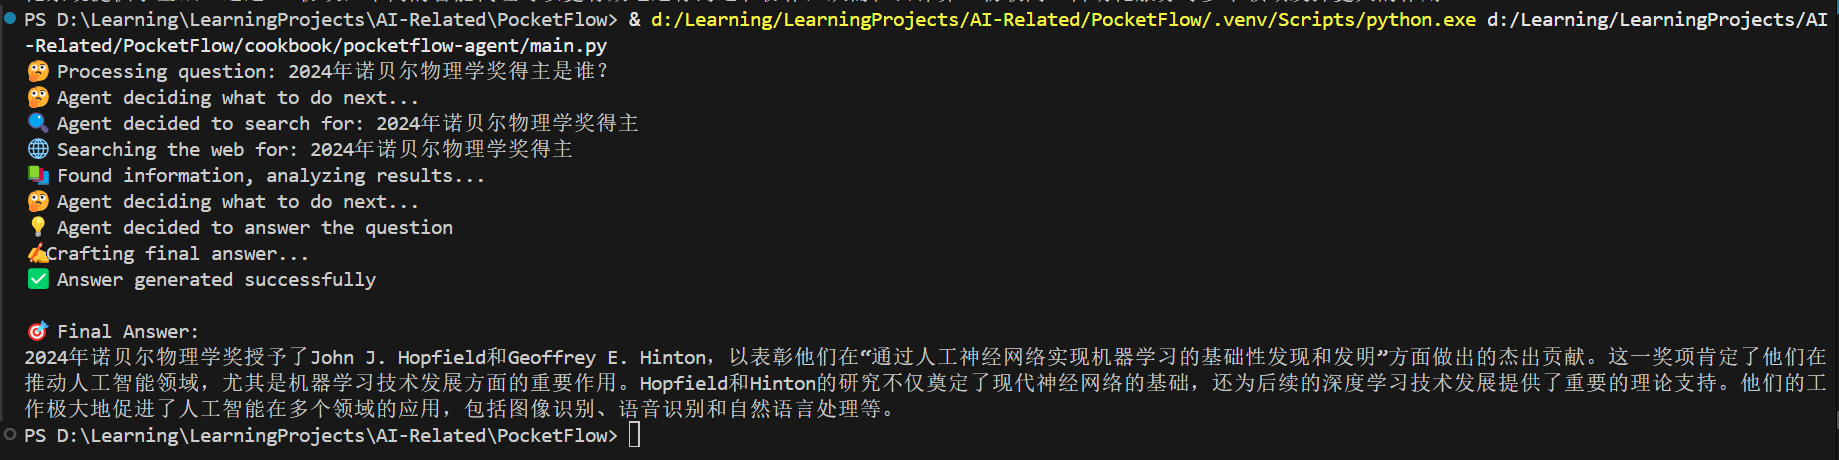
这个Web Search Agent是干嘛的呢?
这个Agent会判断你输入的问题是否需要搜索网络,如果需要会搜索网络之后回答。
效果如下图所示:
现在就让我们看看是怎么实现的吧!!
Web Search Agent实现
先看看这个Web Search Agent的整体架构。
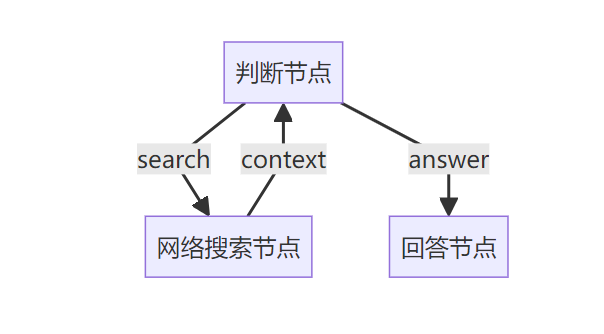
Web Search Agent包含三个节点:
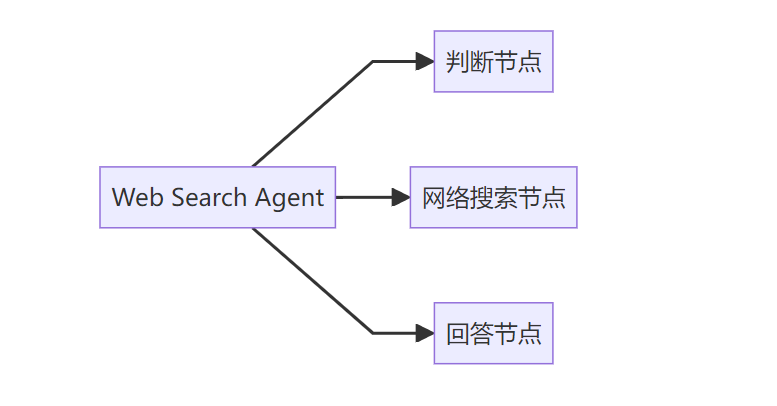
这三个节点的关系如下图所示:
现在来看整体流程。
首先创建节点并连接:
def create_agent_flow():"""Create and connect the nodes to form a complete agent flow.The flow works like this:1. DecideAction node decides whether to search or answer2. If search, go to SearchWeb node3. If answer, go to AnswerQuestion node4. After SearchWeb completes, go back to DecideActionReturns:Flow: A complete research agent flow"""# Create instances of each nodedecide = DecideAction()search = SearchWeb()answer = AnswerQuestion()# Connect the nodes# If DecideAction returns "search", go to SearchWebdecide - "search" >> search# If DecideAction returns "answer", go to AnswerQuestiondecide - "answer" >> answer# After SearchWeb completes and returns "decide", go back to DecideActionsearch - "decide" >> decide# Create and return the flow, starting with the DecideAction nodereturn Flow(start=decide)
决定节点的prep:

获取上下文(当前还没有上下文)与问题。
决定节点的exec:
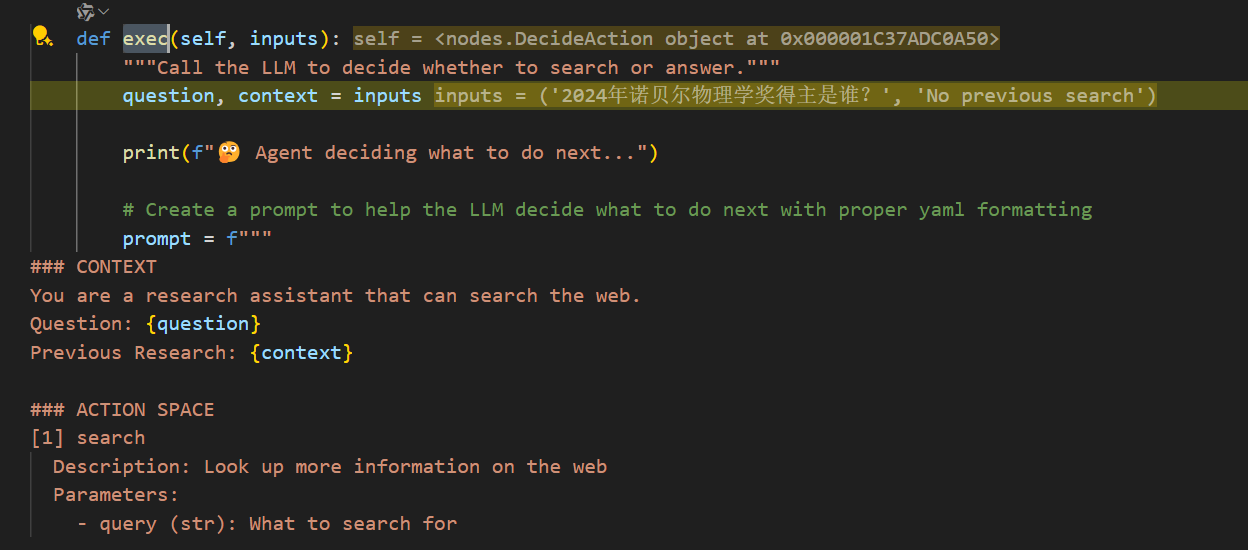
获取prep的问题与上下文,判断是搜索还是回答。
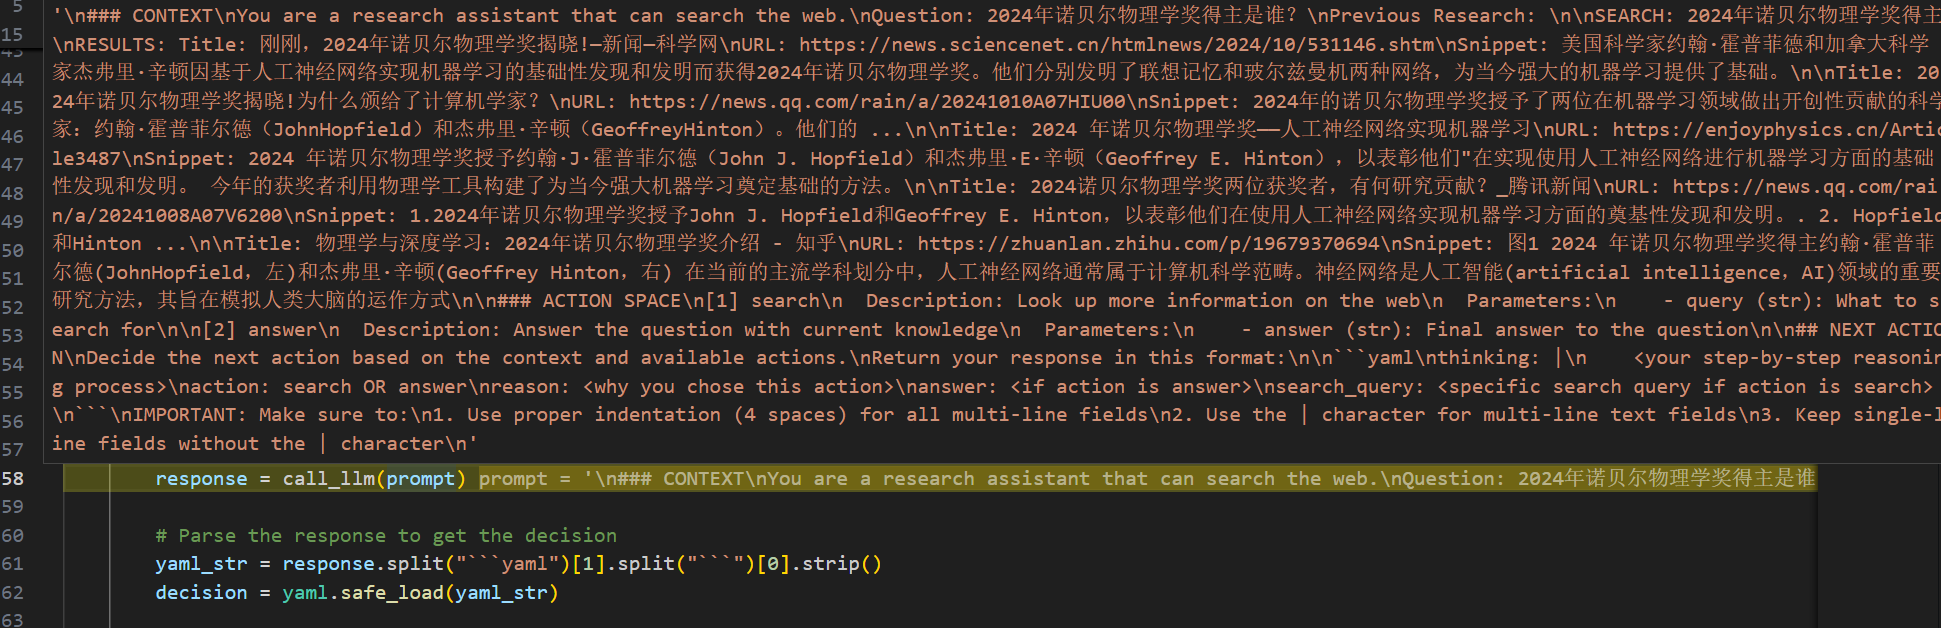
看看这里的提示词:
 prompt = f"""
### CONTEXT
You are a research assistant that can search the web.
Question: {question}
Previous Research: {context}### ACTION SPACE
[1] searchDescription: Look up more information on the webParameters:- query (str): What to search for[2] answerDescription: Answer the question with current knowledgeParameters:- answer (str): Final answer to the question## NEXT ACTION
Decide the next action based on the context and available actions.
Return your response in this format:```yaml
thinking: |<your step-by-step reasoning process>
action: search OR answer
reason: <why you chose this action>
answer: <if action is answer>
search_query: <specific search query if action is search>
```
IMPORTANT: Make sure to:
1. Use proper indentation (4 spaces) for all multi-line fields
2. Use the | character for multi-line text fields
3. Keep single-line fields without the | character
"""
注意这里作者使用的是yaml返回而不是json,这是因为大模型返回json出错的概率更高一点,我也遇到过好多次json返回错误。
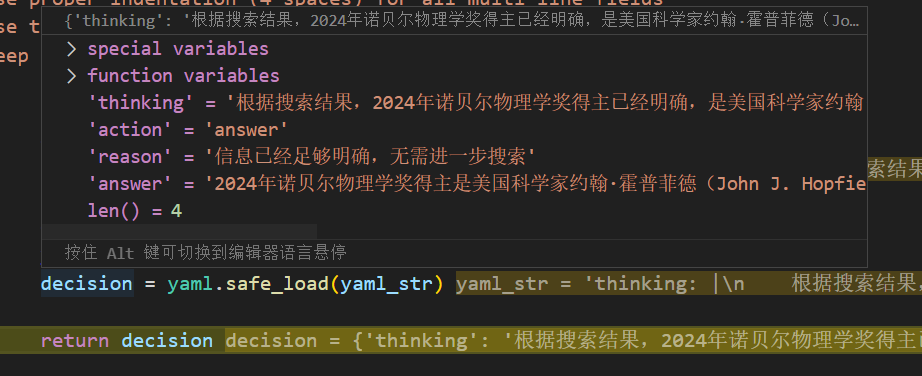
返回大模型的决定:
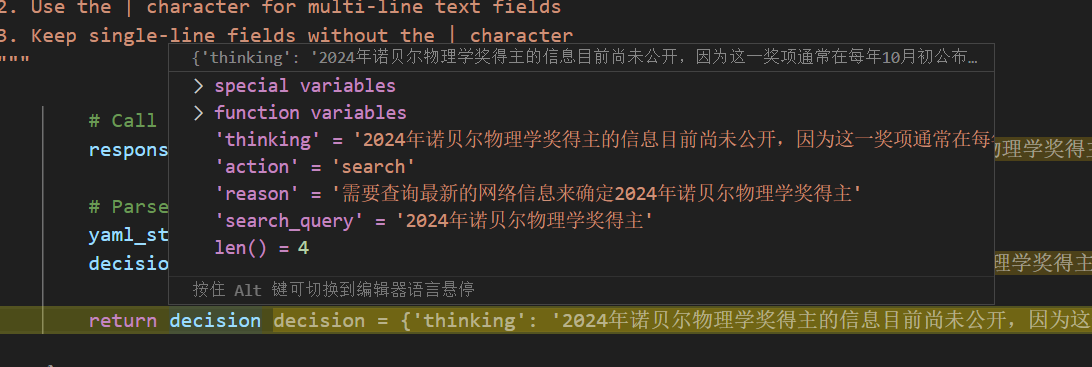
决定节点的post:

会返回search,转到Search节点。
Search节点的prep:

从共享存储中获取要搜索的内容。
Search节点的exec:

开始执行网络搜索,这里作者使用的是duckduckgo,直接使用很方便,当然也可以使用brave,免费订阅一个月2000次的额度。
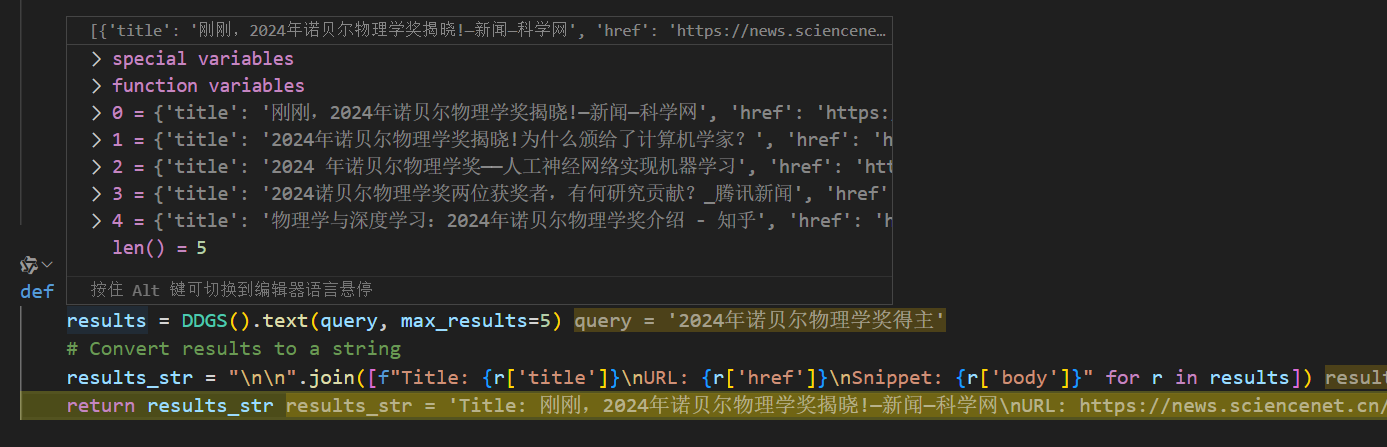
将结果合并之后返回。
Search节点的post:

将网络搜索的结果放到共享存储的context中。
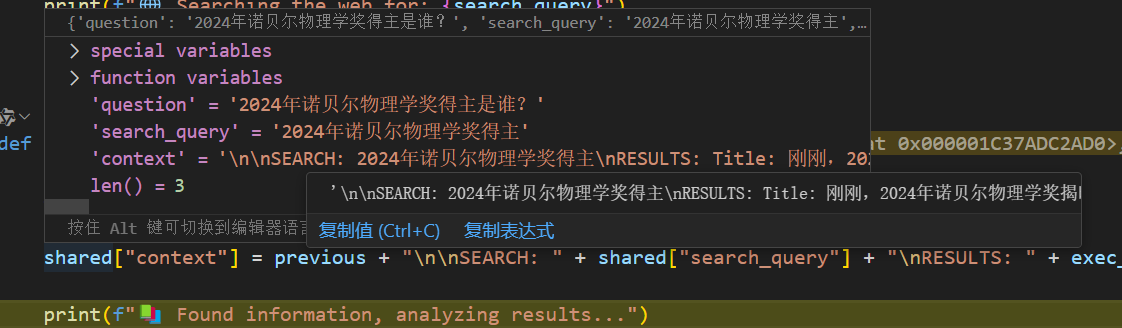
返回决定节点。
根据获取的上下文做判断:
模型决定回答:
回答节点的prep:

从共享存储中获取问题与上下文。
回答节点的exec:
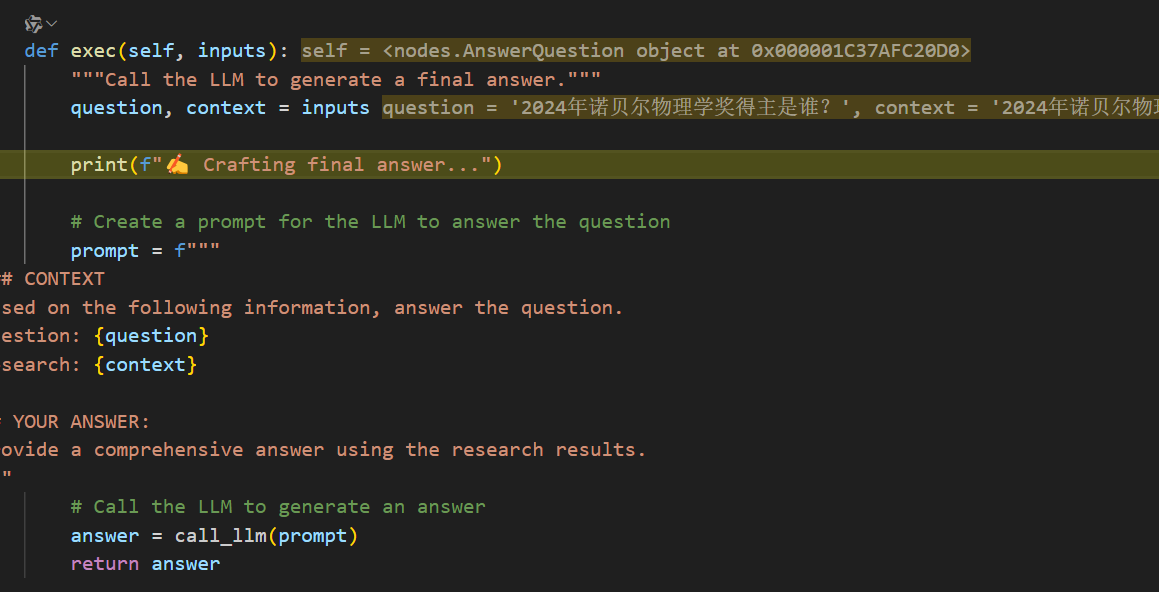
获取问题与上下文,现在的上下文变成之前的答案:

回答的提示词:
 prompt = f"""
### CONTEXT
Based on the following information, answer the question.
Question: {question}
Research: {context}## YOUR ANSWER:
Provide a comprehensive answer using the research results.
"""
回答节点的post:

最终回答从共享存储中取出:
print(shared.get("answer", "No answer found"))

以上就将这个流程走通了。
整体的流程图大概如下所示:
flowchart TD
l[开始] --> a
a[决定节点的prep:获取上下文(当前还没有上下文)与问题。] -->
b[决定节点的exec:获取prep的问题与上下文,判断是搜索还是回答。] -->
c[决定节点的post:返回search或answer] -->|search| d[网络搜索节点的prep:从共享存储中获取要搜索的内容。]
c -->|answer|e[回答节点的prep:从共享存储中获取问题与上下文。]
d -->f[网络搜索节点的exec:获取网络搜索结果]
f -->g[网络搜索节点的post:将网络搜索的结果放到共享存储的context中。]
g -->a
e -->i[回答节点的exec:根据获取的上下文回答问题]
i -->j[回答节点的post:从共享存储中取出最终回答]
j--> k[结束]
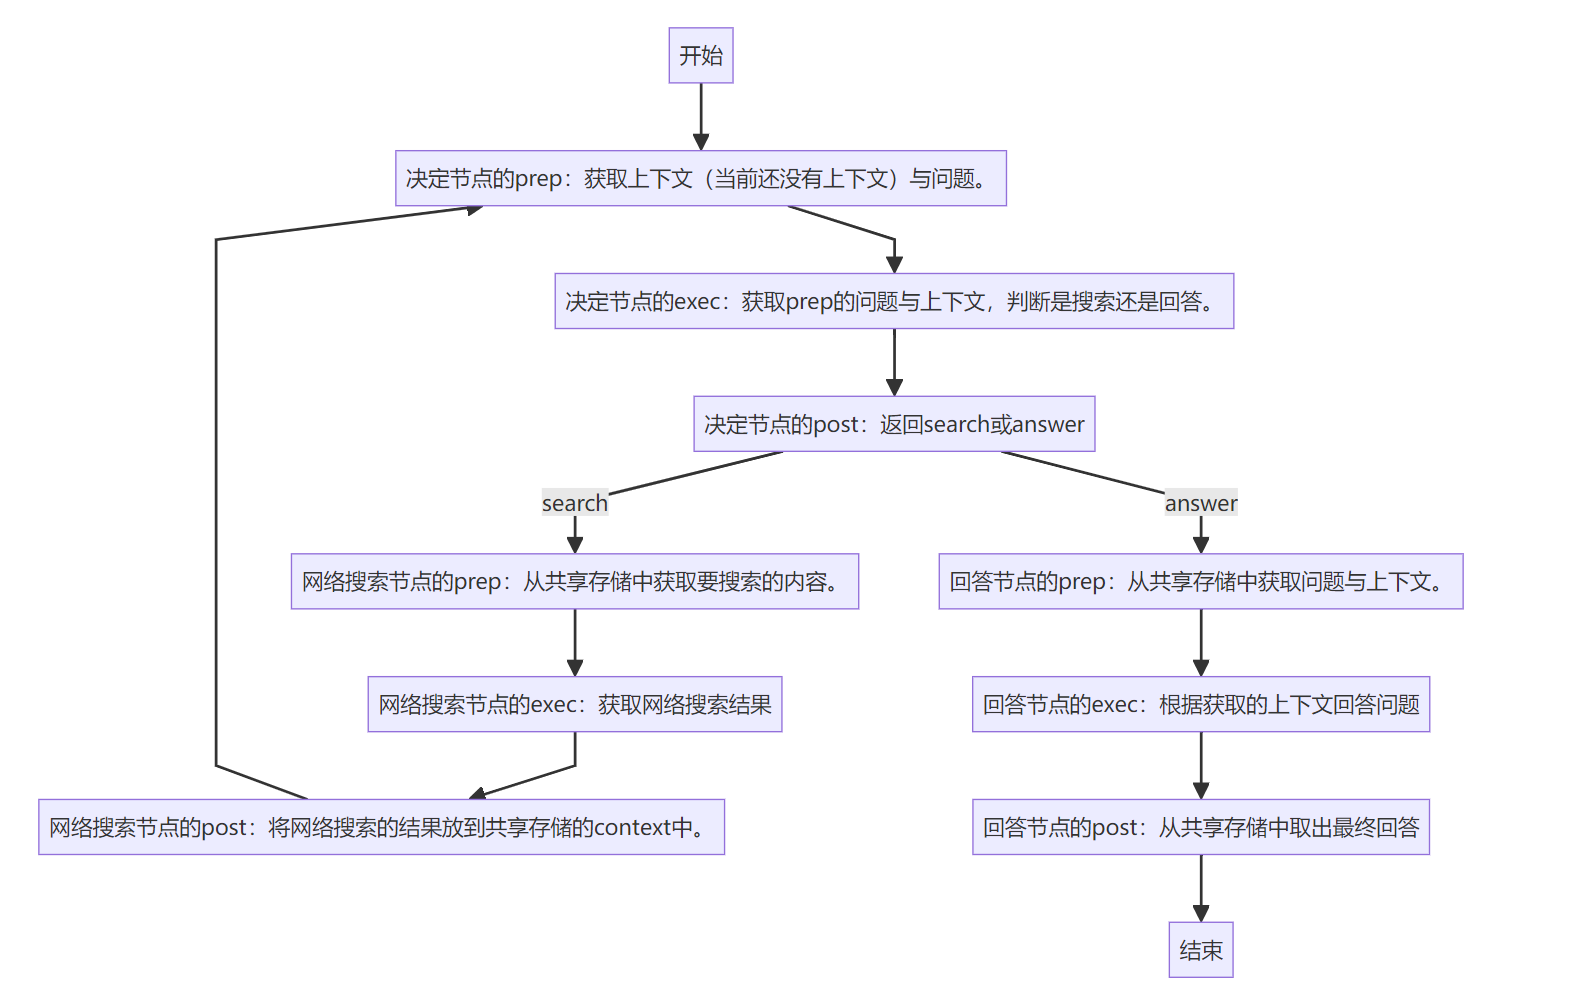
以上就是这个Web Search Agent的工作流。
由于我个人比较喜欢C#,我也用C#复刻了一个,下期介绍如何使用C#复刻一个。