19.three官方示例+编辑器+AI快速学习webgl_buffergeometry_points
本实例主要讲解内容
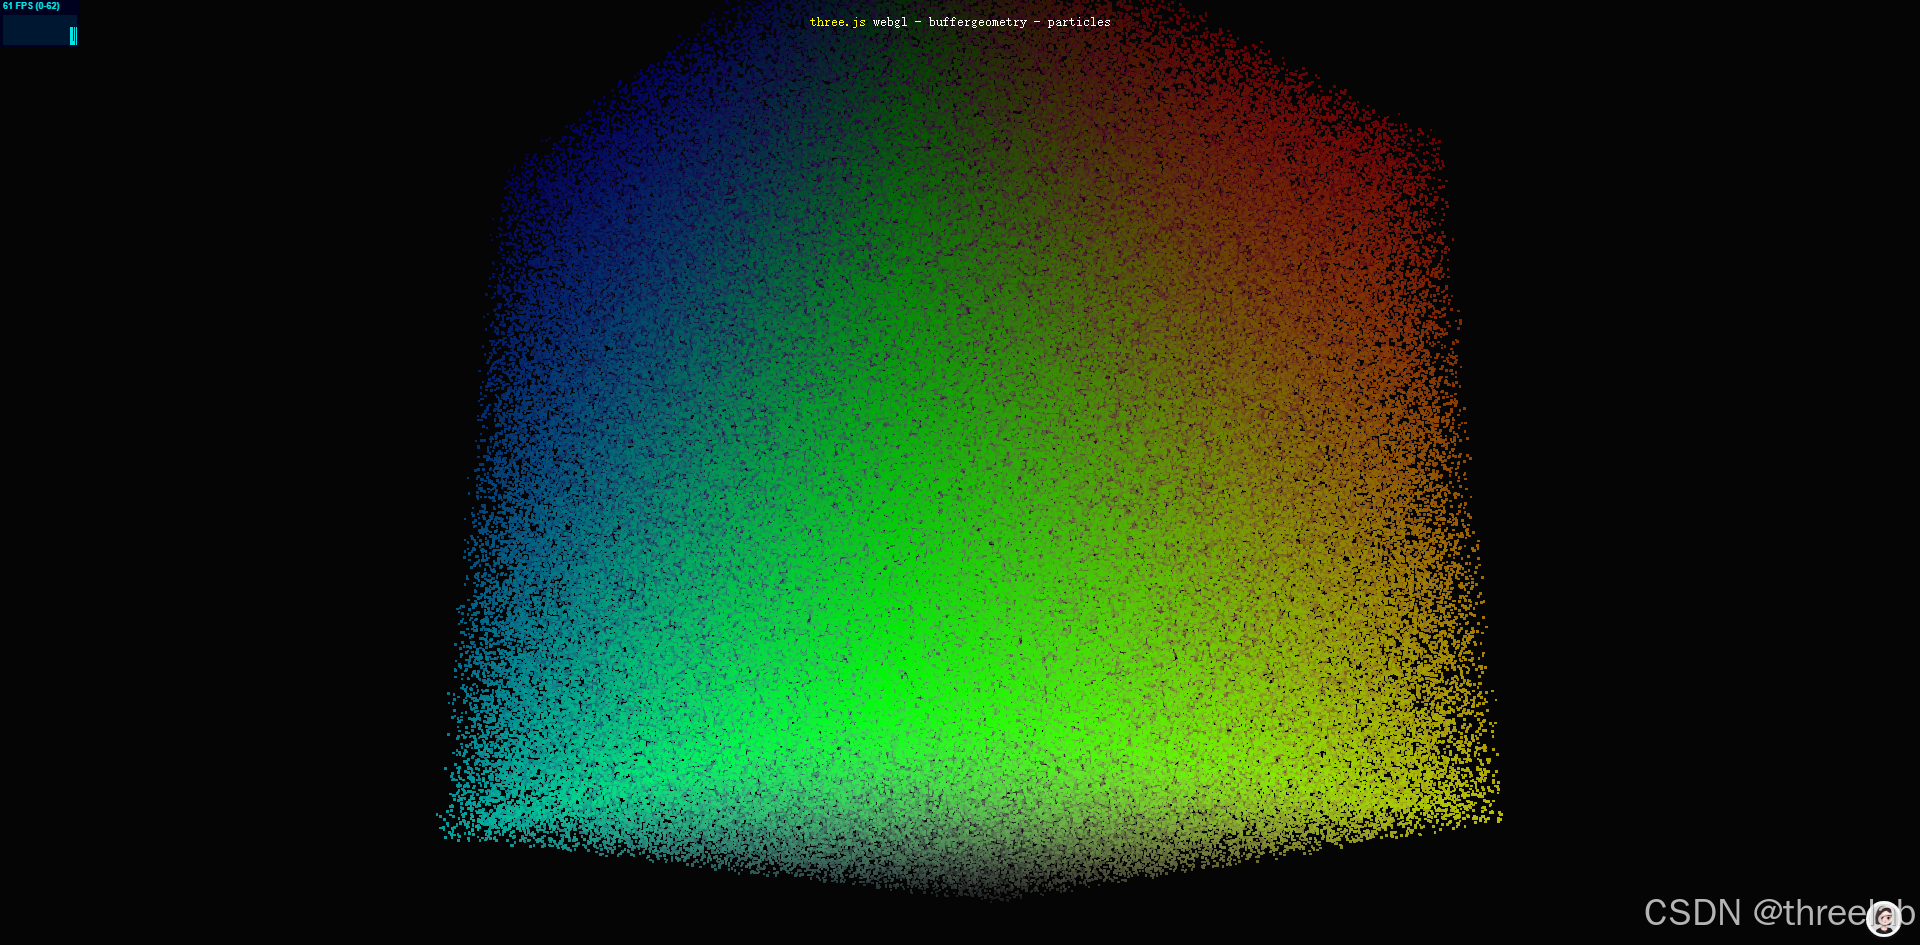
这个Three.js示例展示了如何使用BufferGeometry和Points对象创建高效的粒子系统。通过随机生成50万个粒子并为每个粒子设置基于位置的颜色,结合雾效果和旋转动画,创建出一个视觉效果丰富的3D粒子场景。
核心技术包括:
- BufferGeometry的高效使用
- 顶点颜色的应用
- 粒子系统的性能优化
- 雾效果的实现
完整代码注释
<!DOCTYPE html>
<html lang="en"><head><title>three.js webgl - buffergeometry - particles</title><meta charset="utf-8"><meta name="viewport" content="width=device-width, user-scalable=no, minimum-scale=1.0, maximum-scale=1.0"><link type="text/css" rel="stylesheet" href="main.css"></head><body><div id="container"></div><div id="info"><a href="https://threejs.org" target="_blank" rel="noopener">three.js</a> webgl - buffergeometry - particles</div><script type="importmap">{"imports": {"three": "../build/three.module.js","three/addons/": "./jsm/"}}</script><script type="module">import * as THREE from 'three';import Stats from 'three/addons/libs/stats.module.js';let container, stats;let camera, scene, renderer;let points;init();animate();function init() {container = document.getElementById( 'container' );// 初始化相机camera = new THREE.PerspectiveCamera( 27, window.innerWidth / window.innerHeight, 5, 3500 );camera.position.z = 2750;// 初始化场景scene = new THREE.Scene();scene.background = new THREE.Color( 0x050505 ); // 设置背景颜色scene.fog = new THREE.Fog( 0x050505, 2000, 3500 ); // 添加雾效果// 粒子数量const particles = 500000;// 创建BufferGeometryconst geometry = new THREE.BufferGeometry();// 存储位置和颜色数据const positions = [];const colors = [];// 临时颜色对象const color = new THREE.Color();// 粒子分布范围const n = 1000, n2 = n / 2;// 生成粒子数据for ( let i = 0; i < particles; i ++ ) {// 随机位置const x = Math.random() * n - n2;const y = Math.random() * n - n2;const z = Math.random() * n - n2;// 添加位置数据positions.push( x, y, z );// 基于位置计算颜色const vx = ( x / n ) + 0.5;const vy = ( y / n ) + 0.5;const vz = ( z / n ) + 0.5;// 设置颜色并转换到sRGB空间color.setRGB( vx, vy, vz, THREE.SRGBColorSpace );// 添加颜色数据colors.push( color.r, color.g, color.b );}// 设置几何体属性geometry.setAttribute( 'position', new THREE.Float32BufferAttribute( positions, 3 ) );geometry.setAttribute( 'color', new THREE.Float32BufferAttribute( colors, 3 ) );// 计算边界球体,用于视锥体剔除geometry.computeBoundingSphere();// 创建粒子材质const material = new THREE.PointsMaterial( { size: 15, vertexColors: true } );// 创建粒子系统points = new THREE.Points( geometry, material );scene.add( points );// 初始化渲染器renderer = new THREE.WebGLRenderer();renderer.setPixelRatio( window.devicePixelRatio );renderer.setSize( window.innerWidth, window.innerHeight );renderer.setAnimationLoop( animate );container.appendChild( renderer.domElement );// 添加性能统计stats = new Stats();container.appendChild( stats.dom );// 窗口大小变化事件监听window.addEventListener( 'resize', onWindowResize );}// 窗口大小变化处理函数function onWindowResize() {camera.aspect = window.innerWidth / window.innerHeight;camera.updateProjectionMatrix();renderer.setSize( window.innerWidth, window.innerHeight );}// 动画循环function animate() {const time = Date.now() * 0.001;// 旋转粒子系统points.rotation.x = time * 0.25;points.rotation.y = time * 0.5;// 渲染场景renderer.render( scene, camera );// 更新性能统计stats.update();}</script></body>
</html>
BufferGeometry与粒子系统技术解析
BufferGeometry的优势
BufferGeometry是Three.js中最高效的几何体表示方式,它以连续数组的形式存储顶点数据,更接近GPU原生格式,具有以下优势:
- 内存效率高:减少内存碎片,提高内存访问效率
- 渲染速度快:减少CPU-GPU数据传输开销
- 支持大规模场景:能够处理数百万个顶点
- 灵活的数据组织:可以自定义顶点属性
在本示例中,我们使用BufferGeometry存储粒子的位置和颜色数据:
const geometry = new THREE.BufferGeometry();// 创建位置和颜色数据数组
const positions = [];
const colors = [];// 填充数据...// 设置几何体属性
geometry.setAttribute( 'position', new THREE.Float32BufferAttribute( positions, 3 ) );
geometry.setAttribute( 'color', new THREE.Float32BufferAttribute( colors, 3 ) );
顶点颜色应用
顶点颜色允许为每个顶点(粒子)指定不同的颜色,GPU会自动在顶点之间进行插值,产生平滑的渐变效果。使用顶点颜色的步骤:
- 材质设置:在材质中启用vertexColors
- 提供颜色数据:为每个顶点提供RGB颜色值
在本示例中:
// 创建启用顶点颜色的材质
const material = new THREE.PointsMaterial( { size: 15, vertexColors: true } );// 为每个粒子生成颜色数据(基于位置)
color.setRGB( vx, vy, vz, THREE.SRGBColorSpace );
colors.push( color.r, color.g, color.b );// 设置几何体的颜色属性
geometry.setAttribute( 'color', new THREE.Float32BufferAttribute( colors, 3 ) );
雾效果实现
雾效果可以增强场景的深度感,使远处的物体逐渐消失。在Three.js中实现雾效果非常简单:
// 添加线性雾效果
scene.fog = new THREE.Fog( 0x050505, 2000, 3500 );
参数说明:
- 第一个参数:雾的颜色
- 第二个参数:雾开始的距离
- 第三个参数:雾完全遮蔽的距离
性能优化与应用场景
对于大规模粒子系统的性能优化建议:
- 使用BufferGeometry:相比普通Geometry,性能提升显著
- 批量更新数据:如果需要动态更新粒子,尽量批量更新
- 合理设置粒子大小:过大的粒子会增加渲染负担
- 使用雾效果:可以隐藏远处的粒子,减少渲染压力
- 控制可见范围:移除或不渲染不可见的粒子
这种技术适合以下场景:
- 粒子特效(雨、雪、火、烟等)
- 数据可视化(点云、星空等)
- 游戏中的大规模物体
- 科学模拟(分子结构、星系等)
通过合理使用BufferGeometry和顶点颜色,我们可以创建出性能高效且视觉效果丰富的粒子系统。