okhttp3.Interceptor简介-笔记
1. Interceptor 简介
okhttp3.Interceptor 是 OkHttp 提供的一个核心接口,用于拦截 HTTP 请求和响应,允许开发者在请求发送前和响应接收后插入自定义逻辑。它在构建灵活、可扩展的网络请求逻辑中扮演着重要角色。常见的用途包括:
- 添加请求头(如认证 Token、上下文信息)
- 日志记录(调试请求和响应)
- 请求重试或错误处理
- 缓存控制
- 性能监控(如记录请求耗时)
Interceptor 接口提供一个 intercept(Chain chain) 方法,该方法接收一个 Chain 对象,通过调用 chain.proceed(request) 可以继续请求链的处理。
其中Chain 提供了以下关键方法:
Request request():获取当前请求。Response proceed(Request request):将请求传递给下一个拦截器或服务器。Connection connection():获取当前连接信息(仅限网络拦截器)。
2. Interceptor代码示例
step1.定义拦截器
定义一个 AuthInterceptor,用于添加请求头(认证 Token):
import okhttp3.Interceptor;
import okhttp3.Request;
import okhttp3.Response;import java.io.IOException;public class AuthInterceptor implements Interceptor {private final String authToken;public AuthInterceptor(String authToken) {this.authToken = authToken;}@Overridepublic Response intercept(Chain chain) throws IOException {// 获取原始请求Request originalRequest = chain.request();// 构建新的请求,添加认证 Token 到请求头Request newRequest = originalRequest.newBuilder().header("Authorization", "userDefineAuthToken-" + authToken).build();// 继续请求链return chain.proceed(newRequest);}
}
再定义一个LoggingInterceptor,用于记录请求日志
import okhttp3.Interceptor;
import okhttp3.Request;
import okhttp3.Response;import java.io.IOException;public class LoggingInterceptor implements Interceptor {@Overridepublic Response intercept(Chain chain) throws IOException {Request request = chain.request();long startTime = System.currentTimeMillis();// 记录请求信息System.out.println("┌───────────────────────────────────────────────────────────────────────");System.out.println("│ Sending request: " + request.method() + " " + request.url());System.out.println("│ requestHeaders: ");for (String headerName : request.headers().names()) {System.out.println("│   " + headerName + ": " + request.header(headerName));}// 执行请求并记录响应Response response = chain.proceed(request);long duration = System.currentTimeMillis() - startTime;// 记录响应信息System.out.println("│ Received response: " + response.code() + " in " + duration + "ms");System.out.println("│ responseHeaders: ");for (String headerName : response.headers().names()) {System.out.println("│   " + headerName + ": " + response.header(headerName));}System.out.println("└───────────────────────────────────────────────────────────────────────");return response;}
}
step2.使用 OkHttpClient 添加拦截器并发送请求
import java.io.IOException;import okhttp3.OkHttpClient;
import okhttp3.Request;
import okhttp3.Response;public class InterceptorExample {public static void main(String[] args) {// 0. 创建认证 TokenString token = "your_access_token_here";// 1. 创建 Interceptor 实例AuthInterceptor authInterceptor = new AuthInterceptor(token);LoggingInterceptor loggingInterceptor = new LoggingInterceptor();// 2. 构建 OkHttpClient 并添加拦截器// 拦截器会按照添加顺序依次执行,因此 AuthInterceptor 会在 LoggingInterceptor 之前运行。OkHttpClient client = new OkHttpClient.Builder().addInterceptor(authInterceptor) // 添加token拦截器.addInterceptor(loggingInterceptor)  // 添加日志拦截器.build();// 3. 创建请求对象(例如:GET /data)Request request = new Request.Builder().url("https://www.baidu.com/s?wd=iphone")  // 替换为你的 API 地址.get().build();// 4. 发送请求并处理响应try (Response response = client.newCall(request).execute()) {if (!response.isSuccessful()) {throw new IOException("Unexpected code " + response);}// 读取并打印响应体(可选)String responseBody = response.body().string();System.out.println("Response Body:\n" + responseBody);} catch (IOException e) {e.printStackTrace();}}
}
输出示例如下:
┌───────────────────────────────────────────────────────────────────────
│ Sending request: GET https://www.baidu.com/s?wd=iphone
│ requestHeaders:
│   Authorization: userDefineAuthToken-your_access_token_here
│ Received response: 200 in 228ms
│ responseHeaders:
│   Access-Control-Allow-Credentials: true
│   Date: Mon, 12 May 2025 12:12:59 GMT
│   Vary: Accept-Encoding
└───────────────────────────────────────────────────────────────────────
Response Body:
<!DOCTYPE html>
<html lang="zh-CN">
<head><meta charset="utf-8"><title>百度安全验证</title>......
</head>
<body><div class="timeout hide-callback"><div class="timeout-img"></div></div>......
</body>
</html>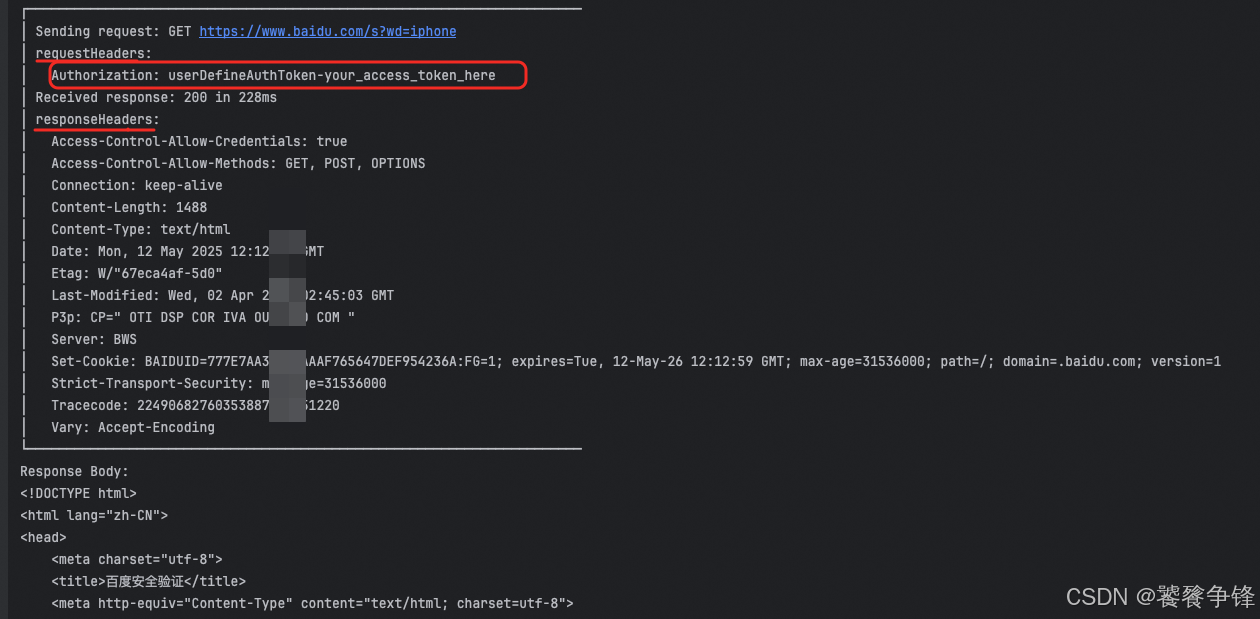
step3.注意事项
- Token 安全性:请勿在生产环境中硬编码 Token,应从安全存储或认证服务中动态获取。
- 异常处理:示例中使用了基本的异常处理逻辑,建议根据业务需求进行扩展。
- 资源管理:使用
try-with-resources或手动调用response.body().close()确保资源被释放。 - 日志安全性:避免在生产环境中记录敏感信息(如 Token、密码、请求体内容),可在正式环境移除或禁用日志拦截器。
- 性能影响:日志记录可能增加请求处理时间,建议在调试阶段启用,生产环境关闭。
- 扩展性:可以根据需求自定义日志格式,例如添加请求体、响应体内容(需谨慎处理)。
3. 扩展&总结
3.1 拦截器的分类与使用场景
| 拦截器类型 | 特点 |
|---|---|
| 应用拦截器 | 每个请求只执行一次,适用于添加统一的请求头、日志等通用逻辑。 |
| 网络拦截器 | 在重试时会再次执行,适用于网络层的处理,如缓存、代理等。 |
添加方式区别:
- 应用拦截器:
client.addInterceptor(...) - 网络拦截器:
client.addNetworkInterceptor(...)
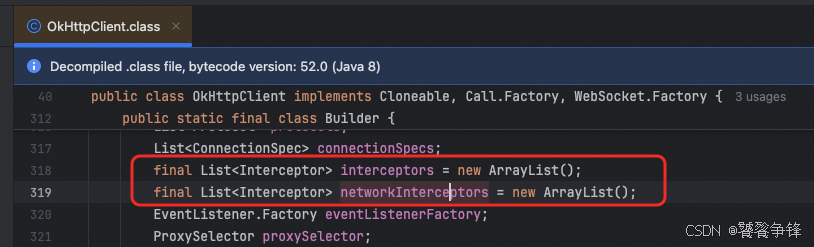
两种拦截器其实都是 Interceptor 的实现类,只是在功能上做了区分:
3.2 注意事项
- 线程安全:拦截器可能在多个线程中运行,需注意线程安全。
- 性能影响:避免在拦截器中执行耗时操作(如数据库查询)。
- 避免无限循环:确保
proceed方法被调用,否则请求会阻塞。 - 请求不可变性:修改请求时需通过
newBuilder()创建副本,不能直接修改原始请求。 - 敏感信息:日志拦截器中应避免打印敏感数据(如 Token、密码)。
3.3 总结
okhttp3.Interceptor 是一个强大且灵活的工具,能够帮助开发者在 HTTP 请求生命周期中插入各种逻辑。通过合理使用拦截器,可以简化网络请求的复杂度,提高代码的可维护性和复用性。在实际开发中,建议结合具体业务需求选择合适的拦截器类型,并遵循最佳实践。