Java创建多线程的四种方式
前言
为了满足性能或其他非功能性需求,Java 的多线程编程,并提供了四种主要方法来创建和管理线程。这篇文章将详细介绍这四种方法,并对这四种方式都进行梳理分析,帮助你选择最佳方案。

继承 Thread 类(最基础的方式)
1、原理
通过继承 Thread 类,重写其 run() 方法,该方法包含线程要执行的任务;
创建子类实例后,调用 start() 方法启动线程;
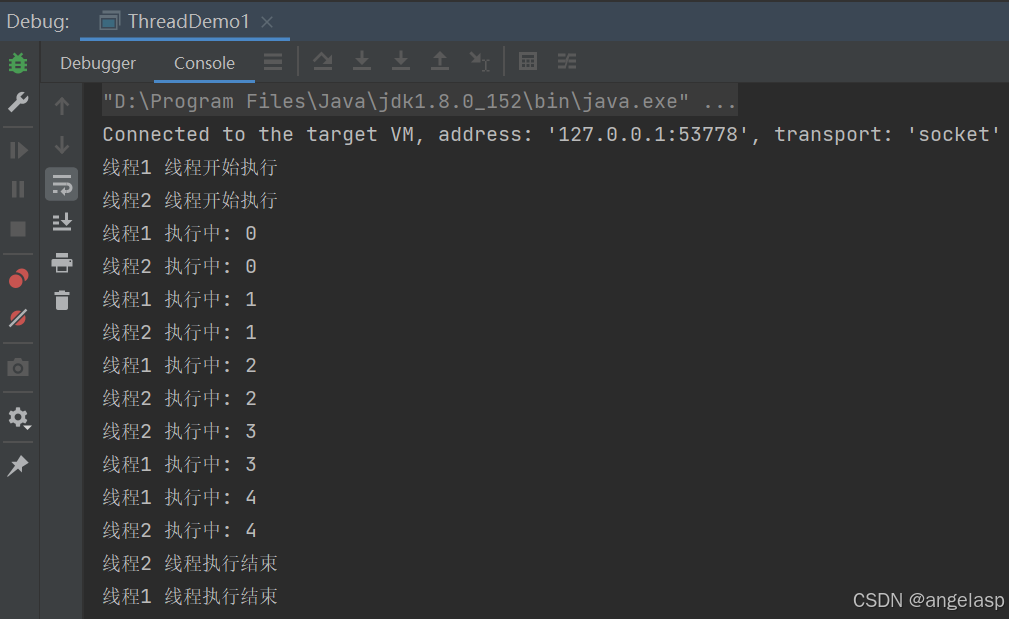
2、代码示例
// 1. 继承 Thread 类
class MyThread extends Thread {private String name;public MyThread(String name) {this.name = name;}@Overridepublic void run() {System.out.println(name + " 线程开始执行");for (int i = 0; i < 5; i++) {System.out.println(name + " 执行中: " + i);try {Thread.sleep(500); // 线程休眠 500 毫秒} catch (InterruptedException e) {e.printStackTrace();}}System.out.println(name + " 线程执行结束");}
}public class ThreadDemo1 {public static void main(String[] args) {// 创建线程实例MyThread thread1 = new MyThread("线程1");MyThread thread2 = new MyThread("线程2");// 启动线程thread1.start();thread2.start();}
}
实现 Runnable 接口(更推荐的方式)
1、原理
实现 Runnable 接口的 run() 方法,将任务封装在实现类中。
通过 Thread 类包装 Runnable 实例,并调用 start() 启动线程。
优势:避免单继承限制,更符合面向对象设计原则。
2、代码示例
方式一:
// 2. 实现 Runnable 接口
class MyRunnable implements Runnable {private String name;public MyRunnable(String name) {this.name = name;}@Overridepublic void run() {System.out.println(name + " 任务开始执行");for (int i = 0; i < 5; i++) {System.out.println(name + " 执行中: " + i);try {Thread.sleep(500);} catch (InterruptedException e) {e.printStackTrace();}}System.out.println(name + " 任务执行结束");}
}public class ThreadDemo2 {public static void main(String[] args) {// 创建 Runnable 实例MyRunnable runnable1 = new MyRunnable("任务1");MyRunnable runnable2 = new MyRunnable("任务2");// 通过 Thread 包装并启动Thread thread1 = new Thread(runnable1);Thread thread2 = new Thread(runnable2);thread1.start();thread2.start();}
}
方式二:
匿名内部类写法
public class ThreadDemo2_Anonymous {public static void main(String[] args) {// 使用匿名内部类实现 RunnableThread thread = new Thread(new Runnable() {@Overridepublic void run() {System.out.println("匿名内部类 Runnable 任务执行中");}});thread.start();// Java 8 Lambda 表达式写法Thread threadLambda = new Thread(() -> {System.out.println("Lambda 表达式 Runnable 任务执行中");});threadLambda.start();}
}
使用 Callable 和 Future(带返回值的线程)
1、原理
Callable 接口的 call() 方法可返回值并抛出异常,比 Runnable 更强大。
通过 FutureTask 包装 Callable 实例,它同时实现了 Runnable 和 Future 接口。
Future 用于获取线程执行结果或取消任务。
2、代码示例
import java.util.concurrent.Callable;
import java.util.concurrent.FutureTask;// 3. 使用 Callable 和 Future
class MyCallable implements Callable<Integer> {private String name;public MyCallable(String name) {this.name = name;}@Overridepublic Integer call() throws Exception {System.out.println(name + " 计算任务开始");int sum = 0;for (int i = 1; i <= 100; i++) {sum += i;Thread.sleep(10);}System.out.println(name + " 计算任务结束");return sum;}
}public class ThreadDemo3 {public static void main(String[] args) throws Exception {// 创建 Callable 实例MyCallable callable1 = new MyCallable("计算任务1");MyCallable callable2 = new MyCallable("计算任务2");// 用 FutureTask 包装 CallableFutureTask<Integer> futureTask1 = new FutureTask<>(callable1);FutureTask<Integer> futureTask2 = new FutureTask<>(callable2);// 通过 Thread 启动Thread thread1 = new Thread(futureTask1);Thread thread2 = new Thread(futureTask2);thread1.start();thread2.start();// 获取任务执行结果(会阻塞当前线程直到任务完成)Integer result1 = futureTask1.get();Integer result2 = futureTask2.get();System.out.println("任务1结果: " + result1);System.out.println("任务2结果: " + result2);}
}
使用线程池(高效管理线程的方式)
1、原理
线程池可复用线程,避免频繁创建和销毁线程的开销。
通过 ExecutorService 接口管理线程池,常用实现类为 ThreadPoolExecutor。
提供 submit() 和 execute() 方法提交任务,通过 shutdown() 关闭线程池。
2、代码示例
import java.util.concurrent.Callable;
import java.util.concurrent.ExecutorService;
import java.util.concurrent.Executors;
import java.util.concurrent.Future;public class ThreadDemo4 {public static void main(String[] args) throws Exception {// 1. 创建线程池(FixedThreadPool 固定大小线程池)ExecutorService executorService = Executors.newFixedThreadPool(3);// 2. 提交 Runnable 任务executorService.execute(new Runnable() {@Overridepublic void run() {System.out.println("线程池执行 Runnable 任务1");}});// 3. 提交 Callable 任务并获取 FutureFuture<String> future = executorService.submit(new Callable<String>() {@Overridepublic String call() throws Exception {System.out.println("线程池执行 Callable 任务2");Thread.sleep(1000);return "任务2执行完成";}});// 4. 获取 Callable 任务结果System.out.println(future.get());// 5. 关闭线程池(不再接受新任务,处理完已提交任务后关闭)executorService.shutdown();}
}
总结
1、四种方式对比
| 创建方式 | 核心接口 / 类 | 是否支持返回值 | 是否支持异常处理 | 适用场景 |
|---|---|---|---|---|
| 继承 Thread | Thread | 否 | 否 | 简单任务,不考虑资源复用 |
| 实现 Runnable | Runnable | 否 | 否 | 推荐方式,避免单继承限制 |
| Callable + Future | Callable, FutureTask | 是 | 是 | 需要任务返回值或异常处理 |
| 线程池 | ExecutorService | 是(通过 Future) | 是 | 大量任务、需要复用线程的场景 |
2、使用总结
实际开发中,线程池是最常用的方式,它能有效管理线程资源,避免内存泄漏和性能损耗,尤其适合高并发场景。而 Callable 则在需要获取任务执行结果时使用,选择正确的线程创建方法依赖于您的特定场景和需求。
在某些情况下,简单的方法可能会更好地服务您的目标和限制条件。
如果小伙伴喜欢的话,希望给点赞收藏加关注哦!!! 感谢大家的支持!!😊🙏