炫酷JavaScript鼠标跟随特效
事件类型:
<!DOCTYPE html>
<html lang="en">
<head><meta charset="UTF-8"><title>Title</title>
</head>
<body>
<input type="text" value="你好你好你好">
<script>let _input=document.querySelector('input')//聚焦_input.onfocus=function(){if(_input.value=="你好你好你好"){_input.value=''}}//失去焦点_input.onblur=function(){if(_input.value==""){_input.value='你好你好你好'}}//value值改变失去焦点才会触发_input.onchange=function(){console.log(_input.value)}//表单输入实时触发_input.oninput=function(){console.log(_input.value)}
</script>
</body>
</html>
聚焦:
当光标点击输入框时将清空里面的内容:
_input.onfocus=function(){if(_input.value=="你好你好你好"){_input.value=''}失去焦点:
当光标离开输入框就会显示原有的内容:
_input.onblur=function(){if(_input.value==""){_input.value='你好你好你好'}}当用户输入内容并且失去焦点时将会触发:
_input.onchange=function(){console.log(_input.value)}表单实时触发:
在输入框中输入什么控制台就会输出什么:

_input.oninput=function(){console.log(_input.value)}表单验证:
<!DOCTYPE html>
<html lang="en">
<head><meta charset="UTF-8"><title>Title</title>
</head>
<body>
<div><form action=""><div>用户名:<input type="text" name="username" placeholder="手机号"><span class="usererr"></span></div><div>密码:<input type="text" name="pwd" placeholder="大小写"><span class="pwderr"></span></div><div><input type="submit" value="注册"></div></form>
</div>
<script>let phone_reg=/^\d{11}$/;let pwd_reg=/^\d{11}$/let _username=document.querySelector('input[name=username]')let _usererr=document.querySelector('.usererr')let _pwd=document.querySelector('input[name=pwd]')let _pwderr=document.querySelector('.pwderr')let _form=document.querySelector('form')_username.onblur = function() {checkuser()}_pwd.onblur = function() {checkpwd()}//验证用户名function checkuser(){//每次验证之前先清空提示_usererr.innerHTML=''//非空验证if(_username.value==""){_usererr.innerHTML='用户名不能为空'return false}//格式验证if(!phone_reg.test(_username.value)){_usererr.innerHTML='格式不正确'return false}return true}//验证密码function checkpwd(){//每次验证之前先清空提示_pwderr.innerHTML=''//非空验证if(_pwd.value==""){_pwderr.innerHTML='密码不能为空'return false}//格式验证if(!pwd_reg.test(_pwd.value)){_pwderr.innerHTML='格式不正确'return false}return true}//表单提交事件_form.onsubmit = function() {//return checkuser()&&checkpwd()//如果用户名没有填写或不正确光标聚焦到用户输入框if(!checkuser()){_username.focus()return false}//如果密码没有填写或不正确光标聚焦到密码输入框if(!checkpwd()){_pwd.focus()return false}return true}
</script>
</body>
</html>
先设置用户名和密码的样式这里都用11位数字代替:
let phone_reg=/^\d{11}$/;let pwd_reg=/^\d{11}$/用户名验证:
首先把用户输入框清空,当用户输入为空时将会提示'用户名不能为空',格式不正确时也会提示格式不正确:
![]()

function checkuser(){_usererr.innerHTML=''if(_username.value==""){_usererr.innerHTML='用户名不能为空'return false}if(!phone_reg.test(_username.value)){_usererr.innerHTML='格式不正确'return false}return true}密码验证也是一样的:


function checkpwd(){//每次验证之前先清空提示_pwderr.innerHTML=''//非空验证if(_pwd.value==""){_pwderr.innerHTML='密码不能为空'return false}//格式验证if(!pwd_reg.test(_pwd.value)){_pwderr.innerHTML='格式不正确'return false}return true}如果用户名或密码没有填写光标将自动聚焦到输入框上:

在函数运行前需要先调用函数:
_username.onblur = function() {checkuser()}_pwd.onblur = function() {checkpwd()}
_form.onsubmit = function() {//return checkuser()&&checkpwd()if(!checkuser()){_username.focus()return false}if(!checkpwd()){_pwd.focus()return false}return true鼠标事件:
<!DOCTYPE html>
<html lang="en">
<head><meta charset="UTF-8"><title>Title</title>
</head>
<body>
<button>点击</button>
<script>//双击事件let _btn=document.querySelector('button');_btn.ondblclick=function(){console.log('双击')}//悬浮事件_btn.onmouseenter=function(){console.log('鼠标悬浮')}//离开事件_btn.onmouseout=function(){console.log('鼠标离开')}//移动事件_btn.onmousemove=function(){console.log('鼠标移动')}//摁下事件_btn.onmousedown=function(){console.log('鼠标摁下')}//弹起事件_btn.onmouseup=function(){console.log('鼠标弹起')}
</script>
</body>
</html>
双击鼠标控制台就会打印:
![]()
let _btn=document.querySelector('button');_btn.ondblclick=function(){console.log('双击')}当鼠标悬浮在按钮上就会打印:
![]()
_btn.onmouseenter=function(){console.log('鼠标悬浮')}鼠标离开事件:
_btn.onmouseout=function(){console.log('鼠标离开')}鼠标移动事件:
![]()
_btn.onmousemove=function(){console.log('鼠标移动')}鼠标按下事件:
![]()
_btn.onmousedown=function(){console.log('鼠标摁下')}鼠标弹起事件:
![]()
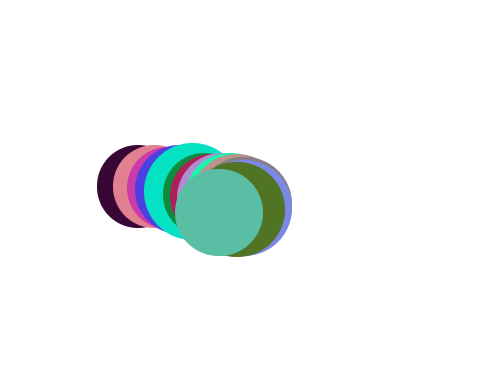
_btn.onmouseup=function(){console.log('鼠标弹起')}鼠标跟随效果:
<!DOCTYPE html>
<html lang="en">
<head><meta charset="UTF-8"><title>Title</title>
</head>
<body>
<script> function randomColor(){let a=parseInt(Math.random()*256);let b=parseInt(Math.random()*256);let c=parseInt(Math.random()*256);return `rgb(${a},${b},${c})`}document.onmousemove=function (event){//获取鼠标坐标let dx=event.pageX;let dy=event.pageY;//构造一个圆let _div=document.createElement("div");let num=parseInt(Math.random()*10+50);_div.style.width=num+'px';_div.style.height=num+'px';_div.style.background=randomColor()_div.style.borderRadius='50%'//圆的位置跟随鼠标移动_div.style.position='absolute';_div.style.left=(dx-num/2)+'px';_div.style.top=(dy-num/2)+'px';//追加document.body.append(_div);//延迟删除setTimeout(function(){_div.remove();},500)}</script>
</body>
</html>
获取鼠标点击时的坐标:
let dx=event.pageX;let dy=event.pageY;构造一个圆形:
let _div=document.createElement("div");let num=parseInt(Math.random()*10+50);_div.style.width=num+'px';_div.style.height=num+'px';_div.style.background=randomColor()_div.style.borderRadius='50%'圆的背景颜色:
function randomColor(){let a=parseInt(Math.random()*256);let b=parseInt(Math.random()*256);let c=parseInt(Math.random()*256);return `rgb(${a},${b},${c})`}给圆加一个绝对定位,左边和顶部的距离都是x,y轴到圆边距的距离
_div.style.position='absolute';_div.style.left=(dx-num/2)+'px';_div.style.top=(dy-num/2)+'px';把div追加到body里面:
document.body.append(_div);延迟删除:
setTimeout(function(){_div.remove();},500)位置:
<!DOCTYPE html>
<html lang="en">
<head><meta charset="UTF-8"><meta name="viewport" content="width=device-width, initial-scale=1.0"><title>Document</title><style>.app {width: 300px;height: 300px;background-color: #ac9090;position: relative;overflow: auto;}.first{width: 200px;height: 200px;background-color: red;margin-left: 50px;}.second{width: 200px;height: 200px;margin-left: 50px;background-color: #2c0b0e;}</style>
</head>
<body><div class="app"><div class="first"></div><div class="second"></div></div><script>/*** 位置:一个元素在某个文档的坐标(和滚动条无关)* offsetTop:相对于最近的已经定位祖先元素的偏移量* 如果祖先元素没有定位,相对于浏览器*/let _app=document.querySelector('.app')let _first=document.querySelector('.first')let _second=document.querySelector('.second')console.log(_app.offsetLeft,_app.offsetTop)console.log(_first.offsetLeft,_first.offsetTop)console.log(_second.offsetLeft,_second.offsetTop)</script>
</body>
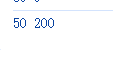
</html>因为app没有祖先元素所以是相对浏览器的偏移量:左边和顶部都是8
![]()
console.log(_app.offsetLeft,_app.offsetTop)因为first的祖先是app所以相对app的左边距离是50,而顶部距离为0:
![]()
console.log(_first.offsetLeft,_first.offsetTop)second的是在first的下面所以它定义的宽度与first相同但是距离app的高度是first的高度:
console.log(_second.offsetLeft,_second.offsetTop)放大镜:
<!DOCTYPE html>
<html lang="en">
<head><meta charset="UTF-8"><meta name="viewport" content="width=device-width, initial-scale=1.0"><title>Document</title><style>/* 原图: 720*720大图与小图比例=大放大镜与小大镜比例*/.app{display: flex;}.app>div{width:360px;height:360px;margin-right: 50px;}.left{border: 1px solid black;position: relative;}.left img{width: 360px;}.right{border: 1px solid rgb(86, 88, 192);overflow: hidden;position: relative;}.right>img{position: absolute;}.mark{width:138px ;height:138px;background-color:white;opacity: 0.5;position: absolute;left:0;top:0;}</style>
</head>
<body><div class="app"><div class="left"><div><img src="./洗手台.jpg" alt=""></div><div class="mark"></div></div><div class="right"><img src="./洗手台.jpg" alt=""></div></div><script>let _left=document.querySelector('.left');let _mark=document.querySelector('.mark');let _img=document.querySelector('.right>img');//进入显示放大镜_left.onmouseenter=function(){_mark.style.display='block';}//离开隐藏放大镜_left.onmouseleave=function(){_mark.style.display='none';}_left.onmousemove=function(event){//计算放大镜坐标let dx=event.pageX-_left.offsetLeft-_mark.offsetWidth/2;//到左边if (dx<=0){dx=0}//到右边if (dx>=_left.clientWidth-_mark.offsetWidth){dx=_left.clientWidth-_mark.offsetWidth}let dy=event.pageY-_left.offsetTop-_mark.offsetHeight/2;//到上边if (dy<=0){dy=0}//到下边if (dy>=_left.clientHeight-_mark.offsetHeight){dy=_left.clientHeight-_mark.offsetHeight}_mark.style.left=dx+'px';_mark.style.top=dy+'px';_img.style.left=-dx*2+'px';_img.style.top=-dy*2+'px';}</script>
</body>
</html>
鼠标进入图片时显示放大镜:
_left.onmouseenter=function(){_mark.style.display='block';}鼠标离开图片时放大镜隐藏:
_left.onmouseleave=function(){_mark.style.display='none';}计算到左边和到右边的距离,让放大镜不会脱离图片:
let dx=event.pageX-_left.offsetLeft-_mark.offsetWidth/2;if (dx<=0){dx=0}if (dx>=_left.clientWidth-_mark.offsetWidth){dx=_left.clientWidth-_mark.offsetWidth}
上面和下面也是一样:
if (dy<=0){dy=0}//到下边if (dy>=_left.clientHeight-_mark.offsetHeight){dy=_left.clientHeight-_mark.offsetHeight}_mark.style.left = dx + 'px'设置
_mark元素的水平位置(left)为变量dx的值加上单位px。dx应为数值类型,表示像素偏移量。
_mark.style.top = dy + 'px'设置
_mark元素的垂直位置(top)为变量dy的值加上单位px。dy应为数值类型,表示像素偏移量。
_img.style.left = -dx * 2 + 'px'设置
_img元素的水平位置(left)为-dx * 2的值加上单位px。负值表示向左移动,且移动距离是
dx的两倍。
_img.style.top = -dy * 2 + 'px'设置
_img元素的垂直位置(top)为-dy * 2的值加上单位px。负值表示向上移动,且移动距离是
dy的两倍。
_mark.style.left=dx+'px';_mark.style.top=dy+'px';_img.style.left=-dx*2+'px';_img.style.top=-dy*2+'px';鼠标拖拽:
- 拖拽开始时绑定
onmousemove事件 - 拖拽结束时通过
onmouseup解除移动监听 - 防止鼠标松开后元素继续跟随鼠标移动
<!DOCTYPE html>
<html lang="en">
<head><meta charset="UTF-8"><title>Title</title><style>.app{width: 200px;height: 200px;background-color: red;}</style>
</head>
<body>
<div class="app"></div>
<script>let _app=document.querySelector('.app')_app.onmousedown=function(event) {//计算鼠标在app的坐标let dx=event.pageX - _app.offsetLeft;let dy=event.pageY - _app.offsetTop;_app.onmousemove=function(event) {_app.style.position = 'absolute';_app.style.left=event.pageX-dx + 'px';_app.style.top=event.pageY-dy + 'px';}_app.onmouseup=function() {_app.onmousemove = null;}}
</script>
</body>
</html>
计算鼠标的坐标:
let dx=event.pageX - _app.offsetLeft;let dy=event.pageY - _app.offsetTop;元素通过position: absolute定位,根据鼠标移动事件更新left和top样式属性。event.pageX和event.pageY获取鼠标当前页面坐标。
_app.onmousemove=function(event) {_app.style.position = 'absolute';_app.style.left=event.pageX-dx + 'px';_app.style.top=event.pageY-dy + 'px';}- 当在
_app元素上触发mouseup事件时,会将onmousemove事件处理器设为null,从而解除之前绑定的鼠标移动事件监听。
_app.onmouseup=function() {_app.onmousemove = null;}