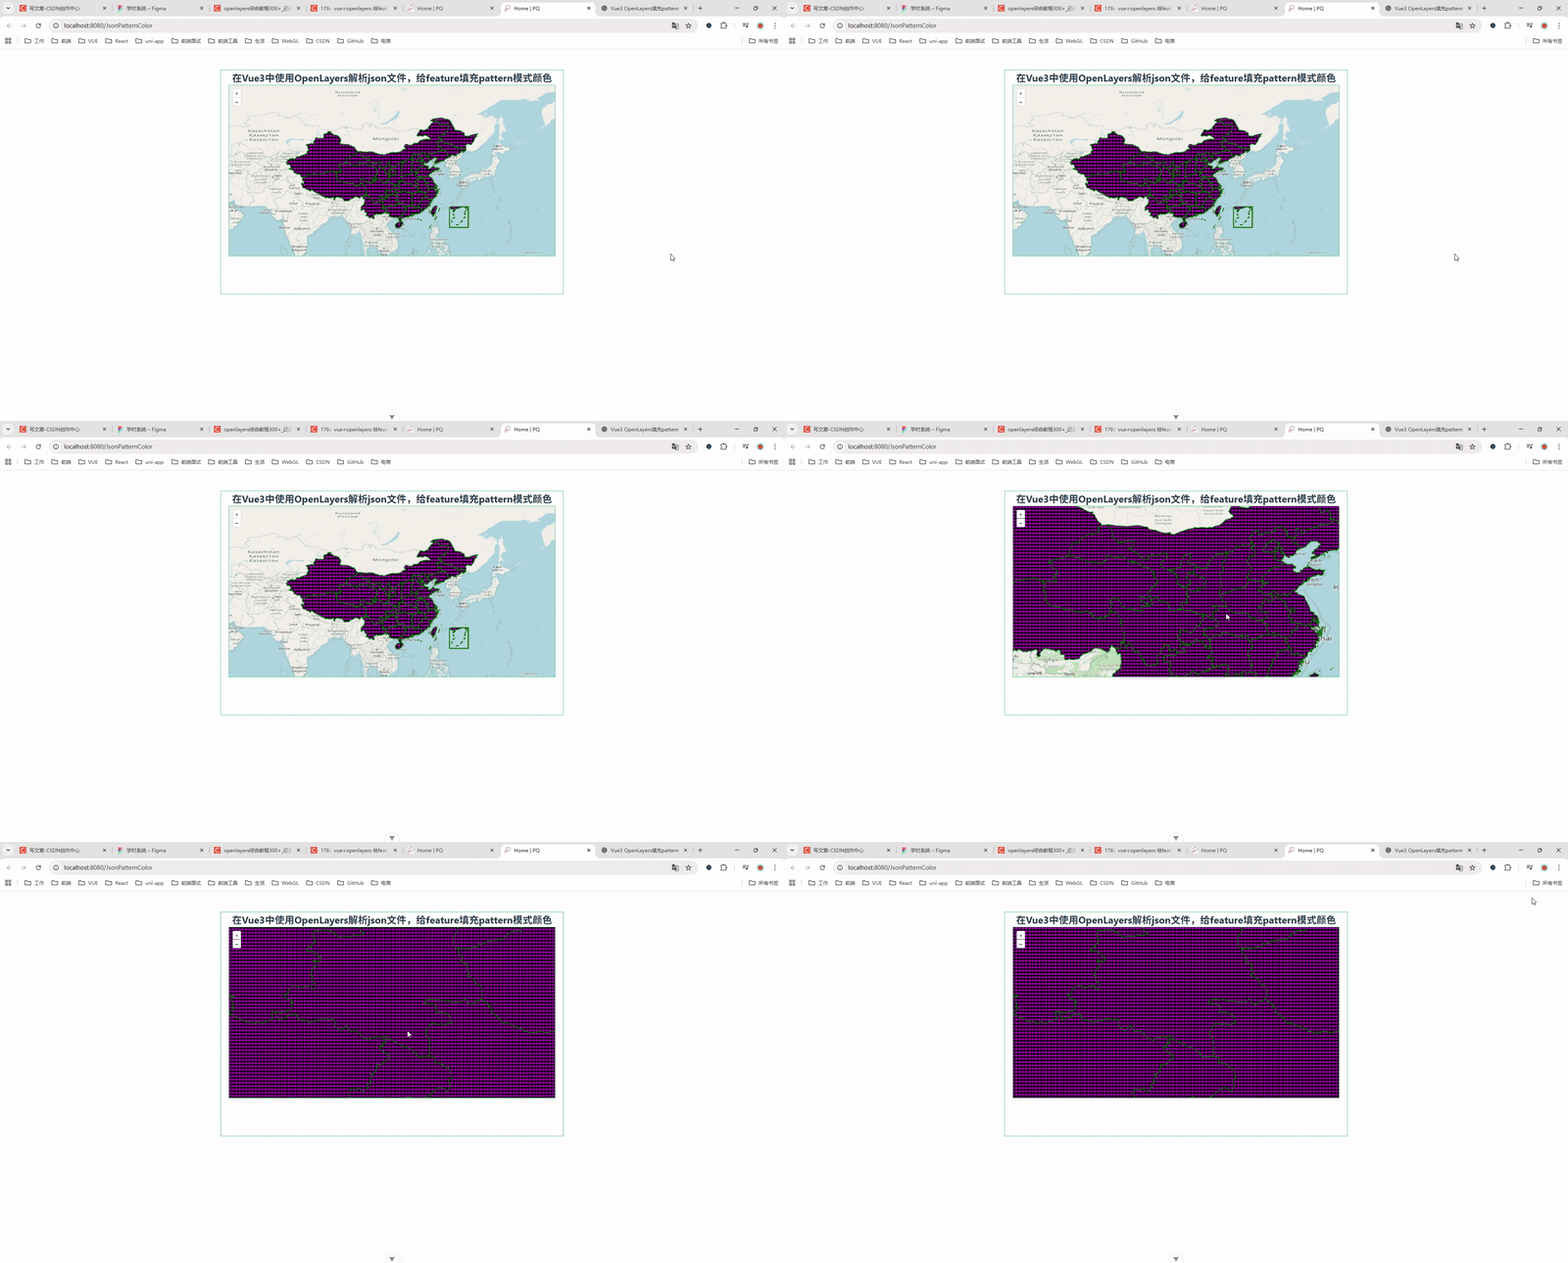
163.在 Vue3 中使用 OpenLayers 解析 GeoJSON,并给 Feature 填充 pattern(图案)颜色
摘要
本文演示如何在 Vue 3(<script setup>)中使用 OpenLayers(ol)解析本地 GeoJSON 文件,并为矢量要素(Feature)使用 Canvas 生成的 pattern(图案)进行填充。示例包含完整源码、关键点解析、性能优化建议、交互(高亮/提示)和发布到 CSDN 的注意事项,适合想在前端地图上实现自定义图案填充的开发者参考。
效果图

1. 前提与依赖
Node 及 NPM/Yarn(推荐使用 Vite + Vue 3 项目)
Vue 3(本文使用
<script setup>)OpenLayers(
ol包)
安装依赖(在项目根目录运行):
npm install ol
# or
yarn add ol
说明:代码示例基于
ol的模块化用法(如ol/Map,ol/layer/Vector等),在 OpenLayers 6+ 版本通用。
2. 项目结构与数据准备
示例中假设你有一个 GeoJSON 文件(如 src/assets/map/china.json),并在组件中通过 import 引入:
import geojsonObject from '@/assets/map/china.json'
项目主要文件(简要):
src/
├─ assets/
│  └─ map/china.json
└─ components/└─ MapPattern.vue   # 本示例组件
3. 完整示例源码(可直接复制到组件)
下面示例在保证可读性的同时对原始实现做了小幅优化(样式缓存、使用 https 的 OSM 图元源、以及更稳健的 pixel-ratio 兼容处理)。你可以直接把它复制到
MapPattern.vue:
<!--* @Author: 彭麒* @Date: 2025/8/29* @Email: 1062470959@qq.com* @Description: 此源码版权归吉檀迦俐所有,可供学习和借鉴或商用。-->
<template><div class="container"><div class="w-full flex justify-center flex-wrap"><div class="font-bold text-[24px]">在Vue3中使用OpenLayers解析json文件,给feature填充pattern模式颜色</div></div><div id="vue-openlayers"></div></div>
</template><script setup>
import 'ol/ol.css'
import { Map, View } from 'ol'
import SourceVector from 'ol/source/Vector'
import LayerVector from 'ol/layer/Vector'
import GeoJSON from 'ol/format/GeoJSON'
import { DEVICE_PIXEL_RATIO } from 'ol/has'
import { Tile } from 'ol/layer'
import XYZ from 'ol/source/XYZ'
import Style from 'ol/style/Style'
import Fill from 'ol/style/Fill'
import Stroke from 'ol/style/Stroke'// 引用数据
import geojsonObject from '@/assets/map/china.json'
import { onMounted } from 'vue'let map = null// 数据源
const source = new SourceVector({features: new GeoJSON().readFeatures(geojsonObject, {dataProjection: 'EPSG:4326',featureProjection: 'EPSG:4326'})
})// 视图
const view = new View({projection: 'EPSG:4326',center: [112.8, 41.5],zoom: 3
})// 获取样式(渐变填充)
function getStyle() {const pixelRatio = DEVICE_PIXEL_RATIOconst canvas = document.createElement('canvas')const context = canvas.getContext('2d')const gradient = context.createLinearGradient(0, 0, 1024 * pixelRatio, 0)var pattern = (function() {canvas.width = 8 * pixelRatio;canvas.height = 8 * pixelRatio;context.fillStyle = 'black';context.fillRect(0, 0, canvas.width, canvas.height);context.fillStyle = 'rgba(252, 0, 255, 0.8)';context.beginPath();context.arc(4 * pixelRatio, 4 * pixelRatio, 3 * pixelRatio, 0, 2 * Math.PI);context.fill();return context.createPattern(canvas, 'repeat');}());gradient.addColorStop(0, 'red')gradient.addColorStop(1 / 3, 'orange')gradient.addColorStop(2 / 3, 'yellow')gradient.addColorStop(1, 'green')return new Style({fill: new Fill({color: pattern}),stroke: new Stroke({width: 2,color: 'darkgreen'})})
}// 初始化地图
function initMap() {map = new Map({target: 'vue-openlayers',layers: [new Tile({source: new XYZ({url: 'http://{a-c}.tile.openstreetmap.de/{z}/{x}/{y}.png'})}),new LayerVector({source: source,style: getStyle})],view})
}onMounted(() => {initMap()
})
</script><style scoped>
.container {width: 840px;height: 550px;margin: 50px auto;border: 1px solid #42B983;
}#vue-openlayers {width: 800px;height: 420px;margin: 0 auto;border: 1px solid #42B983;position: relative;
}
</style>
4. 代码逐行解析(关键点)
import 'ol/ol.css':引入 OpenLayers 的默认样式,确保控件、缩放控件等样式正确显示。VectorSource与GeoJSON().readFeatures(...):用来把 GeoJSON 转换为 OpenLayers 的Feature列表并注入到VectorSource。View的projection:示例使用EPSG:4326(经纬度),如果你的 GeoJSON 是EPSG:3857或者你要使用 Web Mercator,请相应修改dataProjection/featureProjection。createPattern():核心函数,利用canvas画出一个小图块(tile),然后调用context.createPattern(canvas, 'repeat')得到图案对象,赋给Fill.color即可实现重复图案填充。为何把 pattern 缓存起来? 生成 canvas、context、pattern 都是 DOM 操作且比较耗性能,若在样式函数中每次都创建会非常慢,所以要尽量复用同一个
Style或缓存不同风格的Style。
5. pattern 实现细节与常见问题
5.1 Device Pixel Ratio(Retina 显示器)
为避免图案在高 DPI 屏幕上变模糊,需要根据设备像素比放大 canvas 的像素尺寸(canvas.width/height)并在绘制时按比例放大坐标;但保持 CSS 大小不变(通过不设置 canvas 的 CSS 大小即可)。在示例中使用 DEVICE_PIXEL_RATIO 或 window.devicePixelRatio。
5.2 pattern 的范围与 gradient 的区别
pattern是按 tile(你画的 canvas 小图)进行重复的,因此图案本身局限在 tile 内。若希望跨越整个地图实现渐变色(例如从西向东逐渐变化),使用pattern并不适合,而应该使用canvas渲染到覆盖整个区域或使用Style的fill=>color设置渐变(OpenLayers 原生Fill不支持跨多边形渐变,通常需要自定义渲染)。
5.3 CORS / Mixed Content
在使用外部瓦片服务(
XYZ)时,注意服务是否支持https,以及是否设置了允许跨域(CORS)请求,否则图片可能无法加载或在某些浏览器被拦截。
5.4 样式函数签名
OpenLayers 在渲染时会以 (feature, resolution) 的方式调用样式函数。即使你传入一个无参数的函数(像示例中的 styleFunction 返回 cachedStyle),OpenLayers 依然会正确调用并渲染。
6. 性能优化建议
缓存 Style 与 Pattern:永远不要在样式函数里动态
new Style()或createPattern(),除非确实需要动态变化。把常见样式放到外层缓存。按属性缓存:若你需要按某个字段(如
feature.get('type'))返回不同样式,使用一个 Map 对不同type缓存Style对象。按分辨率缓存:如果样式受
resolution强烈影响,可以把缓存键与Math.round(resolution)绑定以减少重复创建。减少 DOM 操作:创建 canvas、image 等尽量只做一次。
批量加载 GeoJSON:对于超大 GeoJSON,考虑按需加载或服务器切片(vector tiles)以避免一次性加载大量 feature。
7. 添加交互(悬停高亮、Tooltip)
下面给出一个快速示例:鼠标移动到要素上高亮,并在要素上显示 Tooltip:
import Overlay from 'ol/Overlay'// tooltip DOM
const tooltip = document.createElement('div')
tooltip.className = 'ol-tooltip'
const overlay = new Overlay({ element: tooltip, offset: [10, 0], positioning: 'bottom-left' })
map.addOverlay(overlay)map.on('pointermove', function (evt) {const feature = map.forEachFeatureAtPixel(evt.pixel, f => f)if (feature) {tooltip.innerHTML = feature.get('name') || feature.get('properties')?.name || 'Unnamed'overlay.setPosition(evt.coordinate)// 临时高亮(构造高亮样式或改变 feature 的 style)feature.setStyle(new Style({fill: new Fill({ color: 'rgba(255,255,0,0.6)' }),stroke: new Stroke({ color: '#ff0', width: 2 })}))} else {overlay.setPosition(undefined)// 记得把 feature 恢复成原始样式(如果你改变了 feature.style)}
})
注意:如果用
feature.setStyle()临时覆盖样式,记得在pointerout或下一次pointermove时恢复原始样式,或把高亮样式缓存并复用,避免重复 new Style。
8. 总结
本文展示了如何在 Vue3 中使用 OpenLayers 从 GeoJSON 读取要素,并通过 Canvas 生成 pattern 填充要素。关键点是合理处理设备像素比、缓存 pattern/style、并注意外部瓦片的 https/CORS 问题。
