GraphQL 实战篇:Apollo Client 配置与缓存
GraphQL 实战篇:Apollo Client 配置与缓存
上一篇:GraphQL 入门篇:基础查询语法
依旧和上一篇的笔记一样,主实操,没啥过多的细节讲解,代码具体在:
https://github.com/GoldenaArcher/graphql-by-example
异常处理
官方文档参考: Error Handling
graphql 处理默认异常是没什么问题的,比如说 id 没有提供的情况:
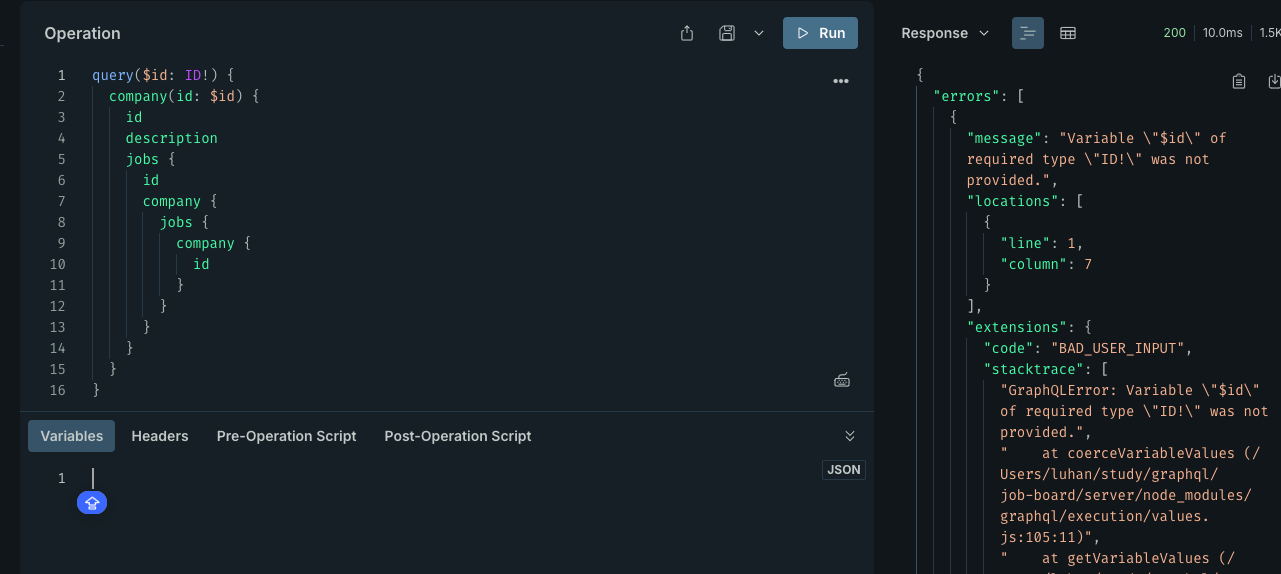
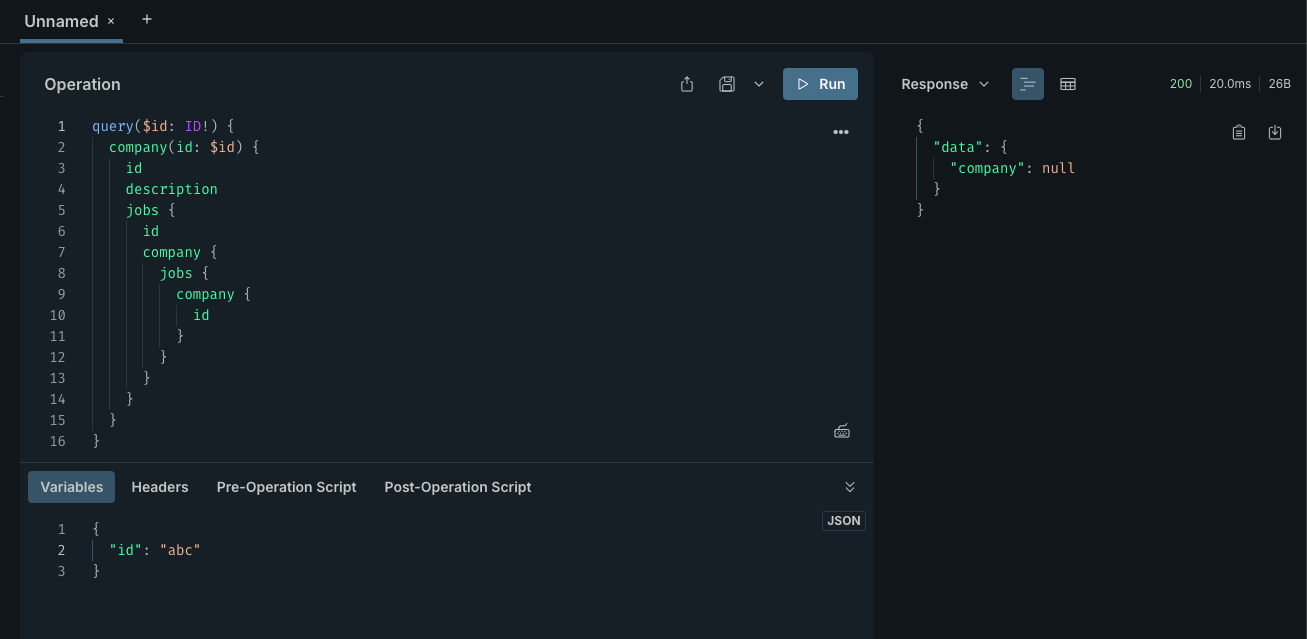
但是,再找不到数据的情况下,graphql 就会返回 null 而非报错:
诚然,使用 !Company 去强制执行非空也是一种解决方案:
type Query {job(id: ID!): Jobjobs: [Job]company(id: ID!): Company!
}
但是,这也会同样触发其他的问题,比如说下面这个情况,当所找的公司不存在,又如果使用非空操作就会跑出内部异常错误,同时 job 的 query 也会终止:
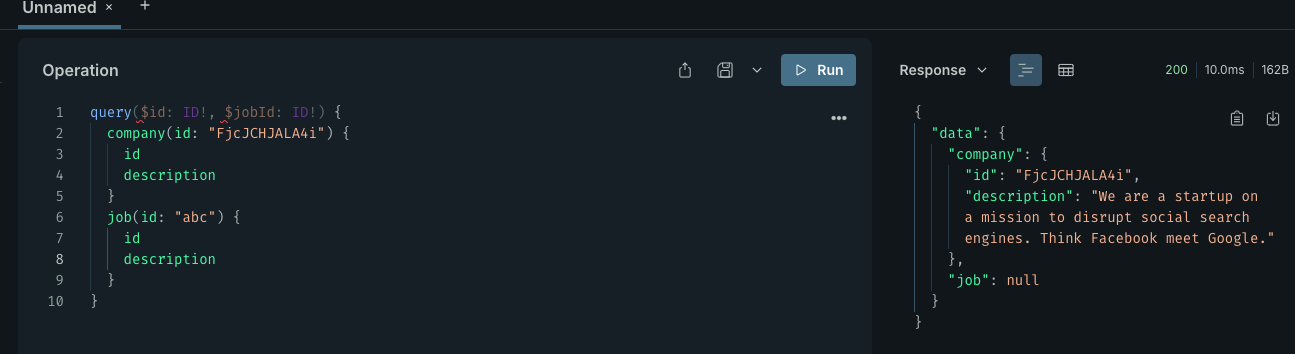
尽管这种调用方式比较少见,但是也是具有特定的业务场景的,因此返回值并不推荐使用强制非空操作,而是建议使用 custom error
custom errors - server
这里只需要更新 resolvers 即可:
import { GraphQLError } from "graphql";
import { getJobs, getJob, getJobsByCompany } from "./db/jobs.js";
import { getCompany } from "./db/companies.js";export const resolvers = {Query: {// new code here, can extract into functionjob: async (_root, { id }) => {const job = await getJob(id);if (!job) {throw new GraphQLError("Job not found: " + id, {extensions: {code: "NOT_FOUND",},});}return job;},jobs: async () => getJobs(),// new code herecompany: async (_root, { id }) => {const company = await getCompany(id);if (!company) {throw new GraphQLError("Company not found: " + id, {extensions: {code: "NOT_FOUND",},});}return company;},},
};
GraphQLError 我这里用了 class-based 的实现:
class GraphQLNotFound extends GraphQLError {constructor(message) {super(message, {extensions: {code: "NOT_FOUND",// this will change the entire graphql status code, be sure to discuss how to approach it firsthttp: {status: 404,},},});}
}
用方法跑出对应的 GraphQLError 也可以
customer errors - client
服务端这里,主要还是在 fetch 的时候进行对应的操作,和正常的 rest 操作也没什么区别:
import { useParams } from "react-router";
import { useEffect, useState } from "react";
import { getCompany } from "../lib/graphql/queries";
import JobList from "../components/JobList";function CompanyPage() {const { companyId } = useParams();const [state, setState] = useState({company: null,loading: true,hasErrors: false,});useEffect(() => {(async () => {try {const company = await getCompany(companyId);setState({ company, loading: false, hasErrors: false });} catch (e) {setState({company: null,loading: false,hasErrors: true,});}})();}, [companyId]);const { company, loading, hasErrors } = state;if (loading) {return <div>Loading...</div>;}if (hasErrors) {return <div>Something went wrong...</div>;}return (<div><h1 className="title">{company.name}</h1><div className="box">{company.description}</div><h2 className="title is-5">Jobs At {company.name}</h2><JobList jobs={company.jobs} /></div>);
}export default CompanyPage;
效果如下:

mutation - add
开始 CUD 操作,这三类都可以被归类到 Mutation 中
mutation - add, server
对 company 来说,只有 title 和 description 可以被更新,不过因为目前没有做 auth 部分的实现,所以还是会写在 signature 里——但是没用上
- schema
type Mutation {createJob(title: String!, description: String, companyId: ID!): Job } - resolver
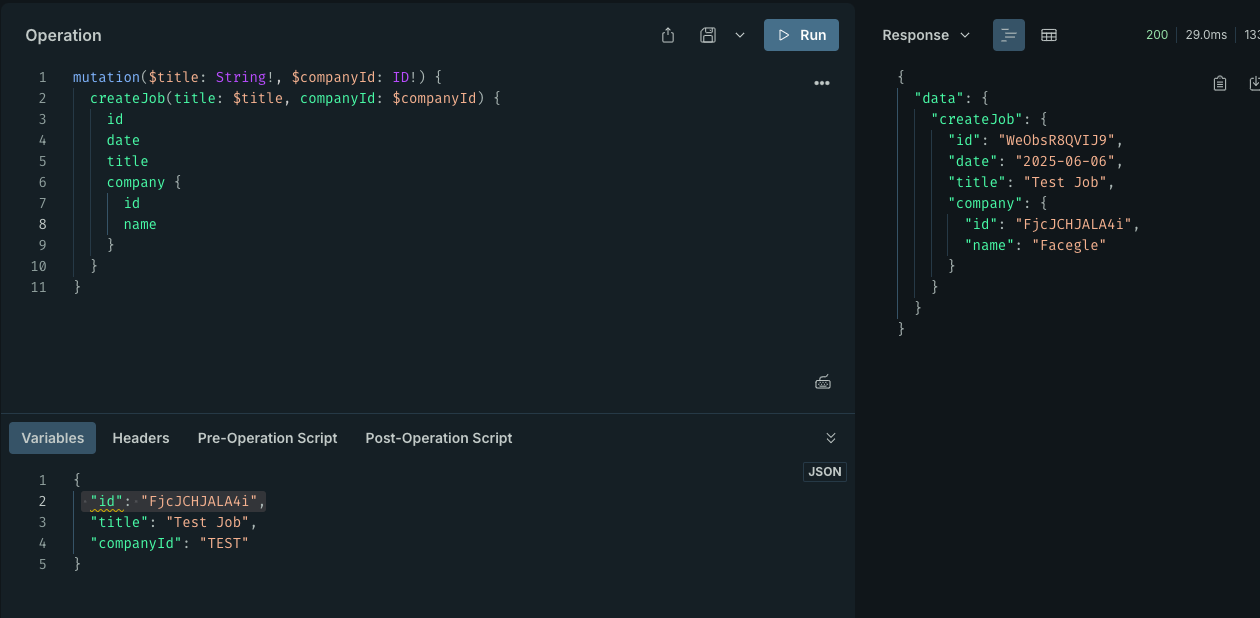
Mutation: {createJob: (_root, { title, description }) => {const companyId = "FjcJCHJALA4i"; // TODO - change it laterreturn createJob({ companyId, title, description });},},
sandbox 中验证更新:
mutation - add, client
- queries
query 这里的代码和 server 中差不多,不过返回数据只显示id去重新拉数据
CreateJobInput的实现看下一个 sectionexport async function createJob({ title, description }) {const mutation = gql`mutation CreateJob($input: CreateJobInput!) {createJob(input: $input) {id}}`;const { createJob: job } = await client.request(mutation, {input: {title,description,},});return job; } - react
import { useState } from "react";
import { useNavigate } from "react-router-dom";
import { createJob } from "../lib/graphql/queries";function CreateJobPage() {const navigate = useNavigate();const [title, setTitle] = useState("");const [description, setDescription] = useState("");const handleSubmit = async (event) => {event.preventDefault();const job = await createJob({ title, description });console.log(job);navigate(`/jobs/${job.id}`);};// 省略 JSX
}export default CreateJobPage;
效果如下:

Input Type
在 graphql 里,input 和 output 是两种不同的类型。之前定义的是 output,下面会重新定义 input:
- schema
type Mutation {createJob(input: CreateJobInput!): Job
}input CreateJobInput {title: String!description: String
}
mutation - delete
这里只更新 server 端:
- schema
type Mutation {deleteJob(id: ID!): Job } - resolvers
Mutation: {deleteJob: (_root, { id }) => {deleteJob(id);},},
mutation - update
这里只更新 server 端:
- schema
type Mutation {updateJob(input: UpdateJobInput!): Job }input UpdateJobInput {id: ID!title: Stringdescription: String } - resolvers
Mutation: {updateJob: async (_root, { input: { id, title, description } }) => {await updateJob({ id, title, description });},},
认证(Authentication)
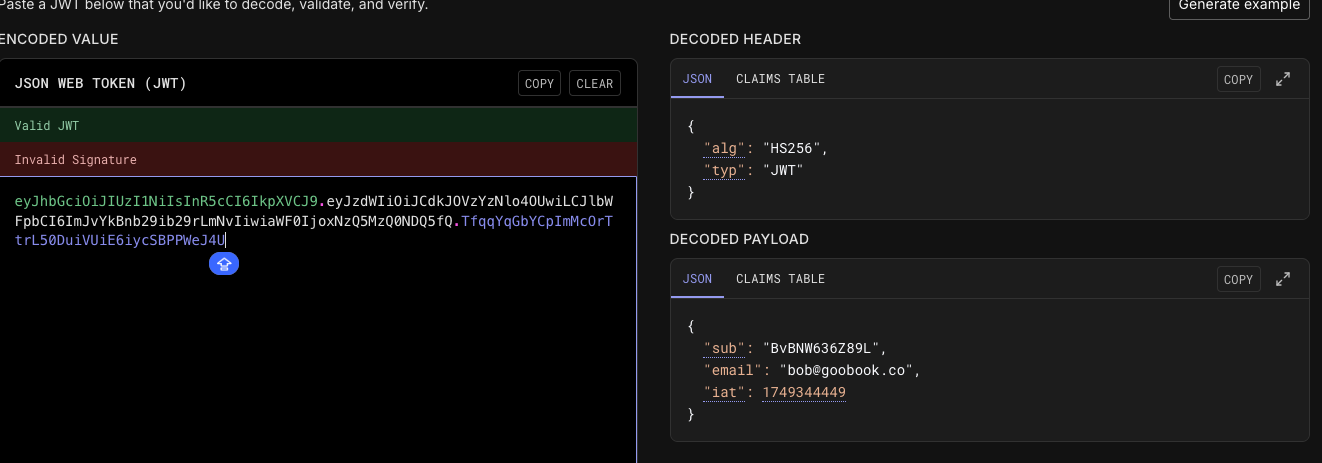
具体的认证流程就不说了,这里依旧用的是基础的 jwt 进行认证
登录时会将 jwt 保存到 local storage 中,这里就简单讲一下,怎么在 graphql 中传递和处理 jwt
目前这段处理服务端代码
- server
const getContext = ({ req }) => {return {auth: req.auth,}; };app.use("/graphql", apolloMiddleware(aplloServer, { context: getContext })); - resolvers
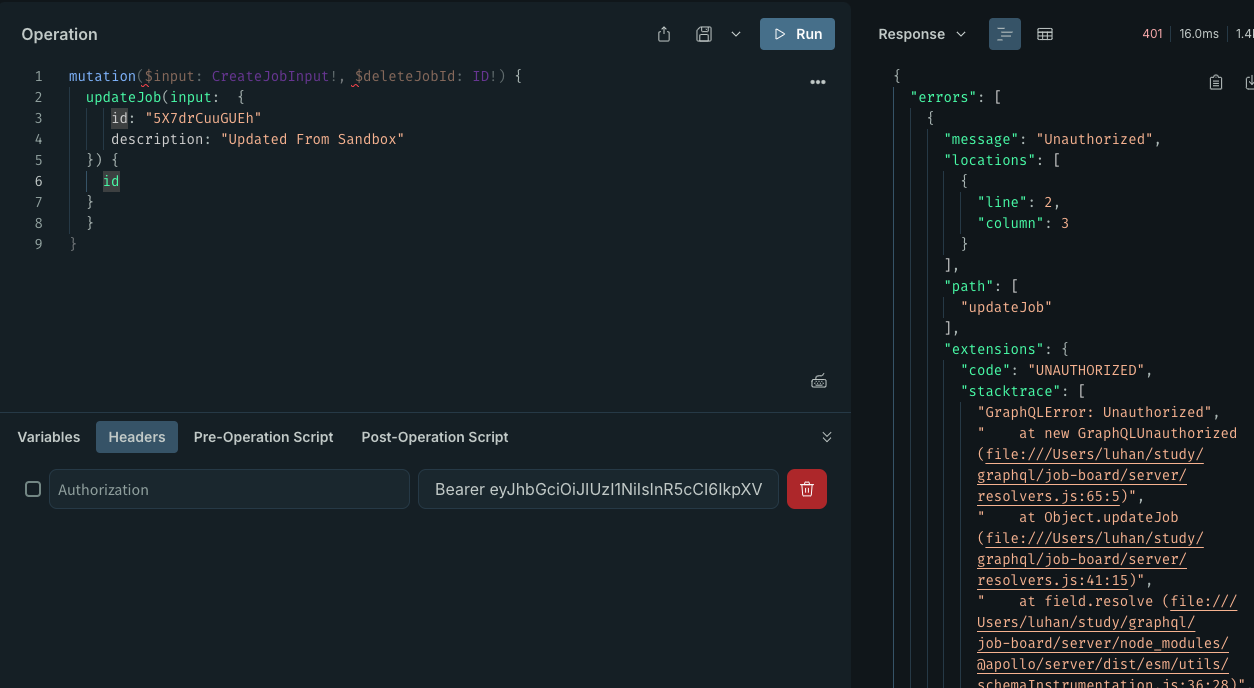
updateJob: async (_root, { input: { id, title, description } }, {auth}) => {if (!auth) {throw new GraphQLUnauthorized("Unauthorized");}await updateJob({ id, title, description });
效果展示:

用户 ↔ 公司 关联
前面是写死了公司 id,现在会用更符合现实逻辑的方式去实现:
- server
const getContext = async ({ req }) => {if (!req.auth) {return {};}const user = await getUser(req.auth.sub);return {user,}; };sub可以理解成用户 id:Asserts the identity of the user, called subject in OpenID (sub). - resolver
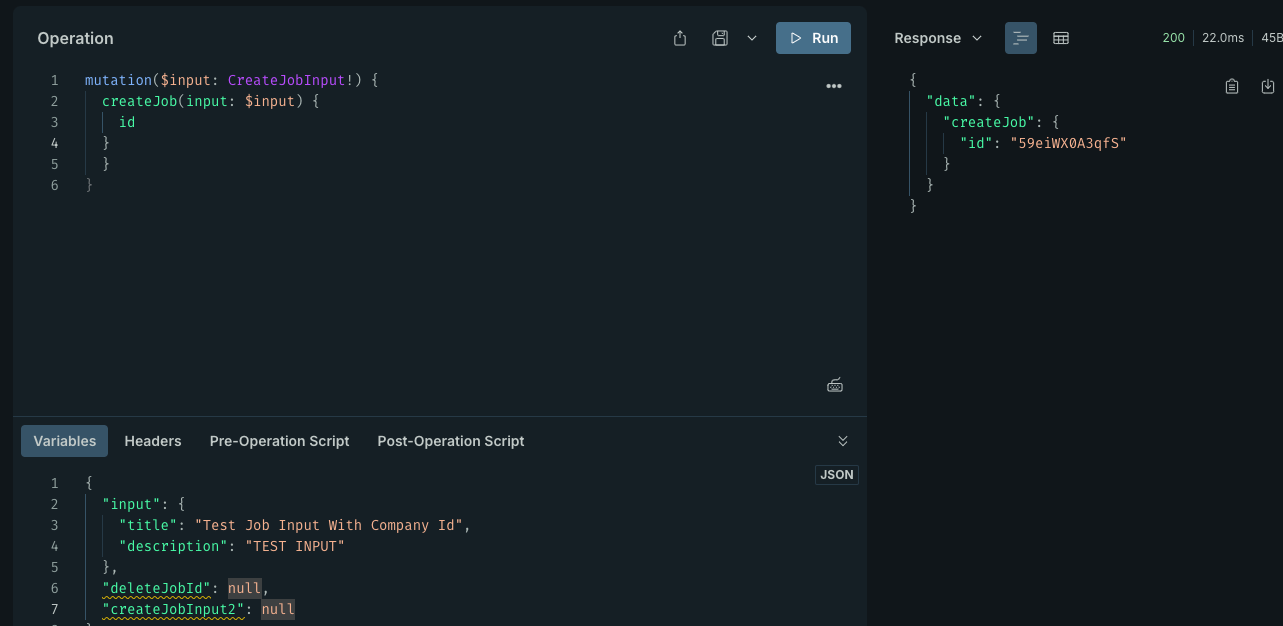
createJob: (_root, { input: { title, description } }, context) => {if (!context.user) {throw new GraphQLUnauthorized("Unauthorized");}const companyId = context.user.companyId; // TODO - change it laterreturn createJob({ companyId, title, description });},
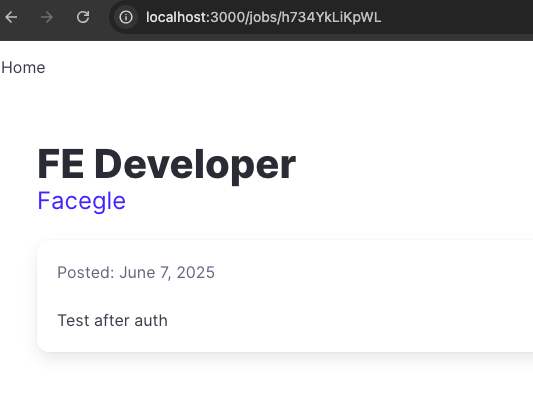
效果如下:
认证(Authorization)- 客户端
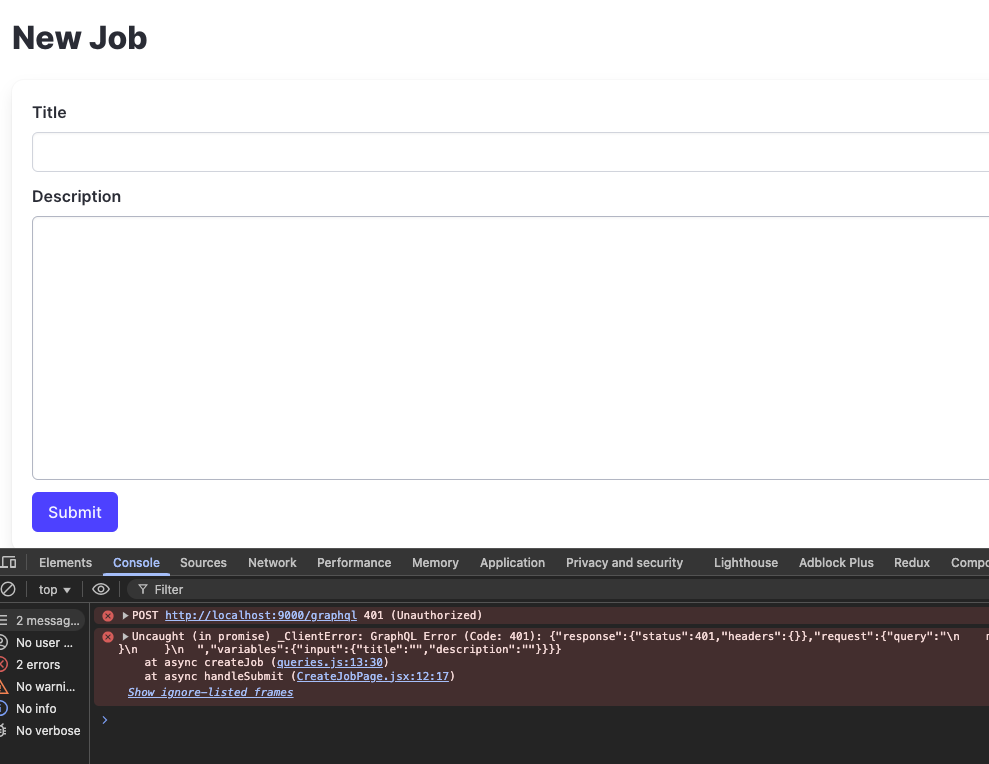
目前后端加了验证,前端如果不传 auth token 的话就无法实现增加的功能:
客户端的实现更多的和用的包有关,这部分会提一下 graqhql-request 的实现,后面替换成 apollo 的 client 也会完成对应的更换:
const client = new GraphQLClient("http://localhost:9000/graphql", {headers: () => {const accessToken = getAccessToken();if (accessToken) {return {Authorization: "Bearer " + accessToken,};}return {};},
});
效果如下:

认证(Authorization)- 删除
删除功能除了认证用户之外,还需要确认当前用户是否可以删除对应的记录,比如说现在的实现,A 公司的用户可以删除 B 公司的 post,从而开启一场朴实无华的商业战:
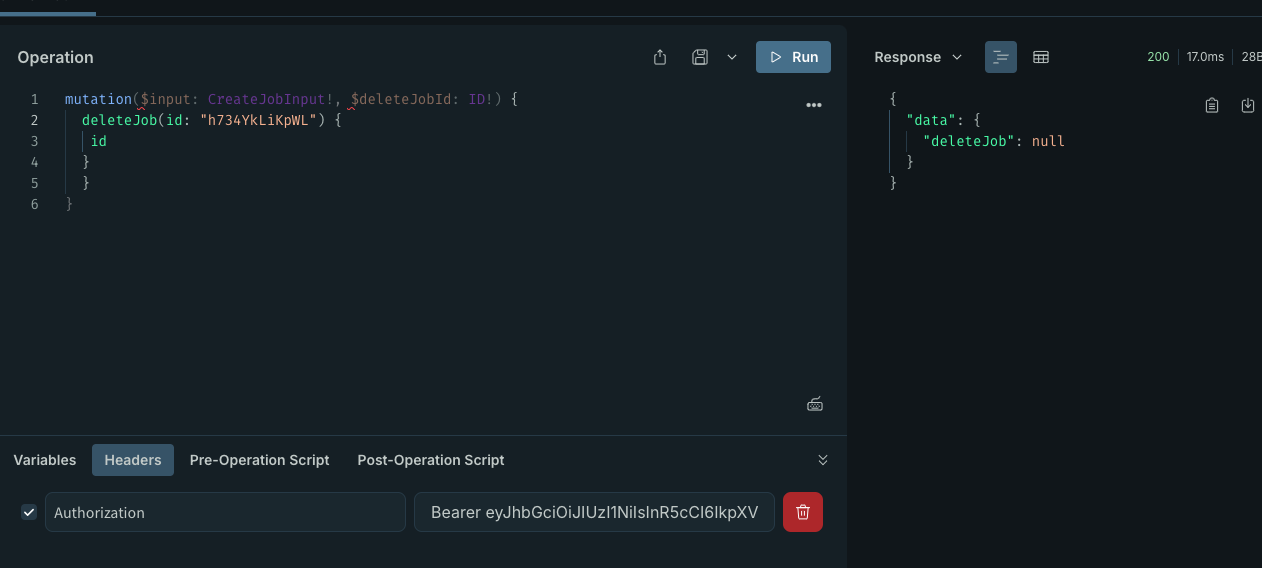
因此,在做认证的时候就需要多加一步:
deleteJob: async (_root, { id }, { user }) => {if (!user) {throw new GraphQLUnauthorized("Unauthorized");}const job = await deleteJob(id, user.companyId);if (!job) {throw new GraphQLNotFound("Job not found: " + id);}return job;
};
这里的 deleteJob 会通过 id 和 companyId 去查找并返回对应的记录
设置 apollo-client
apollo-client 是官方提供的 client 和 server 一样,优势在于提供更可靠的 cache 机制,替换方式相对而言也比较简单——尤其是 graphql-request 和 apollo-client 的冲突不算特别多的情况下,完整的实现如下:
import {ApolloClient,ApolloLink,concat,createHttpLink,gql,InMemoryCache,
} from "@apollo/client";
import { getAccessToken } from "../auth";const httpLink = createHttpLink({uri: "http://localhost:9000/graphql",
});const authLink = new ApolloLink((operation, forward) => {const accessToken = getAccessToken();if (accessToken) {operation.setContext({headers: {authorization: `Bearer ${accessToken}`,},});}return forward(operation);
});const apolloClient = new ApolloClient({link: concat(authLink, httpLink),cache: new InMemoryCache(),
});export async function createJob({ title, description }) {const mutation = gql`mutation CreateJob($input: CreateJobInput!) {createJob(input: $input) {id}}`;const { data } = await apolloClient.mutate({mutation,variables: {input: {title,description,},},});return data.createJob;
}export async function getJobs() {const query = gql`query {jobs {iddatetitlecompany {idname}}}`;const { data } = await apolloClient.query({ query });return data.jobs;
}export async function getJob(id) {const query = gql`query ($id: ID!) {job(id: $id) {iddatetitledescriptioncompany {idname}}}`;const { data } = await apolloClient.query({query,variables: { id },});return data.job;
}export async function getCompany(id) {const query = gql`query Jobs($id: ID!) {company(id: $id) {idnamedescriptionjobs {iddatetitle}}}`;const { data } = await apolloClient.query({ query, variables: { id } });return data.company;
}
这里主要做了几个部分:
- link
类比的话,就是 apollo 的 middleware,官方的图解如下:

目前常见的 Link 有:Link 类型 用途 HttpLink把请求发到 GraphQL 后端(最常用) ErrorLink捕获 GraphQL 错误 / 网络错误,打印或重定向 AuthLink/ApolloLink自定义 headers,例如添加 token RetryLink请求失败时自动 retry(可设置 retry 策略) BatchHttpLink把多个 query 合并成一个 HTTP 请求 这里只会用到 HttpLink和ApolloLink需要注意 chaining 的顺序, HttpLink必须是第一个调用的,按顺序必须在concat的最后一个对于非 HttpLink来说,需要注意forward(operation)进行下一步操作 - cache
这个下一个 section 会讲的更多一些,这里开启了InMemoryCache - 验证
就是ApolloLink中实现的内容
这里主要实现的内容就是绑定了 Authorization header,实现方式和 graphql-request 略有不同,本质上是一样的 - query/mutation 的转换
graphql-request 只有 request,apollo-client 则是像 server 一样分离了 query 和 mutation
然后就是返回结果不一样
这两点需要注意一下
cache
缓存只会在 client 做,server 是没有缓存机制的
这也是为啥课程换用 apollo-client 了吧……
Caching in Apollo Client
前面开启了默认的 InMemoryCache ,实现之后,当遇到数据已经获取的情况下,就不会重新获取数据。如下面这张图:

从主页面到子页面还会进行 fetch——因为缺乏必要的 description,但是当从子页面返回主页面时,数据在已经存在的情况下,就不会自动更新了
他们这个机制还是有点复杂的,Apollo Client 会以对象结构保存请求字段(不是 query 名称,而是字段结构 + 参数值)对应的数据。每次请求时,它根据:
- 查询字段结构是否一致(即你请求了哪些字段);
- 传入的变量(如
$id)是否一致; - 缓存中是否已有这些字段对应的数据(使用 normalized cache,如
Job:123);
如果三者都满足,就会直接从缓存中读取,避免触发网络请求。
cache 机制
目前官方的 client 提供的机制有下面几个:
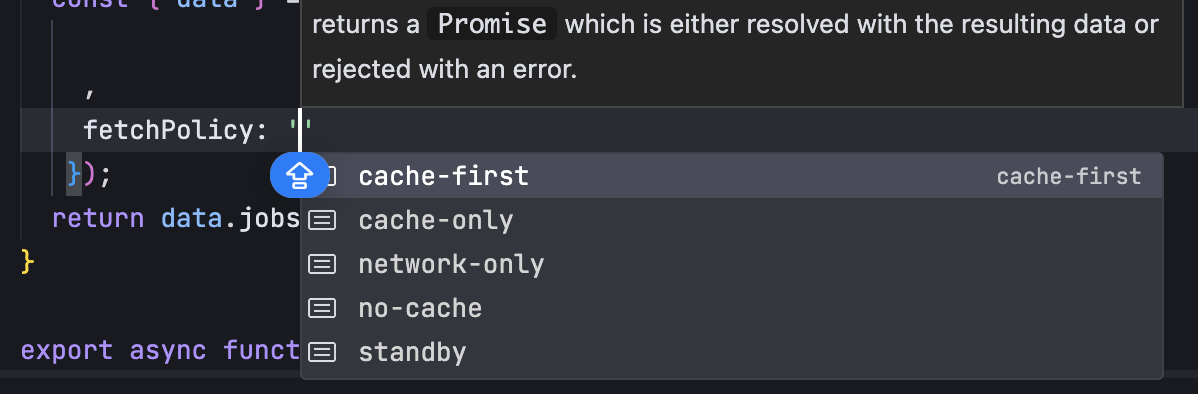
具体说明如下:
| Name | Description | Description |
|---|---|---|
cache-first | Apollo Client first executes the query against the cache. If all requested data is present in the cache, that data is returned. Otherwise, Apollo Client executes the query against your GraphQL server and returns that data after caching it.Prioritizes minimizing the number of network requests sent by your application.This is the default fetch policy. | 缓存优先策略:优先从缓存中读取数据,若缓存不完整则发起网络请求,并将结果缓存。默认策略,适合数据变化不频繁的场景。 |
cache-only | Apollo Client executes the query only against the cache. It never queries your server in this case.A cache-only query throws an error if the cache does not contain data for all requested fields. | 仅使用缓存:完全依赖本地缓存,不发起任何网络请求。若缓存中无数据或不完整会抛出错误。适用于确保缓存已存在的场景。 |
cache-and-network | Apollo Client executes the full query against both the cache and your GraphQL server. The query automatically updates if the result of the server-side query modifies cached fields.Provides a fast response while also helping to keep cached data consistent with server data. | 缓存和网络并用:先返回缓存数据以快速响应,再请求服务端数据并更新缓存。兼顾速度与一致性。 |
network-only | Apollo Client executes the full query against your GraphQL server, without first checking the cache. The query’s result is stored in the cache.Prioritizes consistency with server data, but can’t provide a near-instantaneous response when cached data is available. | 仅走网络,带缓存写入:跳过缓存,始终走网络请求,但结果会写入缓存。适合需要最新数据的情况 |
no-cache | Similar to network-only, except the query’s result is not stored in the cache. | 不使用缓存:请求数据但不写入缓存。适用于一次性查询或敏感数据展示等场景 |
standby | Uses the same logic as cache-first, except this query does not automatically update when underlying field values change. You can still manually update this query with refetch and updateQueries. | 待机模式:和 cache-first 类似,但不会自动响应数据变更,适合后台组件或非活跃页面手动更新数据的场景 |
GraphQL client 端自带的 cache 机制……我觉得应该是可以满足大多数的业务需求了
customized query
下面这个实现,在 createJob 里面写满了对应的数据——也就是 jobByIdQuery 中有的数据,就可以在创建数据后,不获取数据库最新的数据,而直接渲染:
const jobByIdQuery = gql`query ($id: ID!) {job(id: $id) {iddatetitlecompany {idname}}}
`;export async function createJob({ title, description }) {const mutation = gql`mutation CreateJob($input: CreateJobInput!) {createJob(input: $input) {id}}`;const { data } = await apolloClient.mutate({mutation,variables: {input: {title,description,},},update: (cache, { data }) => {cache.writeQuery({query: jobByIdQuery,variables: { id: data.createJob.id },data,});},});return data.createJob;
}export async function getJob(id) {const query = jobByIdQuery;const { data } = await apolloClient.query({query,variables: { id },});return data.job;
}
注意, writeQuery 是在 cache 之后手动重写进 cache 的方法
Fragment
上面的案例中已经可以看到, job 的定义已经被复用了好几次。graphql 本身也提供了一个 Fragment 的对象,可以用来改善代码复用的问题:
const jobDetailFragment = gql`fragment JobDetail on Job {iddatetitledescriptioncompany {idname}}
`;const jobByIdQuery = gql`query ($id: ID!) {job(id: $id) {...JobDetail}}${jobDetailFragment}
`;export async function createJob({ title, description }) {const mutation = gql`mutation CreateJob($input: CreateJobInput!) {createJob(input: $input) {...JobDetail}}${jobDetailFragment}`;const { data } = await apolloClient.mutate({mutation,variables: {input: {title,description,},},update: (cache, { data }) => {cache.writeQuery({query: jobByIdQuery,variables: { id: data.createJob.id },data,});},});return data.createJob;
}export async function getJobs() {const query = gql`query {jobs {...JobDetail}}${jobDetailFragment}`;const { data } = await apolloClient.query({ query });return data.jobs;
}export async function getJob(id) {const query = jobByIdQuery;const { data } = await apolloClient.query({query,variables: { id },});return data.job;
}
可以看到,本来需要重复声明的 Job 定义,这里可以用 JobDetail 去获取
这里还是建议类似的 Fragment 保存最低所需的数据,否则就失去 graphql 可以动态获取对应数据的优势了