iframe(概念、简单例子、在vue项目中的使用)
个人简介
👀个人主页: 前端杂货铺
🙋♂️学习方向: 主攻前端方向,正逐渐往全干发展
📃个人状态: 研发工程师,现效力于中国工业软件事业
🚀人生格言: 积跬步至千里,积小流成江海
🥇推荐学习:🍍前端面试宝典 🎨100个小功能 🍉Vue2 🍋Vue3 🍓Vue2/3项目实战 🥝Node.js实战 🍒Three.js
🌕个人推广:每篇文章最下方都有加入方式,旨在交流学习&资源分享,快加入进来吧
文章目录
- iframe 概念
- 最简单的例子
- 高级点的例子
- 优化封装
- 总结
iframe 概念
iframe 是一个 HTML 标签,作用是文档中的文档,或者浮动的框架(frame)。iframe 元素会创建包含另外一个文档的内联框架(即行内框架)。
HTML 元素 <iframe> 表示嵌套的浏览上下文。它能够将另一个 HTML 页面嵌入到当前页面中。
最简单的例子
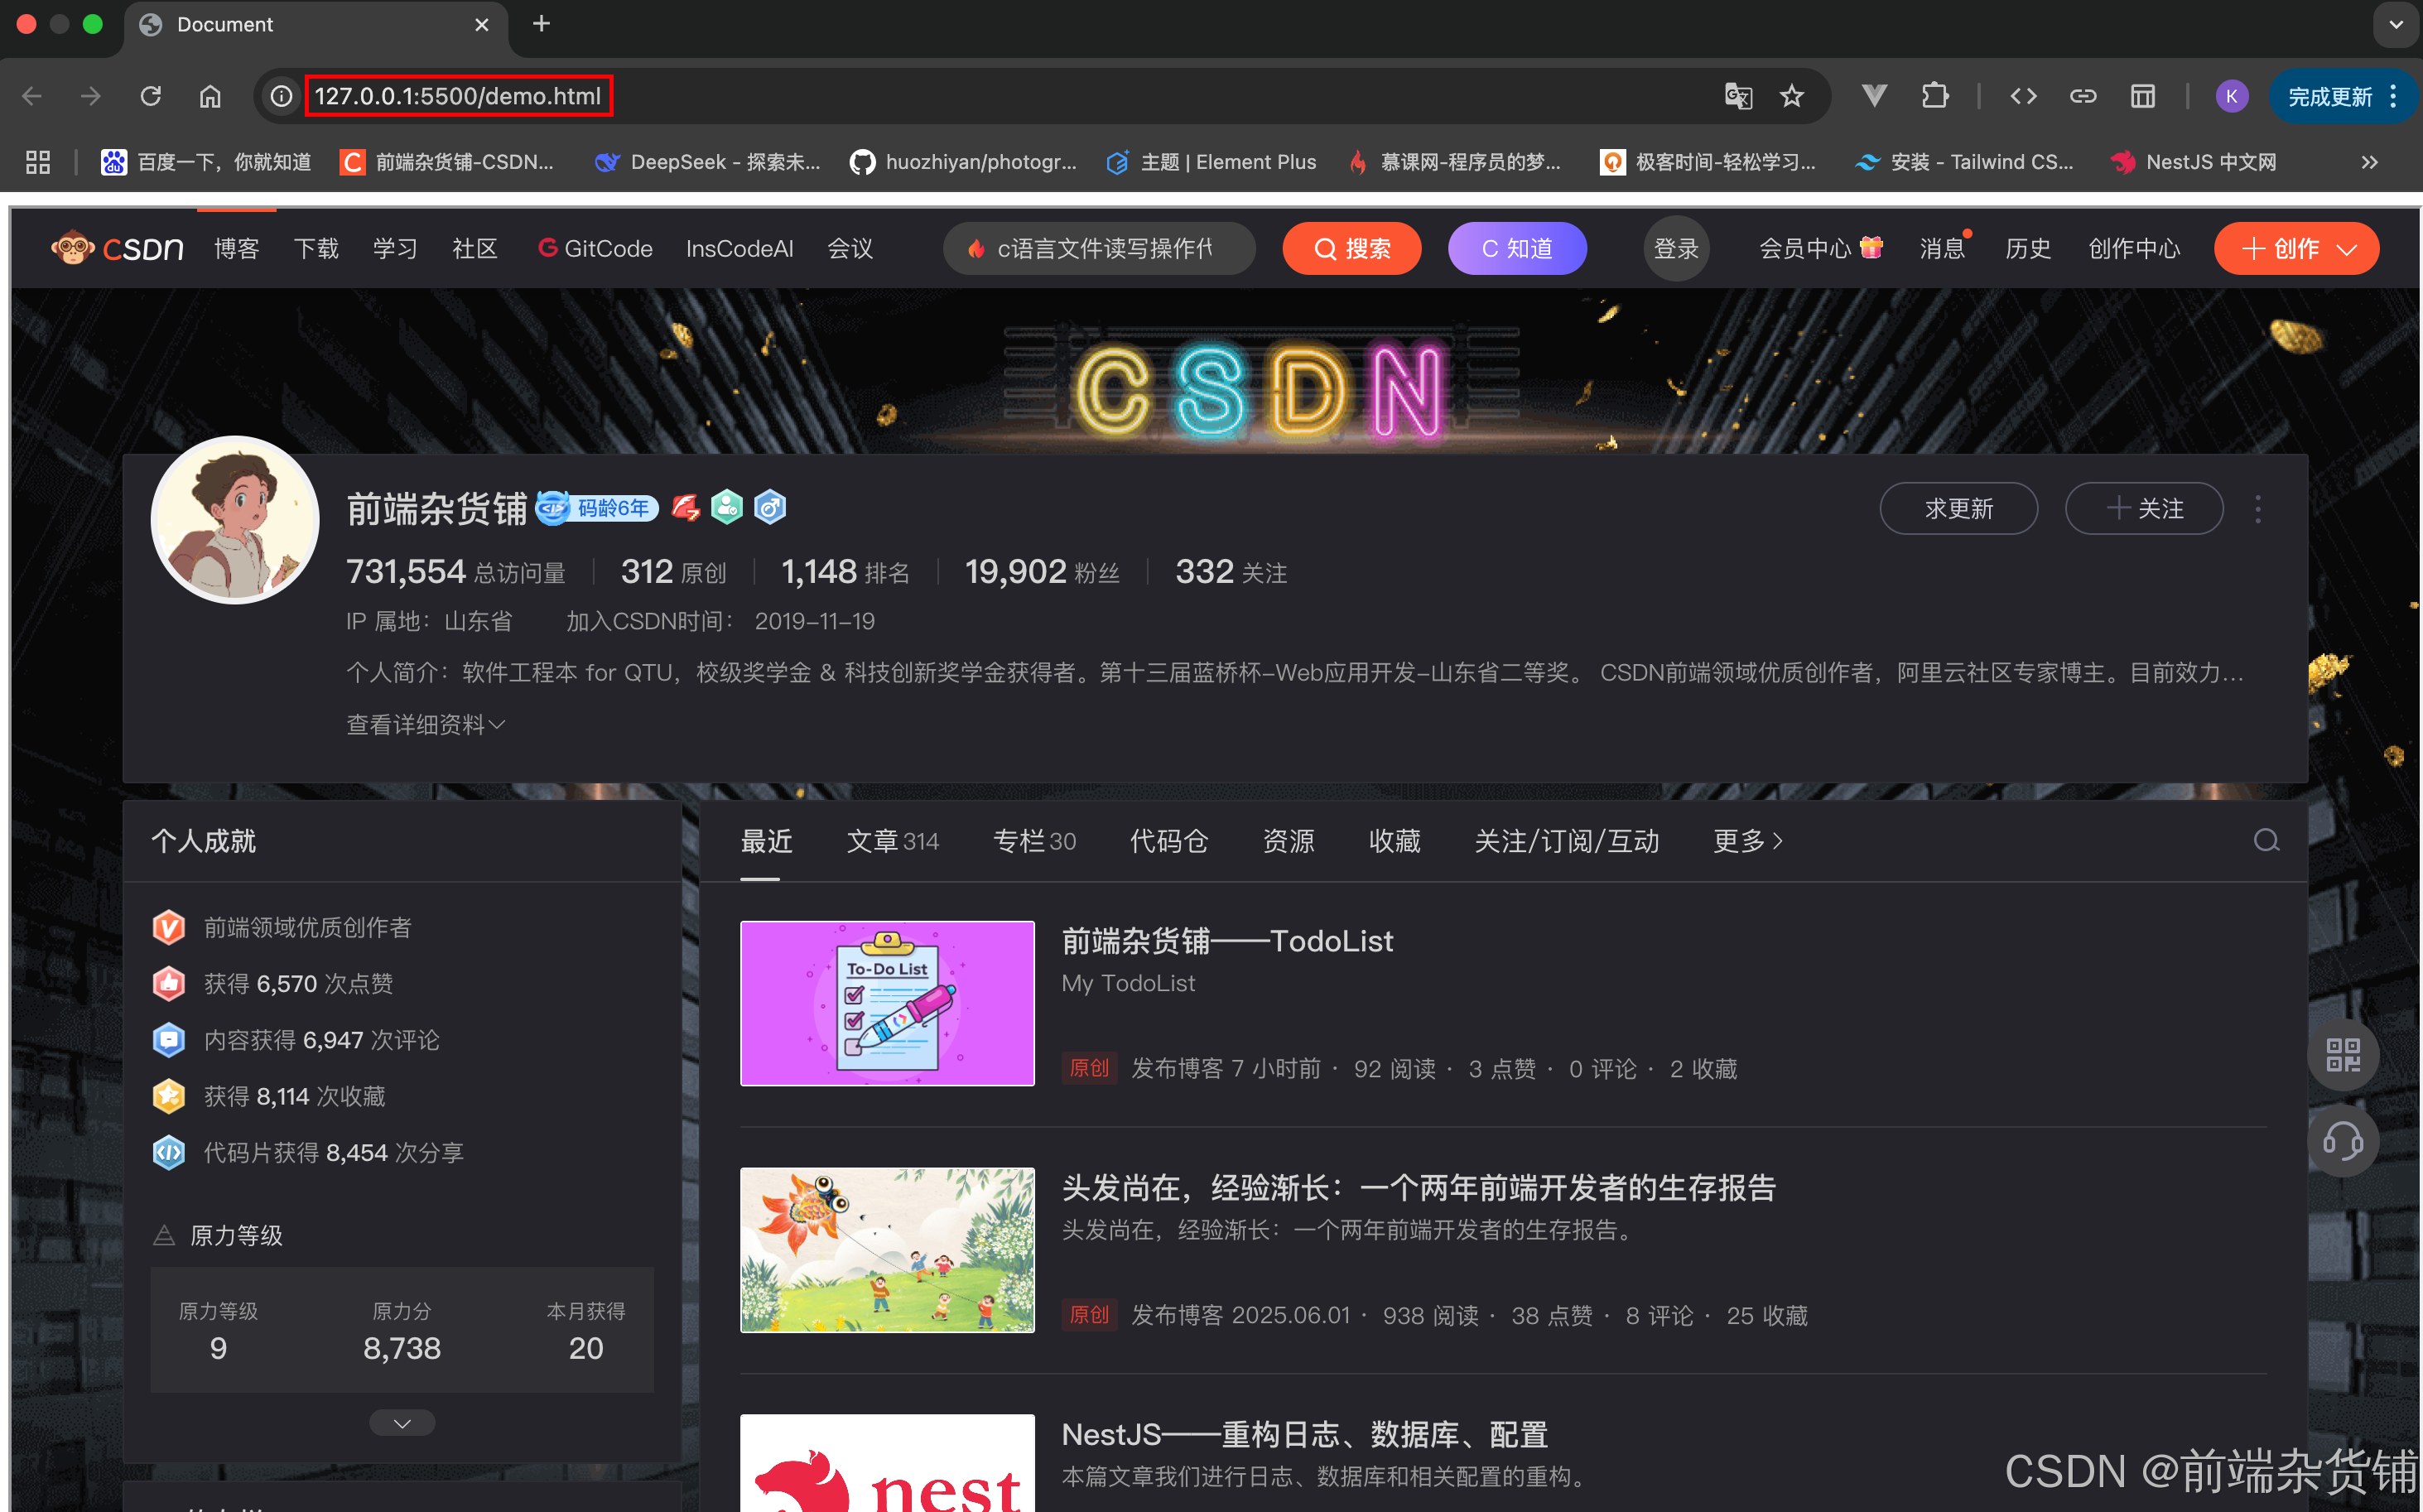
参照 iframe_MDN 的案例,尝试编写一个小 demo,把我的 CSDN 主页嵌入编写的 ifame 中。
由下面代码可见,我们仅需要一个 src 属性放入我们的网址即可,非常简单。
<!DOCTYPE html>
<html lang="en"><head><meta charset="UTF-8" /><meta name="viewport" content="width=device-width, initial-scale=1.0" /><title>Document</title></head><style>iframe {width: 100%;height: 100vh;}</style><body><iframe src="https://blog.csdn.net/qq_45902692?spm=1000.2115.3001.5343"></iframe></body>
</html>
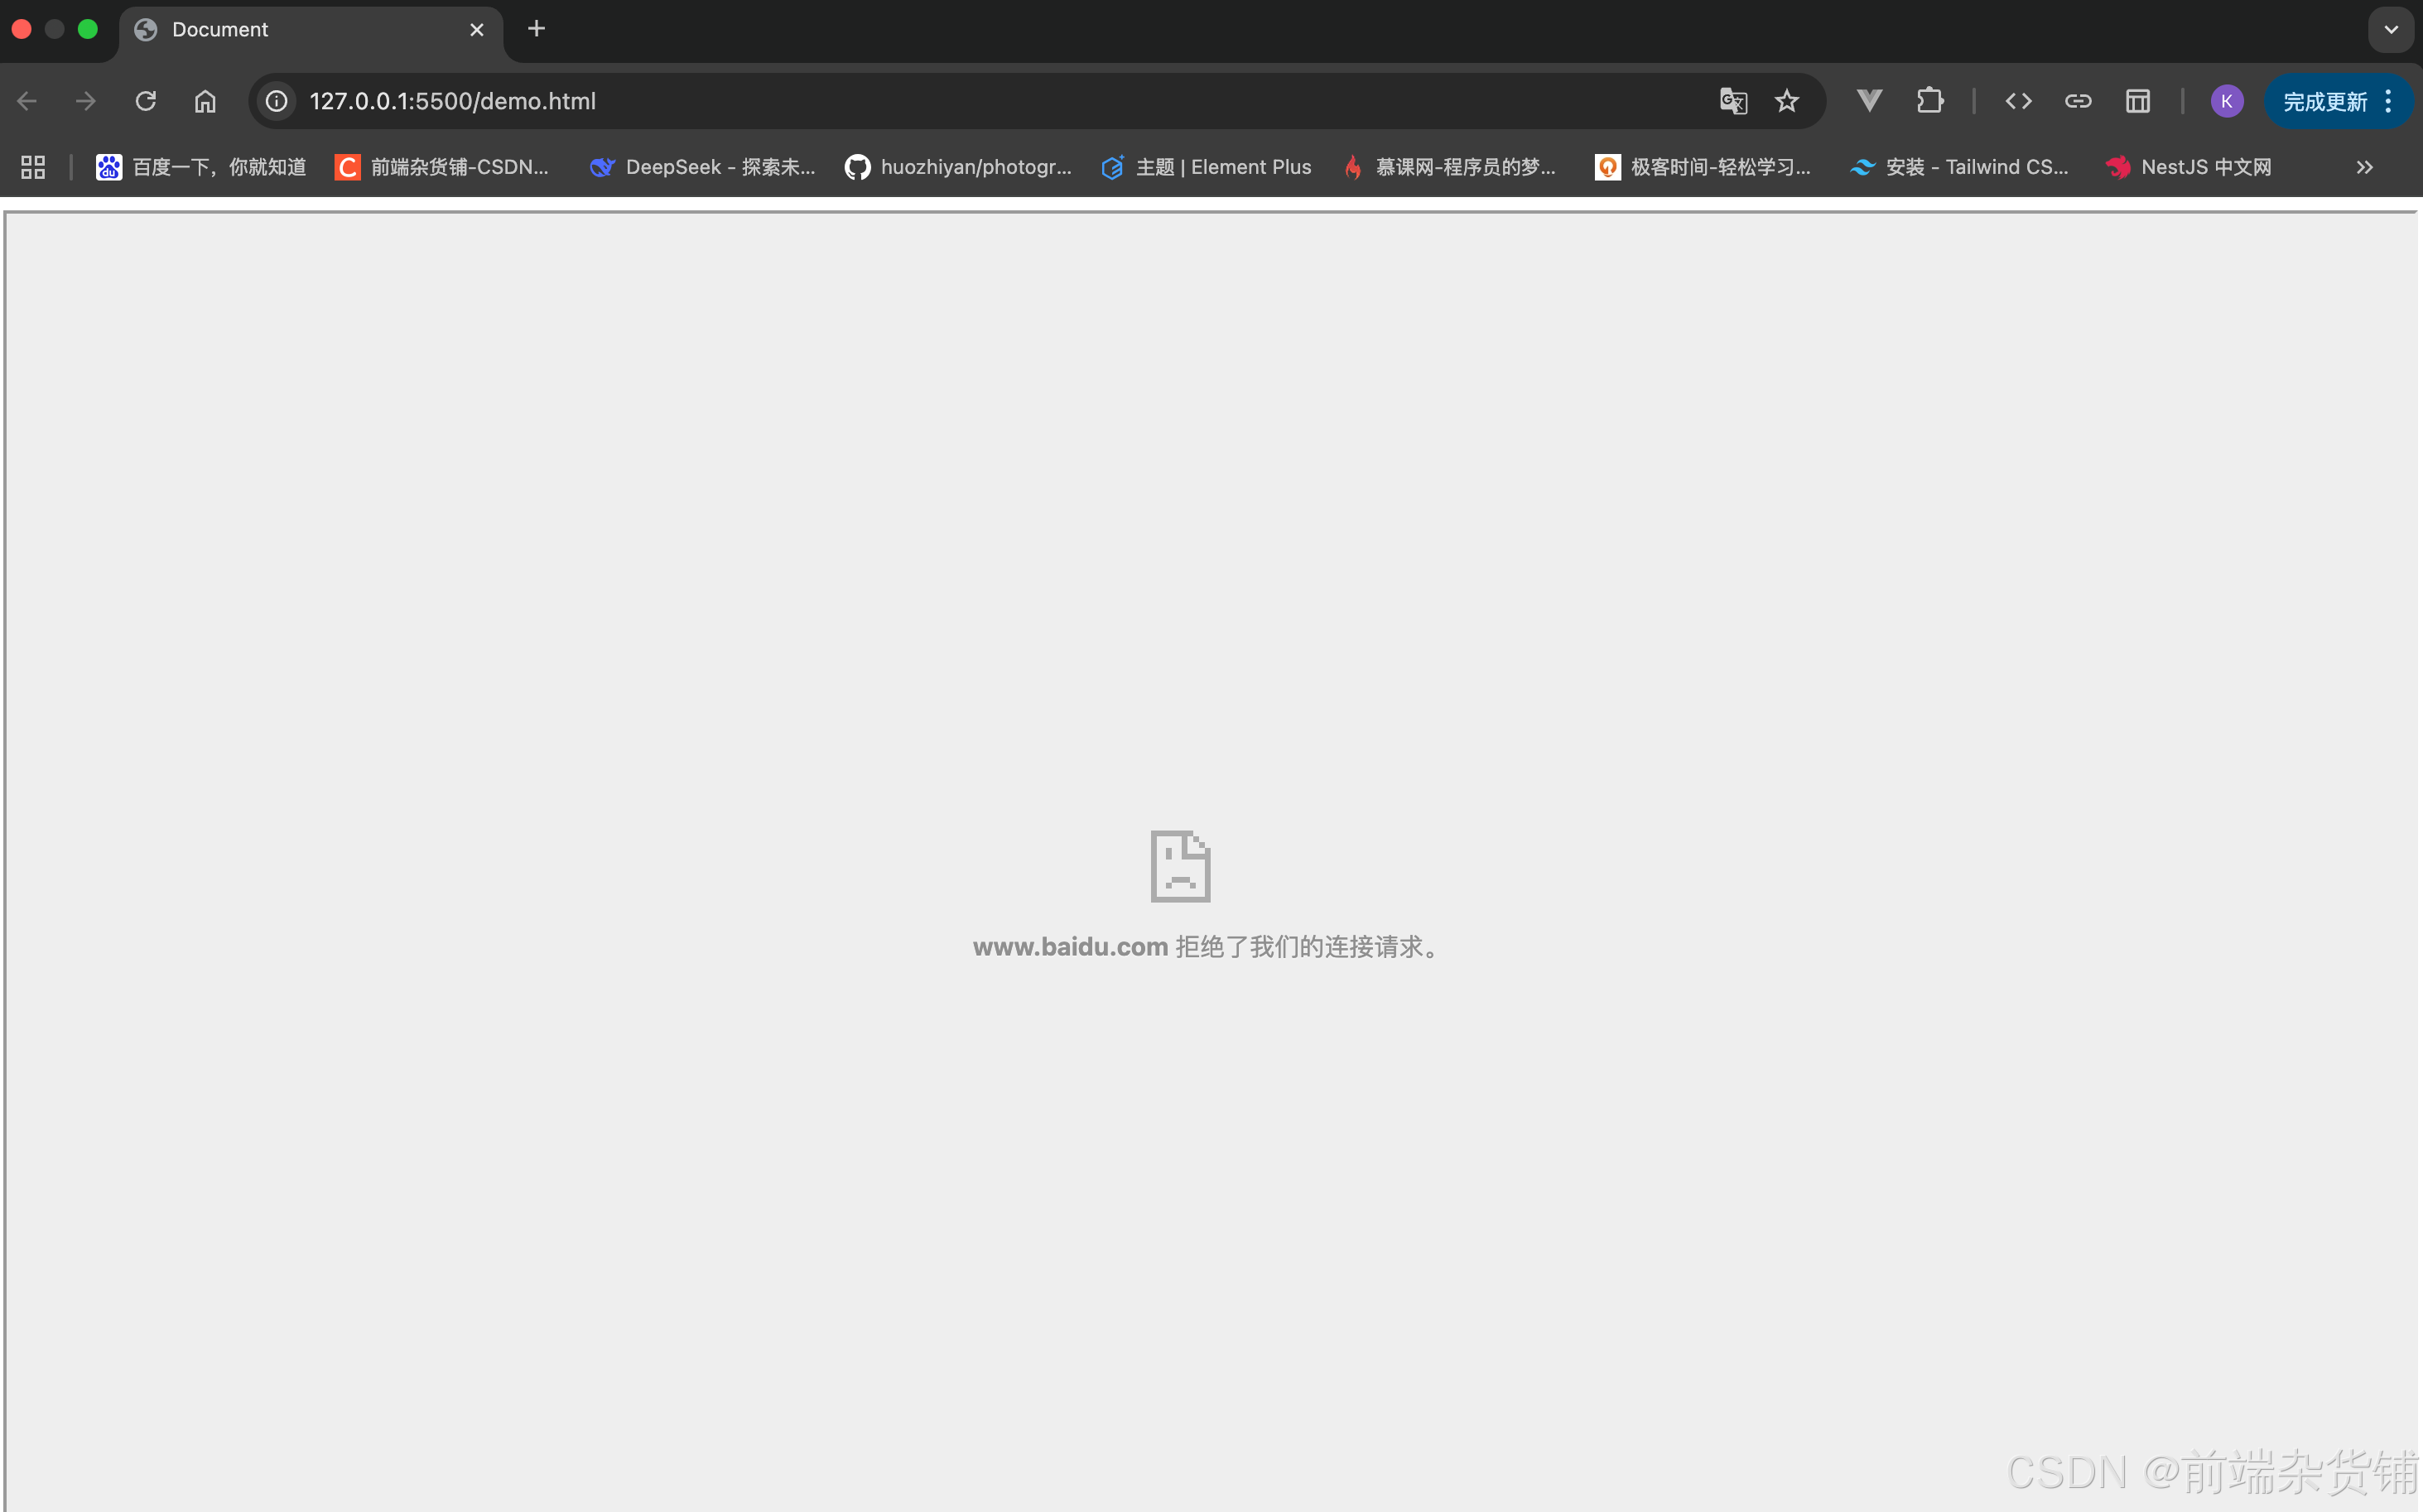
能不能成功嵌入主要还是看我们要嵌入的网站是否给我们提供了相关权限(像百度就会拒绝我们的连接请求)。
高级点的例子
iframe-demo [GitHub源码]
其实使用 iframe 的大多数场景是我们自己(我们能操作的项目)嵌入自己(我们能操作的项目),这样才能进行一些实际的交互。
具体的应用场景:比如甲方公司的平台,需要嵌入我们的产品来使用,那么就会使用到 iframe。
下面,我们就尝试实现在 A 项目中嵌入 B 项目,然后进行项目间的简单通信,让其真正的 “交互” 起来。
创建项目:
// 创建项目
pnpm create vite my-vue-app1
pnpm create vite my-vue-app2// 分别安装依赖
pnpm install// 启动项目,先启动 my-vue-app1, 再启动 my-vue-app2
pnpm dev
GitHub 提交记录
window.postMessage() 方法可以安全地实现跨源通信。
接下来,我们对两个 Vue 项目通过 iframe 嵌入的方式实现基本的通信。
在 my-vue-app1 中创建 MyVueApp1.vue 组件,编写如下代码:
<script setup lang="ts">
import { ref, onBeforeUnmount } from "vue";defineProps<{ msg: string }>();// iframe 的引用,用于后续向子应用发送消息
const iframeRef = ref(null);
// 用于存储从子应用 app2 接收到的消息
const childMessage = ref("");// 向子应用 app2 发送消息的方法
const sendToApp2 = () => {iframeRef.value.contentWindow.postMessage({type: "FROM_PARENT", // 消息类型标识data: "我是app1,收到请回答,收到请回答!", // 发送的内容},// 指定允许接收消息的目标源(安全性考虑)"http://localhost:5174");
};// 处理从子应用 app2 接收到的消息
const handleMessageFromChild = (event) => {// 安全校验,只处理来自指定源的消息if (event.origin !== "http://localhost:5174") return;// 判断消息类型,若为 FROM_CHILD,则更新 childMessageif (event.data.type === "FROM_CHILD") {childMessage.value = event.data.data;}
};// iframe 加载完成时,监听 window 的 message 事件
const onIframeLoad = () => {window.addEventListener("message", handleMessageFromChild);
};// 组件卸载前移除事件监听,防止内存泄漏(已注释,可根据需要启用)
onBeforeUnmount(() => {window.removeEventListener("message", handleMessageFromChild);
});
</script><template><div><h2>{{ msg }}</h2><!-- 按钮:点击后向子应用发送消息 --><button @click="sendToApp2">app1发送消息给app2</button><!-- 展示从子应用接收到的消息 --><p style="color: skyblue">来自子应用的消息: {{ childMessage }}</p></div><!-- 嵌入子应用的 iframe,加载完成后绑定事件监听 --><iframeref="iframeRef"src="http://localhost:5174/"@load="onIframeLoad"frameborder="0"></iframe>
</template><style scoped>
iframe {width: 1000px;height: 400px;border: 1px solid #ccc;margin: 10px;
}
</style>
在 my-vue-app2 中创建 MyVueApp2.vue 组件,编写如下代码:
<script setup lang="ts">
import { ref, onBeforeUnmount } from "vue";defineProps<{ msg: string }>();// 用于存储从父应用接收到的消息
const parentMessage = ref("");// 向父应用发送消息的方法
const sendToParent = () => {window.parent.postMessage({type: "FROM_CHILD", // 消息类型标识data: "我是app2,收到,收到!🫡", // 发送的内容},"http://localhost:5173" // 指定允许接收消息的目标源(安全性考虑)); // 生产环境应指定具体域名
};// 处理从父应用接收到的消息
const handleMessageFromParent = (event) => {// 安全验证,只处理来自指定源的消息if (event.origin !== "http://localhost:5173") return;// 判断消息类型,若为 FROM_PARENT,则更新 parentMessageif (event.data.type === "FROM_PARENT") {parentMessage.value = event.data.data;}
};// 监听 window 的 message 事件,接收父应用的消息
window.addEventListener("message", handleMessageFromParent);// 组件卸载前移除事件监听,防止内存泄漏(已注释,可根据需要启用)
onBeforeUnmount(() => {window.removeEventListener("message", handleMessageFromParent);
});
</script><template><h2>{{ msg }}</h2><!-- 按钮:点击后向父应用发送消息 --><button @click="sendToParent">发送消息给父应用</button><!-- 展示从父应用接收到的消息 --><p style="color: red">来自父应用的消息: {{ parentMessage }}</p>
</template><style scoped></style>
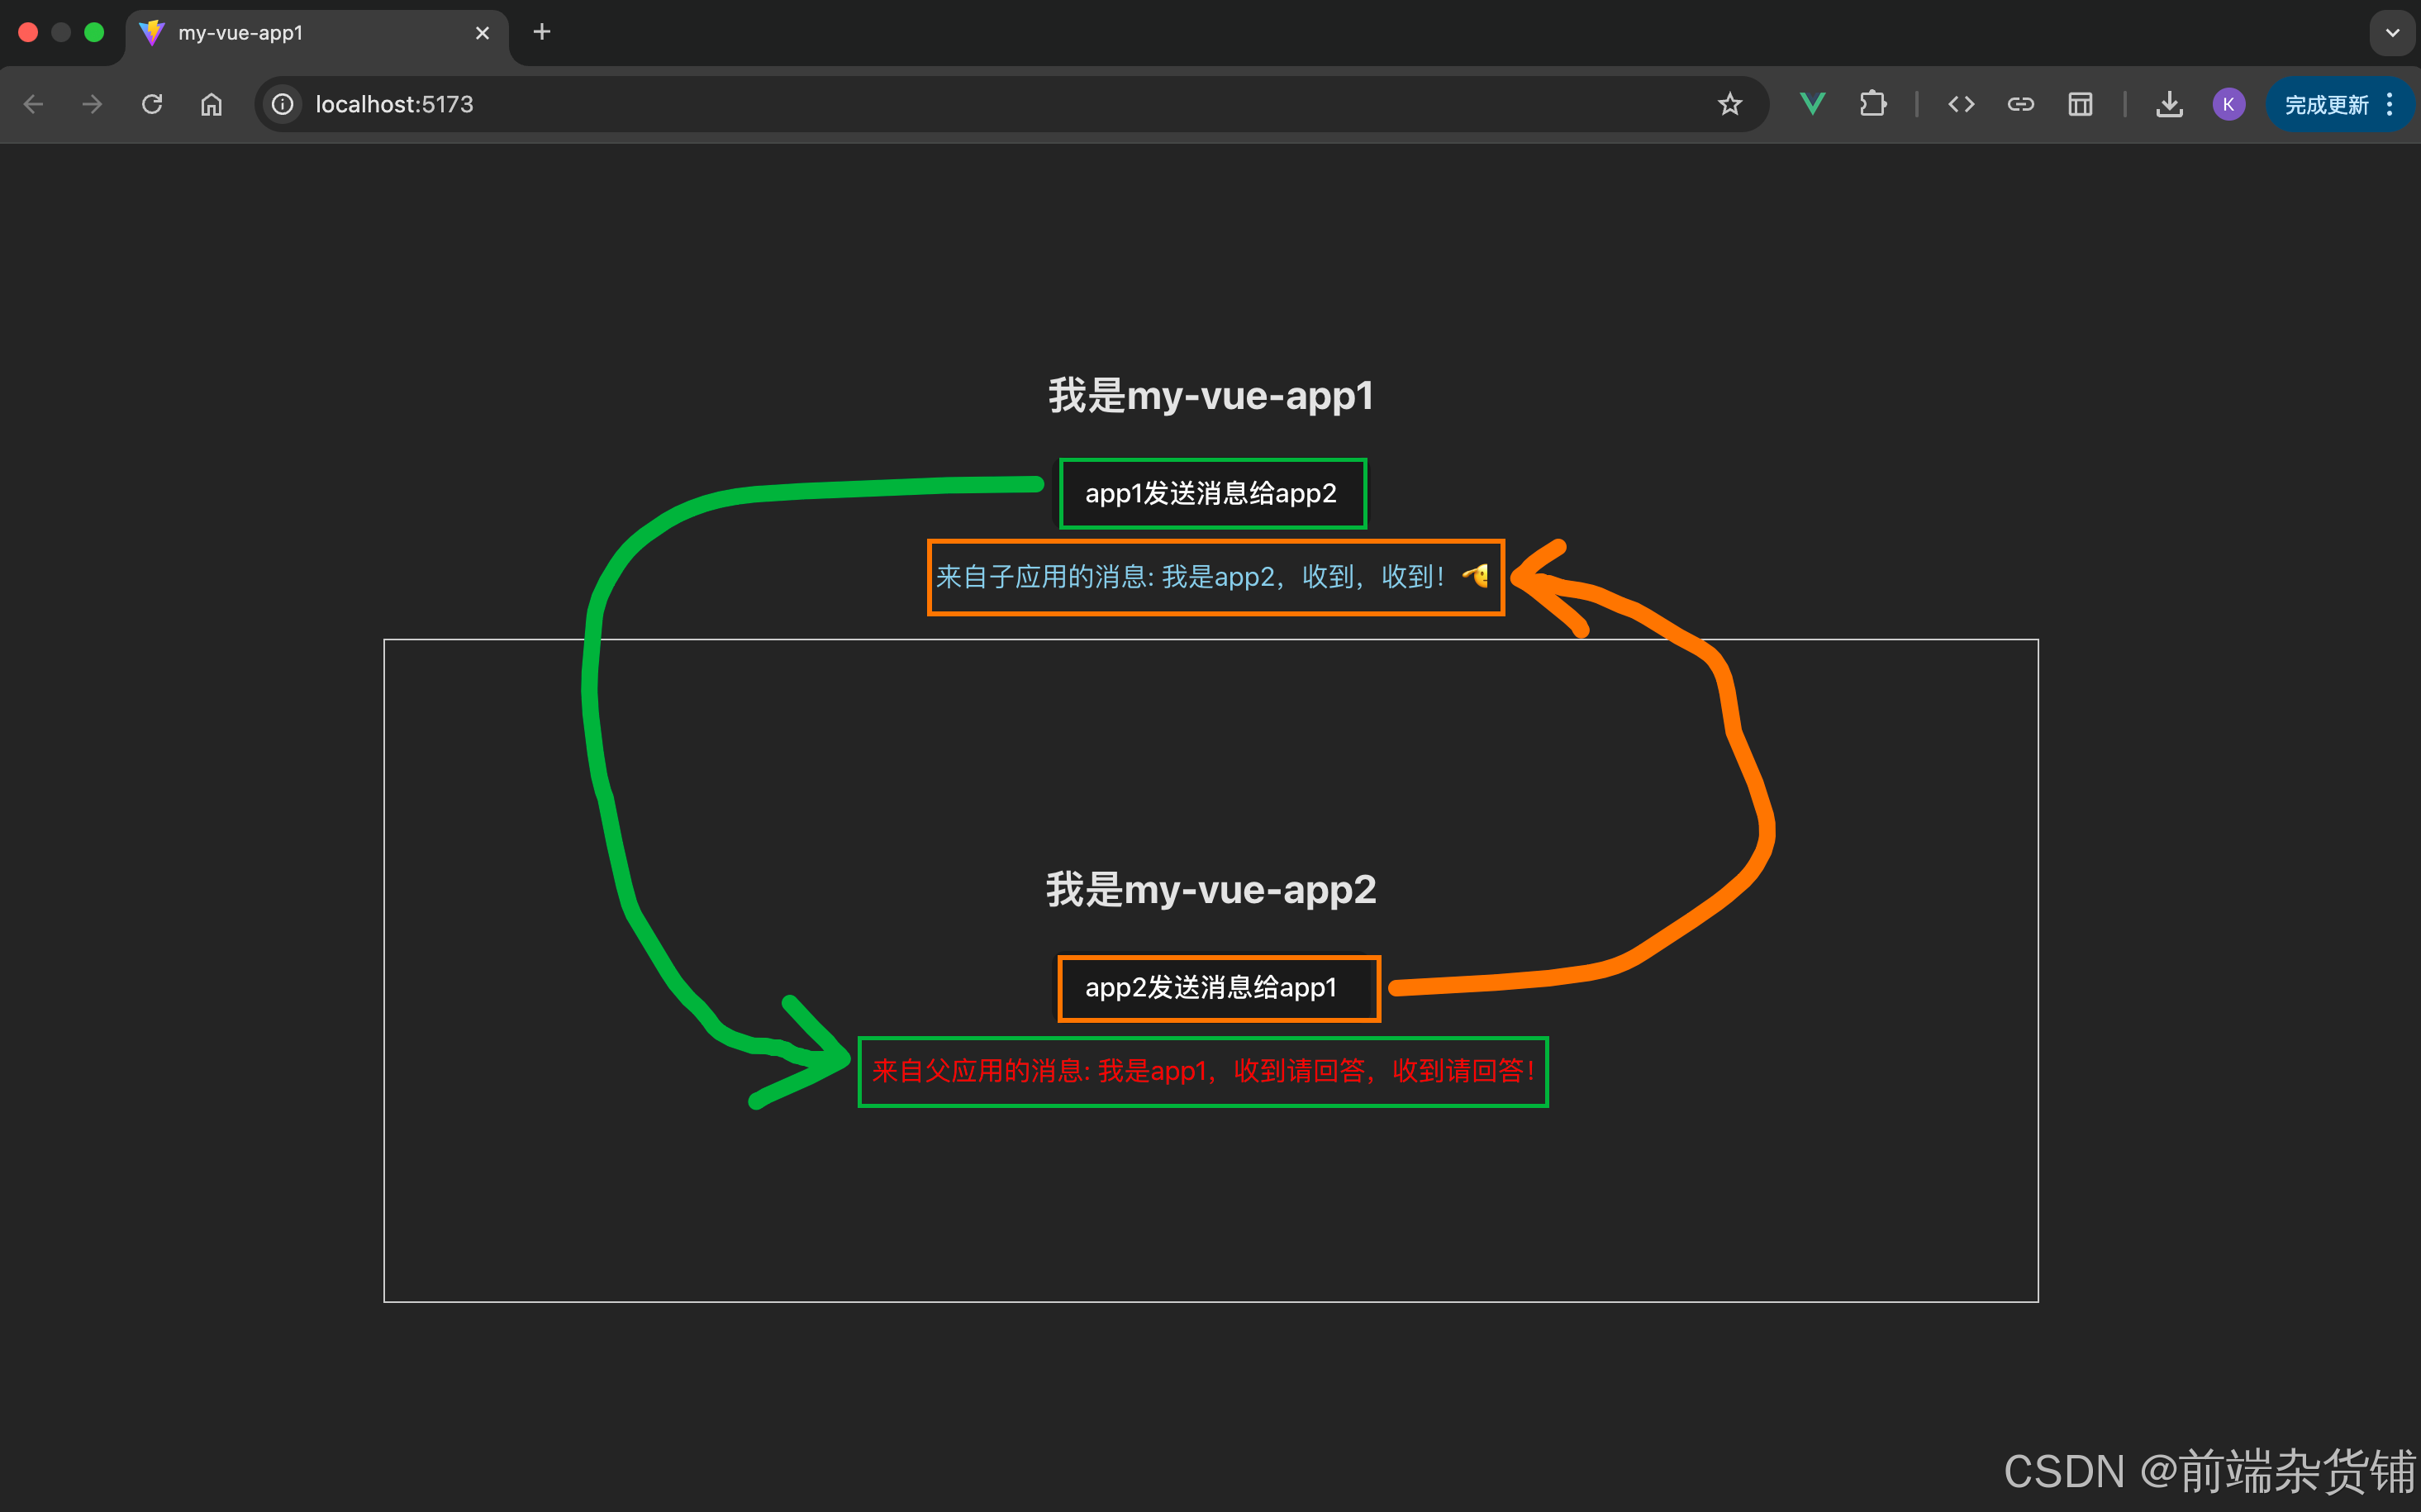
访问 5173 网址,将得到如下页面。
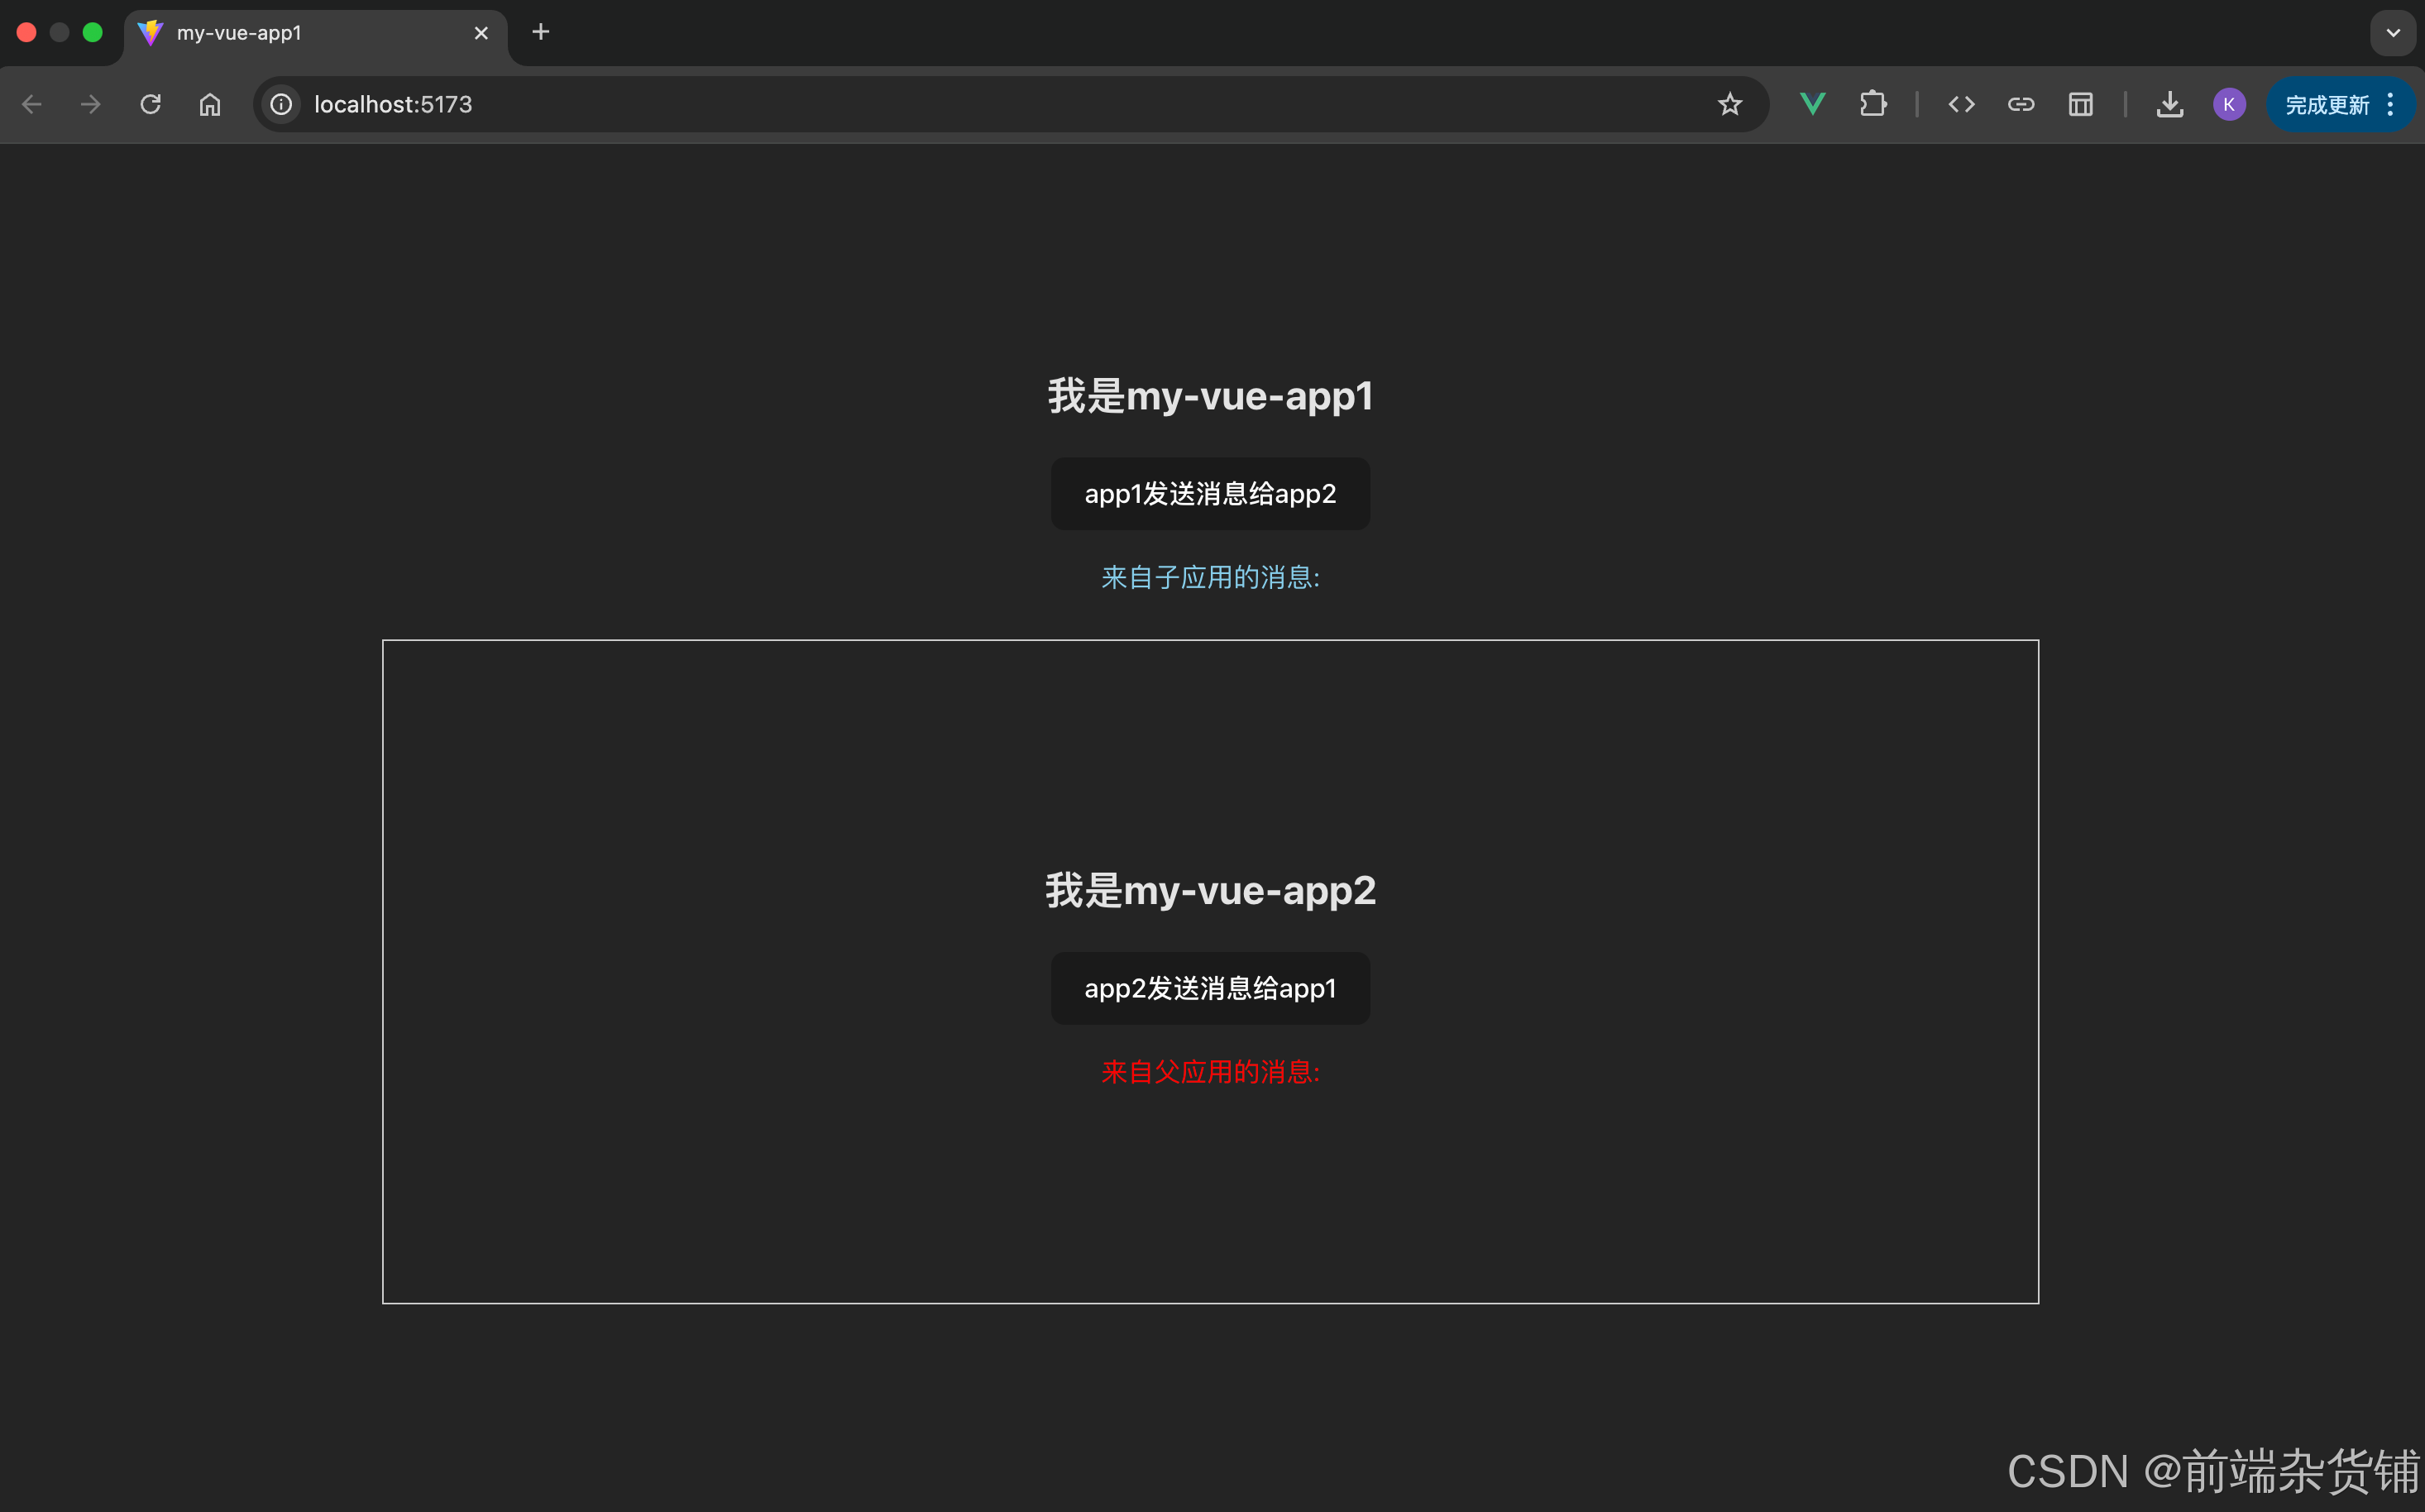
点击按钮之后,获取消息,并渲染到页面上。
优化封装
GitHub 提交记录
在根目录下创建 unils 文件夹,在文件夹中创建 iframeCommunication.ts 文件,用于逻辑封装。
/*** 消息处理函数类型定义* @template T - 消息数据类型* @param data - 消息数据* @param event - 原始 MessageEvent 事件对象*/
type MessageHandler<T = any> = (data: T, event: MessageEvent) => void;/*** useIframeCommunication 的配置项接口* @property allowedOrigin - 允许通信的目标源(origin),用于安全校验*/
interface IframeCommunicationOptions {allowedOrigin?: string;
}/*** useIframeCommunication 返回值接口* @property send - 发送消息方法* @property on - 注册消息处理器方法* @property destroy - 销毁通信实例方法* @property setTargetWindow - 设置目标窗口方法*/
interface IframeCommunication {send: (type: string, data: any) => void;on: (type: string, handler: MessageHandler) => void;destroy: () => void;setTargetWindow: (window: Window) => void;
}/*** 用于 iframe 通信的工具函数,支持发送消息、注册消息处理器、销毁监听等功能。* @param options - 配置项,包含目标窗口和允许的 origin* @returns IframeCommunication 实例*/
export const useIframeCommunication = (options: IframeCommunicationOptions = {}
): IframeCommunication => {const { allowedOrigin } = options;// 存储消息类型与对应处理函数的映射const messageHandlers = new Map<string, MessageHandler>();let targetWindow: Window = window.parent;/*** 设置目标窗口(在iframe加载完成后调用)* @param window - 目标窗口对象*/const setTargetWindow = (window: Window) => {targetWindow = window;};/*** 发送消息到目标窗口* @param type - 消息类型* @param data - 消息数据*/const send = (type: string, data: any) => {targetWindow?.postMessage({ type, data }, allowedOrigin || "*");};/*** 注册消息处理函数* @param type - 消息类型* @param handler - 处理函数*/const on = (type: string, handler: MessageHandler) => {messageHandlers.set(type, handler);};/*** 内部消息事件处理器* @param event - MessageEvent 事件对象*/const messageHandler = (event: MessageEvent) => {// 若指定了 allowedOrigin,则只处理来自该源的消息if (allowedOrigin && event.origin !== allowedOrigin) return;const { type, data } = (event.data || {}) as { type?: string; data?: any };const handler = type && messageHandlers.get(type);// 调用对应类型的处理函数if (typeof handler === "function") {handler(data, event);}};// 注册全局 message 事件监听window.addEventListener("message", messageHandler);/*** 销毁通信实例,移除事件监听并清空处理器*/const destroy = () => {window.removeEventListener("message", messageHandler);messageHandlers.clear();};return { setTargetWindow, send, on, destroy };
};
修改 MyVueApp1.vue 组件。
<script setup>
import { ref, onBeforeUnmount } from "vue";
import { useIframeCommunication } from "../../../utils/iframeCommunication.ts";// iframe 的 DOM 引用
const iframeRef = ref(null);
// 存储从子应用收到的消息
const childMessage = ref("");// iframe 加载完成后,设置通信目标窗口为子应用 iframe
const onIframeLoad = () => {setTargetWindow(iframeRef.value.contentWindow);
};// 初始化通信工具,allowedOrigin 限定只接收来自子应用的消息
const { send, on, destory, setTargetWindow } = useIframeCommunication({allowedOrigin: "http://localhost:5174",
});// 注册消息监听,收到子应用消息时更新 childMessage
on("FROM_CHILD", (data) => {childMessage.value = data;
});// 向子应用发送消息
const sendToApp2 = () => {send("FROM_PARENT", "我是app1,收到请回答,收到请回答!");
};// 组件卸载时销毁通信实例,移除事件监听
onBeforeUnmount(() => {destory();
});
</script><template><div><h2>我是my-vue-app1</h2><!-- 按钮:点击后向子应用发送消息 --><button @click="sendToApp2">app1发送消息给app2</button><!-- 展示从子应用接收到的消息 --><p style="color: skyblue">来自子应用的消息: {{ childMessage }}</p></div><!-- 嵌入子应用的 iframe,加载完成后绑定事件监听 --><iframeref="iframeRef"src="http://localhost:5174"@load="onIframeLoad"frameborder="0"></iframe>
</template><style scoped>
iframe {width: 1000px;height: 400px;border: 1px solid #ccc;margin: 10px;
}
</style>
修改 MyVueApp2.vue 组件。
<script setup>
import { ref, onBeforeUnmount } from "vue";
import { useIframeCommunication } from "../../../utils/iframeCommunication";// 用于存储从父应用收到的消息
const parentMessage = ref("");// 初始化通信工具,只允许接收来自父应用的消息
const { send, on, destory } = useIframeCommunication({allowedOrigin: "http://localhost:5173",
});// 注册消息监听,收到父应用消息时更新 parentMessage
on("FROM_PARENT", (data) => {parentMessage.value = data;
});// 向父应用发送消息
const sendToParent = () => {send("FROM_CHILD", "我是app2,收到,收到!🫡");
};// 组件卸载时销毁通信实例,移除事件监听
onBeforeUnmount(() => {destory();
});
</script><template><h2>我是my-vue-app2</h2><!-- 按钮:点击后向父应用发送消息 --><button @click="sendToParent">app2发送消息给app1</button><!-- 展示从父应用接收到的消息 --><p style="color: red">来自父应用的消息: {{ parentMessage }}</p>
</template><style scoped></style>
即可得到同样的效果,至此完成封装。

总结
本篇文章,我们认识了 iframe 的基本使用,学习了如何在 vue 项目中使用 iframe,并完成了项目间的通信,最后我们进行了一下封装,使通信逻辑更加通用,让代码更加优雅。
当然 iframe 的用法并不止于此,比如还有用于安全性和权限控制的sandbox、 allow,用户体验的allowfullscreen,性能优化的 loading 等等,相关属性的使用请查阅 MDN 文档自行学习。
好啦,本篇文章到这里就要和大家说再见啦,祝你这篇文章阅读愉快,你下篇文章的阅读愉快留着我下篇文章再祝!
参考资料:
- iframe · 百度百科
- MDN
- DeepSeek
- VS Code · Copilot