java swing 自定义标题栏,缩放窗口,阴影窗口
自定义标题栏是一个很复杂的功能,但是如果不去掉会感觉非常丑,网上基本没有教程,现在我吧教程献给各位苦逼的swing小白。
首先看一下成功图 😏

实现功能 :
- 取消默认java标题栏,自定义标题栏样式
- 自定义窗口关闭,最大化,最小化,正常化
- 双击标题栏自动缩放
- 鼠标移入窗体边框,变成缩放状态,可进行窗口大小缩放
- 鼠标在窗口最大化时拖拽窗口,变成正常化尺寸的窗口,并且窗口移动到鼠标在对应位置。
(最近在做课设,各种坑,这是在做课设中需要用的功能,有空考虑做一个swing框架,帮助一些大学的swing小白)
这是一个自定义的窗口,有阴影边框效果,有自定义标题栏,是不是瞬间高大上了 😎。接下来我们开始教程。
课设以及此文章的项目源码: https://github.com/enncy/student-course-selection
目录
- 前言
- 一 消除java默认边框
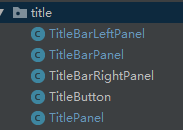
- 二 添加自定义标题栏
- TitlePanel 主面板
- TitleButton 标题栏按钮
- TitleBarRightPanel 标题栏右面板
- TitleBarPanel 标题栏面板
- TitleBarLeftPanel 标题栏左面板
- NiceColors 颜色工具类
- DragEvent 拖拽工具类
- 三 设置窗口自定义拉伸
- ResizeFrame
- 四 阴影边框面板
- DropShadowPanel
- 最后
前言
如果不想复制粘贴代码,觉得麻烦的同学,可以直接去 github 找最新的 release 下载,jar包叫diy-frame-x.x.x.jar已经打包好在 dist 目录下,下载源码,
-
引入
diy-frame-x.x.x.jar包。https://github.com/enncy/student-course-selection/releases -
复制粘贴
文章最后的代码,运行即可 -
还是建议看看源码以及讲解哦 😃
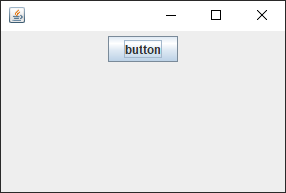
一 消除java默认边框
让我们看看不消除边框的代码
JFrame jFrame = new JFrame();
jFrame.setSize(300,200);
jFrame.setLayout(new FlowLayout());
jFrame.add(new JButton("button"));
//设置窗口居中
jFrame.setLocationRelativeTo(null);
jFrame.setVisible(true);
消除边框:
JFrame jFrame = new JFrame();
jFrame.setSize(300,200);
jFrame.setLayout(new FlowLayout());
jFrame.add(new JButton("button"));
// 去掉java自带边框
jFrame.setUndecorated(true);
//背景透明
jFrame.setBackground(new Color(0,0,0,0));
//设置窗口居中
jFrame.setLocationRelativeTo(null);
jFrame.setVisible(true);
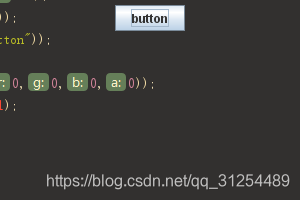
你没看错,就是这样,没有图标,没有标题栏,没有关闭按钮,也没有布局界面。更没有阴影边框。😱
二 添加自定义标题栏
我们需要创建这些组件,还有其他额外组件下面会说,全部复制粘贴即可
TitlePanel 主面板
public class TitlePanel extends JPanel {public  TitleBarPanel titleBarPanel  ;public TitlePanel(JFrame jFrame) {this.setLayout(new BorderLayout());this.setBorder(new EmptyBorder(5,5,0,5));this.setBackground(NiceColors.WHITE);titleBarPanel=  new TitleBarPanel(jFrame);this.add(titleBarPanel,BorderLayout.NORTH);}public TitleBarPanel getTitleBarPanel() {return titleBarPanel;}
}
TitleButton 标题栏按钮
public class TitleButton extends JPanel {public TitleButton(String text ) {// 操作按钮JLabel jLabel = new JLabel(text);jLabel.setFont(new Font("宋体",Font.BOLD,16));this.add(jLabel);this.setBackground(NiceColors.WHITE);//取消默认选中this.setFocusable(false);//添加鼠标移入移出事件this.addMouseListener(new MouseAdapter() {@Overridepublic void mouseEntered(MouseEvent e) {Component component = e.getComponent();//设置背景颜色component.setBackground(NiceColors.GHOST_WHITE);//设置鼠标样式:点击样式component.setCursor(new Cursor(Cursor.HAND_CURSOR));}@Overridepublic void mouseExited(MouseEvent e) {e.getComponent().setBackground(NiceColors.WHITE);}});}
}
TitleBarRightPanel 标题栏右面板
public class TitleBarRightPanel extends ScsWhitePanel {// jFrame 是需要控制的目标窗口public TitleBarRightPanel(JFrame jFrame) {//右对齐FlowLayout rightFlowLayout = new FlowLayout(FlowLayout.RIGHT);rightFlowLayout.setHgap(10);this.setLayout(rightFlowLayout);// 最小化按钮TitleButton min = new TitleButton("—");min.addMouseListener(new MouseAdapter() {@Overridepublic void mouseClicked(MouseEvent e) {jFrame.setExtendedState(JFrame.ICONIFIED);}});//最大化TitleButton max = new TitleButton("□");max.addMouseListener(new MouseAdapter() {@Overridepublic void mouseClicked(MouseEvent e) {reSize(jFrame);}});//关闭TitleButton close = new TitleButton("×");close.addMouseListener(new MouseAdapter() {@Overridepublic void mouseClicked(MouseEvent e) {jFrame.dispose();System.exit(0);}});this.add(min);this.add(max);this.add(close);}/*** 根据状态进行缩放* @param jFrame    目标窗体* @return: void*/public static void reSize(JFrame jFrame){int state =  jFrame.getExtendedState();if(state==JFrame.MAXIMIZED_BOTH){//还原最大化之前的尺寸jFrame.setExtendedState(JFrame.NORMAL);}else if(state==JFrame.ICONIFIED || state==JFrame.NORMAL){//最大化jFrame.setExtendedState(JFrame.MAXIMIZED_BOTH);}}
}
TitleBarPanel 标题栏面板
public class TitleBarPanel extends JPanel {public   TitleBarLeftPanel titleBarLeftPanel = new TitleBarLeftPanel("标题栏");/**** @param jframe* @return:*/public TitleBarPanel(JFrame jframe) {this.setLayout(new BorderLayout());//给父窗体初始化拖拽事件DragEvent.initDragEvent(jframe,this);//添加右界面this.add(new TitleBarRightPanel(jframe),BorderLayout.EAST);//添加左界面this.add(titleBarLeftPanel,BorderLayout.WEST);//设置高度this.setPreferredSize(new Dimension(0, 36));//设置背景this.setBackground(Color.WHITE);//双击标题栏,进行缩放this.addMouseListener(new MouseAdapter() {@Overridepublic void mouseClicked(MouseEvent e) {if(e.getClickCount()==2){TitleBarRightPanel.reSize(jframe);}super.mouseClicked(e);}});}public TitleBarLeftPanel getTitleBarLeftPanel() {return titleBarLeftPanel;}
}
TitleBarLeftPanel 标题栏左面板
====
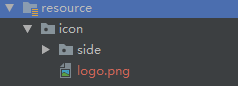
需要设置图标的同学这里注意!!!设置ICON图标, “icon/logo.png” 是 resource 文件夹下的路径
IDEA操作如下
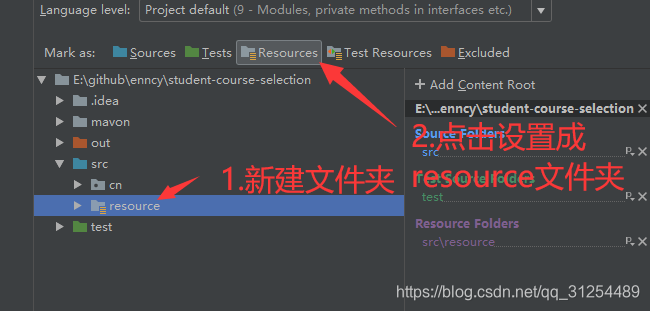
放置图片在指定位置。

如果不需要设置图标,或者不会设置,请吧下面源代码的这一段删除
ImageIcon icon = new ImageIcon(Objects.requireNonNull(this.getClass().getClassLoader().getResource("icon/logo.png")).getPath());//设置icon大小,和缩放大小,Image.SCALE_AREA_AVERAGING = 16 最大icon.setImage(icon.getImage().getScaledInstance(16, 16 ,Image.SCALE_AREA_AVERAGING ));jLabel.setIcon(icon);
public class TitleBarLeftPanel extends ScsWhitePanel {public JLabel jLabel;public TitleBarLeftPanel(String title) {//左对齐this.setLayout(new FlowLayout(FlowLayout.LEFT));// 设置标题栏jLabel = new JLabel(title);//设置ICON图标, "icon/logo.png" 是 resource 文件夹下的路径,如果没设置,默认是 classpath(src) 文件夹ImageIcon icon = new ImageIcon(Objects.requireNonNull(this.getClass().getClassLoader().getResource("icon/logo.png")).getPath());//设置icon大小,和缩放大小,Image.SCALE_AREA_AVERAGING = 16 最大icon.setImage(icon.getImage().getScaledInstance(16, 16 ,Image.SCALE_AREA_AVERAGING ));jLabel.setIcon(icon);//设置字体jLabel.setFont(new Font("微软雅黑",0,12));//设置边框this.setBorder(new EmptyBorder(5,5,5,5));this.add(jLabel);}public static void setTitle(String title){jLabel.setText(title);jLabel.repaint();}
}
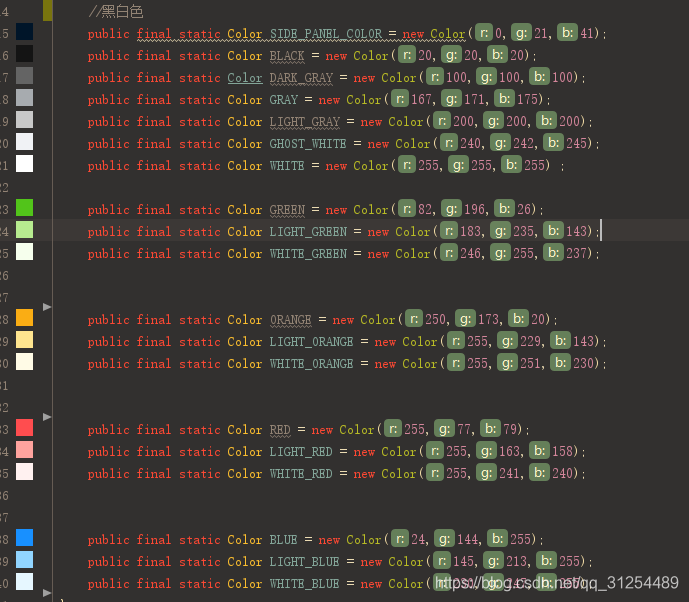
NiceColors 颜色工具类
public class NiceColors {public final static Color SIDE_PANEL_COLOR = new Color(0,21,41);public final static Color BLACK = new Color(20,20,20);public final static Color DARK_GRAY = new Color(100,100,100);public final static Color GRAY = new Color(167,171,175);public final static Color LIGHT_GRAY = new Color(200,200,200);public final static Color GHOST_WHITE = new Color(240,242,245);public final static Color WHITE = new Color(255,255,255) ;public final static Color GREEN = new Color(82,196,26);public final static Color LIGHT_GREEN = new Color(183,235,143);public final static Color WHITE_GREEN = new Color(246,255,237);public final static Color ORANGE = new Color(250,173,20);public final static Color LIGHT_ORANGE = new Color(255,229,143);public final static Color WHITE_ORANGE = new Color(255,251,230);public final static Color RED = new Color(255,77,79);public final static Color LIGHT_RED = new Color(255,163,158);public final static Color WHITE_RED = new Color(255,241,240);public final static Color BLUE = new Color(24,144,255);public final static Color LIGHT_BLUE = new Color(145,213,255);public final static Color WHITE_BLUE = new Color(230,247,255);
}
DragEvent 拖拽工具类
public class DragEvent {/*** 目标拖拽事件* @param moveComponent 被移动的组件* @param dragTarget 点击进行移动的组件* @return: void*/public static void initDragEvent(Component moveComponent, Component dragTarget){final boolean[] isDragging = new boolean[1];final int[] x = new int[1];final int[] y = new int[1];dragTarget.addMouseListener(new MouseAdapter() {@Overridepublic void mousePressed(MouseEvent e) { //鼠标点击时记录一下初始位置isDragging[0] = true;x[0] = e.getX();y[0] = e.getY();}@Overridepublic void mouseReleased(MouseEvent e) { //鼠标松开时isDragging[0] = false;}});//时刻更新鼠标位置//添加指定的鼠标移动侦听器,以接收发自此组件的鼠标移动事件。如果侦听器 l 为 null,则不会抛出异常并且不执行动作。dragTarget.addMouseMotionListener(new MouseMotionAdapter() {@Overridepublic void mouseDragged(MouseEvent e) {try {//如果从最大化状态拖动,则变回正常尺寸JFrame jFrame = ((JFrame) moveComponent);int state = jFrame.getExtendedState();if(state==JFrame.MAXIMIZED_BOTH){// 获取侧边栏的宽度,如果没侧边栏可以忽略int sideWidth = moveComponent.getWidth() - e.getComponent().getWidth();//还原尺寸jFrame.setExtendedState(JFrame.NORMAL);//获取屏幕大小int width = Toolkit.getDefaultToolkit().getScreenSize().width;// 获取整个屏幕中,拖拽组件点击x坐标相对于整个屏幕的比例,// 例如 rate 为 0.5 ,则说明点击的位置,是拖拽组件的正中央double rate = ((double) (e.getXOnScreen() - sideWidth)/ (double) width);// 获取被移动窗体中,拖拽组件距离窗体x坐标的距离int resultX = (int) ((moveComponent.getWidth()-sideWidth) * rate);// 替换点击按下时的坐标x[0] = resultX;moveComponent.setLocation(e.getXOnScreen() - resultX ,y[0]);}else{//修改位置//只要鼠标是点击的(isDragging),就时刻更改窗体的位置if (isDragging[0]) {int left = moveComponent.getLocation().x;int top = moveComponent.getLocation().y;moveComponent.setLocation(left + e.getX() - x[0], top + e.getY() - y[0]);}}}catch (Exception e1){e1.printStackTrace();}}});}}
好了,接下来我们开始实现自定义标题栏
我们这里用 BorderLayout 来管理布局,新建TitlePanel 面板,最后添加到 jFrame 里即可
JFrame jFrame = new JFrame();
jFrame.setSize(300,200);
//设置 BorderLayout  布局管理器
jFrame.setLayout(new BorderLayout());
//新建 TitlePanel 面板,传入需要控制的目标窗口 jFrame
TitlePanel titlePanel = new TitlePanel(jFrame);
//新建按钮在布局下方
titlePanel.add(new JButton("button"),BorderLayout.SOUTH);
//将面板添加
jFrame.add(titlePanel,BorderLayout.CENTER);
//取消java默认标题栏
jFrame.setUndecorated(true);
//设置背景透明
jFrame.setBackground(new Color(0,0,0,0));
//设置窗口居中
jFrame.setLocationRelativeTo(null);
jFrame.setVisible(true);
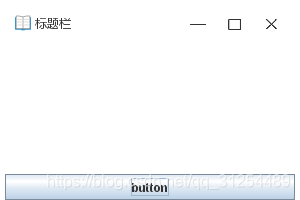
我们点击标题栏区域即可实现整个窗体的移动。
但是不能自动缩放窗口,而且没有阴影边框。接下来我们继续拓展功能。
三 设置窗口自定义拉伸
复制粘贴即可
ResizeFrame
源码来自于一位csdn网友,已经找不到出处了 😂
public class ResizeFrame extends JFrame {private boolean isTopLeft;// 是否处于左上角调整窗口状态private boolean isTop;// 是否处于上边界调整窗口状态private boolean isTopRight;// 是否处于右上角调整窗口状态private boolean isRight;// 是否处于右边界调整窗口状态private boolean isBottomRight;// 是否处于右下角调整窗口状态private boolean isBottom;// 是否处于下边界调整窗口状态private boolean isBottomLeft;// 是否处于左下角调整窗口状态private boolean isLeft;// 是否处于左边界调整窗口状态private final static int RESIZE_WIDTH = 5;// 判定是否为调整窗口状态的范围与边界距离private     int min_width = 500;// 窗口最小宽度private     int min_height = 400;// 窗口最小高度public ResizeFrame(int min_width,int min_height) {this.min_height = min_height;this.min_width = min_width;//2021/5/26 bug fix  : 鼠标离开页面后重新设置鼠标样式,解决鼠标移开之后,点击任务栏中的应用进行最小化,再次点击后应用显示,造成鼠标依然显示上一次在边界位置的样式。addMouseListener(new MouseAdapter() {@Overridepublic void mouseExited(MouseEvent e) {Component c = e.getComponent();c.setCursor(new Cursor(Cursor.DEFAULT_CURSOR));}});addMouseMotionListener(new MouseAdapter() {@Overridepublic void mouseMoved(MouseEvent event) {Component c = event.getComponent();int x = event.getX();int y = event.getY();int width = c.getWidth();int height = c.getHeight();int cursorType = Cursor.DEFAULT_CURSOR;// 鼠标光标初始为默认类型,若未进入调整窗口状态,保持默认类型// 先将所有调整窗口状态重置isTopLeft = isTop = isTopRight = isRight = isBottomRight = isBottom = isBottomLeft = isLeft = false;if (y <= RESIZE_WIDTH) {if (x <= RESIZE_WIDTH) {// 左上角调整窗口状态isTopLeft = true;cursorType = Cursor.NW_RESIZE_CURSOR;} else if (x >= width - RESIZE_WIDTH) {// 右上角调整窗口状态isTopRight = true;cursorType = Cursor.NE_RESIZE_CURSOR;} else {// 上边界调整窗口状态isTop = true;cursorType = Cursor.N_RESIZE_CURSOR;}} else if (y >= height - RESIZE_WIDTH) {if (x <= RESIZE_WIDTH) {// 左下角调整窗口状态isBottomLeft = true;cursorType = Cursor.SW_RESIZE_CURSOR;} else if (x >= width - RESIZE_WIDTH) {// 右下角调整窗口状态isBottomRight = true;cursorType = Cursor.SE_RESIZE_CURSOR;} else {// 下边界调整窗口状态isBottom = true;cursorType = Cursor.S_RESIZE_CURSOR;}} else if (x <= RESIZE_WIDTH) {// 左边界调整窗口状态isLeft = true;cursorType = Cursor.W_RESIZE_CURSOR;} else if (x >= width - RESIZE_WIDTH) {// 右边界调整窗口状态isRight = true;cursorType = Cursor.E_RESIZE_CURSOR;}// 最后改变鼠标光标c.setCursor(new Cursor(cursorType));}@Overridepublic void mouseDragged(MouseEvent event) {Component c = event.getComponent();int x = event.getX();int y = event.getY();int width = c.getWidth();int height = c.getHeight();// 保存窗口改变后的x、y坐标和宽度、高度,用于预判是否会小于最小宽度、最小高度int nextX = c.getX();int nextY = c.getY();int nextWidth = width;int nextHeight = height;if (isTopLeft || isLeft || isBottomLeft) {// 所有左边调整窗口状态nextX += x;nextWidth -= x;}if (isTopLeft || isTop || isTopRight) {// 所有上边调整窗口状态nextY += y;nextHeight -= y;}if (isTopRight || isRight || isBottomRight) {// 所有右边调整窗口状态nextWidth = x;}if (isBottomLeft || isBottom || isBottomRight) {// 所有下边调整窗口状态nextHeight = y;}if (nextWidth <= min_width) {// 如果窗口改变后的宽度小于最小宽度,则宽度调整到最小宽度nextWidth = min_width;if (isTopLeft || isLeft || isBottomLeft) {// 如果是从左边缩小的窗口,x坐标也要调整nextX = c.getX() + width - nextWidth;}}if (nextHeight <= min_height) {// 如果窗口改变后的高度小于最小高度,则高度调整到最小高度nextHeight = min_height;if (isTopLeft || isTop || isTopRight) {// 如果是从上边缩小的窗口,y坐标也要调整nextY = c.getY() + height - nextHeight;}}// 最后统一改变窗口的x、y坐标和宽度、高度,可以防止刷新频繁出现的屏闪情况setBounds(nextX, nextY, nextWidth, nextHeight);}});}public void setMin_width(int min_width) {this.min_width = min_width;}public void setMin_height(int min_height) {this.min_height = min_height;}public static void main(String[] args) {//一个简单的演示小例子JFrame frame = new ResizeFrame(400,300);frame.setSize(400, 300);Dimension screenSize = Toolkit.getDefaultToolkit().getScreenSize();frame.setLocation((screenSize.width - frame.getWidth()) / 2, (screenSize.height - frame.getHeight()) / 2);frame.addMouseListener(new MouseAdapter() {@Overridepublic void mouseClicked(MouseEvent event) {if (event.getClickCount() > 1) {System.exit(0);}}});frame.setUndecorated(true);frame.setVisible(true);}
}
接下来开始设置
我们只需要将第一句
JFrame jFrame = new JFrame();
改成
JFrame jFrame = new ResizeFrame(300,200);
即可
//最小宽度300,最小高度200
JFrame jFrame = new ResizeFrame(300,200);
jFrame.setSize(300,200);
jFrame.setLayout(new BorderLayout());TitlePanel titlePanel = new TitlePanel(jFrame);
titlePanel.add(new JButton("button"),BorderLayout.SOUTH);
jFrame.add(titlePanel,BorderLayout.CENTER);jFrame.setUndecorated(true);
jFrame.setBackground(new Color(0,0,0,0));
jFrame.setLocationRelativeTo(null);
jFrame.setVisible(true);
你可能感觉没有任何变化,但是鼠标移到框边边,就会和原生的效果一模一样。因为不能截图鼠标的样子所以这里就不放图了.
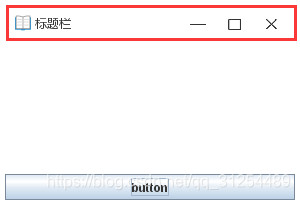
这里需要注意,如果你的页面被填满了,请给主面板 titlePanel设置一个 EmptyBorder 留出来一点边框。 要不然鼠标缩放效果会被挡住,因为我已经在titlePanel里设置了,所以这里跟你们说一下。红色线条就是 EmptyBorder

四 阴影边框面板
DropShadowPanel
具体解析请看 : java swing 阴影边框 https://blog.csdn.net/qq_31254489/article/details/116093173
复制粘贴即可
public class DropShadowPanel extends JPanel {private static final long serialVersionUID = 1L;public int pixels;public DropShadowPanel(int pix) {this.pixels = pix;Border border = BorderFactory.createEmptyBorder(pixels, pixels, pixels, pixels);this.setBorder(BorderFactory.createCompoundBorder(this.getBorder(), border));this.setLayout(new BorderLayout());}@Overrideprotected void paintComponent(Graphics g) {int shade = 0;int topOpacity = 80;for (int i = 0; i < pixels; i++) {g.setColor(new Color(shade, shade, shade, ((topOpacity / (pixels*2)) * i)));g.drawRect(i, i, this.getWidth() - ((i * 2) + 1), this.getHeight() - ((i * 2) + 1));}}
}
最后
只需要将阴影面板里面,添加一个标题面板即可实现我们的最终窗口。
JFrame jFrame = new ResizeFrame(300,200);
jFrame.setSize(300,200);
jFrame.setLayout(new BorderLayout());
// 创建阴影面板,并设置阴影大小
DropShadowPanel dropShadowPanel = new DropShadowPanel(8);
// 创建标题栏面板,传入需要控制的目标窗体
TitlePanel titlePanel = new TitlePanel(jFrame);
// 将标题面板添加到阴影面板中
dropShadowPanel.add(titlePanel);
// 添加按钮
titlePanel.add(new JButton("button"),BorderLayout.SOUTH);
// 将阴影面板添加到窗体
jFrame.add(dropShadowPanel,BorderLayout.CENTER);jFrame.setUndecorated(true);
jFrame.setBackground(new Color(0,0,0,0));
jFrame.setLocationRelativeTo(null);
jFrame.setVisible(true);

最后设置一下标题就行了
titlePanel.getTitleBarPanel().getTitleBarLeftPanel().setTitle("学生选课系统");
完美 😎😎😎
就讲那么多了,有什么不懂的私聊我即可。
课设以及此文章的源码: https://github.com/enncy/student-course-selection