【Tauri2】027——plugin(三)——fs
前言
前面使用了fs这个插件,这篇就来简单看看关于fs内部的东西
正文
init方法
先来看看init方法
函数签名
pub fn init<R: Runtime>() -> TauriPlugin<R, Option<config::Config>> 返回TauriPlugin,
看看Config 又是什么
#[derive(Deserialize)]
#[serde(rename_all = "camelCase", deny_unknown_fields)]
pub struct Config {pub require_literal_leading_dot: Option<bool>,
}
是个结构体,只是一个字段require_literal_leading_dot,根据意思,可以知道
一个可选的布尔字段,表示是否要求路径中以点(.)开头的组件必须显式匹配
实现了trait Deserialize,这是PluginBuilder的trait要求
pub struct Builder<R: Runtime, C: DeserializeOwned = ()> new方法
PluginBuilder::<R, Option<config::Config>>::new("fs").invoke_handler(tauri::generate_handler![commands::create,...])传入fs作为插件的名字,后面接着调用invoke_handler,用于注册通信函数
setup方法
.setup(|app, api| {let scope = Scope {require_literal_leading_dot: api.config().as_ref().and_then(|c| c.require_literal_leading_dot),scope: tauri::fs::Scope::new(app, &FsScope::default())?,};#[cfg(target_os = "android")]{let fs = mobile::init(app, api)?;app.manage(fs);}#[cfg(not(target_os = "android"))]app.manage(Fs(app.clone()));app.manage(scope);Ok(())})pub(crate) struct Scope {pub(crate) scope: tauri::fs::Scope,pub(crate) require_literal_leading_dot: Option<bool>,
}Scope是个结构体,里面有scope和require_literal_leading_dot字段
先初始化这个Scope
然后,注册了两个State,一个是Fs,另一个就是初始化后的scope
简单使用require_literal_leading_dot——读取.gitignore文件
在配置文件tauri.conf.json中,进行如下配置
"plugins":{"fs": {"requireLiteralLeadingDot": false}},因为.gitignore文件的路径在D:/start/.gitignore
但是tauri.conf.json的路径D:/start/src-tauri/tauri.conf.json
因此resources如下
"resources": {..."../.gitignore": "public/.gitignore"},要往后退一个目录才能找到。
当然,也可以写绝对路径
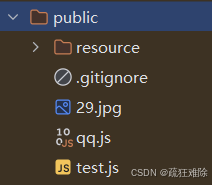
编译后,debug目录下

成功
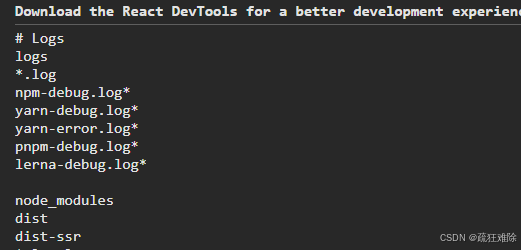
读取.gitignore
关键代码如下
let rf=await readTextFile("public/.gitignore",{baseDir})console.log(rf)结果如下

没问题
on_event
.on_event(|app, event| {if let RunEvent::WindowEvent {label: _,event: WindowEvent::DragDrop(DragDropEvent::Drop { paths, position: _ }),..} = event{let scope = app.fs_scope();for path in paths {if path.is_file() {dbg!(&path);let _ = scope.allow_file(path);} else {let _ = scope.allow_directory(path, true);}}}})很明显,这里面就是监控window事件的,来试试
使用拖拽事件DragDrop
在尝试过程中,笔者发现一件事情
如果在Cargo文件,在依赖tauri中,设置了features=["unstable"],笔者发现无法触发这个DragDrop事件和Focus事件。
但是如果不设置feature=["unstable"],在前面文章中使用的一些东西WindowBuilder,就使用不了。
笔者在这里删除unstable,为了触发DragDrop
在源代码中,添加打印语句
let scope = app.fs_scope();println!("DragDropEvent::Drop {:#?}", paths);println!("DragDropEvent::Drop {:#?}", scope);总之,代码如下
fn use_window_event(window: &Window,event: &WindowEvent,
){match event {WindowEvent::DragDrop(drag)=>{match drag {tauri::DragDropEvent::Drop {paths,position,..}=>{println!("{:?}",paths);},_=> {println!("DragDrop {:?}", drag);}}}_ => {println!("Other event {:?}", event);}}
}
主项目的main函数中
.on_window_event(use_window_event)笔者多次尝试,打印的结果如下
DragDropEvent::Drop Scope {allowed_patterns: ["C:\\Users\\26644\\Desktop\\f10c2ffebc1a933389a5390179c5cd13.png","C:\\Users\\26644\\Desktop\\hello.asm","\\\\[?]\\C:\\Users\\26644\\Desktop\\hello.asm","\\\\[?]\\C:\\Users\\26644\\Desktop\\f10c2ffebc1a933389a5390179c5cd13.png",],forbidden_patterns: [],
}
好像拖拽了之后,会把文件路经添加到allowed_patterns。
最后调用build方法
.build()返回TauriPlugin<R, Option<config::Config>>
总之,干了四件事
1、添加一个配置
2、注册通信函数
3、注册了两个State
4、事件处理
看看通信函数create
#[tauri::command]
pub fn create<R: Runtime>(webview: Webview<R>,global_scope: GlobalScope<Entry>,command_scope: CommandScope<Entry>,path: SafeFilePath,options: Option<BaseOptions>,
) -> CommandResult<ResourceId> {let resolved_path = resolve_path(&webview,&global_scope,&command_scope,path,options.and_then(|o| o.base_dir),)?;let file = File::create(&resolved_path).map_err(|e| {format!("failed to create file at path: {} with error: {e}",resolved_path.display())})?;let rid = webview.resources_table().add(StdFileResource::new(file));Ok(rid)
}
前三个参数都是能直接获取的,不必细说。
需要传path和options两个参数。
看看resolve_path方法
pub fn resolve_path<R: Runtime>(webview: &Webview<R>,global_scope: &GlobalScope<Entry>,command_scope: &CommandScope<Entry>,path: SafeFilePath,base_dir: Option<BaseDirectory>,
) -> CommandResult<PathBuf> {let path = path.into_path()?;let path = if let Some(base_dir) = base_dir {webview.path().resolve(&path, base_dir)?} else {path};let fs_scope = ...let scope =...let require_literal_leading_dot = ...if is_forbidden(&fs_scope.scope, &path, require_literal_leading_dot)...if fs_scope.scope.is_allowed(&path) || scope.is_allowed(&path) {Ok(path)} else {Err(CommandError::Plugin(Error::PathForbidden(path)))}
}
大致的过程
1、路径拼接
webview.path().resolve(&path, base_dir)?webview实现了Manager,调用path方法,返回&PathResolve,使用
resolve拼接路径
2、判断是否被禁止
3、判断是否满足允许的条件
最后返回需要的路径
File::create
调用Rust标志库std::fs::File中的方法来创建文件
resources_table
fn resources_table(&self) -> MutexGuard<'_, ResourceTable> 返回一个锁,里面是ResourceTable
#[derive(Default)]
pub struct ResourceTable {index: BTreeMap<ResourceId, Arc<dyn Resource>>,
}
而ResourceTable 是个结构体,内部只有一个字段,index。类型是BTreeMap
BTreeMap in std::collections - Rust![]() https://doc.rust-lang.org/std/collections/struct.BTreeMap.html
https://doc.rust-lang.org/std/collections/struct.BTreeMap.html
简单地说,BTreeMap 是一种基于 B树 的有序键值存储结构
1、有序存储
2、高效的查找、插入和删除
3、适用于内存和磁盘存储
键是ResourceId,值是Arc<dyn Resource>,动态分发trait Resource
pub type ResourceId = u32;ResourceId是u32的别名
看看这个StdFileResouzhe
struct StdFileResource(Mutex<File>);impl StdFileResource {fn new(file: File) -> Self {Self(Mutex::new(file))}fn with_lock<R, F: FnMut(&File) -> R>(&self, mut f: F) -> R {let file = self.0.lock().unwrap();f(&file)}
}
impl Resource for StdFileResource {}
这是一个结构体,实现了 trait Resource
看看其中的add方法
pub fn add<T: Resource>(&mut self, resource: T) -> ResourceId {self.add_arc(Arc::new(resource))}返回了ResourceId
一直往里面走,发现add_arc_dyn
pub fn add_arc_dyn(&mut self, resource: Arc<dyn Resource>) -> ResourceId {let mut rid = Self::new_random_rid();while self.index.contains_key(&rid) {rid = Self::new_random_rid();}let removed_resource = self.index.insert(rid, resource);assert!(removed_resource.is_none());rid}大致过程
1、随机创造一个的ResourceId
fn new_random_rid() -> u32 {let mut bytes = [0_u8; 4];getrandom::getrandom(&mut bytes).expect("failed to get random bytes");u32::from_ne_bytes(bytes)}2、在BtreeMap中判断是否包含这个随机的ResourceId,如果存在,重新生成一个随机的 ResourceId,直到生成一个唯一的 ResourceId。
3、BtreeMap的insert方法,插入ResourceId和对应的resource,比如文件。
insert 方法的返回值是 Option<V>,表示插入操作是否覆盖了原有的值:
如果键已经存在,返回 Some(旧值)。
如果键不存在,返回 None
4、断言插入操作没有覆盖任何已有的资源
5、返回ResourceId
总结
在create中,先判断是否满足权限,再将资源插入到BtreeMap中,返回ResourceId
其他方法就不必细看了,都是围绕标准库std::fs和BtreeMap,进行展开。
比如说write,就是先通过BtreeMap获取rid,然后使用fs中的方法。
