Spring Boot 3.x集成SaToken使用swagger3+knife4j 4.X生成接口文档
说一说Spring Boot 3.X集成SaToken使用swagger3并使用第三方的knife4j踩过的坑,废话不多说直接上正题,SaToken的我就不贴了
第一步当然是要先导入相关的依赖,包括swagger和knife4j,如下
<dependency><groupId>com.github.xiaoymin</groupId><artifactId>knife4j-openapi3-jakarta-spring-boot-starter</artifactId><version>4.4.0</version></dependency>
在最新版的knife4j 4.x中已经在starter中集成了openapi3和swagger3相关的依赖了,所以只需要这一个Starter就行了,不需要额外的sprinfox之类的。
第二步,添加相关的配置
application.yml
# security配置,如果使用了Spring security或者satoken需要添加排除路径
security:# 排除路径excludes:- /*.html- /**/*.html- /**/*.css- /**/*.js- /favicon.ico- /error/**#swagger文档和knife4j的路径- /v3/api-docs/**- /doc.html/**
# 是否开启swagger 生产环境切记关闭
swagger:enabled: true
# springdoc-openapi项目配置
sspringdoc:swagger-ui:enable: falsepath: /swagger-ui.htmlapi-docs:path: /v3/api-docsgroup-configs:- group: 'default'paths-to-match: '/**'#生成文档所需的扫包路径,一般为启动类目录packages-to-scan: com.xxxx.xxxx.xxxx#knife4j配置knife4j:#是否启用增强设置enable: true#开启生产环境屏蔽production: true#是否启用登录认证basic:enable: falsesetting:language: zh_cn
SwaggerConfig.java
import com.github.xiaoymin.knife4j.spring.annotations.EnableKnife4j;
import io.swagger.v3.oas.models.ExternalDocumentation;
import io.swagger.v3.oas.models.OpenAPI;
import io.swagger.v3.oas.models.info.Contact;
import io.swagger.v3.oas.models.info.Info;
import io.swagger.v3.oas.models.info.License;
import org.springdoc.core.models.GroupedOpenApi;
import org.springframework.boot.autoconfigure.AutoConfiguration;
import org.springframework.context.annotation.Bean;/*** @Author: zhang* @CreateTime: 2025-04-26 13:42* @Description: TODO*/
@EnableKnife4j
@AutoConfiguration
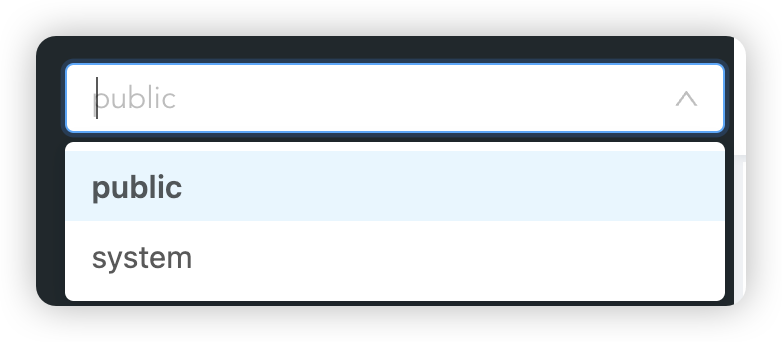
public class SwaggerConfig {/*** 创建API* http:IP:端口号/swagger-ui/index.html 原生地址* http:IP:端口号/doc.html bootStrap-UI地址*/@Beanpublic OpenAPI swaggerOpenAPI() {return new OpenAPI().info(new Info().title("XXXX")// 信息.contact(new Contact().name("zhang").email("邮箱").url("地址"))// 简介.description("XXXX系统API文档")// 版本.version("v1")// 许可证.license(new License().name("Apache 2.0").url("http://springdoc.org"))).externalDocs(new ExternalDocumentation().description("外部文档").url("https://springshop.wiki.github.org/docs"));}@Beanpublic GroupedOpenApi systemApi() {return GroupedOpenApi.builder().group("system").pathsToMatch("/system/**").build();}//这里是新建的分组,会在knife4j中显示,需要注意的是pathsToMatch中的url需要有固定的前缀@Beanpublic GroupedOpenApi publicApi() {return GroupedOpenApi.builder().group("public").pathsToMatch("/public/**").build();}}需要注意的是GroupOpenApi中的pathsToMatch中的URL需要严格按照分组确定,否则打开knife4j文档会报错.。设置好分组后会在knife4j显示,分组后方便管理,如下图:
SecurityConfig.java
import cn.dev33.satoken.exception.NotLoginException;
import cn.dev33.satoken.interceptor.SaInterceptor;
import cn.dev33.satoken.router.SaRouter;
import cn.dev33.satoken.stp.StpUtil;
import cn.hutool.extra.spring.SpringUtil;
import com.mayun.store.management.common.utils.ServletUtils;
import com.mayun.store.management.common.utils.StringUtils;
import lombok.RequiredArgsConstructor;
import lombok.extern.slf4j.Slf4j;
import org.springframework.boot.autoconfigure.AutoConfiguration;
import org.springframework.boot.context.properties.EnableConfigurationProperties;
import org.springframework.web.servlet.config.annotation.InterceptorRegistry;
import org.springframework.web.servlet.config.annotation.WebMvcConfigurer;import java.util.Objects;/*** @author zhang*/
@Slf4j
@AutoConfiguration
@RequiredArgsConstructor
@EnableConfigurationProperties(SecurityProperties.class)
public class SecurityConfig implements WebMvcConfigurer {private final SecurityProperties securityProperties;/*** 注册sa-token的拦截器*/@Overridepublic void addInterceptors(InterceptorRegistry registry) {// 注册路由拦截器,自定义验证规则registry.addInterceptor(new SaInterceptor(handler -> {UrlHandler urlHandler = SpringUtil.getBean(UrlHandler.class);// 登录验证 -- 排除多个路径SaRouter// 获取所有的.match(urlHandler.getUrls())// 对未排除的路径进行检查.check(() -> {// 检查是否登录 是否有tokenStpUtil.checkLogin();// 自定义的satoken校验逻辑...});})).order(1)//默认拦截excludes外的所有 不需要拦截的配置excludes 或者方法 or 类 添加 @SaIgnore//.addPathPatterns("/api/**")// 排除不需要拦截的路径.excludePathPatterns(securityProperties.getExcludes());}}
SecurityProperties.java 中没有多余的属性
import lombok.Data;
import org.springframework.boot.context.properties.ConfigurationProperties;/*** @author zhang*/
@Data
@ConfigurationProperties(prefix = "security")
public class SecurityProperties {/*** 排除路径*/private String[] excludes;}
到这里不出意外的话就可以启动了,地址是:http://localhost:8088/doc.html
也有可能会报异常,satoken会校验token,导致无法访问
这个时候需要添加下面映射静态资源的配置:
WebResoueceLocationConfig.java
import lombok.extern.slf4j.Slf4j;
import org.springframework.boot.autoconfigure.AutoConfiguration;
import org.springframework.web.servlet.config.annotation.ResourceHandlerRegistry;
import org.springframework.web.servlet.config.annotation.WebMvcConfigurationSupport;/*** @Author: zhang* @CreateTime: 2025-05-05  17:11* @Description: TODO swagger静态资源的映射*/
@AutoConfiguration
@Slf4j
public class WebResoueceLocationConfig extends WebMvcConfigurationSupport {@Overrideprotected void addResourceHandlers(ResourceHandlerRegistry registry) {log.info("开启静态资源映射...");registry.addResourceHandler("doc.html").addResourceLocations("classpath:/META-INF/resources/");registry.addResourceHandler("/webjars/**").addResourceLocations("classpath:/META-INF/resources/webjars/");registry.addResourceHandler("/swagger-ui/**").addResourceLocations("classpath:/META-INF/resources/");registry.addResourceHandler("/**").addResourceLocations("classpath:/static/");}
}
到这里基本上就不会有问题了,也可以在启动类上加一点改造,在控制台自动输出文档 的地址,改造后的启动类如下:
import io.micrometer.common.util.StringUtils;
import lombok.extern.slf4j.Slf4j;
import org.springframework.boot.Banner;
import org.springframework.boot.SpringApplication;
import org.springframework.boot.autoconfigure.SpringBootApplication;
import org.springframework.context.annotation.ComponentScan;
import org.springframework.core.env.Environment;
import org.springframework.scheduling.annotation.EnableAsync;
import org.springframework.scheduling.annotation.EnableScheduling;import java.net.InetAddress;
import java.net.UnknownHostException;@Slf4j
@EnableAsync
@EnableScheduling
@SpringBootApplication
//替换为自己的实际路径
@ComponentScan("xxx.xxx.xxx.xxx")
public class AdminApplication {public static void main(String[] args) {SpringApplication app = new SpringApplication(AdminApplication.class);Environment env = app.run(args).getEnvironment();app.setBannerMode(Banner.Mode.CONSOLE);logApplicationStartup(env);}private static void logApplicationStartup(Environment env) {String protocol = "http";if (env.getProperty("server.ssl.key-store") != null) {protocol = "https";}String serverPort = env.getProperty("server.port");String contextPath = env.getProperty("server.servlet.context-path");if (StringUtils.isBlank(contextPath)) {contextPath = "/doc.html";} else {contextPath = contextPath + "/doc.html";}String hostAddress = "localhost";try {hostAddress = InetAddress.getLocalHost().getHostAddress();} catch (UnknownHostException e) {log.warn("The host name could not be determined, using `localhost` as fallback");}log.info("""\n----------------------------------------------------------\t应用程序“{}”正在运行中......\t接口文档访问 URL:\t本地: \t\t{}://localhost:{}{}\t外部: \t{}://{}:{}{}\t配置文件: \t{}----------------------------------------------------------""",env.getProperty("spring.application.name"),protocol,serverPort,contextPath,protocol,hostAddress,serverPort,contextPath,env.getActiveProfiles());}
这样就能在启动的时候再控制台打印出文档的地址了,如下:
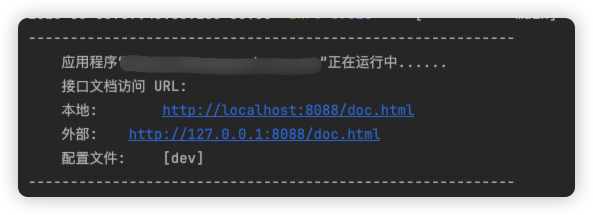
点击控制台的链接就可以自动跳转到文档页面了。
SaToken的配置我就不贴了