Java中使用Spring Boot+Ollama实现本地AI的MCP接入
目录结构
- 完善spring boot
- pom.xml添加依赖
- application.yml
- MCP 工具配置 mcp-servers.json
- 配置类
- 编写API
在我的上一篇文章搭建好本地的聊天机器人后,准备接入MCP进一步增强AI的能力,以实现类似手机AI的功能
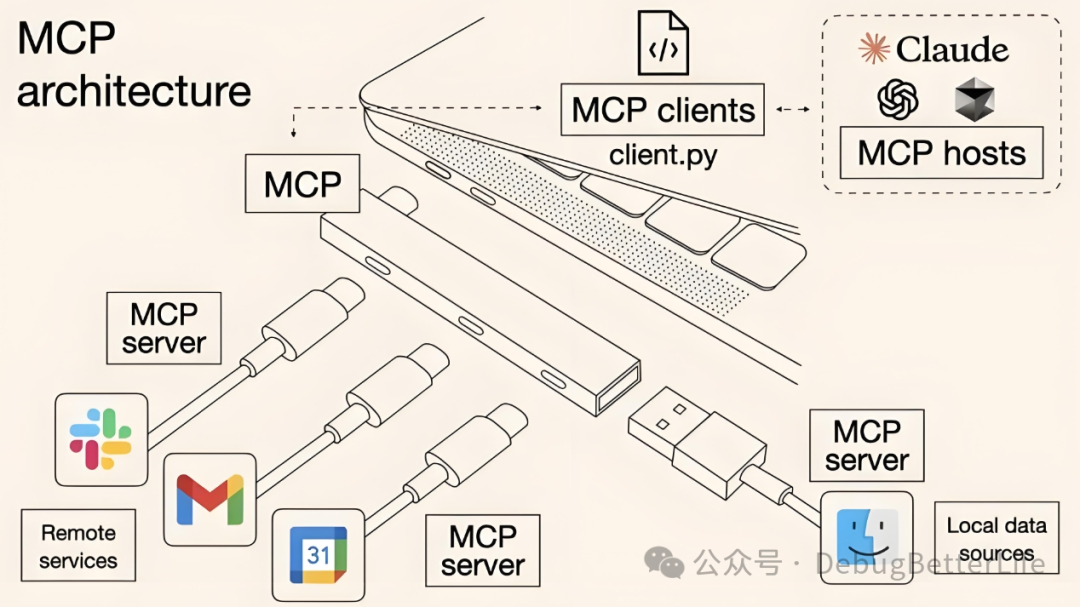
参考的是第二篇文章链接其内容比较精炼,有些细节被忽略了,导致踩坑不少,可能是因为版本原因,最终我没能使用他的方案运行成功,转而使用了另一个方案,原文连接
为什么使用Qwen3
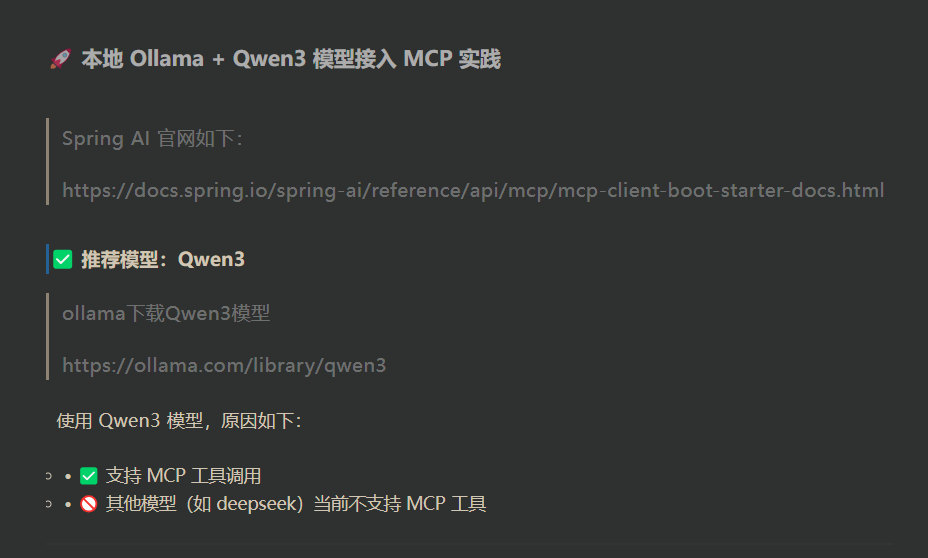
完善spring boot
pom.xml添加依赖
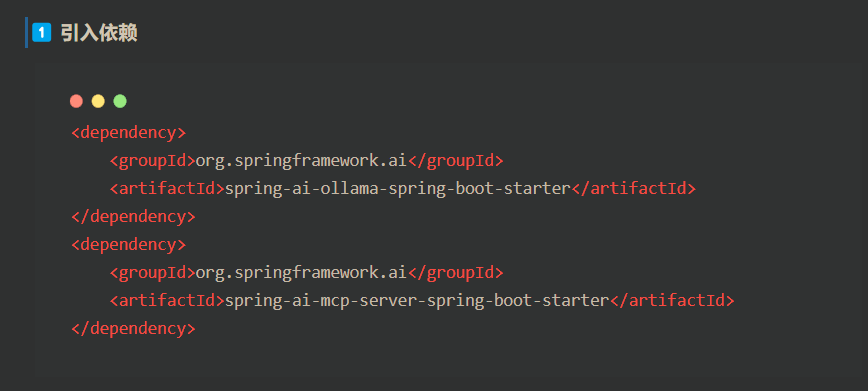
在实际添加过程中,第一个依赖我用的不一样,原文给的我无法加载,第二个依赖我并不能成功加入,我使用的依赖如下
<?xml version="1.0" encoding="UTF-8"?>
<project xmlns="http://maven.apache.org/POM/4.0.0"xmlns:xsi="http://www.w3.org/2001/XMLSchema-instance"xsi:schemaLocation="http://maven.apache.org/POM/4.0.0https://maven.apache.org/xsd/maven-4.0.0.xsd"><modelVersion>4.0.0</modelVersion><groupId>com.example</groupId><artifactId>Qwen3</artifactId><version>0.0.1-SNAPSHOT</version><name>Qwen3</name><description>Qwen3</description><parent><groupId>org.springframework.boot</groupId><artifactId>spring-boot-starter-parent</artifactId><version>3.4.1</version></parent><properties><java.version>17</java.version><project.build.sourceEncoding>UTF-8</project.build.sourceEncoding><project.reporting.outputEncoding>UTF-8</project.reporting.outputEncoding></properties><dependencies><dependency><groupId>org.springframework.boot</groupId><artifactId>spring-boot-starter-web</artifactId></dependency><dependency><groupId>org.springframework.ai</groupId><artifactId>spring-ai-ollama-spring-boot-starter</artifactId><version>1.0.0-M6</version></dependency><dependency><groupId>org.springframework.boot</groupId><artifactId>spring-boot-starter-test</artifactId><scope>test</scope></dependency><dependency><groupId>org.springframework.ai</groupId><artifactId>spring-ai-mcp-client-spring-boot-starter</artifactId><version>1.0.0-M6</version></dependency></dependencies><repositories><repository><id>spring-milestones</id><url>https://repo.spring.io/milestone</url></repository><repository><id>spring-snapshots</id><url>https://repo.spring.io/snapshot</url><snapshots><enabled>true</enabled></snapshots></repository></repositories><build><plugins><plugin><groupId>org.apache.maven.plugins</groupId><artifactId>maven-compiler-plugin</artifactId><version>3.8.1</version><configuration><source>17</source><target>17</target><encoding>UTF-8</encoding></configuration></plugin><plugin><groupId>org.springframework.boot</groupId><artifactId>spring-boot-maven-plugin</artifactId><configuration><mainClass>com.example.qwen3.Qwen3Application</mainClass></configuration></plugin></plugins></build></project>
MCP客户端和服务端分别作用
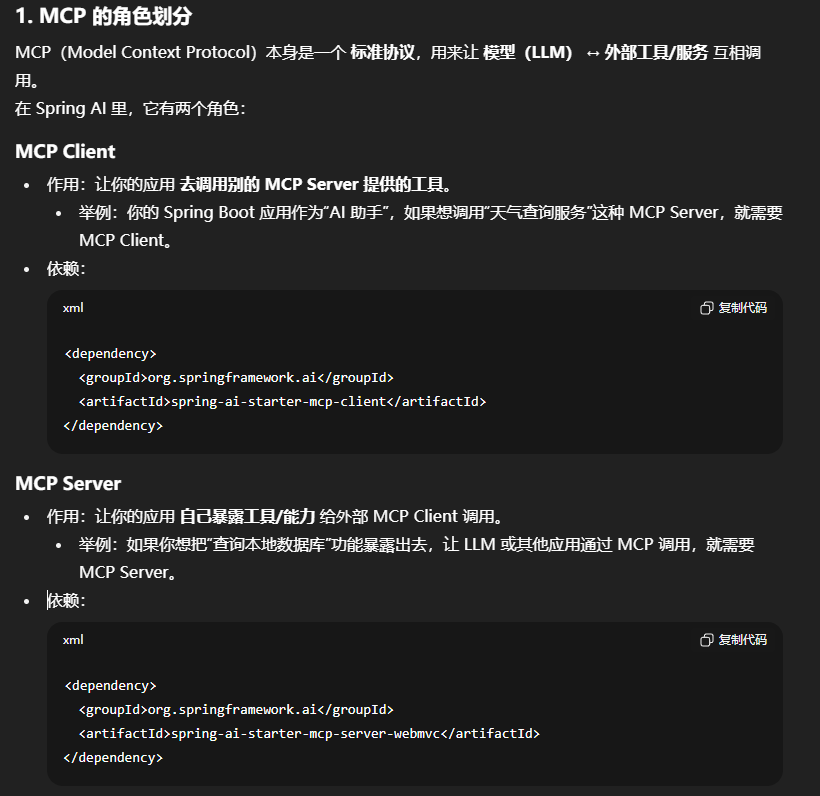
我两者都添加了
application.yml
yml完全改掉了,毕竟
spring:ai:ollama:base-url: http://localhost:11434chat:enabled: true# 聊天模型model: qwen3:4boptions:temperature: 0.7top_p: 0.9num_predict: 5120 # 单次回复最大长度,根据自己电脑性能来定embedding:enabled: true# 向量模型(通常用小点的模型效率高)model: qwen3:4boptions:num-batch: 5120mcp:client:enabled: truename: mcp-clientversion: 1.0type: SYNCrequest-timeout: 30sstdio:servers-configuration: classpath:/mcp-server-settings.jsonlogging:level:org.springframework.ai.mcp.tool: DEBUGserver:port: 8181
MCP 工具配置 mcp-servers.json
我想使用本地文件操作以实现
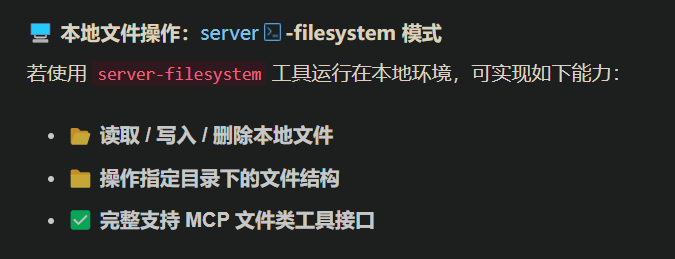
它需要安装Node.js 和 npm
自测一下确实安装过了
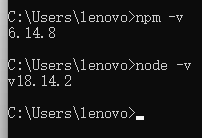
并且
在红框路径新建mcp-servers.json文件,注意红色下划线处要改成自己的桌面路径
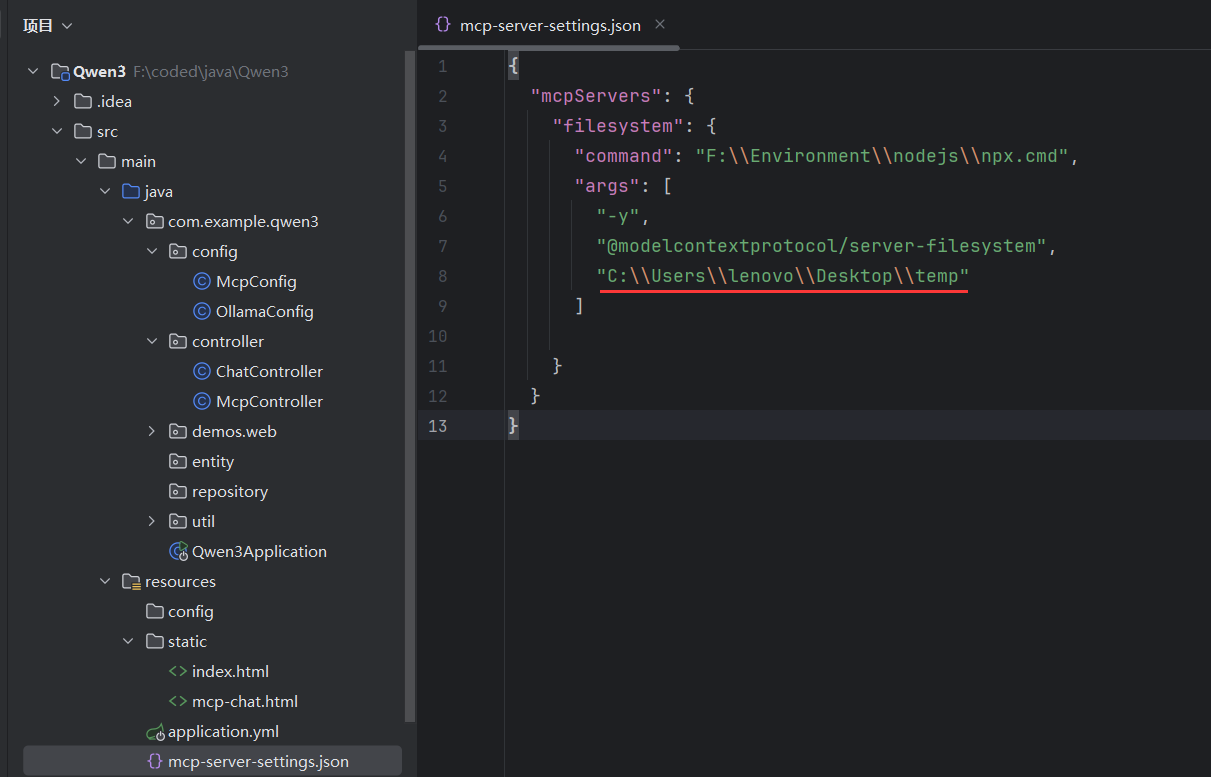
{"mcpServers": {"filesystem": {"command": "F:\\Environment\\nodejs\\npx.cmd","args": ["-y","@modelcontextprotocol/server-filesystem","C:\\Users\\lenovo\\Desktop\\temp"]}}
}
“filesystem” 是 MCP server 的名字
“command”: “npx.cmd” → Windows 下用 npx 启动(Linux/macOS 下就是 “npx”)
“@modelcontextprotocol/server-filesystem” 是官方提供的文件系统 MCP server
“C:\Users\lenovo\Desktop\temp” 表示允许 AI 访问的目录范围
配置类
package com.example.qwen3.config;import io.modelcontextprotocol.client.McpSyncClient;
import org.springframework.ai.mcp.SyncMcpToolCallbackProvider;
import org.springframework.context.annotation.Bean;
import org.springframework.context.annotation.Configuration;import java.util.List;@Configuration
public class McpConfig {@Beanpublic SyncMcpToolCallbackProvider syncMcpToolCallbackProvider(List<McpSyncClient> mcpSyncClients) {return new SyncMcpToolCallbackProvider(mcpSyncClients);}}
编写API
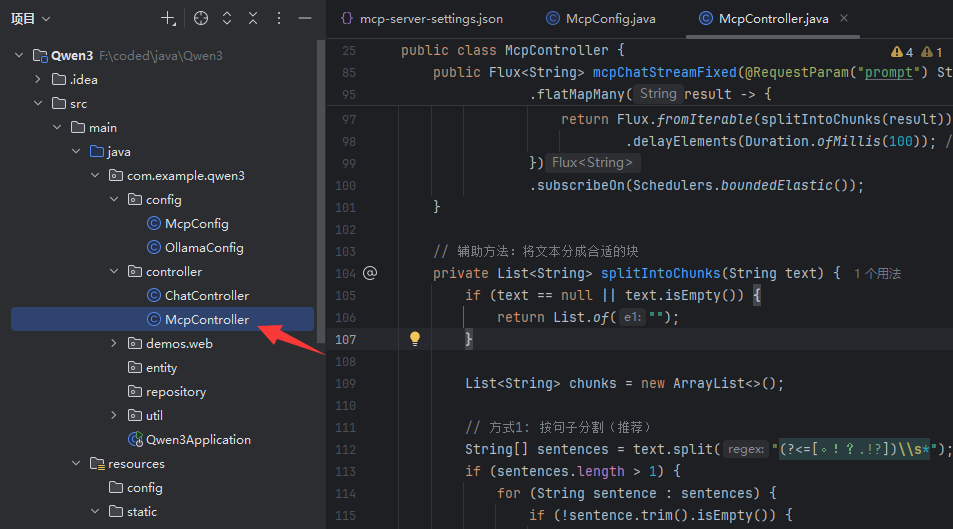
package com.example.qwen3.controller;import org.springframework.ai.chat.client.ChatClient;
import org.springframework.ai.chat.model.ChatResponse;
import org.springframework.ai.mcp.SyncMcpToolCallbackProvider;
import org.springframework.ai.ollama.OllamaChatModel;
import org.springframework.ai.ollama.api.OllamaOptions;
import org.springframework.http.MediaType;
import org.springframework.http.codec.ServerSentEvent;
import org.springframework.web.bind.annotation.GetMapping;
import org.springframework.web.bind.annotation.RequestMapping;
import org.springframework.web.bind.annotation.RequestParam;
import org.springframework.web.bind.annotation.RestController;
import reactor.core.publisher.Flux;
import reactor.core.publisher.Mono;
import reactor.core.scheduler.Schedulers;import java.time.Duration;@RequestMapping("/mcp")
@RestController
public class McpController {private final OllamaChatModel chatModel;private final SyncMcpToolCallbackProvider syncMcpToolCallbackProvider;public McpController(OllamaChatModel chatModel, SyncMcpToolCallbackProvider syncMcpToolCallbackProvider) {this.chatModel = chatModel;this.syncMcpToolCallbackProvider = syncMcpToolCallbackProvider;}@GetMapping("/mcpChat")public String generate(@RequestParam(value = "prompt") String prompt) {ChatClient chatClient = ChatClient.builder(chatModel).defaultTools(syncMcpToolCallbackProvider.getToolCallbacks()).build();return chatClient.prompt().user(prompt).call().content();}@GetMapping(value = "/mcpChatStream", produces = MediaType.TEXT_EVENT_STREAM_VALUE)public Flux<ChatResponse> generateStream(@RequestParam(value = "prompt") String prompt) {// 先执行一次完整的调用以确保工具被执行ChatClient chatClient = ChatClient.builder(chatModel).defaultTools(syncMcpToolCallbackProvider.getToolCallbacks()).defaultOptions(OllamaOptions.builder().model("qwen3:4b").build()).build();// 执行工具调用(非流式)String result = chatClient.prompt().user(prompt).call().content();// 然后返回流式响应(基于已执行的结果)return chatClient.prompt().user(prompt + "\n\n基于上述操作,请总结执行结果:").stream().chatResponse();}// 方案5:简化版本 - 直接使用工作版本的逻辑@GetMapping(value = "/mcpChatStreamFixed", produces = MediaType.TEXT_EVENT_STREAM_VALUE)public Flux<String> mcpChatStreamFixed(@RequestParam("prompt") String prompt) {ChatClient chatClient = ChatClient.builder(chatModel).defaultTools(syncMcpToolCallbackProvider.getToolCallbacks()).build();// 使用已知工作的逻辑,但改为流式输出return Mono.fromCallable(() -> {// 先执行完整的对话(包括工具调用)return chatClient.prompt().user(prompt).call().content();}).flatMapMany(result -> {// 然后将结果分块流式返回return Flux.fromArray(result.split("")).delayElements(Duration.ofMillis(50)); // 每个字符延迟50ms}).subscribeOn(Schedulers.boundedElastic());}@GetMapping("/test")public String test(@RequestParam(value = "prompt") String prompt) {return "input=" + prompt;}
}
我在想要实现流式问答部分卡了很久,原因是在流式响应中,工具调用和工具执行的时机与非流式不同,导致工具调用被跳过或执行顺序有问题。
所以要么就是一次性输出内容,比如
http://localhost:8181/mcp/mcpChat?在temp目录下创建文件e1.txt,内容为我是mcpChat创建的文件
要么是先执行操作,再流式输出对于上一次操作的总结
http://localhost:8181/mcp/mcpChatStream?在temp目录下创建文件e2.txt,内容为我是mcpChat创建的文件
或者单纯流式
本地模型速度还是太慢了,实测大概需要5分钟才能创建好一个文件,基本没有实用性可言
