【39】OpenCV C++实战篇——直线拟合、直线测距、平行线段测距;(边缘检测,剔除噪点,轮廓检测,渐进概率霍夫直线)
参考:学习OpenCV3:判断两条直线平行,并计算平行距离
- 1 边缘检测,获取直线并剔除噪声点
- 1.1 轮廓检测,剔除长度小于20的直线
- 1.2 渐进概率霍夫直线
- 2 计算两直线间的距离
1 边缘检测,获取直线并剔除噪声点


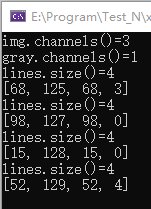
1.1 轮廓检测,剔除长度小于20的直线
#include <opencv2/opencv.hpp>
#include <iostream>using namespace cv;
using namespace std;//绘制直线
void drawapp(Mat src, Mat dst, vector<vector<Vec2i>> vec_point)
{if (src.channels() == 1){//合并成三通到,便于绘制彩色线条vector<Mat> channels;for (int i = 0; i < 3; i++){channels.push_back(src);}merge(channels, dst);}for (int j = 0; j < 4; j++){for (int i = 0; i < vec_point[j].size()-1; i++){line(dst, vec_point[j][i], vec_point[j][i+1], Scalar(0, 255, 0), 1, 8, 0);}}imshow("dst", dst);
}//边缘检测,轮廓提取,将提取的直线中小线段踢掉,保留长直线
int getPointsOnLines()
{Mat img = imread("result.png");if (img.empty()){cout << "请确认图像文件名称是否正确" << endl;return -1;}Mat gray;cvtColor(img, gray, COLOR_BGR2GRAY);// 边缘检测Mat canny, canny2;Canny(gray, canny, 230, 255, 3, false);//cv::imshow("canny", canny);cout << "img.channels()=" << img.channels() << endl;cout << "gray.channels()=" << gray.channels() << endl;//创建一个三通到的图片与绘制目标图合并Mat three_channel;//定义合并的输出矩阵vector<Mat> channels;for (int i = 0; i < 3; i++){channels.push_back(canny);}merge(channels, three_channel);vector<Vec2i> point1, point2, point3, point4; //存储待检测的4条直线的所有点vector<vector<Vec2i>> vec_point;vec_point.push_back(point1);vec_point.push_back(point3);vec_point.push_back(point2);vec_point.push_back(point4);// 轮廓发现与绘制vector<vector<Point>> contours;  //轮廓//CV_CHAIN_APPROX_SIMPLE:仅保存轮廓的拐点信息,把所有轮廓拐点处的点保存入contours向量内,拐点与拐点之间直线段上的信息点不予保留;//如果是水平的矩形,那么构成矩形只有4个点,但现在矩形线条是由很多个小线段组成,,,,所以输出的点有很多findContours(canny, contours, RETR_EXTERNAL, CHAIN_APPROX_NONE, Point());int count = 0;cout << "contours.size()=" << contours.size() << endl;//轮廓条数for (int t = contours.size()-1; t >=0; t--){drawContours(three_channel, contours, t, Scalar(0, 0, 255), 1, 8);//绘制轮廓drawContours(img, contours, t, Scalar(0, 0, 255), 1, 8);//绘制轮廓	cout << "contours[" << t << "]点的个数" << contours[t].size() << endl;		int count = 0;//for (int i = 0; i < contours[t].size()/2-5; i += 5)//contours轮廓是闭合的形状,两条边重合了,故取一般//contours是一个闭合的轮廓点集,即使是单个像素的直线,contours轮廓也是闭合的,只不过两条表重合了;通过输出contours点集,验证{if (contours[t][i].x == contours[t][i + 5].x){count++;if (count == 4)//连续20像素在一条直线上,将这条直线段每间隔5个点,存入ponit1点集体{cout << "i=" << i << endl;vec_point[t].push_back(Point(contours[t][i - 15]));//此时i=15,存储第0个点vec_point[t].push_back(Point(contours[t][i - 10]));//第5个vec_point[t].push_back(Point(contours[t][i - 5]));//第10个vec_point[t].push_back(Point(contours[t][i]));//第15}if (count > 4)//如果,这条直线长度大于20,那么将大于的部分继续,每隔5个点,存入ponit1点集体vec_point[t].push_back(Point(contours[t][i]));}else//如果,这条线长度小于20,count归零,前面丢弃,从此点开始,再向后找20个长度{count = 0;}}}//通过大容器,把所有数据遍历一遍,输出筛选后的四条直线上的点for (vector<vector<Vec2i>>::iterator it = vec_point.begin(); it != vec_point.end(); it++){//(*it)-----容器 vector<int>for (vector<Vec2i>::iterator vit = (*it).begin(); vit != (*it).end(); vit++){cout << *vit << " ";}cout << endl;}canny.copyTo(canny2);drawapp(canny2, canny2, vec_point);////二维容器输出,迭代器遍历,输出筛选后的四条直线上的点//vector<vector<Vec2i>>::iterator it;//for (it = vec_point.begin(); it != vec_point.end(); ++it) {//	for (int i = 0; i < (*it).size(); ++i) {//		cout << (*it)[i] << " ";//	}//	cout << endl;//}cv::imshow("three_channel", three_channel);cv::imshow("img", img);return 0;
}int main()
{	getPointsOnLines();cout << "ok" << endl;waitKey(0);return 0;
}

1.2 渐进概率霍夫直线
//边缘检测,渐进概率霍夫直线,小于20的直线过滤
int getLines()
{Mat img = imread("result.png");if (img.empty()){cout << "请确认图像文件名称是否正确" << endl;return -1;}Mat gray;cvtColor(img, gray, COLOR_BGR2GRAY);// 边缘检测Mat canny, canny2;Canny(gray, canny, 230, 255, 3, false);//cv::imshow("canny", canny);cout << "img.channels()=" << img.channels() << endl;cout << "gray.channels()=" << gray.channels() << endl;//创建一个三通到的图片与绘制目标图合并Mat three_channel;//定义合并的输出矩阵vector<Mat> channels;for (int i = 0; i < 3; i++){channels.push_back(canny);}merge(channels, three_channel);vector<Vec4i> lines;HoughLinesP(canny ,lines,1,CV_PI/180,50,20,10);for (size_t i = 0; i < lines.size(); i++){line(three_channel,Point(lines[i][0],lines[i][1]),Point(lines[i][2],lines[i][3]),Scalar(0,0,255),1);cout << "lines.size()=" << lines.size() << endl;cout << lines[i] <<" " ;cout << endl;}cv::imshow("img", three_channel);return 0;
}

2 计算两直线间的距离
直线不一定是平行线,可能会梯形不能直接计算平行线的距离。
故,计算两根线上端点距离和下端点的距离,求平均。(直线倾斜时,会有误差)
int getDistance(Mat dstROI, int dst_height, int cannythreshold1, int cannythreshold2)
{Mat dst;imshow("dstROI", dstROI);if (dstOne_width== dst_height)//如果是目标区域1,二值化,其他区域跳过{threshold(dstROI, dstROI, 80, 255, THRESH_BINARY);//dst = 255 - dst;imshow("dst", dstROI);//	waitKey(0);}Canny(dstROI, dst, cannythreshold1, cannythreshold2, 3);imshow("dst2", dst);//创建一个三通到的图片与绘制目标图合并Mat three_channel = Mat::zeros(dst.rows, dst.cols, CV_8UC3);vector<Mat> channels;for (int i = 0; i < 3; i++){channels.push_back(dst);}merge(channels, three_channel);// 轮廓发现与绘制vector<vector<Point>> contours;  //轮廓//CV_CHAIN_APPROX_SIMPLE:仅保存轮廓的拐点信息,把所有轮廓拐点处的点保存入contours向量内,拐点与拐点之间直线段上的信息点不予保留;//如果是水平的矩形,那么构成矩形只有4个点,但现在矩形线条是由很多个小线段组成,,,,所以输出的点有很多findContours(dst, contours, RETR_EXTERNAL, CHAIN_APPROX_NONE, Point());//绘制轮廓cout << "contours.size()=" << contours.size() << endl;//轮廓条数for (int t = contours.size() - 1; t >= 0; t--){drawContours(three_channel, contours, t, Scalar(0, 0, 255), 1, 8);//绘制轮廓}Vec4f line1, line2, line3, line4;  //存放你拟合的直线float x11, x12, x21, x22, x31, x32, x41, x42;//四条线的四个端点的x值;(直线不一定是平行线,可能会梯形不能直接计算平行线的距离。故,计算两根线上端点距离和下端点的距离,求平均)//参数设置double param = 0;  //距离模型中的数值参数Cdouble reps = 0.01;  //坐标原点与直线之间的距离精度double aeps = 0.01;  //角度精度fitLine(contours[3], line1, DIST_L1, 0, 0.01, 0.01);//直线拟合cout << "直线上一点坐标x:" << line1[2] << ", y:" << line1[3] << endl;double k1 = line1[1] / line1[0];  //直线斜率cout << "直线解析式:y=" << k1 << "(x-" << line1[2] << ")+" << line1[3] << endl;//y=k(x-x0)+y0,x=(y+k*x0-y0)/k;x11 = (0 + k1 * line1[2] - line1[3]) / k1;//第一条线的上端点x值x12 = (dst_height + k1 * line1[2] - line1[3]) / k1;//第一条线的下端点x值Point2f point11(x11, 0);//第一条线的上端点Point2f point12(x12, dst_height);//第一条线的下端点cout << point11 << "," << point12 << endl;fitLine(contours[2], line2, DIST_L1, 0, 0.01, 0.01);//直线拟合cout << "直线上一点坐标x:" << line2[2] << ", y:" << line2[3] << endl;double k2 = line2[1] / line2[0];  //直线斜率cout << "直线解析式:y=" << k2 << "(x-" << line2[2] << ")+" << line2[3] << endl;x21 = (0 + k2 * line2[2] - line2[3]) / k2;//第一条线的上端点x值x22 = (dst_height + k2 * line2[2] - line2[3]) / k2;//第一条线的下端点x值Point2f point21(x21, 0);//第一条线的上端点Point2f point22(x22, dst_height);//第一条线的下端点cout << point21 << "," << point22 << endl;fitLine(contours[1], line3, DIST_L1, 0, 0.01, 0.01);//直线拟合cout << "直线上一点坐标x:" << line3[2] << ", y:" << line3[3] << endl;double k3 = line3[1] / line3[0];  //直线斜率cout << "直线解析式:y=" << k3 << "(x-" << line3[2] << ")+" << line3[3] << endl;x31 = (0 + k3 * line3[2] - line3[3]) / k3;//第一条线的上端点x值x32 = (dst_height + k3 * line3[2] - line3[3]) / k3;//第一条线的下端点x值Point2f point31(x31, 0);//第一条线的上端点Point2f point32(x32, dst_height);//第一条线的下端点cout << point31 << "," << point32 << endl;fitLine(contours[0], line4, DIST_L1, 0, 0.01, 0.01);//直线拟合cout << "直线上一点坐标x:" << line4[2] << ", y:" << line4[3] << endl;double k4 = line4[1] / line4[0];  //直线斜率cout << "直线解析式:y=" << k4 << "(x-" << line4[2] << ")+" << line4[3] << endl;x41 = (0 + k4 * line4[2] - line4[3]) / k4;//第一条线的上端点x值x42 = (dst_height + k4 * line4[2] - line4[3]) / k4;//第一条线的下端点x值Point2f point41(x41, 0);//第一条线的上端点Point2f point42(x42, dst_height);//第一条线的下端点cout << point41 << "," << point42 << endl;namedWindow("轮廓检测结果", WINDOW_NORMAL);imshow("轮廓检测结果", three_channel);//waitKey();float dis1 = (x41 - x11 + x42 - x12) / 2;//碳线和银线的总宽度,即第一条线和第四条线的距离float dis2 = (x21 - x11 + x22 - x12) / 2;//银线左侧与碳线的距离,即第一条线和第二条线的距离float dis3 = (x41 - x31 + x42 - x22) / 2;//银线右侧与碳线的距离,即第三条线和第四条线的距离cout << "\n碳线和银线的总宽度" << dis1 << endl;cout << "银线左侧与碳线的距离" << dis2 << endl;cout << "银线右侧与碳线的距离" << dis3 << endl;return 0;
}

