21.three官方示例+编辑器+AI快速学习webgl_buffergeometry_selective_draw
本实例主要讲解内容
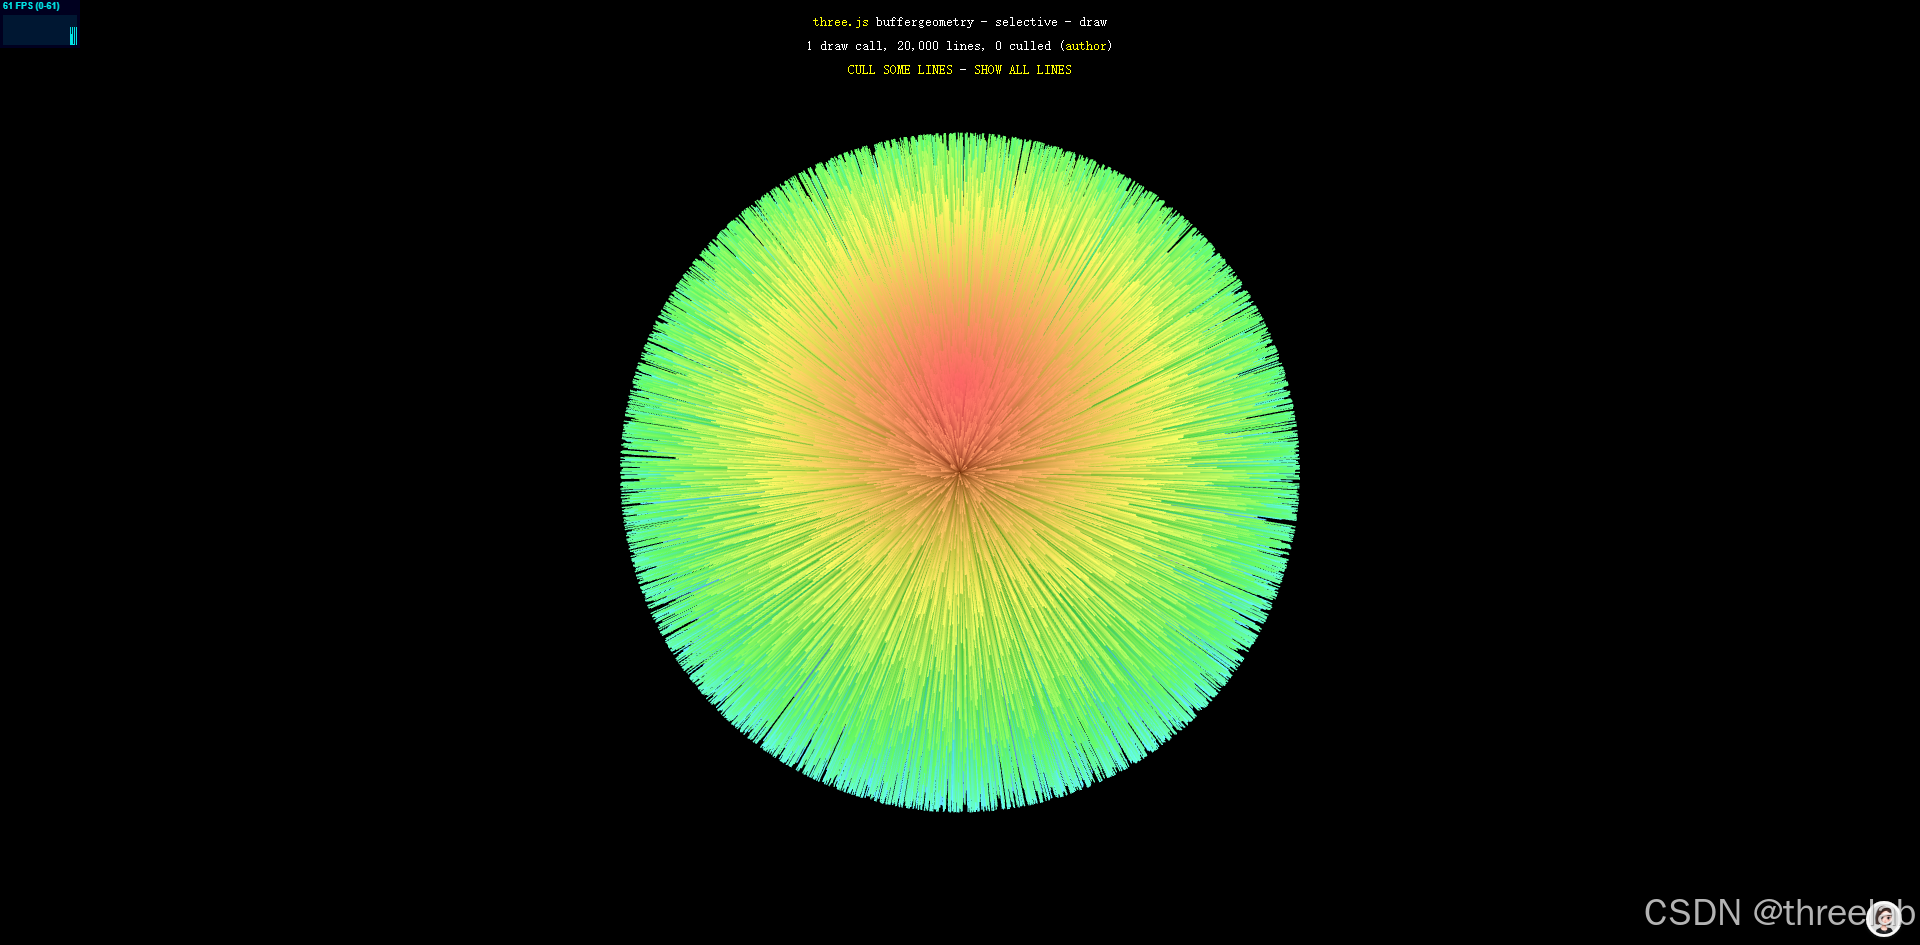
这个Three.js示例展示了如何通过着色器选择性绘制技术高效控制大量线条的可见性。通过自定义着色器和顶点属性,实现了在单个绘制调用中动态隐藏或显示特定线条,避免了传统方法中频繁切换绘制状态的性能开销。
核心技术包括:
- 自定义着色器实现选择性绘制
- 顶点属性控制线条可见性
- 高效管理大量几何元素
- 动态更新顶点属性
完整代码注释
<!DOCTYPE html>
<html lang="en"><head><title>three.js webgl - buffergeometry - selective - draw</title><meta charset="utf-8"><meta name="viewport" content="width=device-width, user-scalable=no, minimum-scale=1.0, maximum-scale=1.0"><link type="text/css" rel="stylesheet" href="main.css"><!-- 顶点着色器 --><script type="x-shader/x-vertex" id="vertexshader">attribute float visible; // 顶点可见性属性varying float vVisible; // 传递给片段着色器的可见性attribute vec3 vertColor; // 顶点颜色varying vec3 vColor; // 传递给片段着色器的颜色void main() {vColor = vertColor;vVisible = visible;gl_Position = projectionMatrix * modelViewMatrix * vec4( position, 1.0 );}</script><!-- 片段着色器 --><script type="x-shader/x-fragment" id="fragmentshader">varying float vVisible; // 从顶点着色器接收的可见性varying vec3 vColor; // 从顶点着色器接收的颜色void main() {if ( vVisible > 0.0 ) {gl_FragColor = vec4( vColor, 1.0 ); // 可见则绘制} else {discard; // 不可见则丢弃片段}}</script></head><body><div id="info"><a href="https://threejs.org" target="_blank" rel="noopener">three.js</a> buffergeometry - selective - draw<div id="title"></div><div id="ui"><a href="#" id="hideLines">CULL SOME LINES</a> - <a href="#" id="showAllLines">SHOW ALL LINES</a></div></div><script type="importmap">{"imports": {"three": "../build/three.module.js","three/addons/": "./jsm/"}}</script><script type="module">import * as THREE from 'three';import Stats from 'three/addons/libs/stats.module.js';let camera, scene, renderer, stats;let geometry, mesh;// 经纬度线数量const numLat = 100;const numLng = 200;// 被剔除的线条数量let numLinesCulled = 0;init();function init() {// 初始化场景scene = new THREE.Scene();// 初始化相机camera = new THREE.PerspectiveCamera( 45, window.innerWidth / window.innerHeight, 0.01, 10 );camera.position.z = 3.5;// 添加性能统计stats = new Stats();document.body.appendChild( stats.dom );// 窗口大小变化事件监听window.addEventListener( 'resize', onWindowResize );// 添加线条addLines( 1.0 );// 按钮事件监听document.getElementById( 'hideLines' ).addEventListener( 'click', hideLines );document.getElementById( 'showAllLines' ).addEventListener( 'click', showAllLines );// 初始化渲染器renderer = new THREE.WebGLRenderer( { antialias: true } );renderer.setPixelRatio( window.devicePixelRatio );renderer.setSize( window.innerWidth, window.innerHeight );renderer.setAnimationLoop( animate );document.body.appendChild( renderer.domElement );}// 添加线条function addLines( radius ) {// 创建BufferGeometrygeometry = new THREE.BufferGeometry();// 创建位置、颜色和可见性数组// 每条线2个顶点,每个顶点3个坐标const linePositions = new Float32Array( numLat * numLng * 3 * 2 );// 每条线2个顶点,每个顶点3个颜色分量const lineColors = new Float32Array( numLat * numLng * 3 * 2 );// 每条线2个顶点,每个顶点1个可见性值const visible = new Float32Array( numLat * numLng * 2 );// 生成线条数据for ( let i = 0; i < numLat; ++ i ) {for ( let j = 0; j < numLng; ++ j ) {// 随机生成经纬度const lat = ( Math.random() * Math.PI ) / 50.0 + i / numLat * Math.PI;const lng = ( Math.random() * Math.PI ) / 50.0 + j / numLng * 2 * Math.PI;// 计算索引const index = i * numLng + j;// 设置线条起点(中心点)linePositions[ index * 6 + 0 ] = 0;linePositions[ index * 6 + 1 ] = 0;linePositions[ index * 6 + 2 ] = 0;// 设置线条终点(球面坐标)linePositions[ index * 6 + 3 ] = radius * Math.sin( lat ) * Math.cos( lng );linePositions[ index * 6 + 4 ] = radius * Math.cos( lat );linePositions[ index * 6 + 5 ] = radius * Math.sin( lat ) * Math.sin( lng );// 设置线条颜色let color = new THREE.Color( 0xffffff );// 起点颜色(暗)color.setHSL( lat / Math.PI, 1.0, 0.2 );lineColors[ index * 6 + 0 ] = color.r;lineColors[ index * 6 + 1 ] = color.g;lineColors[ index * 6 + 2 ] = color.b;// 终点颜色(亮)color.setHSL( lat / Math.PI, 1.0, 0.7 );lineColors[ index * 6 + 3 ] = color.r;lineColors[ index * 6 + 4 ] = color.g;lineColors[ index * 6 + 5 ] = color.b;// 默认都可见visible[ index * 2 + 0 ] = 1.0;visible[ index * 2 + 1 ] = 1.0;}}// 设置几何体属性geometry.setAttribute( 'position', new THREE.BufferAttribute( linePositions, 3 ) );geometry.setAttribute( 'vertColor', new THREE.BufferAttribute( lineColors, 3 ) );geometry.setAttribute( 'visible', new THREE.BufferAttribute( visible, 1 ) );// 计算边界球体geometry.computeBoundingSphere();// 创建自定义着色器材质const shaderMaterial = new THREE.ShaderMaterial( {vertexShader: document.getElementById( 'vertexshader' ).textContent,fragmentShader: document.getElementById( 'fragmentshader' ).textContent} );// 创建线条对象mesh = new THREE.LineSegments( geometry, shaderMaterial );scene.add( mesh );// 更新显示计数updateCount();}// 更新显示计数function updateCount() {// 格式化显示文本const str = '1 draw call, ' + numLat * numLng + ' lines, ' + numLinesCulled + ' culled (<a target="_blank" href="http://callum.com">author</a>)';document.getElementById( 'title' ).innerHTML = str.replace( /\B(?=(\d{3})+(?!\d))/g, ',' );}// 隐藏部分线条function hideLines() {for ( let i = 0; i < geometry.attributes.visible.array.length; i += 2 ) {// 随机选择约25%的线条隐藏if ( Math.random() > 0.75 ) {if ( geometry.attributes.visible.array[ i + 0 ] ) {++ numLinesCulled;}// 设置线条两个顶点都不可见geometry.attributes.visible.array[ i + 0 ] = 0;geometry.attributes.visible.array[ i + 1 ] = 0;}}// 标记属性需要更新geometry.attributes.visible.needsUpdate = true;updateCount();}// 显示所有线条function showAllLines() {numLinesCulled = 0;for ( let i = 0; i < geometry.attributes.visible.array.length; i += 2 ) {// 设置所有线条为可见geometry.attributes.visible.array[ i + 0 ] = 1;geometry.attributes.visible.array[ i + 1 ] = 1;}// 标记属性需要更新geometry.attributes.visible.needsUpdate = true;updateCount();}// 窗口大小变化处理function onWindowResize() {camera.aspect = window.innerWidth / window.innerHeight;camera.updateProjectionMatrix();renderer.setSize( window.innerWidth, window.innerHeight );}// 动画循环function animate() {const time = Date.now() * 0.001;// 旋转网格mesh.rotation.x = time * 0.25;mesh.rotation.y = time * 0.5;// 渲染场景renderer.render( scene, camera );// 更新性能统计stats.update();}</script></body>
</html>
选择性绘制技术解析
核心原理
这个示例实现选择性绘制的核心原理是:
- 为每个顶点添加一个
visible属性,表示该顶点是否可见 - 通过顶点着色器将可见性传递给片段着色器
- 在片段着色器中根据可见性决定是否绘制该片段
这种方法的优势在于:
- 所有线条在一个几何体中,只需一次绘制调用
- 动态控制可见性无需重新创建几何体
- 比传统方法(创建多个对象)性能更高
着色器实现
顶点着色器:
attribute float visible;
varying float vVisible;
attribute vec3 vertColor;
varying vec3 vColor;void main() {vColor = vertColor;vVisible = visible;gl_Position = projectionMatrix * modelViewMatrix * vec4( position, 1.0 );
}
片段着色器:
varying float vVisible;
varying vec3 vColor;void main() {if ( vVisible > 0.0 ) {gl_FragColor = vec4( vColor, 1.0 );} else {discard;}
}
动态更新顶点属性
在JavaScript代码中,我们可以动态更新visible属性来控制线条的可见性:
// 隐藏部分线条
function hideLines() {for ( let i = 0; i < geometry.attributes.visible.array.length; i += 2 ) {if ( Math.random() > 0.75 ) {geometry.attributes.visible.array[ i + 0 ] = 0;geometry.attributes.visible.array[ i + 1 ] = 0;}}// 标记属性需要更新geometry.attributes.visible.needsUpdate = true;
}
注意,修改顶点属性后需要设置needsUpdate = true来通知Three.js重新上传数据到GPU。
性能优化与应用场景
这种选择性绘制技术特别适合以下场景:
- 大型场景管理:控制大量对象的可见性
- 数据可视化:动态显示/隐藏数据点或连接线
- 游戏开发:实现植被、粒子系统等的动态显示
- 虚拟现实:优化场景渲染,减少不必要的绘制
与传统方法相比,这种技术的主要优势是:
- 减少绘制调用:所有对象在一个几何体中,只需一次绘制调用
- 高效内存使用:避免为每个对象创建单独的几何体
- 快速切换:动态控制可见性无需重新创建或销毁对象
通过合理使用这种技术,可以在保持良好视觉效果的同时显著提升大型场景的渲染性能。