Python笔记:windows下编译python3.8.20
1. 说明
python3.4及以下可用于老系统
Note that Python 3.5.0 cannot be used on Windows XP or earlier.
Note that Python 3.9.0 cannot be used on Windows 7 or earlier.
截止到2025.4.23 Latest Python 3 Release - Python 3.13.3
2. 编译
参看源码目录下的
PCbuild/readme.txt可知,
windows下直接运行build.bat开启编译,可运行build.bat -h参看编译选项。
Python3.8.20官方发布的版本用的是vs2017编译,本人用的是vs2019编译,可以通过。
编译需要Python,要求3.6及以上,可以设置好环境变量HOST_PYTHON,否则会自动下载python,我是自己安装的python,
然后增加了环境变量 HOST_PYTHON=D:\Python387\python.exe.
这里注意下,如果python路径带有空格,需要将PCBuild/find_python.bat中的@HOST_PYTHON%加上双引号,即将
@rem If HOST_PYTHON is recent enough, use that
@echo %HOST_PYTHON%
@if NOT "%HOST_PYTHON%"=="" @%HOST_PYTHON% -Ec "import sys; assert sys.version_info[:2] >= (3, 6)" >nul 2>nul && (set PYTHON="%HOST_PYTHON%") && (set _Py_Python_Source=found as HOST_PYTHON) && goto :found
修改为
@rem If HOST_PYTHON is recent enough, use that
@echo %HOST_PYTHON%
@if NOT "%HOST_PYTHON%"=="" @"%HOST_PYTHON%" -Ec "import sys; assert sys.version_info[:2] >= (3, 6)" >nul 2>nul && (set PYTHON="%HOST_PYTHON%") && (set _Py_Python_Source=found as HOST_PYTHON) && goto :found
2.1. vs2013编译debug版本
开始试图用vs2013编译debug版本,命令如下
build.bat -c Debug -p x64 “/p:PlatformToolset=v120”
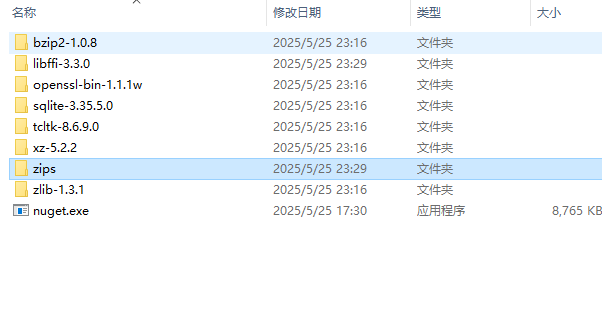
编译过程如果第三方依赖库下载不下来,可以多试下,再不行就看下get_externals.bat或get_external.py文件中,将里面的github地址改成替代的镜像地址或使用github加速下载,我使用的是后者,在此网站生成加速下载地址Doget,依次下载好需要的externals文件,解压到PCBuild/externals文件夹下,如下图:
使用v120,即vs2013不能编译,很多语法错误
如:
对于.c文件,vs2013不支持如下语法
static inline int future_call_schedule_callbacks(FutureObj *)
但可支持
static __inline int future_call_schedule_callbacks(FutureObj *)
2.2. vs2019编译debug版本
使用vs2019编译Debug版本,Release类似,此处略
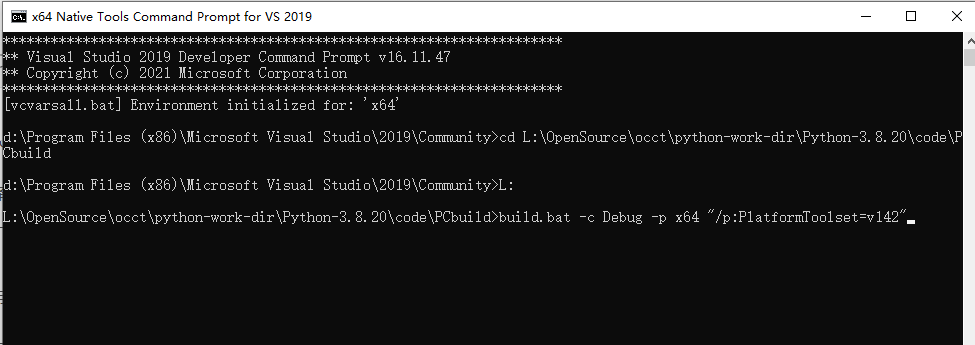
启动vs201964位命令行程序,x64 Native Tools Command Prompt for VS 2019
cd到源码的PCBuild目录,然后执行如下命令:
build.bat -c Debug -p x64 "/p:PlatformToolset=v142"
如图:
其中编译选项PlatformToolset应该是visual studio的编译选项,在PCbuild/env.bat找到如下说明:
rem This script adds the latest available tools to the path for the
current rem command window. However, most builds of Python will ignore
the version rem of the tools on PATH and use PlatformToolset instead.
Ideally, both sets of rem tools should be the same version to avoid
potential conflicts. rem rem To build Python with an earlier toolset,
pass “/p:PlatformToolset=v100” (or rem ‘v110’, ‘v120’ or ‘v140’) to
the build script.
编译完release后,运行测试,参看PCbuild/rt.bat文件
rem Run Tests. Run the regression test suite. rem Usage: rt [-d]
[-O] [-q] [-x64] regrtest_args rem -d Run Debug build
(python_d.exe). Else release build. rem -O Run python.exe or
python_d.exe (see -d) with -O. rem -q “quick” – normally the tests
are run twice, the first time rem after deleting all the .pyc
files reachable from Lib/. rem -q runs the tests just once, and
without deleting .pyc files. rem -p <Win32|x64|ARM|ARM64> or -win32,
-x64, -arm32, -arm64 rem Run the specified architecture of python (or python_d if -d rem was specified). If omitted, uses %PREFIX%
if set or 32-bit. rem All leading instances of these switches are
shifted off, and rem whatever remains (up to 9 arguments) is passed to
regrtest.py. rem For example, rem rt -O -d -x test_thread rem runs
rem python_d -O …/lib/test/regrtest.py -x test_thread rem twice,
and rem rt -q -g test_binascii rem runs rem python_d
…/lib/test/regrtest.py -g test_binascii rem to generate the
expected-output file for binascii quickly. rem rem Confusing: if you
want to pass a comma-separated list, like rem -u network,largefile
rem then you have to quote it on the rt line, like rem rt -u
“network,largefile”
3. 编译完后打包
编译完成后,到此目录下Python-3.8.20\Tools\msi\README.txt参看如何打包,但此处用手工的方式整理
官方 Python 的目录结构通常包含以下核心目录 :
- Doc: 直接复制正式安装包的,或不用也行
- Tools: 参看官方的,只复制了个别
- DLLs:存放 Python 及第三方扩展的动态链接库(如 .pyd 和 .dll)。
- Lib:标准库源码(.py)和编译后的字节码(pycache)。
- Scripts:可执行脚本(如 pip.exe 、python.exe )。自动生成脚本目录
使用 setuptools 或 distutils 生成 Scripts 目录:
python -m ensurepip --default-pip
python -m pip install --upgrade pip - include:C 扩展开发所需的头文件。
- libs:静态库文件(如 python35.lib )。
4. 编译是遇到的问题
问题1: pip install pip -U 失败
Could not fetch URL https://pypi.python.org/simple/pipe/: There was a
problem confirming the ssl certificate: [SSL:
CERTIFICATE_VERIFY_FAILED] certificate ver ify
failed (_ssl.c:728) - skipping Could not find a version that
satisfies the requirement pipe (from versions: ) No matching
distribution found for pipe
解决步骤
检查 Python SSL 模块支持
若 Python 编译时未启用 SSL 支持,会导致 _ssl 模块缺失:
验证 SSL 模块:
import ssl
print(ssl.OPENSSL_VERSION)  # 若报错或无输出,说明 SSL 未正确编译
最终解决方案:
更新 pip 与 certifi 证书库
SSL 证书验证依赖 certifi 库,若证书过期或缺失会导致问题:
更新 pip 和 certifi方法
python -m pip install --upgrade pip certifi --trusted-host pypi.python.org
成功后,会在路径Lib\site-packages\pip_vendor\certifi下生成cacert.pem文件,即证书文件
5. 其他库的安装
安装pyside2
使用以下安装成功,很慢
pip install PySide25.15.2
使用国内源,安装成功,很快
pip install pyside25.15.2 -i https://pypi.tuna.tsinghua.edu.cn/simple
使用QT源
pip install --index-url=http://download.qt.io/snapshots/ci/pyside/5.15/latest pyside2 --trusted-host download.qt.io
安装pybind11
pip install pybind112.13.6
使用国内源,安装成功,很快
pip install pybind112.13.6 -i https://pypi.tuna.tsinghua.edu.cn/simple