linux nfs+autofs
linux nfs+autofs
nfs网络文件系统
autofs自动挂载服务
nfs服务端部署:
1、需要安装nfs-utils rpcbind nfs-utils
yum -y install nfs-utils rpcbind nfs-utils
先查看有没有rpcbind
[root@ws ~]# rpm -q rpcbind
rpcbind-0.2.0-47.el7.x86_64
[root@ws ~]# rpm -q nfs-utils
nfs-utils-1.3.0-0.61.el7.x86_64
2.新建共享目录和文件
[root@ws ~]# mkdir /common
[root@ws ~]# cd /common/
[root@ws common]# ls
[root@ws common]# touch file1
[root@ws common]# ls
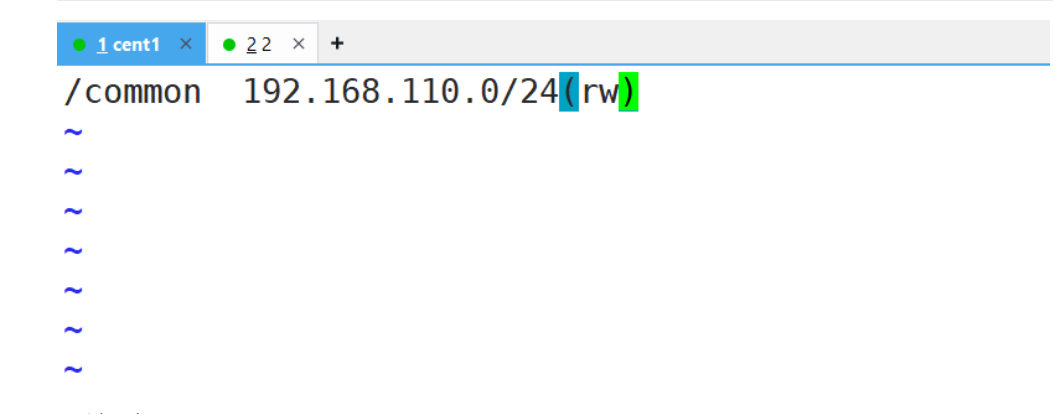
file13.编辑/etc/exports文件 配置共享目录
/common 192.168.110.0/24(rw)
[root@ws ~]# vim /etc/exports
4.重启服务
systemctl restart rpcbind
systemctl enable rpcbind
systemctl restart nfs-server
systemctl enable nfs-server
[root@ws ~]# systemctl restart rpcbind
[root@ws ~]# systemctl enable rpcbind
Created symlink from /etc/systemd/system/multi-user.target.wants/rpcbind.service to /usr/lib/systemd/system/rpcbind.service.
[root@ws ~]# systemctl restart nfs-server
[root@ws ~]# systemctl enable nfs-server
Created symlink from /etc/systemd/system/multi-user.target.wants/nfs-server.service to /usr/lib/systemd/system/nfs-server.service.
5.修改共享目录的访问权限,需要和共享权限保持一致
chmod o+w /common
[root@ws ~]# chmod o+w /common/6.关闭防护墙
systemctl stop firewalld
systemctl disable firewalld
[root@ws ~]# systemctl stop firewalld
[root@ws ~]# systemctl disable firewalld
Removed symlink /etc/systemd/system/multi-user.target.wants/firewalld.service.
Removed symlink /etc/systemd/system/dbus-org.fedoraproject.FirewallD1.service.
客户端
查看nfs服务器的信息
[root@ws2 ~]# vim /etc/nfs.conf
查看有没有nfs
[root@ws2 ~]# rpm -q nfs-utils
nfs-utils-1.3.0-0.61.el7.x86_64
新建挂载点 然后挂载 这个是临时挂载
[root@ws2 ~]# mkdir /abc
[root@ws2 ~]# mount -t nfs 192.168.110.10:/common /abc
[root@ws2 ~]# df -Th
文件系统               类型      容量  已用  可用 已用% 挂载点
/dev/sda2              xfs        50G  3.6G   47G    8% /
devtmpfs               devtmpfs  2.0G     0  2.0G    0% /dev
tmpfs                  tmpfs     2.0G     0  2.0G    0% /dev/shm
tmpfs                  tmpfs     2.0G   13M  2.0G    1% /run
tmpfs                  tmpfs     2.0G     0  2.0G    0% /sys/fs/cgroup
/dev/sda1              xfs      1014M  163M  852M   17% /boot
tmpfs                  tmpfs     394M   28K  394M    1% /run/user/0
/dev/sr0               iso9660   4.3G  4.3G     0  100% /run/media/root/CentOS 7 x86_64
192.168.110.10:/common nfs4       50G  3.5G   47G    7% /abc
查看服务器创建的目录中的文件客户端能否查看
[root@ws2 ~]#  cd /abc
[root@ws2 abc]# ls
file1
[root@ws2 abc]# touch file2
[root@ws2 abc]# ls
file1  file2
[root@ws ~]# cd /common/
[root@ws common]# ll
总用量 0
-rw-r--r--. 1 root      root      0 8月   5 16:58 file1
-rw-r--r--. 1 nfsnobody nfsnobody 0 8月   5 18:23 file2
永久挂载
 [root@ws2 ~]# umount /abc/
[root@ws2 ~]# vim /etc/fstab
[root@ws2 ~]# mount -a
[root@ws2 ~]# df -Th
文件系统               类型      容量  已用  可用 已用% 挂载点
/dev/sda2              xfs        50G  3.6G   47G    8% /
devtmpfs               devtmpfs  2.0G     0  2.0G    0% /dev
tmpfs                  tmpfs     2.0G     0  2.0G    0% /dev/shm
tmpfs                  tmpfs     2.0G   13M  2.0G    1% /run
tmpfs                  tmpfs     2.0G     0  2.0G    0% /sys/fs/cgroup
/dev/sda1              xfs      1014M  163M  852M   17% /boot
tmpfs                  tmpfs     394M   28K  394M    1% /run/user/0
/dev/sr0               iso9660   4.3G  4.3G     0  100% /run/media/root/CentOS 7 x86_64
192.168.110.10:/common nfs4       50G  3.5G   47G    7% /abc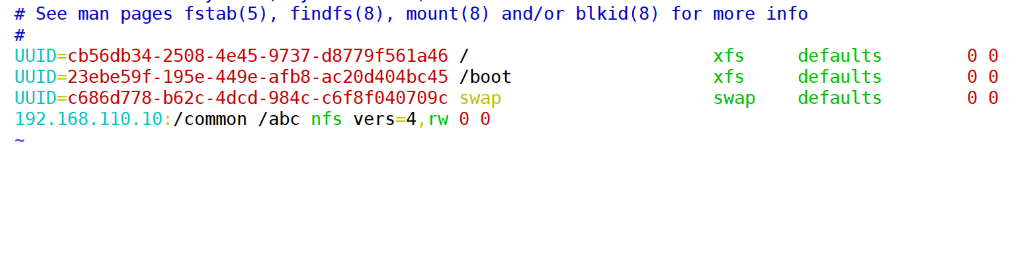
autofs自动挂载服务
1、安装autofs软件包
yum -y install autofs
[root@ws2 ~]# cd /etc/yum.repos.d/
[root@ws2 yum.repos.d]# rm -rf *
[root@ws2 yum.repos.d]# ll
总用量 0
[root@ws2 yum.repos.d]# vim server.repo
[root@ws2 yum.repos.d]# mount /dev/cdrom /mnt/
mount: /dev/sr0 写保护,将以只读方式挂载
[root@ws2 yum.repos.d]# yum -y install autofs
已加载插件:fastestmirror, langpacks
Loading mirror speeds from cached hostfile
aa                                                                                             | 3.6 kB  00:00:00
(1/2): aa/group_gz                                                                             | 166 kB  00:00:00
(2/2): aa/primary_db                                                                           | 3.1 MB  00:00:00
正在解决依赖关系
--> 正在检查事务
---> 软件包 autofs.x86_64.1.5.0.7-99.el7 将被 安装
--> 正在处理依赖关系 libhesiod.so.0()(64bit),它被软件包 1:autofs-5.0.7-99.el7.x86_64 需要
--> 正在检查事务
---> 软件包 hesiod.x86_64.0.3.2.1-3.el7 将被 安装
--> 解决依赖关系完成依赖关系解决======================================================================================================================Package                   架构                      版本                                 源                     大小
======================================================================================================================
正在安装:autofs                    x86_64                    1:5.0.7-99.el7                       aa                    814 k
为依赖而安装:hesiod                    x86_64                    3.2.1-3.el7                          aa                     30 k事务概要
======================================================================================================================
安装  1 软件包 (+1 依赖软件包)总下载量:843 k
安装大小:5.1 M
Downloading packages:
----------------------------------------------------------------------------------------------------------------------
总计                                                                                   54 MB/s | 843 kB  00:00:00
Running transaction check
Running transaction test
Transaction test succeeded
Running transaction正在安装    : hesiod-3.2.1-3.el7.x86_64                                                                         1/2 正在安装    : 1:autofs-5.0.7-99.el7.x86_64                                                                      2/2 验证中      : hesiod-3.2.1-3.el7.x86_64                                                                         1/2 验证中      : 1:autofs-5.0.7-99.el7.x86_64                                                                      2/2 已安装:autofs.x86_64 1:5.0.7-99.el7                                                                                        作为依赖被安装:hesiod.x86_64 0:3.2.1-3.el7                                                                                         完毕!
2、重启autofs服务并设置下次启动生效
systemctl restart autofs
systemctl enable autofs
[root@ws2 yum.repos.d]# systemctl restart autofs
[root@ws2 yum.repos.d]# systemctl enable autofs
Created symlink from /etc/systemd/system/multi-user.target.wants/autofs.service to /usr/lib/systemd/system/autofs.service.
3.新建挂载点的主目录
mkdir /luoqi/ws/aaa
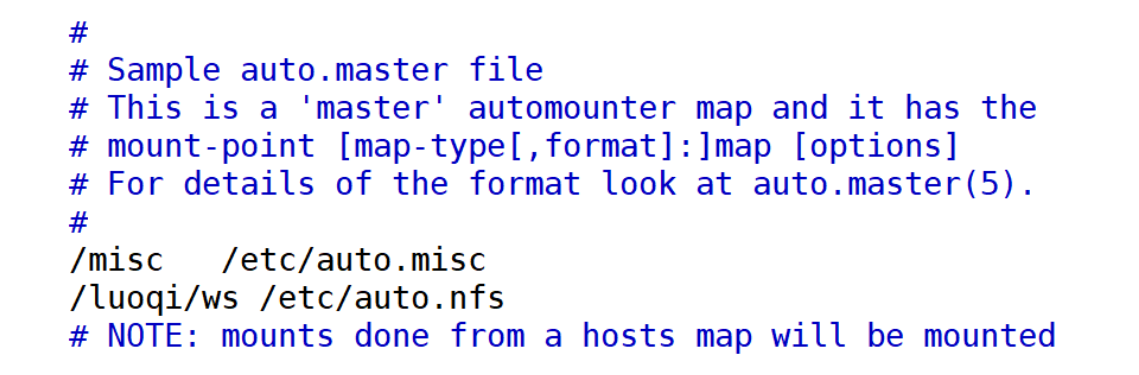
4./etc/auto.master 定义挂载点组目录的位置,及具体挂载内容的文件名
[root@ws2 ~]# vim /etc/auto.master
5、将/etc/auto.misc模板内容复制到/etc/auto.nfs
[root@ws2 ~]# cp /etc/auto.misc /etc/auot.nfs
6./etc/auto.misc 定义具体挂载点内容的文件,及挂载点的子目录名称
编辑挂载内容的配置文件
vim /etc/auto.nfs
注释掉之前的挂载信息,然后在最后一行的下面写入如下信息
挂载点子目录 文件系统类型 设备地址
abc -fstype=nfs,vers=4,rw 192.168.110.10:/common
vim /etc/auto.nfs

7、重启autofs服务并设置下次启动生效
systemctl restart autofs
systemctl enable autofs
[root@ws2 ~]# systemctl restart autofs
[root@ws2 ~]# systemctl enable autofs
查看
[root@ws2 ~]# ls /
abc  boot  etc   lib    luoqi  misc  net  proc  run   srv  tmp  var
bin  dev   home  lib64  media  mnt   opt  root  sbin  sys  usr  ws
[root@ws2 ws]# ll
总用量 0
[root@ws2 ws]# cd abc
[root@ws2 abc]# df -Th
文件系统               类型      容量  已用  可用 已用% 挂载点
/dev/sda2              xfs        50G  3.6G   47G    8% /
devtmpfs               devtmpfs  2.0G     0  2.0G    0% /dev
tmpfs                  tmpfs     2.0G     0  2.0G    0% /dev/shm
tmpfs                  tmpfs     2.0G   13M  2.0G    1% /run
tmpfs                  tmpfs     2.0G     0  2.0G    0% /sys/fs/cgroup
/dev/sda1              xfs      1014M  163M  852M   17% /boot
tmpfs                  tmpfs     394M   28K  394M    1% /run/user/0
/dev/sr0               iso9660   4.3G  4.3G     0  100% /run/media/root/CentOS 7 x86_64
192.168.110.10:/common nfs4       50G  3.5G   47G    7% /luoqi/ws/abc