Java转Go日记(六十):gin其他常用知识
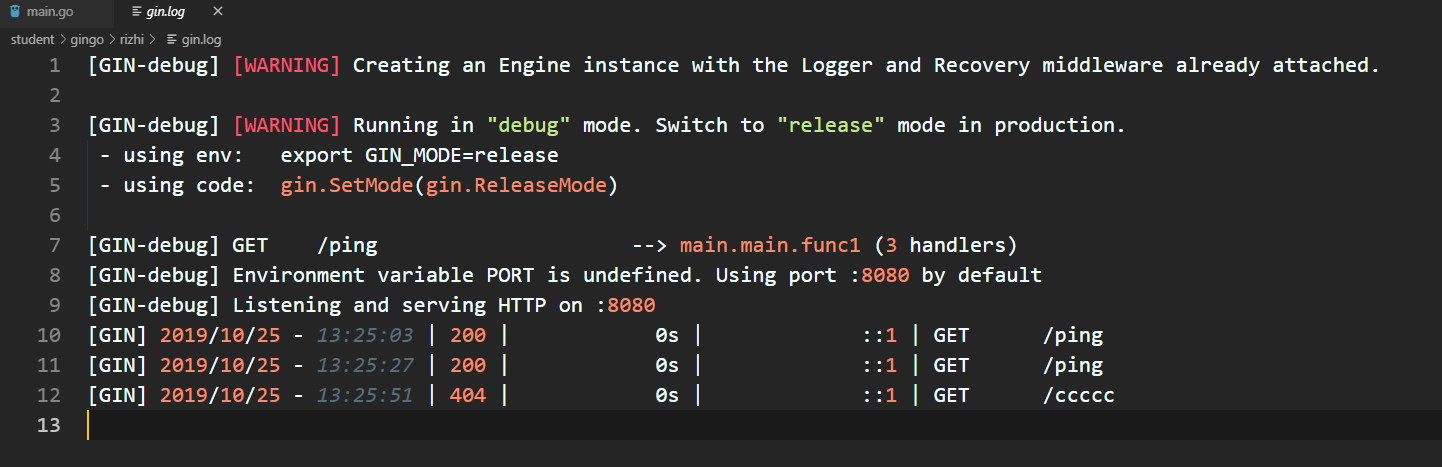
1. 日志文件
package mainimport ("io""os""github.com/gin-gonic/gin"
)func main() {gin.DisableConsoleColor()// Logging to a file.f, _ := os.Create("gin.log")gin.DefaultWriter = io.MultiWriter(f)// 如果需要同时将日志写入文件和控制台,请使用以下代码。// gin.DefaultWriter = io.MultiWriter(f, os.Stdout)r := gin.Default()r.GET("/ping", func(c *gin.Context) {c.String(200, "pong")})r.Run()
}
效果演示:
2. Air实时加载
本章我们要介绍一个神器——Air能够实时监听项目的代码文件,在代码发生变更之后自动重新编译并执行,大大提高gin框架项目的开发效率。
2.1.1. 为什么需要实时加载?
之前使用Python编写Web项目的时候,常见的Flask或Django框架都是支持实时加载的,你修改了项目代码之后,程序能够自动重新加载并执行(live-reload),这在日常的开发阶段是十分方便的。
在使用Go语言的gin框架在本地做开发调试的时候,经常需要在变更代码之后频繁的按下Ctrl+C停止程序并重新编译再执行,这样就不是很方便。
2.1.2. Air介绍
怎样才能在基于gin框架开发时实现实时加载功能呢?像这种烦恼肯定不会只是你一个人的烦恼,所以我报着肯定有现成轮子的心态开始了全网大搜索。果不其然就在Github上找到了一个工具:Air[1]。它支持以下特性:
- 彩色日志输出
- 自定义构建或二进制命令
- 支持忽略子目录
- 启动后支持监听新目录
- 更好的构建过程
2.1.3. 安装Air
Go
这也是最经典的安装方式:
go get -u github.com/cosmtrek/air
MacOS
curl -fLo air https://git.io/darwin_air
Linux
curl -fLo air https://git.io/linux_air
Windows
curl -fLo air.exe https://git.io/windows_air
Dcoker
docker run -it --rm \-w "<PROJECT>" \-e "air_wd=<PROJECT>" \-v $(pwd):<PROJECT> \-p <PORT>:<APP SERVER PORT> \cosmtrek/air-c <CONF>
然后按照下面的方式在docker中运行你的项目:
docker run -it --rm \-w "/go/src/github.com/cosmtrek/hub" \-v $(pwd):/go/src/github.com/cosmtrek/hub \-p 9090:9090 \cosmtrek/air
2.1.4. 使用Air
为了敲命令更简单更方便,你应该把alias air='~/.air'加到你的.bashrc或.zshrc中。
首先进入你的项目目录:
cd /path/to/your_project
最简单的用法就是直接执行下面的命令:
# 首先在当前目录下查找 `.air.conf`配置文件,如果找不到就使用默认的
air -c .air.conf
推荐的使用方法是:
# 1. 在当前目录创建一个新的配置文件.air.conf
touch .air.conf# 2. 复制 `air.conf.example` 中的内容到这个文件,然后根据你的需要去修改它# 3. 使用你的配置运行 air, 如果文件名是 `.air.conf`,只需要执行 `air`。
air
air_example.conf示例
完整的air_example.conf示例配置如下,可以根据自己的需要修改。
# [Air](https://github.com/cosmtrek/air) TOML 格式的配置文件# 工作目录
# 使用 . 或绝对路径,请注意 `tmp_dir` 目录必须在 `root` 目录下
root = "."
tmp_dir = "tmp"[build]
# 只需要写你平常编译使用的shell命令。你也可以使用 `make`
cmd = "go build -o ./tmp/main ."
# 由`cmd`命令得到的二进制文件名
bin = "tmp/main"
# 自定义的二进制,可以添加额外的编译标识例如添加 GIN_MODE=release
full_bin = "APP_ENV=dev APP_USER=air ./tmp/main"
# 监听以下文件扩展名的文件.
include_ext = ["go", "tpl", "tmpl", "html"]
# 忽略这些文件扩展名或目录
exclude_dir = ["assets", "tmp", "vendor", "frontend/node_modules"]
# 监听以下指定目录的文件
include_dir = []
# 排除以下文件
exclude_file = []
# 如果文件更改过于频繁,则没有必要在每次更改时都触发构建。可以设置触发构建的延迟时间
delay = 1000 # ms
# 发生构建错误时,停止运行旧的二进制文件。
stop_on_error = true
# air的日志文件名,该日志文件放置在你的`tmp_dir`中
log = "air_errors.log"[log]
# 显示日志时间
time = true[color]
# 自定义每个部分显示的颜色。如果找不到颜色,使用原始的应用程序日志。
main = "magenta"
watcher = "cyan"
build = "yellow"
runner = "green"[misc]
# 退出时删除tmp目录
clean_on_exit = true
3. gin验证码
在开发的过程中,我们有些接口为了防止被恶意调用,我们会采用加验证码的方式,例如:发送短信的接口,为了防止短信接口被频繁调用造成损失;注册的接口,为了防止恶意注册。在这里为大家推荐一个验证码的类库,方便大家学习使用。
github.com/dchest/captcha
web端是怎么实现验证码的功能呢?
- 提供一个路由,先在session里写入键值对(k->v),把值写在图片上,然后生成图片,显示在浏览器上面
- 前端将图片中的内容发送给后后端,后端根据session中的k取得v,比对校验。如果通过继续下一步的逻辑,失败给出错误提示
API接口验证码实现方式类似,可以把键值对存储在起来,验证的时候把键值对传输过来一起校验。这里我只给出了web端的方法,爱动手的小伙伴可以自己尝试一下。
后端
package mainimport ("bytes""github.com/dchest/captcha""github.com/gin-contrib/sessions""github.com/gin-contrib/sessions/cookie""github.com/gin-gonic/gin""net/http""time"
)// 中间件,处理session
func Session(keyPairs string) gin.HandlerFunc {store := SessionConfig()return sessions.Sessions(keyPairs, store)
}
func SessionConfig() sessions.Store {sessionMaxAge := 3600sessionSecret := "topgoer"var store sessions.Storestore = cookie.NewStore([]byte(sessionSecret))store.Options(sessions.Options{MaxAge: sessionMaxAge, //secondsPath:   "/",})return store
}func Captcha(c *gin.Context, length ...int) {l := captcha.DefaultLenw, h := 107, 36if len(length) == 1 {l = length[0]}if len(length) == 2 {w = length[1]}if len(length) == 3 {h = length[2]}captchaId := captcha.NewLen(l)session := sessions.Default(c)session.Set("captcha", captchaId)_ = session.Save()_ = Serve(c.Writer, c.Request, captchaId, ".png", "zh", false, w, h)
}
func CaptchaVerify(c *gin.Context, code string) bool {session := sessions.Default(c)if captchaId := session.Get("captcha"); captchaId != nil {session.Delete("captcha")_ = session.Save()if captcha.VerifyString(captchaId.(string), code) {return true} else {return false}} else {return false}
}
func Serve(w http.ResponseWriter, r *http.Request, id, ext, lang string, download bool, width, height int) error {w.Header().Set("Cache-Control", "no-cache, no-store, must-revalidate")w.Header().Set("Pragma", "no-cache")w.Header().Set("Expires", "0")var content bytes.Bufferswitch ext {case ".png":w.Header().Set("Content-Type", "image/png")_ = captcha.WriteImage(&content, id, width, height)case ".wav":w.Header().Set("Content-Type", "audio/x-wav")_ = captcha.WriteAudio(&content, id, lang)default:return captcha.ErrNotFound}if download {w.Header().Set("Content-Type", "application/octet-stream")}http.ServeContent(w, r, id+ext, time.Time{}, bytes.NewReader(content.Bytes()))return nil
}func main() {router := gin.Default()router.LoadHTMLGlob("./*.html")router.Use(Session("topgoer"))router.GET("/captcha", func(c *gin.Context) {Captcha(c, 4)})router.GET("/", func(c *gin.Context) {c.HTML(http.StatusOK, "index.html", nil)})router.GET("/captcha/verify/:value", func(c *gin.Context) {value := c.Param("value")if CaptchaVerify(c, value) {c.JSON(http.StatusOK, gin.H{"status": 0, "msg": "success"})} else {c.JSON(http.StatusOK, gin.H{"status": 1, "msg": "failed"})}})router.Run(":8080")
}
前端页面
<!DOCTYPE html>
<html lang="en">
<head><meta charset="UTF-8"><title>www.topgoer.com验证码</title>
</head>
<body>
<img src="/captcha" onclick="this.src='/captcha?v='+Math.random()">
</body>
</html>
浏览器访问http://127.0.0.1:8080
访问http://127.0.0.1:8080/captcha/verify/5721 进行验证
{"msg": "failed","status": 1}