Linux系统编程收尾(35)
文章目录
- 前言
- 一、读写锁
- 二、自旋锁
- 总结
前言
大家好,这是我们Linux系统编程的最后一节课了!
大家请再撑住一会儿~
一、读写锁
提到读写锁,我们就不得不提到 读者写者模型 ,跟 生产者消费者模型 不同的是,本模型的核心思想是 读者共享,写者互斥
这就好比博客发布了,允许很多人同时读,但如果作者想要进行修改,那么其他人自然也就无法查看了,这就是一个很典型的 读者写者 问题
读者写者模型 也遵循 321 原则
3 种关系:
读者 <-> 读者 无关系
写者 <-> 写者 互斥
读者 <-> 写者 互斥、同步
2 种角色:读者、写者
1 个交易场所:阻塞队列或其他缓冲区
为什么读者与读者间甚至不存在互斥关系?
因为读者读取数据时,并不会对数据做出修改,因此不需要维持互斥关系
pthread库里面提供了有关读写锁的一些接口
#include <pthread.h>pthread_rwlock_t; // 读写锁类型// 初始化读写锁
int pthread_rwlock_init(pthread_rwlock_t *__restrict__ __rwlock, const pthread_rwlockattr_t *__restrict__ __attr); // 销毁读写锁
int pthread_rwlock_destroy(pthread_rwlock_t *__rwlock) // 读者,加锁
int pthread_rwlock_rdlock(pthread_rwlock_t *__rwlock); // 阻塞式
int pthread_rwlock_tryrdlock(pthread_rwlock_t *__rwlock); // 非阻塞式// 写者,加锁
int pthread_rwlock_wrlock(pthread_rwlock_t *__rwlock); // 阻塞式
int pthread_rwlock_trywrlock(pthread_rwlock_t *__rwlock); // 非阻塞式// 解锁(读者锁、写者锁都可以解)
int pthread_rwlock_unlock(pthread_rwlock_t *__rwlock);
注意: 读者和写者使用的加锁接口并不是同一个
关于 读者写者模型 的实现:
- 读者读数据时,允许其他读者一起读取数据,但不允许写者修改数据
- 写者写数据时,不允许读者进入
- 读者读取完数据后,通知写者进行写入
- 写者写完数据后,通知读者进行读取
因为现实中,读者数量大多数情况下都是多于写者的,所以势必会存在很多很多读者不断读取,导致写者根本申请不到信号量,写者陷入 死锁 状态
这是读者写者模型的特性,也是 读者优先 策略的体现,如果想要避免死锁,可以选择 写者优先 策略,优先让写者先写,读者先等一等
#include <iostream>
#include <pthread.h>
#include <unistd.h>
#include <vector>
#include <cstdlib>
#include <ctime>// 共享资源
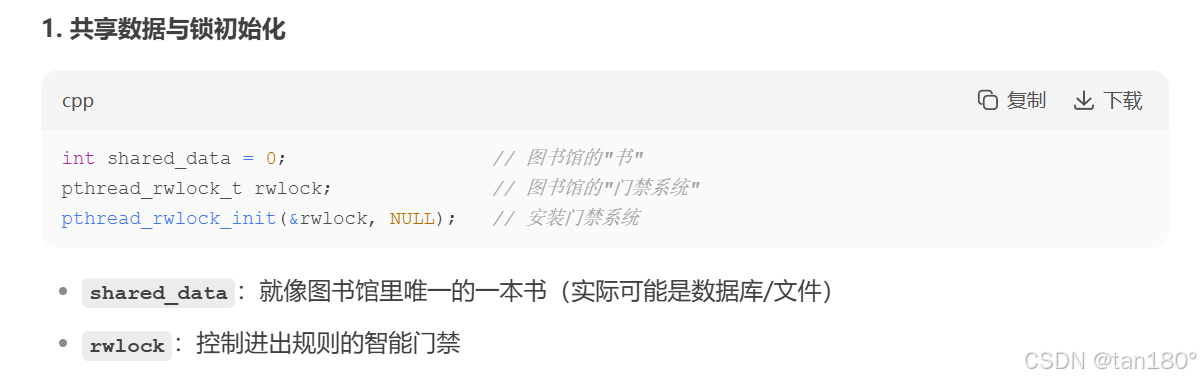
int shared_data = 0;// 读写锁
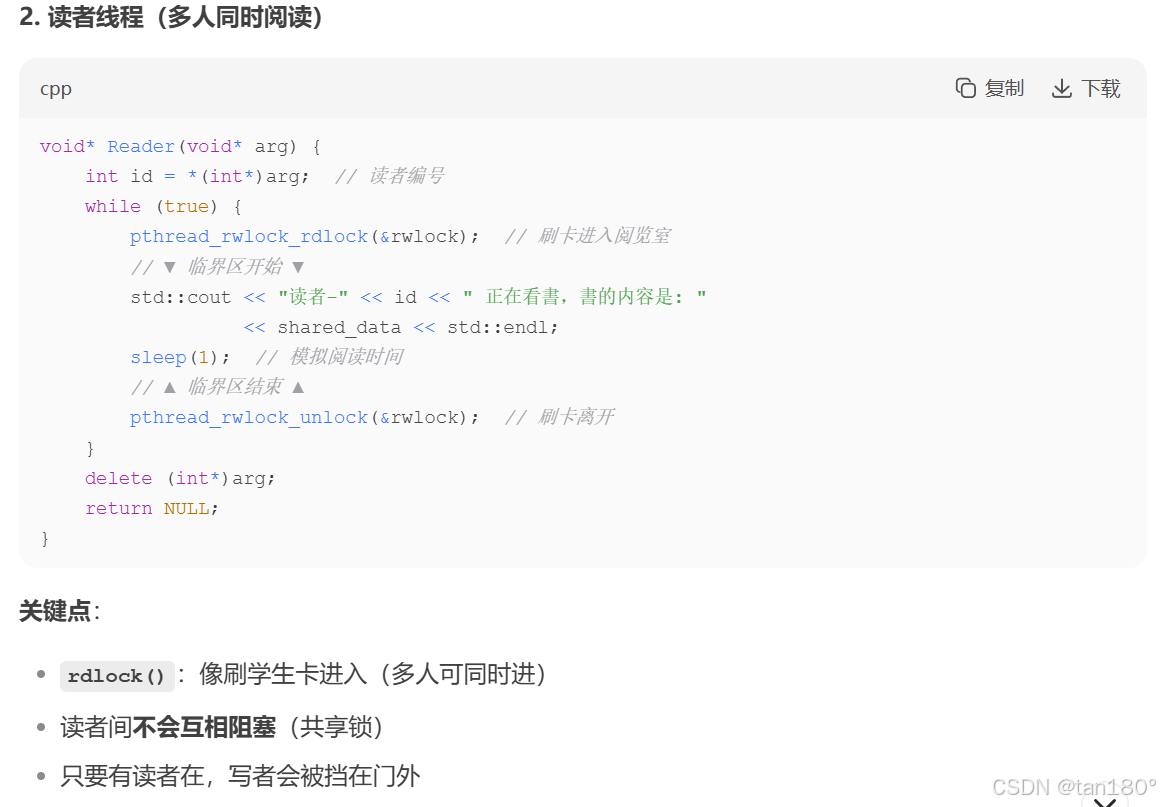
pthread_rwlock_t rwlock;// 读者线程函数
void* Reader(void* arg)
{//sleep(1); //读者优先,一旦读者进入 && 读者很多,写者基本就很难进入了int number = *(int *)arg;while (true){pthread_rwlock_rdlock(&rwlock); // 读者加锁std::cout << "读者-" << number << " 正在读取数据, 数据是: " << shared_data << std::endl;sleep(1); // 模拟读取操作pthread_rwlock_unlock(&rwlock); // 解锁}delete (int*)arg;return NULL;
}// 写者线程函数
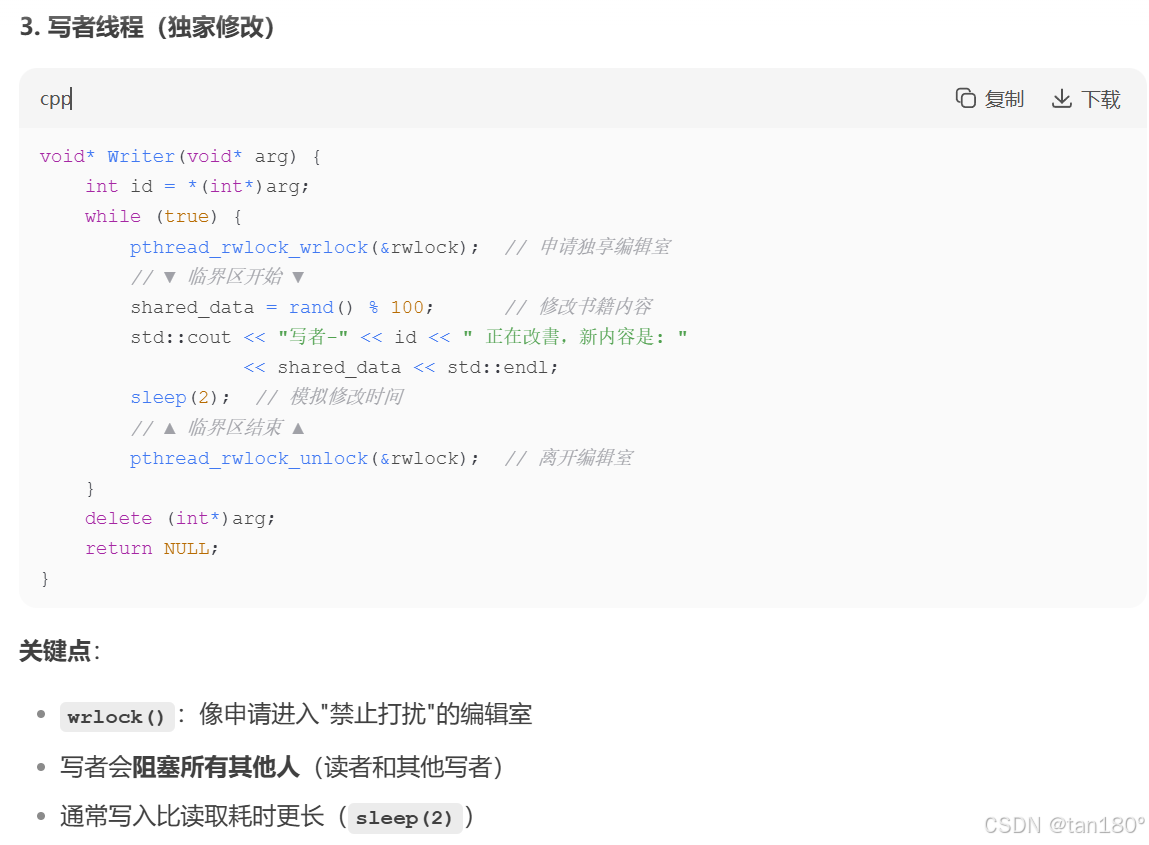
void* Writer(void* arg)
{int number = *(int *)arg;while (true){pthread_rwlock_wrlock(&rwlock); // 写者加锁shared_data = rand() % 100; // 修改共享数据std::cout << "写者- " << number << " 正在写入. 新的数据是: " << shared_data << std::endl;sleep(2); // 模拟写入操作pthread_rwlock_unlock(&rwlock); // 解锁}delete (int*)arg;return NULL;
}int main()
{srand(time(nullptr) ^ getpid());pthread_rwlock_init(&rwlock, NULL); // 初始化读写锁// 可以更高读写数量配比,观察现象const int reader_num = 2;const int writer_num = 2;const int total = reader_num + writer_num;pthread_t threads[total]; // 假设读者和写者数量相等// 创建读者线程for (int i = 0; i < reader_num; ++i){int *id = new int(i);pthread_create(&threads[i], NULL, Reader, id);}// 创建写者线程for (int i = reader_num; i < total; ++i){int *id = new int(i - reader_num);pthread_create(&threads[i], NULL, Writer, id);}// 等待所有线程完成for (int i = 0; i < total; ++i){pthread_join(threads[i], NULL);}pthread_rwlock_destroy(&rwlock); // 销毁读写锁return 0;
}
现在我将以 生活化 的例子来帮大家理解这段代码
首先,先用图书馆来比喻什么是读者,什么是写者

共享数据与锁初始化
读者线程
写者线程
主线程

锁的三种状态

二、自旋锁
接口大致浏览~
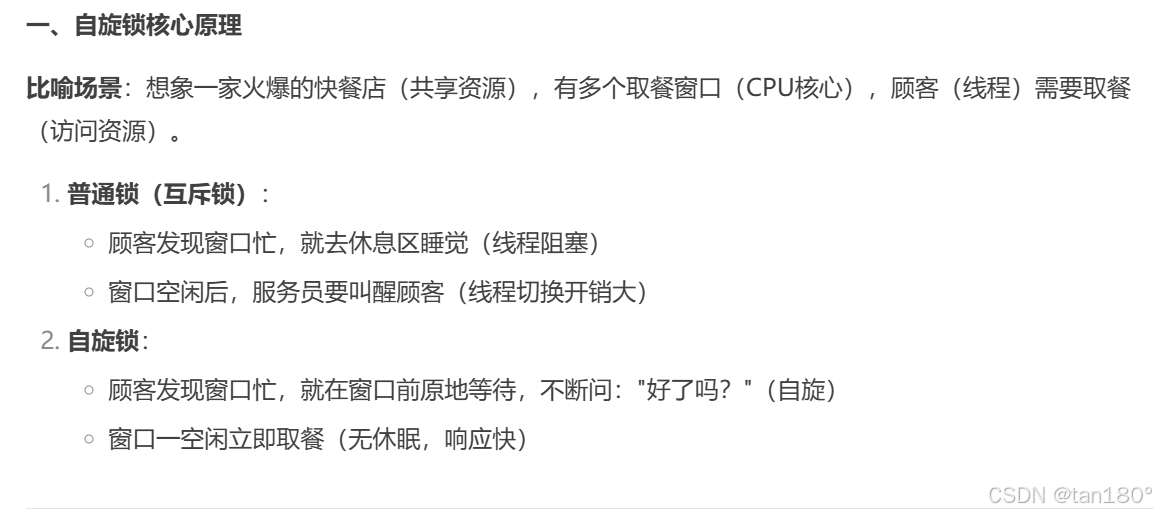
自旋锁:申请锁失败时,线程不会被挂起,而且不断尝试申请锁
自旋 本质上就是一个不断 轮询 的过程,即不断尝试申请锁,这种操作是十分消耗 CPU 时间的,因此推荐临界区中的操作时间较短时,使用 自旋锁 以提高效率;操作时间较长时,自旋锁 会严重占用 CPU 时间
自旋锁 的优点:可以减少线程切换的消耗
#include <pthread.h>pthread_spinlock_t lock; // 自旋锁类型int pthread_spin_init(pthread_spinlock_t *lock, int pshared); // 初始化自旋锁int pthread_spin_destroy(pthread_spinlock_t *lock); // 销毁自旋锁// 自旋锁加锁
int pthread_spin_lock(pthread_spinlock_t *lock); // 失败就不断重试(阻塞式)
int pthread_spin_trylock(pthread_spinlock_t *lock); // 失败就继续向后运行(非阻塞式)// 自旋锁解锁
int pthread_spin_unlock(pthread_spinlock_t *lock);
现在我们再次借用 DS 来用比喻助于你的理解
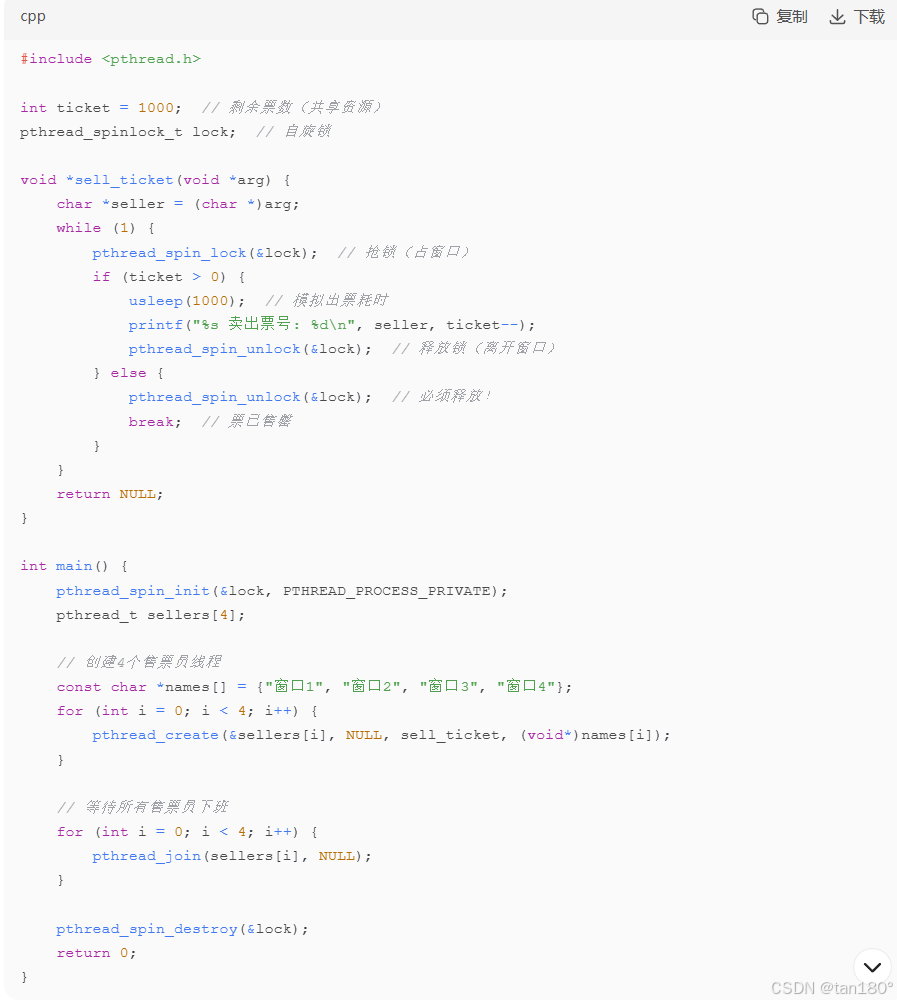
// 操作共享变量会有问题的售票系统代码
#include <stdio.h>
#include <stdlib.h>
#include <string.h>
#include <unistd.h>
#include <pthread.h>int ticket = 1000;
pthread_spinlock_t lock;void* route(void* arg)
{char* id = (char*)arg;while (1){pthread_spin_lock(&lock);if (ticket > 0){usleep(1000);printf("%s sells ticket:%d\n", id, ticket);ticket--;pthread_spin_unlock(&lock);}else{pthread_spin_unlock(&lock);break;}}return nullptr;
}int main(void)
{pthread_spin_init(&lock, PTHREAD_PROCESS_PRIVATE);pthread_t t1, t2, t3, t4;pthread_create(&t1, NULL, route, (void *)"thread 1");pthread_create(&t2, NULL, route, (void *)"thread 2");pthread_create(&t3, NULL, route, (void *)"thread 3");pthread_create(&t4, NULL, route, (void *)"thread 4");pthread_join(t1, NULL);pthread_join(t2, NULL);pthread_join(t3, NULL);pthread_join(t4, NULL);pthread_spin_destroy(&lock);return 0;
}
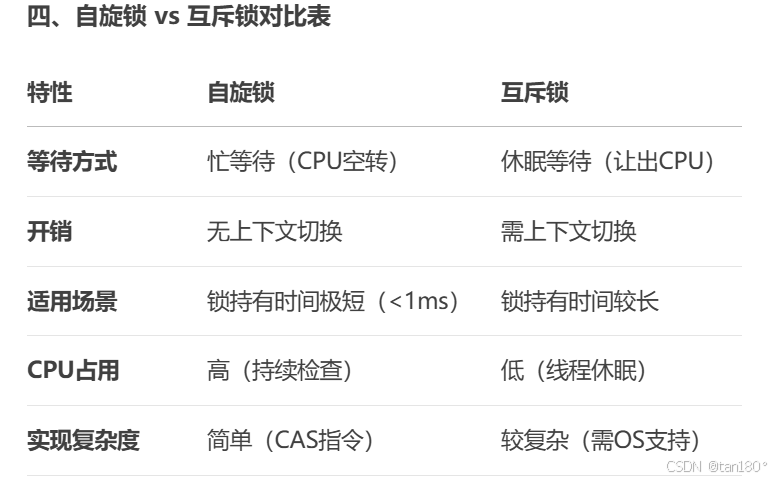
上面是DS大人给出的比喻,下面是其给出的对比表
总结
结束喽,Linux系统编程环节,现在是即将进入Linux网络编程!!!