rhce第二次作业
任务目标
1.配置ssh实现A,B主机互相免密登录
2.配置nginx服务,通过多ip区分多网站
任务一
关闭防火墙
[root@localhost ~]# setenforce 0
[root@localhost ~]# systemctl stop firewalld.service
A主机免密登录B主机
### A主机生成密钥
[root@localhost ~]# ssh-keygen -t RSA    #-t RSA 非对称算法
Generating public/private RSA key pair.
Enter file in which to save the key (/root/.ssh/id_rsa):   #enter 默认存储目录
Enter passphrase (empty for no passphrase):    #enter 默认无密码
Enter same passphrase again:
Your identification has been saved in /root/.ssh/id_rsa
Your public key has been saved in /root/.ssh/id_rsa.pub
The key fingerprint is:
SHA256:8a0Kzu/gbqNGzaEadlreu8v0CHb2fkHvQpfs/iw7liI root@localhost.localdomain
The key's randomart image is:
+---[RSA 3072]----+
|                 |
|                 |
|        .        |
|      .  o..     |
|     + .S..o..   |
|  o = o   o.=    |
| . Oo.*  ..= .   |
|  o.oX+*E.+ B.   |
|   ..+@OBo =o=o  |
+----[SHA256]-----+###检查生成的密钥是否在默认路径
[root@localhost ~]# ll /root/.ssh
总用量 8
-rw-------. 1 root root 2655  5月  3 09:49 id_rsa
-rw-r--r--. 1 root root  580  5月  3 09:49 id_rsa.pub###将A主机公钥拷贝到B主机
[root@localhost ~]# ssh-copy-id root@192.168.17.129
/usr/bin/ssh-copy-id: INFO: Source of key(s) to be installed: "/root/.ssh/id_rsa.pub"
The authenticity of host '192.168.17.129 (192.168.17.129)' can't be established.
ED25519 key fingerprint is SHA256:BwZ4cqQb3WYw/nzjMXT+j6BP5FnIbow9zFeIjEDEKp8.
This key is not known by any other names
Are you sure you want to continue connecting (yes/no/[fingerprint])? yes
/usr/bin/ssh-copy-id: INFO: attempting to log in with the new key(s), to filter out any that are already installed
/usr/bin/ssh-copy-id: INFO: 1 key(s) remain to be installed -- if you are prompted now it is to install the new keys
root@192.168.17.129's password: Number of key(s) added: 1Now try logging into the machine, with:   "ssh 'root@192.168.17.129'"
and check to make sure that only the key(s) you wanted were added.###A免密连接B测试
[root@localhost ~]# ssh 192.168.17.129
Activate the web console with: systemctl enable --now cockpit.socketRegister this system with Red Hat Insights: insights-client --register
Create an account or view all your systems at https://red.ht/insights-dashboard
Last login: Sat May  3 09:57:36 2025 from 192.168.17.1
B主机免密登录A主机同理
###B主机生成密钥
[root@localhost ~]# ssh-keygen -t RSA
Generating public/private RSA key pair.
Enter file in which to save the key (/root/.ssh/id_rsa):
Enter passphrase (empty for no passphrase):
Enter same passphrase again:
Your identification has been saved in /root/.ssh/id_rsa
Your public key has been saved in /root/.ssh/id_rsa.pub
The key fingerprint is:
SHA256:/Pb6m9qrq8PwZKTnFt14CK0hGuW2uJ95vT4VxK9OBWA root@localhost.localdomain
The key's randomart image is:
+---[RSA 3072]----+
|          Eo     |
|      .  .  +    |
|     o   . . o   |
|    . +.+ . . o  |
|     = =S= + +   |
|    o + *.+ *    |
|     . O oo=     |
|    .  oB.oo..   |
|     .+o.+BOBo   |
+----[SHA256]-----+###拷贝密钥到A主机
[root@localhost ~]# ssh-copy-id 192.168.17.128
/usr/bin/ssh-copy-id: INFO: Source of key(s) to be installed: "/root/.ssh/id_rsa.pub"
/usr/bin/ssh-copy-id: INFO: attempting to log in with the new key(s), to filter out any that are already installed
/usr/bin/ssh-copy-id: INFO: 1 key(s) remain to be installed -- if you are prompted now it is to install the new keys
root@192.168.17.128's password: Number of key(s) added: 1Now try logging into the machine, with:   "ssh '192.168.17.128'"
and check to make sure that only the key(s) you wanted were added.###B主机连接A主机测试
[root@localhost ~]# ssh 192.168.17.128
Activate the web console with: systemctl enable --now cockpit.socketRegister this system with Red Hat Insights: insights-client --register
Create an account or view all your systems at https://red.ht/insights-dashboard
Last login: Sat May  3 09:43:54 2025 from 192.168.17.1
任务二
配置多个网卡
打开虚拟机设置,点击下方的添加
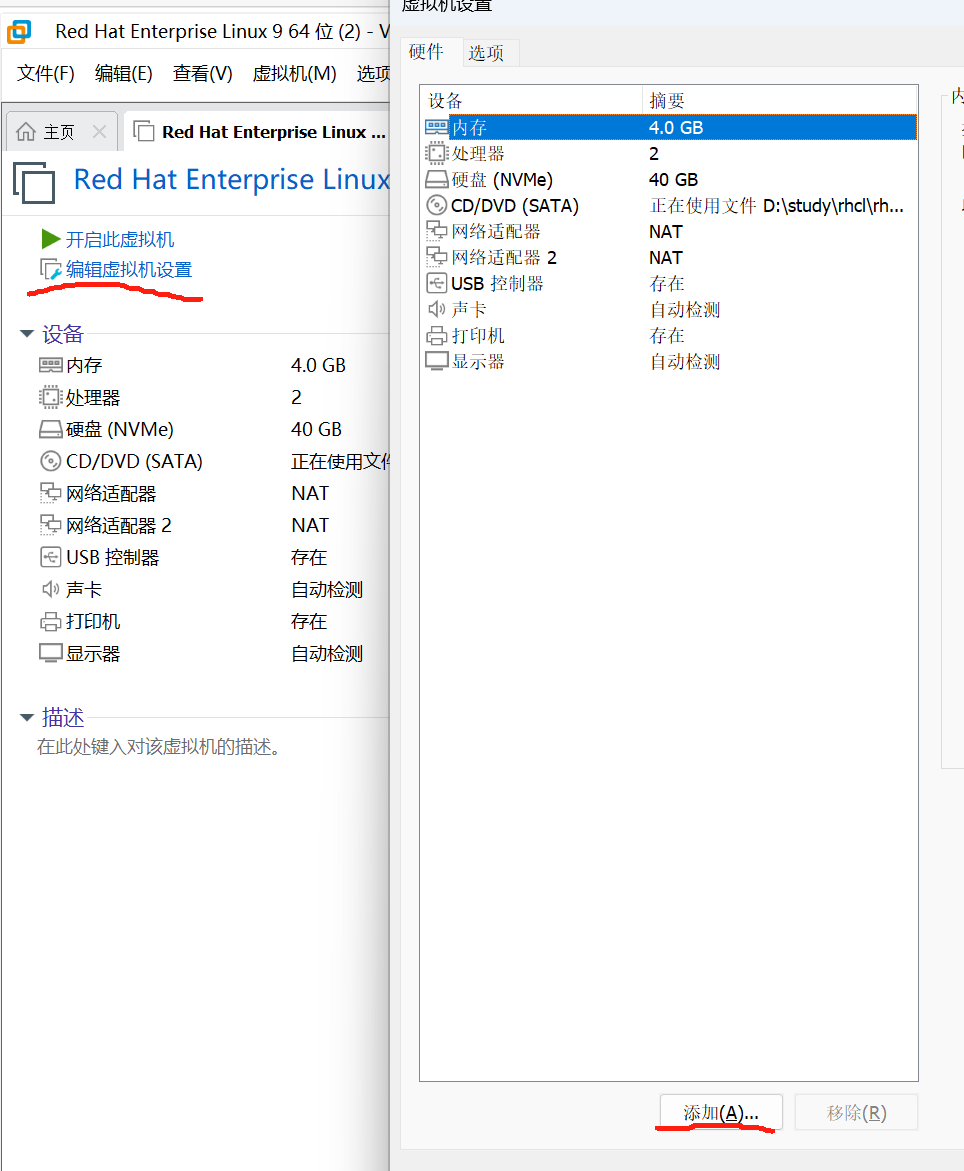
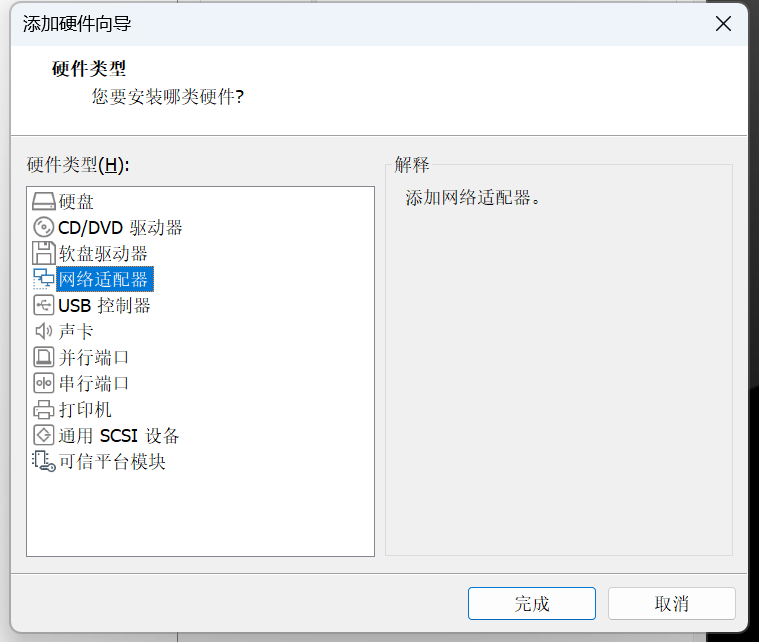
选择安装网络适配器,确定后回到虚拟机
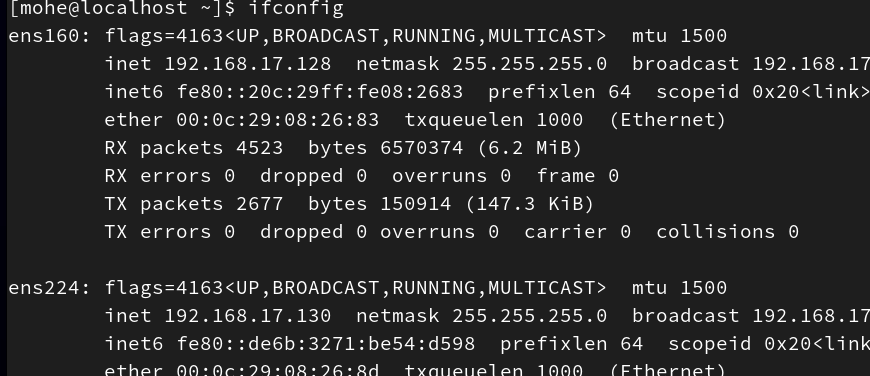
输入ifconfig指令查看新添加的网卡
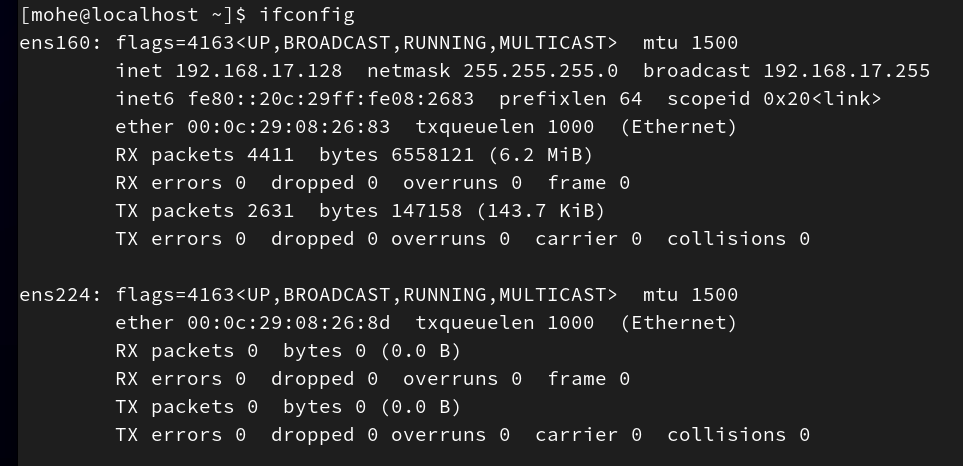
###激活ens224网卡
[mohe@localhost ~]$ nmcli device connect ens224
设备 "ens224" 成功以 "f2130624-5326-4d3f-9908-16d9f7c1ef6a" 激活。
[mohe@localhost ~]$ nmcli connection up ens224
连接已成功激活(D-Bus 活动路径:/org/freedesktop/NetworkManager/ActiveConnection/6)
安装以及使用nginx
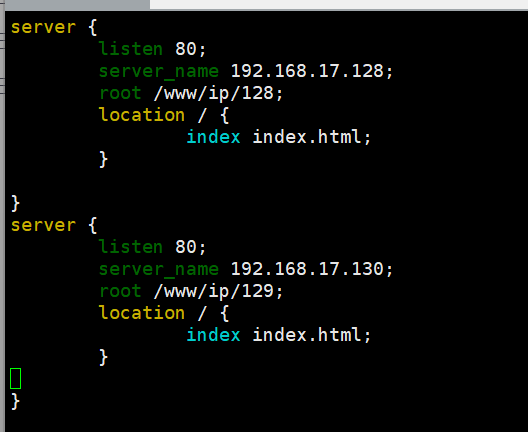
配置多ip多网站信息
[root@localhost mohe]# dnf install nginx
[root@localhost ~]# vim /etc/nginx/conf.d/ip.conf
vim界面
###创建目录,添加文件
[root@localhost ~]# mkdir /www/ip/{128,130} -pv
mkdir: 已创建目录 '/www'
mkdir: 已创建目录 '/www/ip'
mkdir: 已创建目录 '/www/ip/128'
mkdir: 已创建目录 '/www/ip/130'
[root@localhost ~]# echo this is 128 > /www/ip/128/index.html
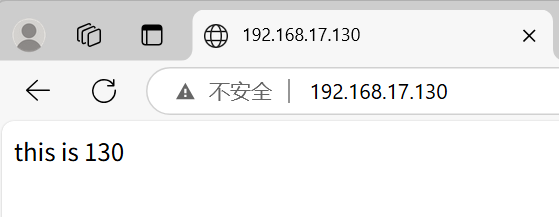
[root@localhost ~]# echo this is 130 > /www/ip/130/index.html
[root@localhost ~]# systemctl restart nginx
结果如下