Android studio进阶开发(六)--如何用真机通过okhttp连接服务器
我们学过了如何通过okhttp查询网络上已经发布的网页,但我们还需要在做全栈时保证前后端能够交互。
前要课程
okhttp的使用
真机端口连接
安全认证
由于http的安全性较差,在没有安全协议的情况下,使用自己的后端连接会报错,所以我们要在项目中配置安全文件:
r在 res/xml 目录下创建 network_security_config.xml
<?xml version="1.0" encoding="utf-8"?>
<network-security-config><base-config cleartextTrafficPermitted="true"><trust-anchors><certificates src="system" /></trust-anchors></base-config>
</network-security-config>
在 AndroidManifest.xml 的 标签中启用配置:
android:networkSecurityConfig="@xml/network_security_config"
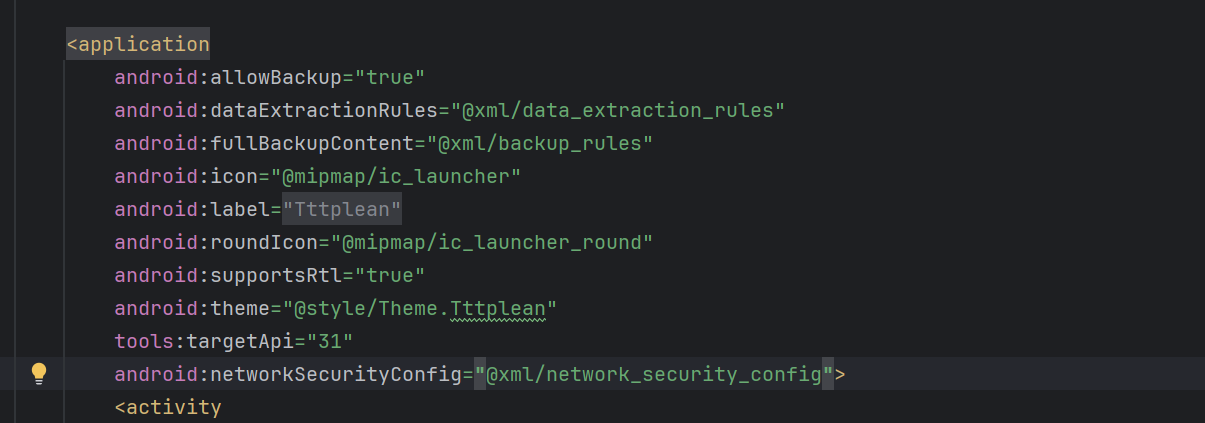
这样安全配置就完成了
后端
我们先看下后端的情况吧:

我们主要去调用name与type的属性,通过唯一的name去获取信息
代码
我们的代码基本上是在此文章中的代码进行改进的Android studio进阶开发(四)–okhttp的网络通信的使用
主要修改的地方:
private static final String BASE_URL = "http://192.168.43.9:8080/"; // 电脑的IP地址```java// 发起GET方式的HTTP请求private void doGet() {// 1. 构建带参数的URLHttpUrl url = new HttpUrl.Builder().scheme("http").host("192.168.43.9") // 替换为实际IP.port(8080).addPathSegments("threes/query/nametypes") // 层级路径的正确写法.addQueryParameter("name", "id") // 查询参数.build();OkHttpClient client = new OkHttpClient.Builder().connectTimeout(15, TimeUnit.SECONDS) // 添加超时配置.readTimeout(20, TimeUnit.SECONDS).build();Request request = new Request.Builder().url(url).header("Accept-Language", "zh-CN")// 移除不需要的Referer头.build();client.newCall(request).enqueue(new Callback() {@Overridepublic void onFailure(Call call, IOException e) {runOnUiThread(() ->tv_result.setText("请求失败: " + e.getMessage()));}@Overridepublic void onResponse(Call call, Response response) throws IOException {if (response.isSuccessful()) {String resp = response.body().string();try {// 关键修改点:解析JSON数组JSONArray jsonArray = new JSONArray(resp);// 遍历数组中的对象StringBuilder result = new StringBuilder();for (int i = 0; i < jsonArray.length(); i++) {JSONObject item = jsonArray.getJSONObject(i);// 根据实际返回字段提取数据String name = item.optString("name", "未知");String type = item.optString("type", "未知");result.append("字段名称:").append(name).append("\n类型:").append(type).append("\n\n");}runOnUiThread(() ->tv_result.setText(result.toString()));} catch (JSONException e) {runOnUiThread(() ->tv_result.setText("数据解析失败\n原始数据:" + resp));}} else {runOnUiThread(() ->tv_result.setText("错误码:" + response.code()));}}});}
效果图:
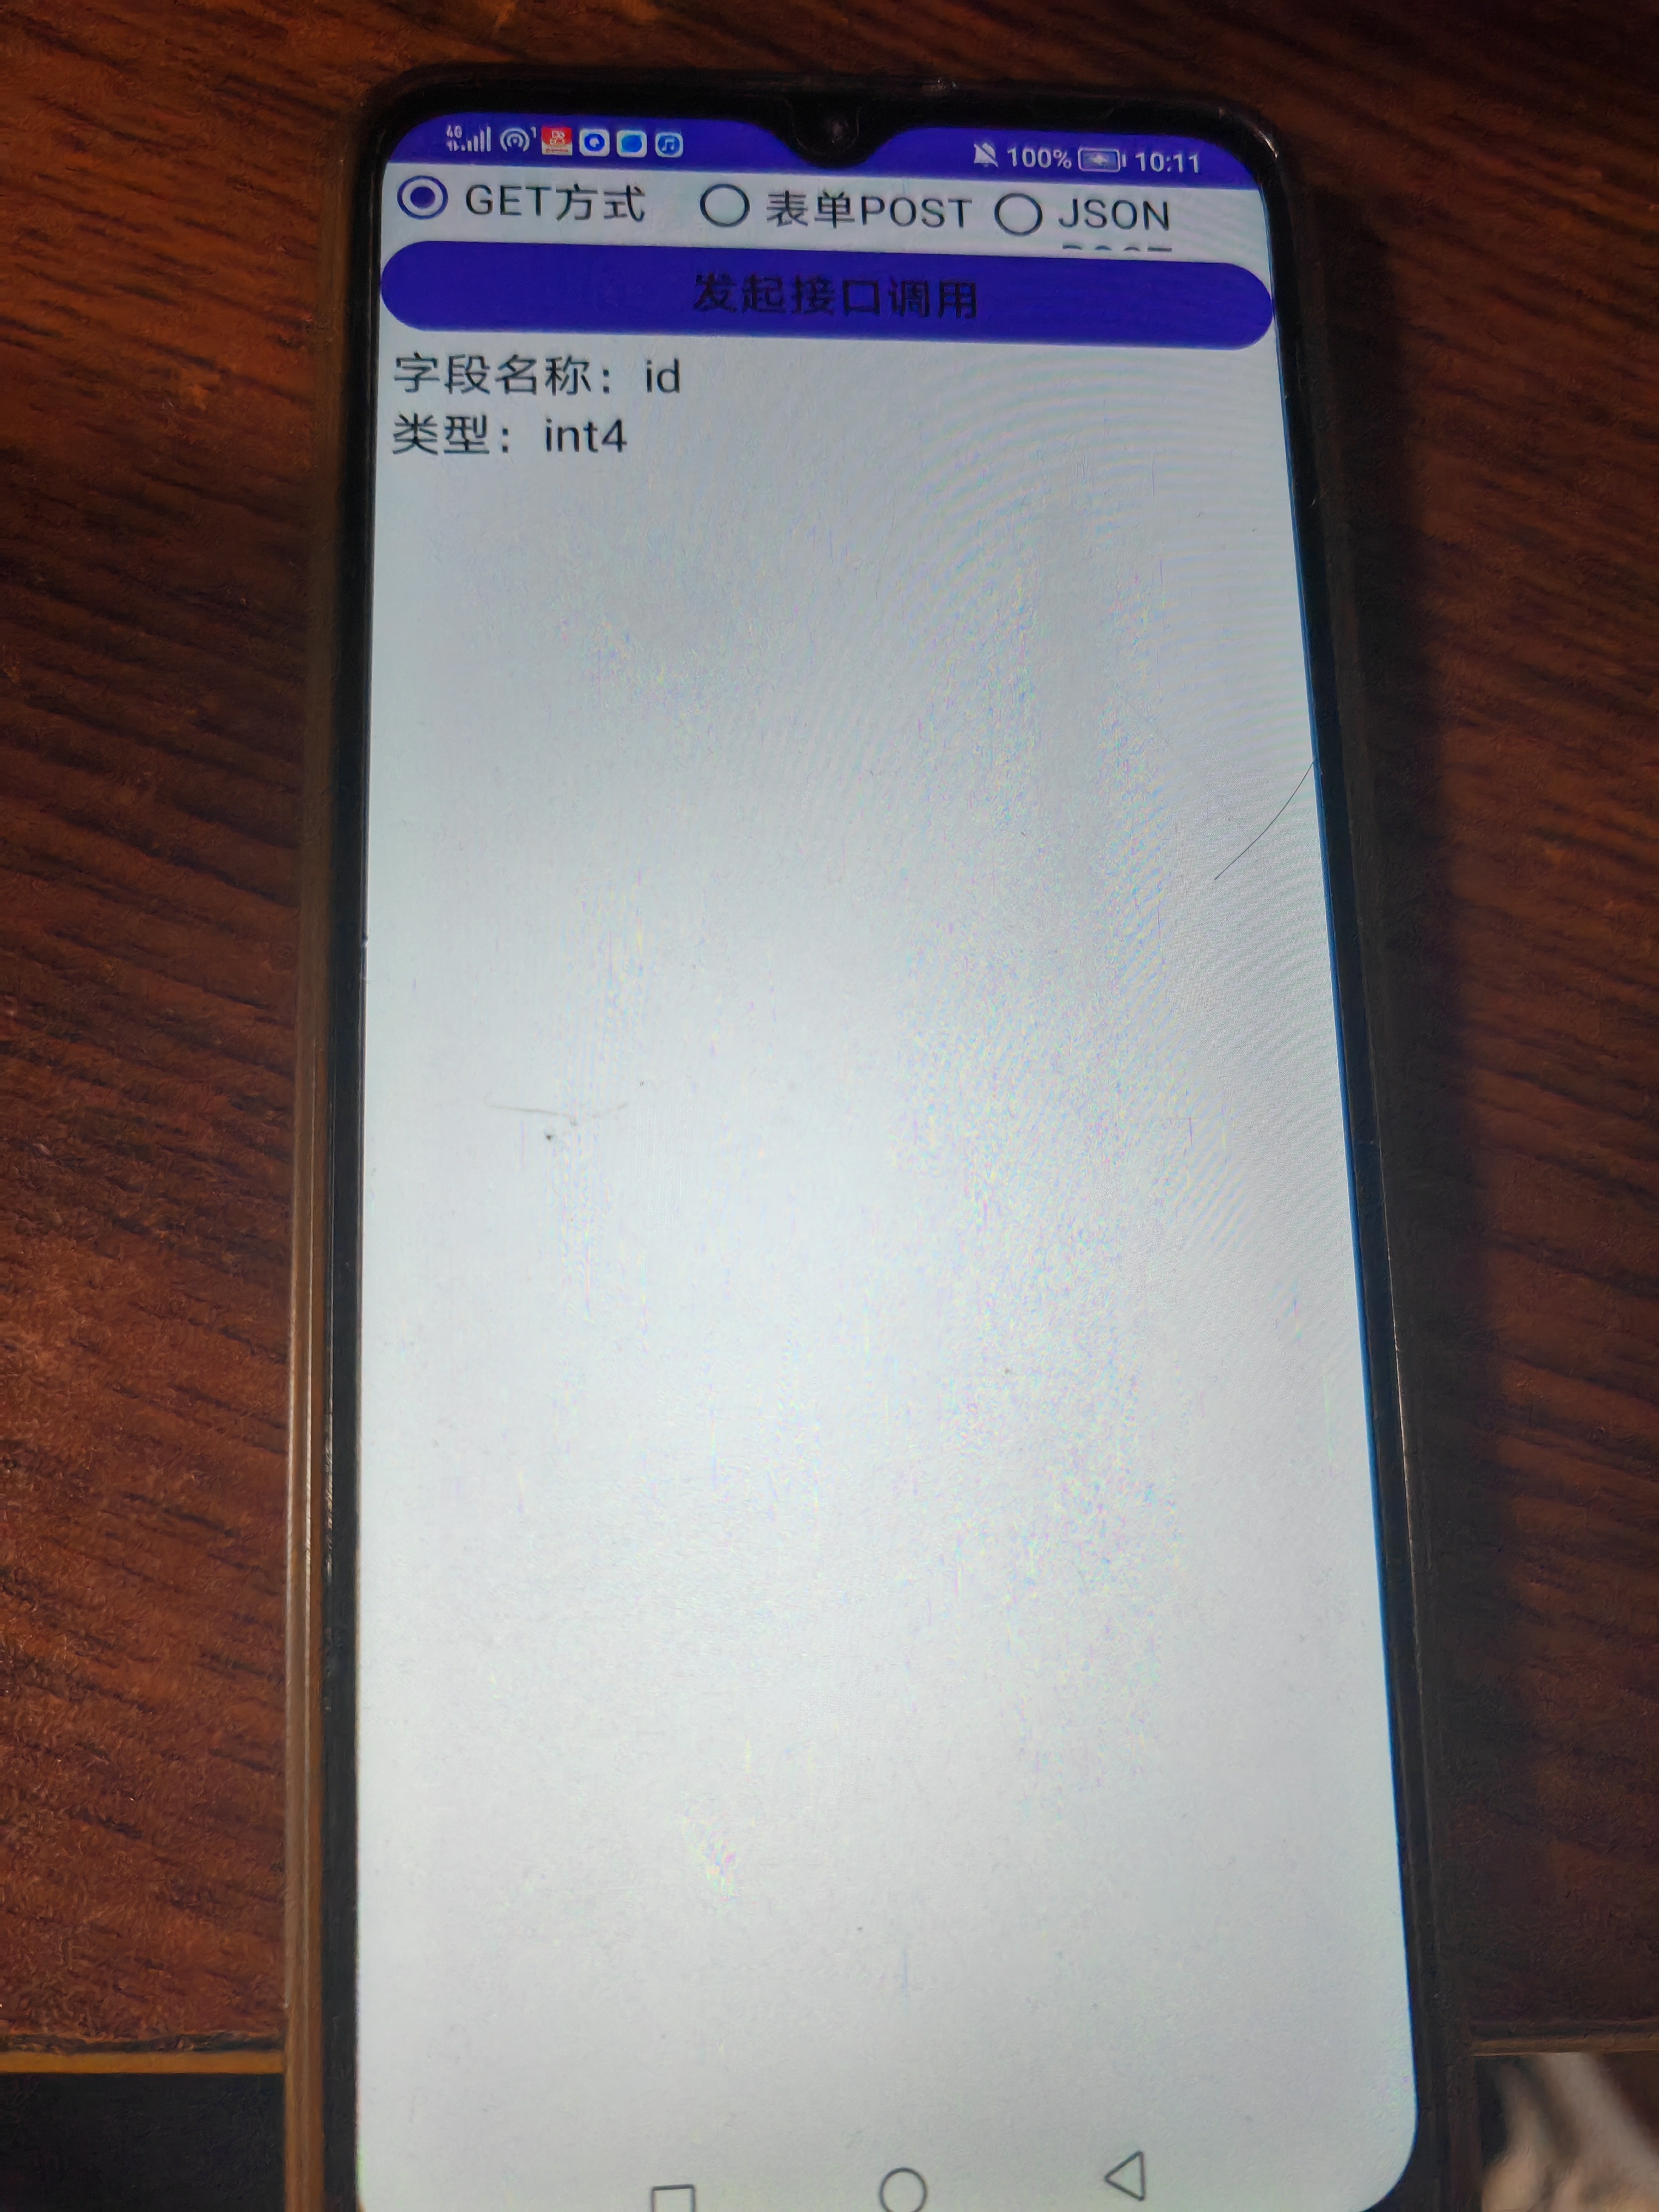
这样,我们可以通过连接查询到我们后端数据库中的内容。
全部代码:
java:
package com.example.tttplean;import android.os.Bundle;
import android.view.View;
import android.widget.EditText;
import android.widget.LinearLayout;
import android.widget.RadioGroup;
import android.widget.TextView;import androidx.appcompat.app.AppCompatActivity;import com.example.tttplean.Netconst;import org.json.JSONArray;
import org.json.JSONException;
import org.json.JSONObject;import java.io.IOException;
import java.util.concurrent.TimeUnit;import okhttp3.Call;
import okhttp3.Callback;
import okhttp3.FormBody;
import okhttp3.HttpUrl;
import okhttp3.MediaType;
import okhttp3.OkHttpClient;
import okhttp3.Request;
import okhttp3.RequestBody;
import okhttp3.Response;public class Okhttp extends AppCompatActivity {private final static String TAG = "OkhttpCallActivity";private static final String BASE_URL = "http://192.168.43.9:8080/"; // 电脑的IP地址private static final String CITY_ENDPOINT = BASE_URL + "city";private final static String URL_LOGIN = Netconst.HTTP_PREFIX + "login";private LinearLayout ll_login; // 声明一个线性布局对象private EditText et_username; // 声明一个编辑框对象private EditText et_password; // 声明一个编辑框对象private TextView tv_result; // 声明一个文本视图对象private int mCheckedId = R.id.rb_get; // 当前选中的单选按钮资源编号@Overrideprotected void onCreate(Bundle savedInstanceState) {super.onCreate(savedInstanceState);setContentView(R.layout.activity_okhttp);ll_login = findViewById(R.id.ll_login);et_username = findViewById(R.id.et_username);et_password = findViewById(R.id.et_password);tv_result = findViewById(R.id.tv_result);RadioGroup rg_method = findViewById(R.id.rg_method);rg_method.setOnCheckedChangeListener((group, checkedId) -> {mCheckedId = checkedId;int visibility = mCheckedId == R.id.rb_get ? View.GONE : View.VISIBLE;ll_login.setVisibility(visibility);});findViewById(R.id.btn_send).setOnClickListener(v -> {if (mCheckedId == R.id.rb_get) {doGet(); // 发起GET方式的HTTP请求} else if (mCheckedId == R.id.rb_post_form) {postForm(); // 发起POST方式的HTTP请求(报文为表单格式)} else if (mCheckedId == R.id.rb_post_json) {postJson(); // 发起POST方式的HTTP请求(报文为JSON格式)}});}// 发起GET方式的HTTP请求private void doGet() {// 1. 构建带参数的URLHttpUrl url = new HttpUrl.Builder().scheme("http").host("192.168.43.9") // 替换为实际IP.port(8080).addPathSegments("threes/query/nametypes") // 层级路径的正确写法.addQueryParameter("name", "id") // 查询参数.build();OkHttpClient client = new OkHttpClient.Builder().connectTimeout(15, TimeUnit.SECONDS)  // 添加超时配置.readTimeout(20, TimeUnit.SECONDS).build();Request request = new Request.Builder().url(url).header("Accept-Language", "zh-CN")// 移除不需要的Referer头.build();client.newCall(request).enqueue(new Callback() {@Overridepublic void onFailure(Call call, IOException e) {runOnUiThread(() ->tv_result.setText("请求失败: " + e.getMessage()));}@Overridepublic void onResponse(Call call, Response response) throws IOException {if (response.isSuccessful()) {String resp = response.body().string();try {// 关键修改点:解析JSON数组JSONArray jsonArray = new JSONArray(resp);// 遍历数组中的对象StringBuilder result = new StringBuilder();for (int i = 0; i < jsonArray.length(); i++) {JSONObject item = jsonArray.getJSONObject(i);// 根据实际返回字段提取数据String name = item.optString("name", "未知");String type = item.optString("type", "未知");result.append("字段名称:").append(name).append("\n类型:").append(type).append("\n\n");}runOnUiThread(() ->tv_result.setText(result.toString()));} catch (JSONException e) {runOnUiThread(() ->tv_result.setText("数据解析失败\n原始数据:" + resp));}} else {runOnUiThread(() ->tv_result.setText("错误码:" + response.code()));}}});}// 发起POST方式的HTTP请求(报文为表单格式)private void postForm() {String username = et_username.getText().toString();String password = et_password.getText().toString();// 创建一个表单对象FormBody body = new FormBody.Builder().add("username", username).add("password", password).build();OkHttpClient client = new OkHttpClient(); // 创建一个okhttp客户端对象// 创建一个POST方式的请求结构Request request = new Request.Builder().post(body).url(URL_LOGIN).build();Call call = client.newCall(request); // 根据请求结构创建调用对象// 加入HTTP请求队列。异步调用,并设置接口应答的回调方法call.enqueue(new Callback() {@Overridepublic void onFailure(Call call, IOException e) { // 请求失败// 回到主线程操纵界面runOnUiThread(() -> tv_result.setText("调用登录接口报错:"+e.getMessage()));}@Overridepublic void onResponse(Call call, final Response response) throws IOException { // 请求成功String resp = response.body().string();// 回到主线程操纵界面runOnUiThread(() -> tv_result.setText("调用登录接口返回:\n"+resp));}});}// 发起POST方式的HTTP请求(报文为JSON格式)private void postJson() {String username = et_username.getText().toString();String password = et_password.getText().toString();String jsonString = "";try {JSONObject jsonObject = new JSONObject();jsonObject.put("username", username);jsonObject.put("password", password);jsonString = jsonObject.toString();} catch (Exception e) {e.printStackTrace();}// 创建一个POST方式的请求结构RequestBody body = RequestBody.create(jsonString, MediaType.parse("text/plain;charset=utf-8"));OkHttpClient client = new OkHttpClient(); // 创建一个okhttp客户端对象Request request = new Request.Builder().post(body).url(URL_LOGIN).build();Call call = client.newCall(request); // 根据请求结构创建调用对象// 加入HTTP请求队列。异步调用,并设置接口应答的回调方法call.enqueue(new Callback() {@Overridepublic void onFailure(Call call, IOException e) { // 请求失败// 回到主线程操纵界面runOnUiThread(() -> tv_result.setText("调用登录接口报错:"+e.getMessage()));}@Overridepublic void onResponse(Call call, final Response response) throws IOException { // 请求成功String resp = response.body().string();// 回到主线程操纵界面runOnUiThread(() -> tv_result.setText("调用登录接口返回:\n"+resp));}});}
}