Spring Boot 自动装配用法
说明:自动装配是Spring Boot框架的一大特点,简单说,是项目启动时,自动创建一系列Bean对象。
本文介绍几个借助Spring Boot自动装配的用法。
基础用法
用法一:基本操作
最基础的用法是用 @Bean 注解,手动将对象放入到 Spring Boot 的IOC容器中,其他地方就可以使用 @Autowired 注解直接使用该对象。
如下:
(某个类对象,注意类上没有额外加注解)
public class DemoService {public String test() {return "test";}
}
(将对象放入到 IOC 容器中)
import com.hezy.service.DemoService;
import org.springframework.context.annotation.Bean;
import org.springframework.context.annotation.Configuration;@Configuration
public class AutoBeanConfiguration {@Beanpublic DemoService testBean() {return new DemoService();}
}
(直接注入使用)
import com.hezy.service.DemoService;
import org.springframework.beans.factory.annotation.Autowired;
import org.springframework.web.bind.annotation.GetMapping;
import org.springframework.web.bind.annotation.RequestMapping;
import org.springframework.web.bind.annotation.RestController;@RestController
@RequestMapping("/demo")
public class DemoController {@Autowiredprivate DemoService demoService ;@GetMappingpublic String sayHello() {return demoService.test();}
}
启动项目,调用,正常返回结果

另外,使用 @Bean 注解将对象放入 IOC 容器,需要配合类上的 @Configuration 注解,所以通常来说,我们都会创建一个配置类,将需要实例化的 Bean 对象都放入到这个配置类中,最后再使用服务注册的方式,将这个配置的全限定类名放到 META-INF 文件下的 org.springframework.boot.autoconfigure.AutoConfiguration.imports 文件里,这样其他引入该模块的其他模块,就能直接注入该模块的 Bean 对象。
用法二:获取指定Service
在一些场景,比如将数据生成文件(excel、word、pdf),我们需要根据配置来调用指定的 Service 实现类(ExcelServiceImpl、WordServiceImpl、PdfServiceImpl),我们通常的做法是给这些 Service 设置一个名称,然后使用 applicationContext 的 ap i获取指定实现类调用。
如下:
(创建一个写服务接口,其他具体实现类实现该接口)
/*** 写服务接口*/
public interface WriteService {String write(String content);
}
(excel实现类)
import org.springframework.stereotype.Service;/*** excel实现类*/
@Service("excel")
public class ExcelServiceIImpl implements WriteService {@Overridepublic String write(String content) {return "excel:" + content;}
}
(word实现类)
import org.springframework.stereotype.Service;/*** word实现类*/
@Service("word")
public class WordServiceImpl implements WriteService {@Overridepublic String write(String content) {return "word:" + content;}
}
(pdf实现类)
import org.springframework.stereotype.Service;/*** pdf实现类*/
@Service("pdf")
public class PdfServiceImpl implements WriteService {@Overridepublic String write(String content) {return "pdf:" + content;}
}
(使用,使用 applicationContext 的 getBean方法获取指定实现类调用其方法执行)
import org.springframework.beans.factory.annotation.Autowired;
import org.springframework.context.ApplicationContext;
import org.springframework.stereotype.Service;@Service
public class TestService {@Autowiredprivate ApplicationContext applicationContext;public String test(String type, String content) {return applicationContext.getBean(type, WriteService.class).write(content);}
}
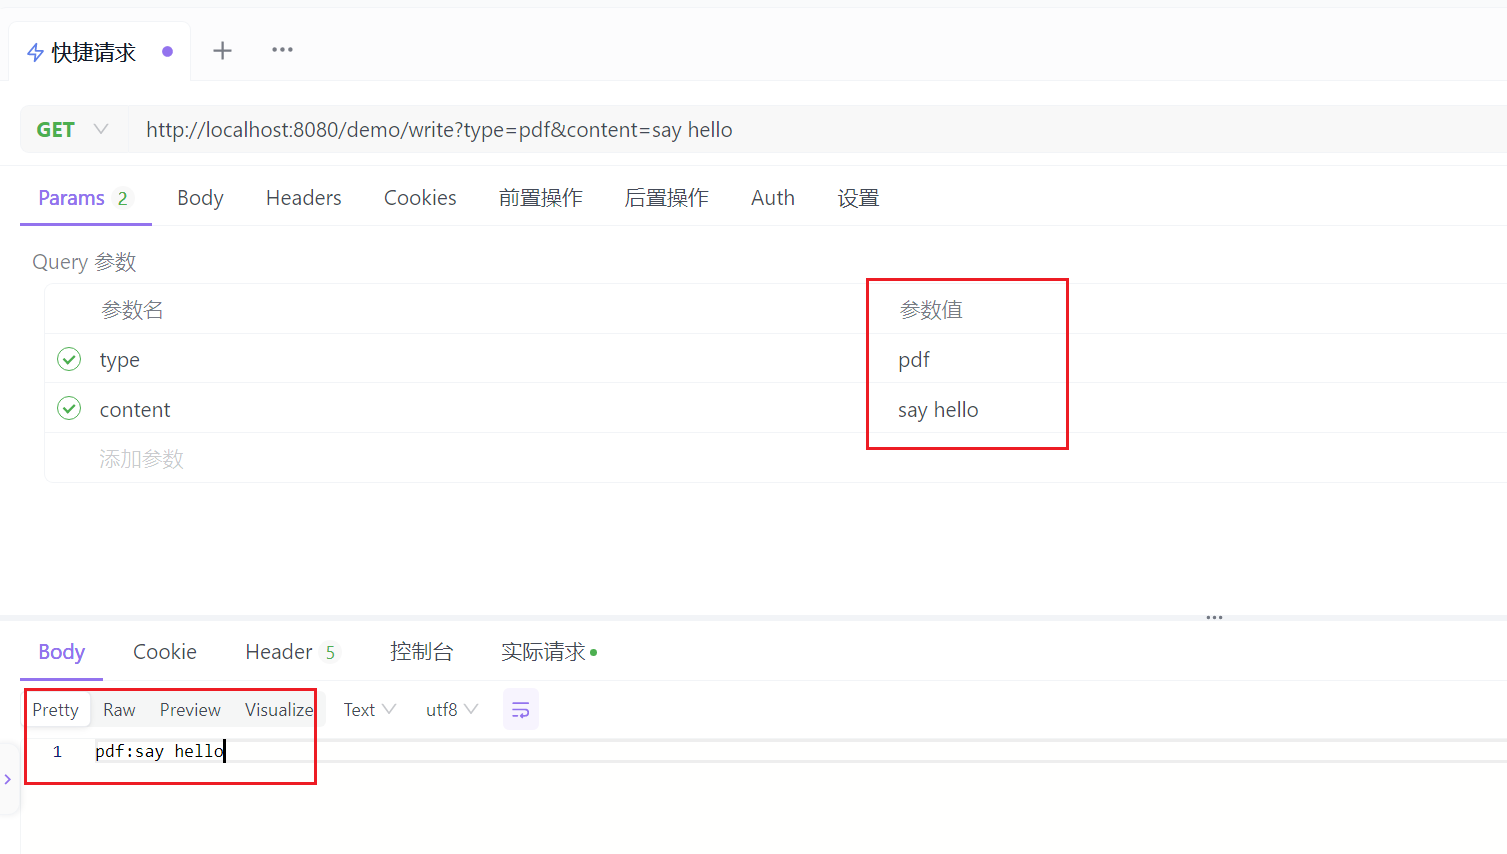
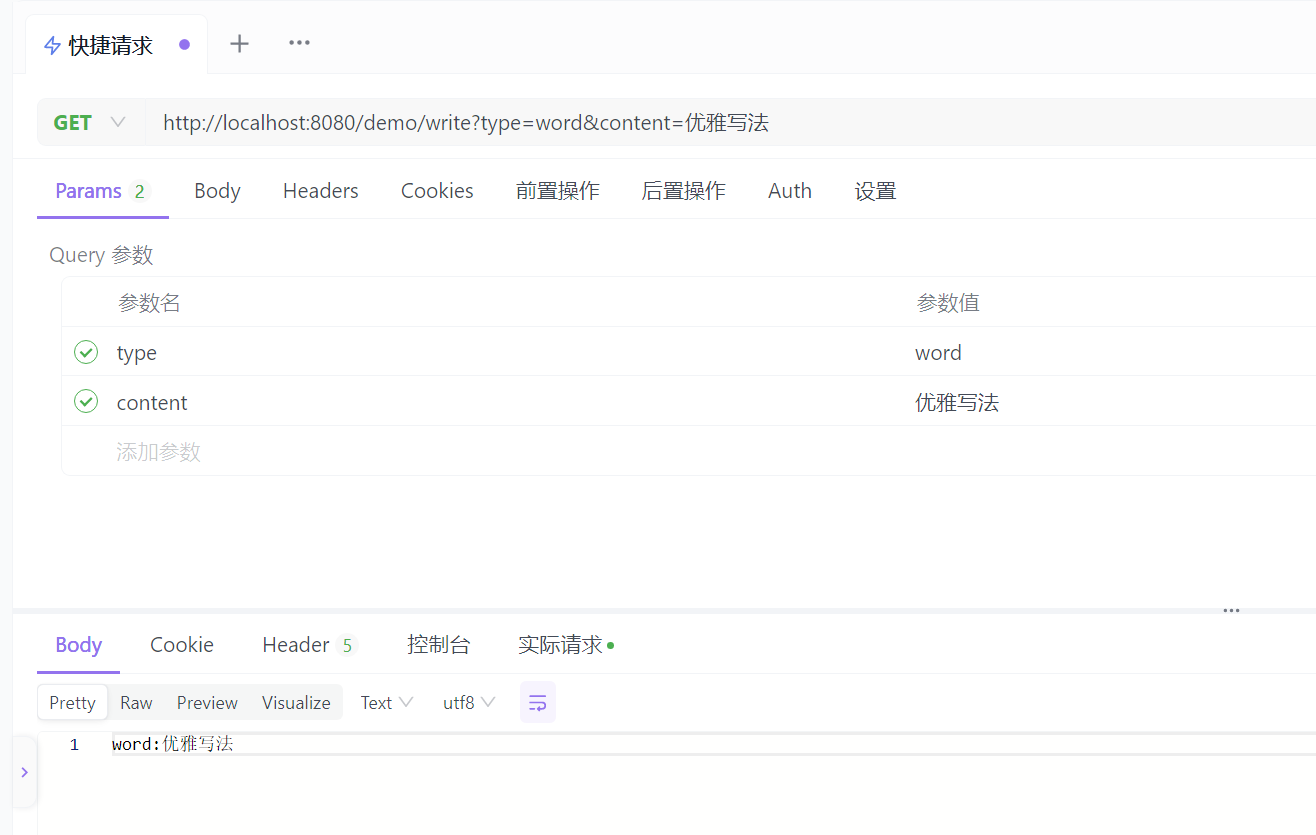
(具体使用哪一个实现类,来自前端传递的参数)
@Autowiredprivate TestService testService;@GetMapping("/write")public String write(String type, String content) {return testService.test(type, content);}
启动项目,传递执行写操作的类型及内容,如下。这样就很方便了,是策略模式的一种体现。
高级用法
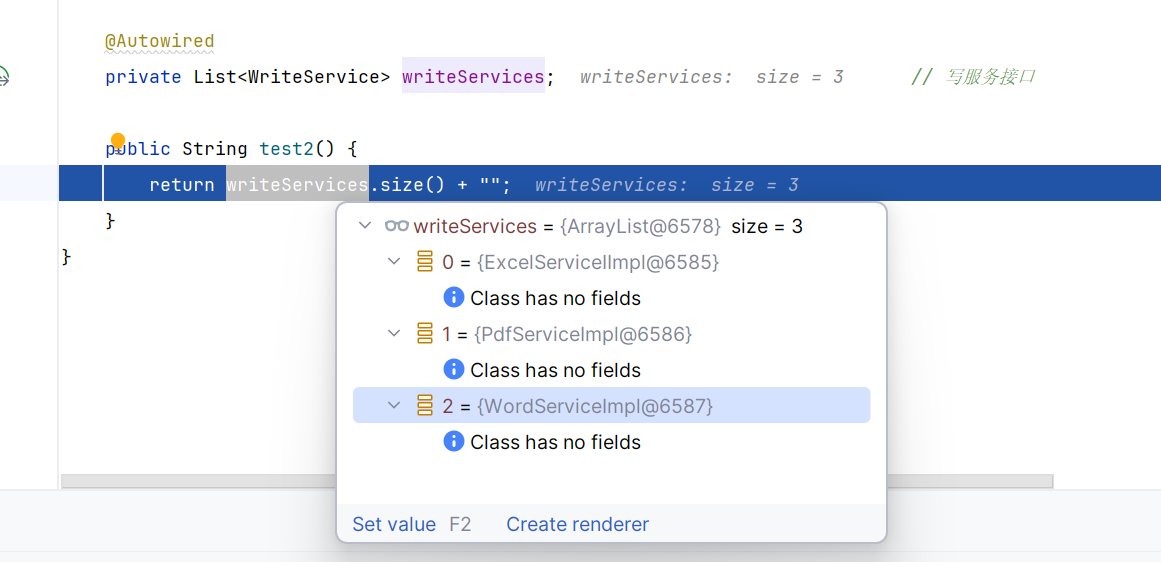
用法一:获取某接口的所有实现类
假设一个场景,我们需要获取某接口的所有实现类,依次执行,返回最终结果。这时我们可以通过下面这种方式,直接获取所有实现类的集合:
@Autowiredprivate List<WriteService> writeServices;public String test2() {return writeServices.size() + "";}
启动项目,调用接口,打断点查看集合,可见该接口的所有实现类
这种用法场景挺多的,作者在实际开发中也遇到过。可以参看下面这两篇博客介绍:
-
从管道符到Java编程
-
Quartz任务调度框架实现任务动态执行
用法二:获取具体实现类的Map映射
在前面基础用法中,我们提到获取指定 Service 可以使用 applicationContext 的 api,其实更简单的可以直接使用下面这种方式:
@Autowiredprivate Map<String, WriteService> writeServiceMap;public String test3() {return writeServiceMap.size() + "";}
启动项目,断点打在这里,可以看到 Map 里面存的 key 是 Bean 名称,value 是具体实现类

所以基础用法的代码,可以修改如下:
@Autowiredprivate Map<String, WriteService> writeServiceMap;public String test(String type, String content) {return writeServiceMap.get(type).write(content);}
这种写法是不是更简洁、优雅
总结
本文介绍了Spring Boot 自动装配的几种用法