71 模块编程之新增一个字符设备
前言
这个 主要是 最开始的时候了解驱动的时候, 看到的一系列的 case, 这里 来大致剖析一下 相关的道理
这些模块 是怎么和内核交互的, 内核的这些业务是怎么实现的
这里主要是一个模块来注册了一个字符设备
然后这个字符设备 可读可写, 基于的是分配的一段空间
测试用例
测试模块如下, 模块主要是来自于 某git仓库, 这里未记录信息, 感谢原作者
#include <linux/init.h>
#include <linux/module.h>
#include <linux/cdev.h>
#include <linux/fs.h>
#include <linux/device.h>
#include <asm/uaccess.h>
#include <linux/string.h>
#include <linux/errno.h>MODULE_LICENSE("Dual BSD/GPL");static char data[] = "0123456789\r\n";
/* The lock for device data. */
static rwlock_t lock;static int example_open(struct inode *inode, struct file *filp) {printk(KERN_DEBUG "EXAMPLE: open\n");/* Initial lock. */rwlock_init(&lock);/* Map the data location to the file data pointer. */filp->private_data = data;return 0;
}static int example_close(struct inode *inode, struct file *filp) {printk(KERN_DEBUG "EXAMPLE: close\n");/* Release the mapping of file data address. */if(filp->private_data) {filp->private_data = NULL;}return 0;
}static ssize_t example_read(struct file *filp, char __user *buf, size_t size, loff_t *f_pos) {size_t count;uint8_t byte;uint8_t *data_p;printk(KERN_DEBUG "EXAMPLE: read (size=%zu)\n", size);data_p = filp->private_data;/* Get the lock for reading. */read_lock(&lock);/* Read from the device data to user space. */for(count = 0; (count < size) && (*f_pos) < strlen(data); ++(*f_pos), ++count) {byte = data_p[*f_pos];if(copy_to_user(buf + count, &byte, 1) != 0) {break;}printk(KERN_DEBUG "EXAMPLE: read (buf[%zu]=%02x)\n", count, (unsigned)byte);}/* Release the lock for reading. */read_unlock(&lock);return count;
}static ssize_t example_write(struct file *filp, const char __user *buf, size_t size, loff_t *f_pos) {size_t count;ssize_t ret;uint8_t byte;uint8_t *data_p;printk(KERN_DEBUG "EXAMPLE: write (size=%zu)\n", size);data_p = filp->private_data;/* Get the lock for writing. */write_lock(&lock);/* Write from user space to the device. */for(count = 0; (count < size) && (*f_pos) < strlen(data); ++(*f_pos), ++count) {if(copy_from_user(&byte, buf + count, 1) != 0) {break;}data_p[*f_pos] = byte;printk(KERN_DEBUG "EXAMPLE: write (buf[%zu]=%02x)\n", count, (unsigned)byte);}/* Release the lock for writing. */write_unlock(&lock);if((count == 0) && ((*f_pos) >= strlen(data))) {ret = -ENOBUFS;}else {ret = count;}return ret;
}static struct file_operations example_fops = {.open = example_open,.release = example_close,.read = example_read,.write = example_write,
};#define EXAMPLE_NAME "example"static unsigned int example_major;
static unsigned int example_devs = 2;
static struct cdev example_cdev;
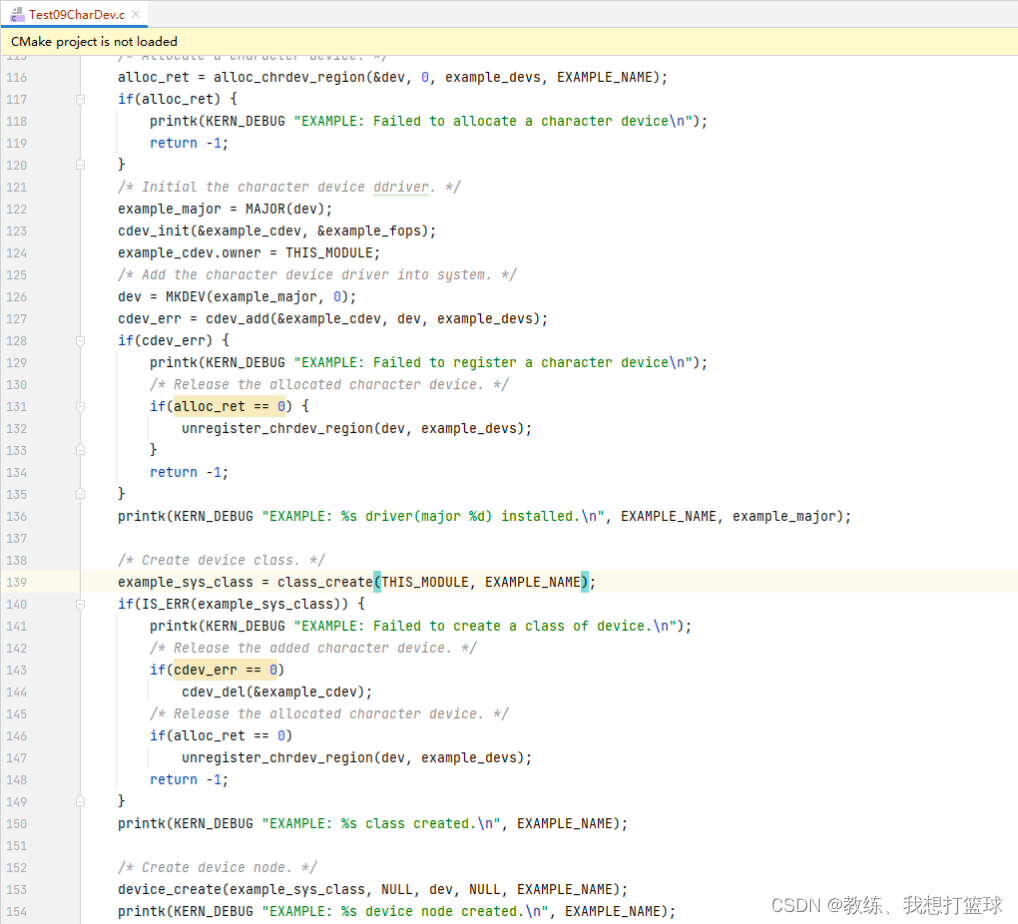
static struct class *example_sys_class = NULL;static int example_init(void) {dev_t dev;int alloc_ret, cdev_err;printk(KERN_DEBUG "EXAMPLE: init\n");/* Allocate a character device. */alloc_ret = alloc_chrdev_region(&dev, 0, example_devs, EXAMPLE_NAME);if(alloc_ret) {printk(KERN_DEBUG "EXAMPLE: Failed to allocate a character device\n");return -1;}/* Initial the character device ddriver. */example_major = MAJOR(dev);cdev_init(&example_cdev, &example_fops);example_cdev.owner = THIS_MODULE;/* Add the character device driver into system. */dev = MKDEV(example_major, 0);cdev_err = cdev_add(&example_cdev, dev, example_devs);if(cdev_err) {printk(KERN_DEBUG "EXAMPLE: Failed to register a character device\n");/* Release the allocated character device. */if(alloc_ret == 0) {unregister_chrdev_region(dev, example_devs);}return -1;}printk(KERN_DEBUG "EXAMPLE: %s driver(major %d) installed.\n", EXAMPLE_NAME, example_major);/* Create device class. */example_sys_class = class_create(THIS_MODULE, EXAMPLE_NAME);if(IS_ERR(example_sys_class)) {printk(KERN_DEBUG "EXAMPLE: Failed to create a class of device.\n");/* Release the added character device. */if(cdev_err == 0)cdev_del(&example_cdev);/* Release the allocated character device. */if(alloc_ret == 0)unregister_chrdev_region(dev, example_devs);return -1;}printk(KERN_DEBUG "EXAMPLE: %s class created.\n", EXAMPLE_NAME);/* Create device node. */device_create(example_sys_class, NULL, dev, NULL, EXAMPLE_NAME);printk(KERN_DEBUG "EXAMPLE: %s device node created.\n", EXAMPLE_NAME);return 0;
}static void example_exit(void) {dev_t dev = MKDEV(example_major, 0);printk(KERN_DEBUG "EXAMPLE: exit\n");/* Destory device nodes. */device_destroy(example_sys_class, dev);/* Delete device class. */class_destroy(example_sys_class);/* Delete the character device driver from system. */cdev_del(&example_cdev);/* Unregister the allocated character device. */unregister_chrdev_region(dev, example_devs);printk(KERN_DEBUG "EXAMPLE: %s driver removed.\n", EXAMPLE_NAME);
}module_init(example_init);
module_exit(example_exit);
创建 dev, cdev
分为创建 dev, 初始化 cdev, 关联 dev, cdev
创建设备节点
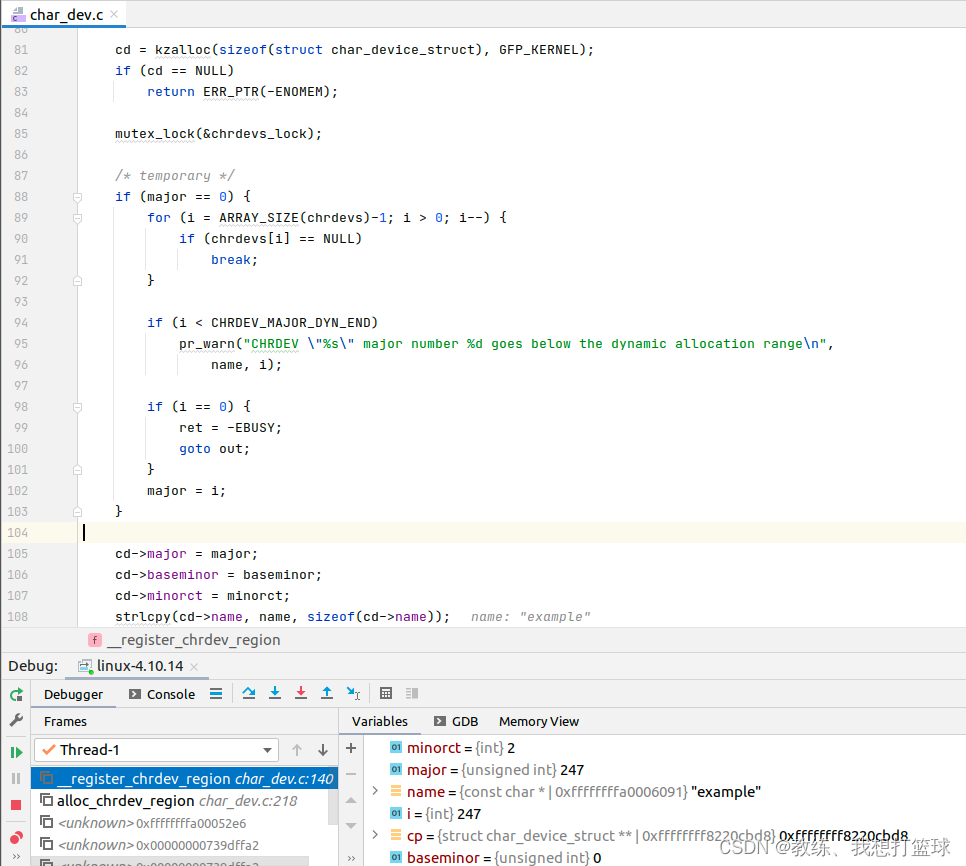
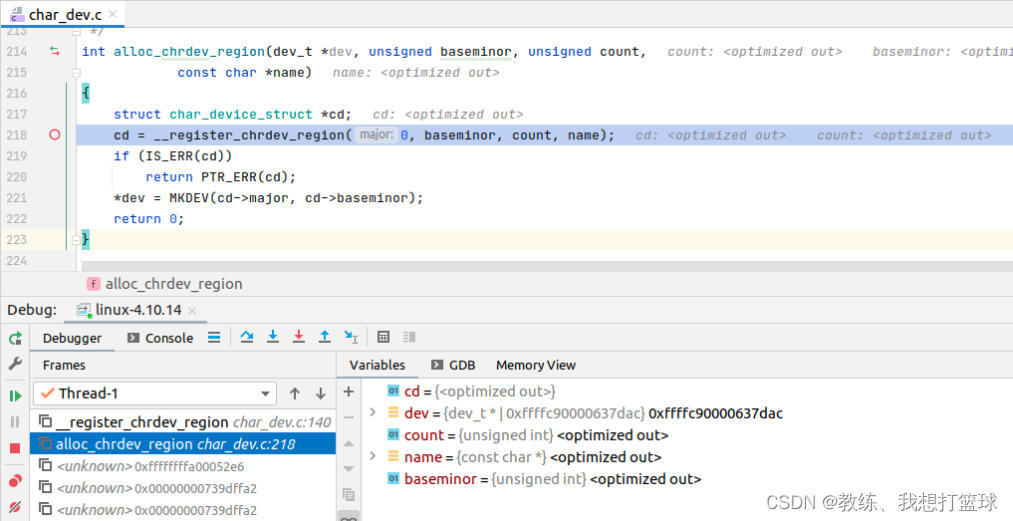
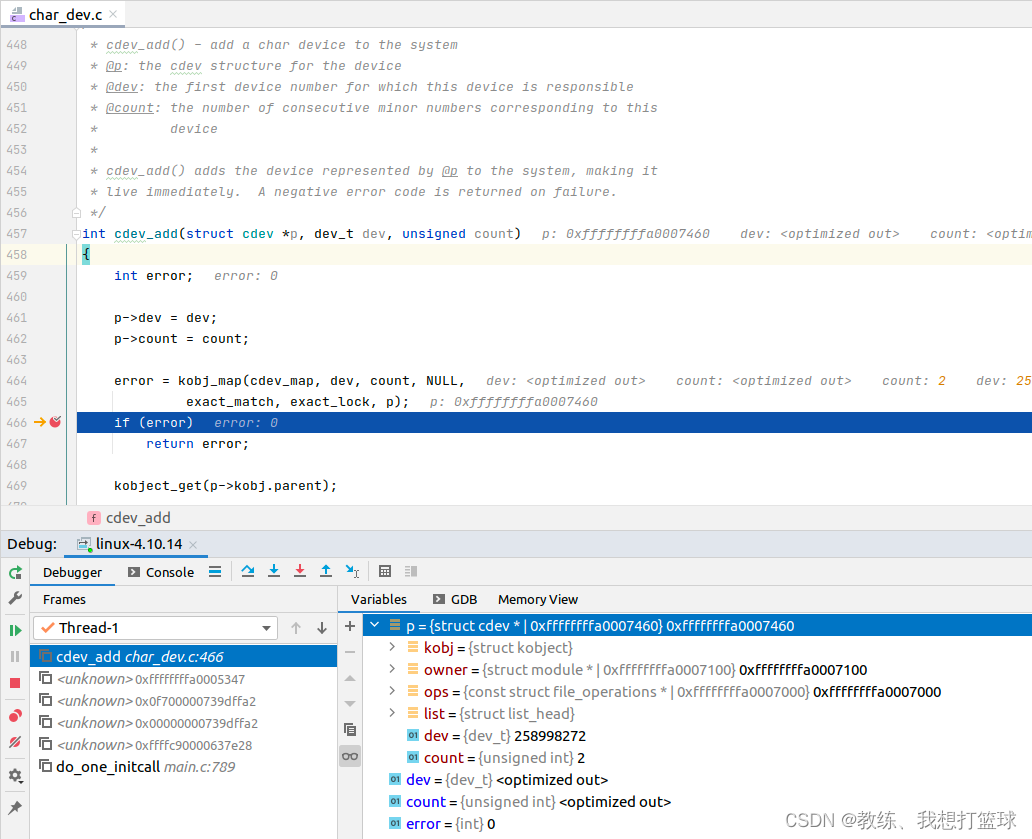
创建 char_device_struct, 将 dev 和 char_device_sturct 关联起来, 通过 major, baseminor 关联
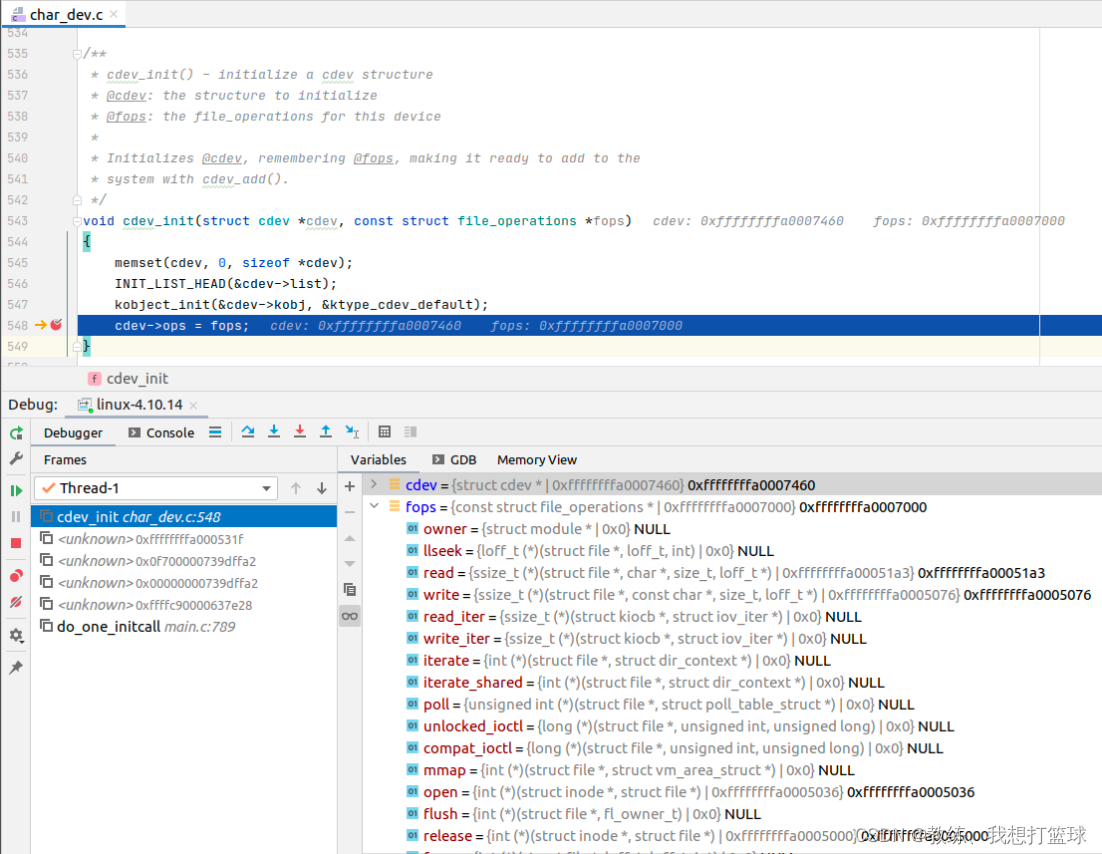
这里是初始化 cdev, 以及 cdev->ops 为传入的 example_fops
将 dev 关联到 cdev 上面
创建 probe, 关联 dev, cdev, module 并且添加到 cdev_map 中
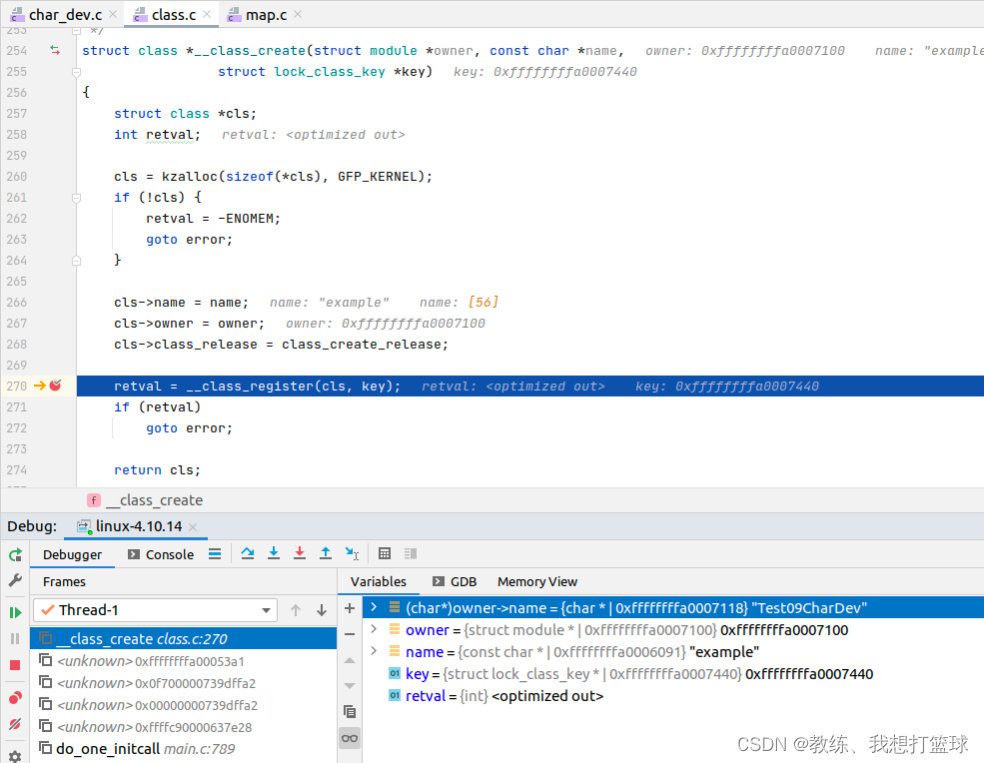
创建当前 module 下面的 example 的 class
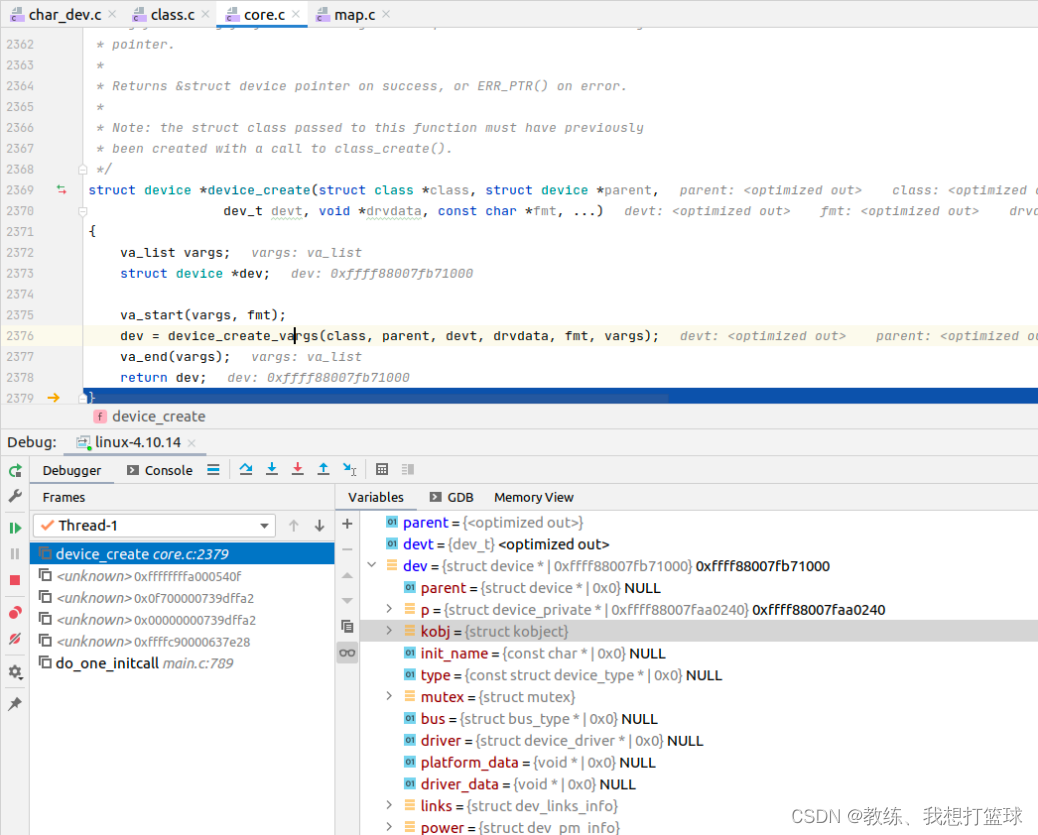
创建 device 以及设备文件
创建 device 相关
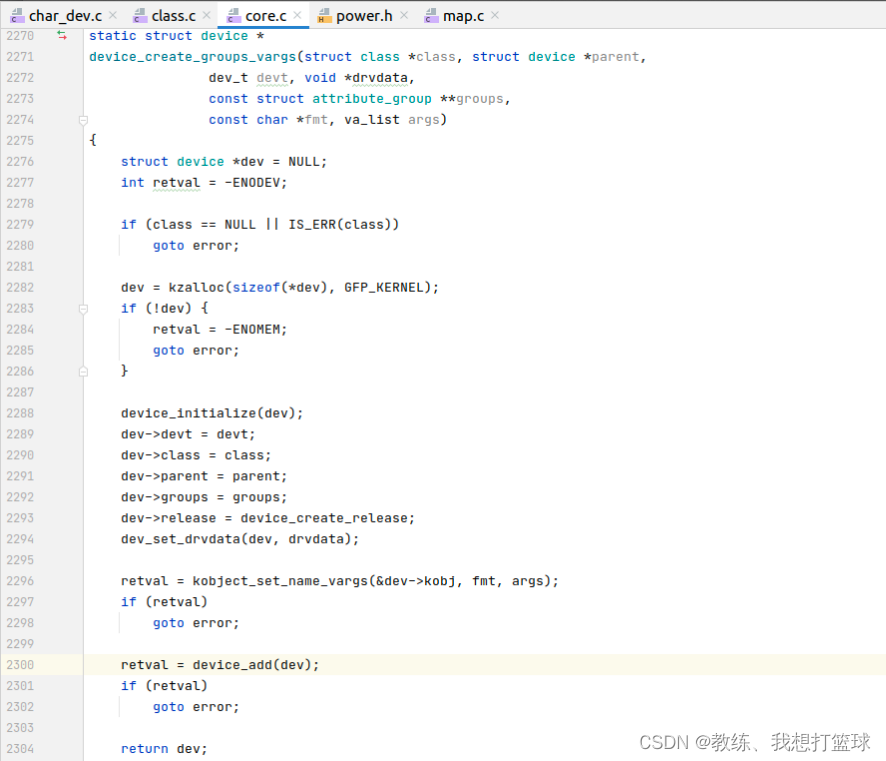
创建 kobject, 注册到 sysfs, 创建设备文件 等等
创建 device 对象并初始化 dev_initialize 中主要是初始化各类链表
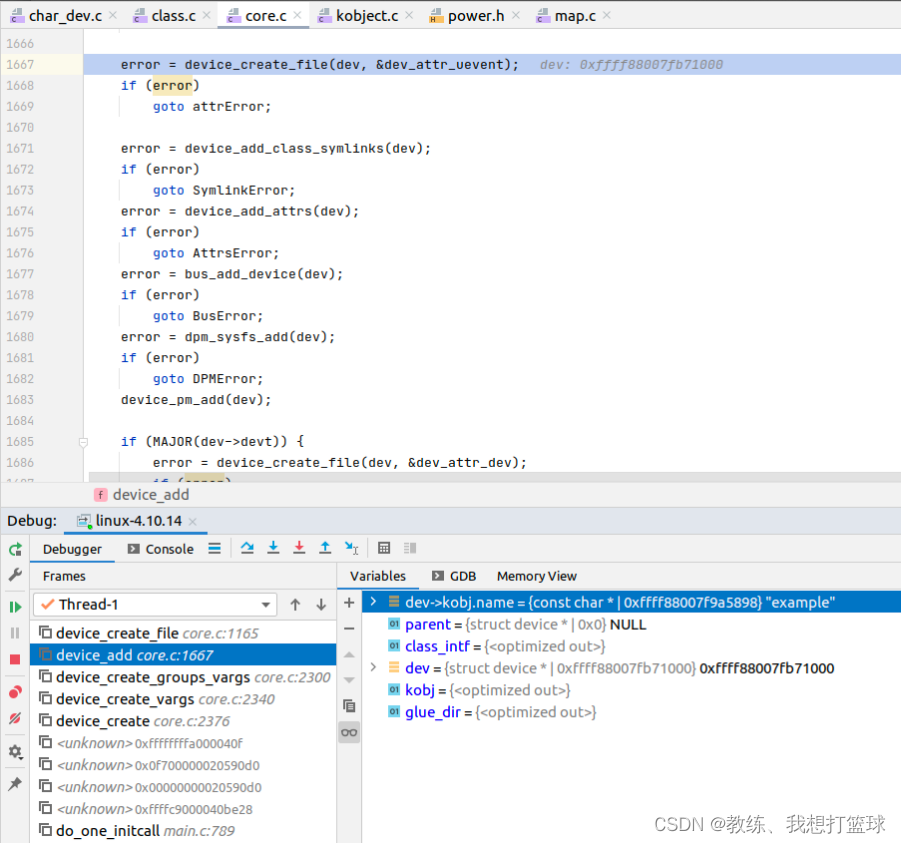
device_add 中处理的相关核心业务
根据 dev.kobj 在 sysfs 中注册 sysfs 文件
dev, subsystem, group, power 相关
创建 /dev 中设备文件的地方, 这里放入 任务队列
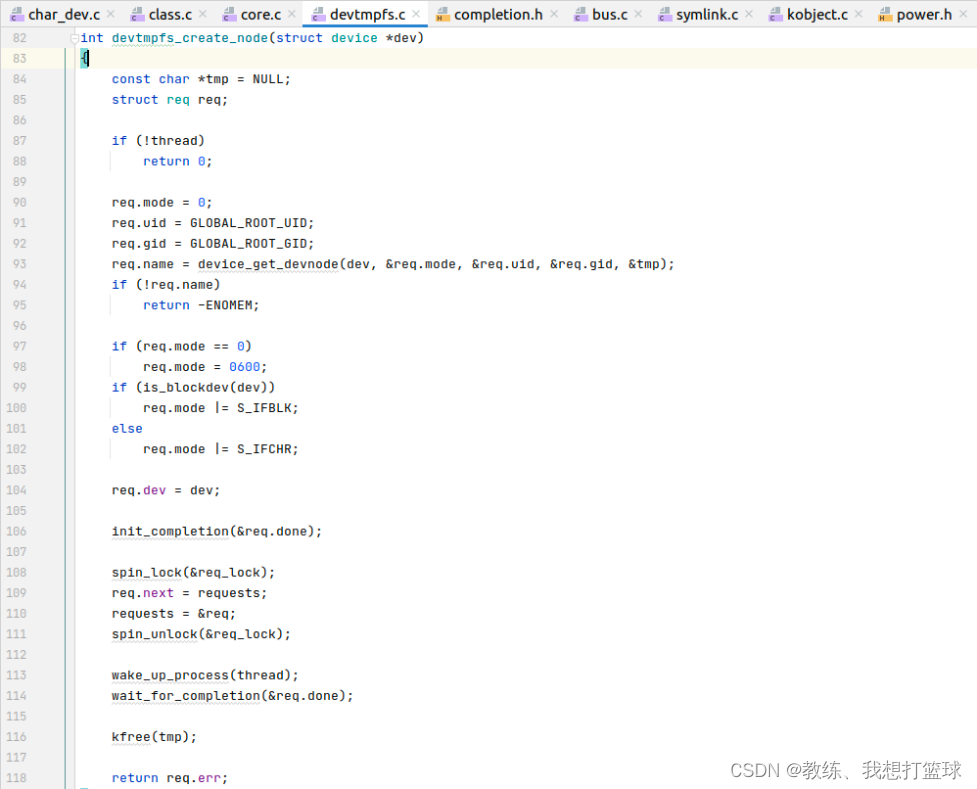
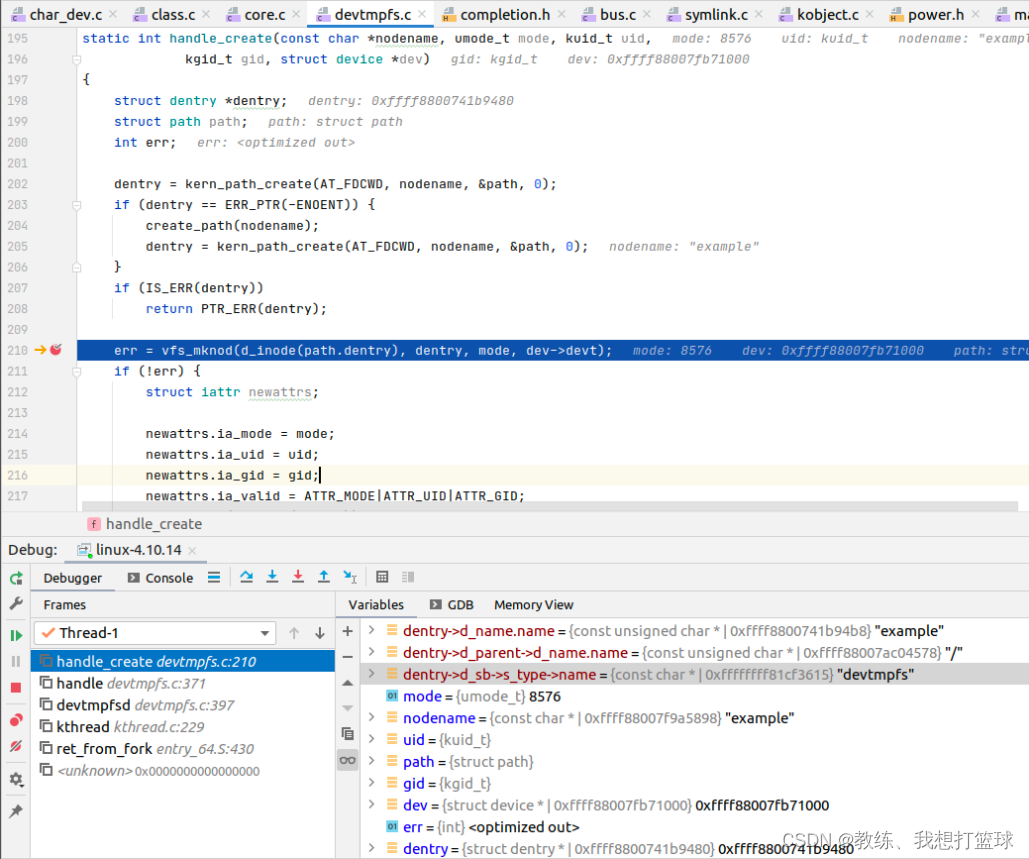
真实异步创建 /dev 中设备文件的地方
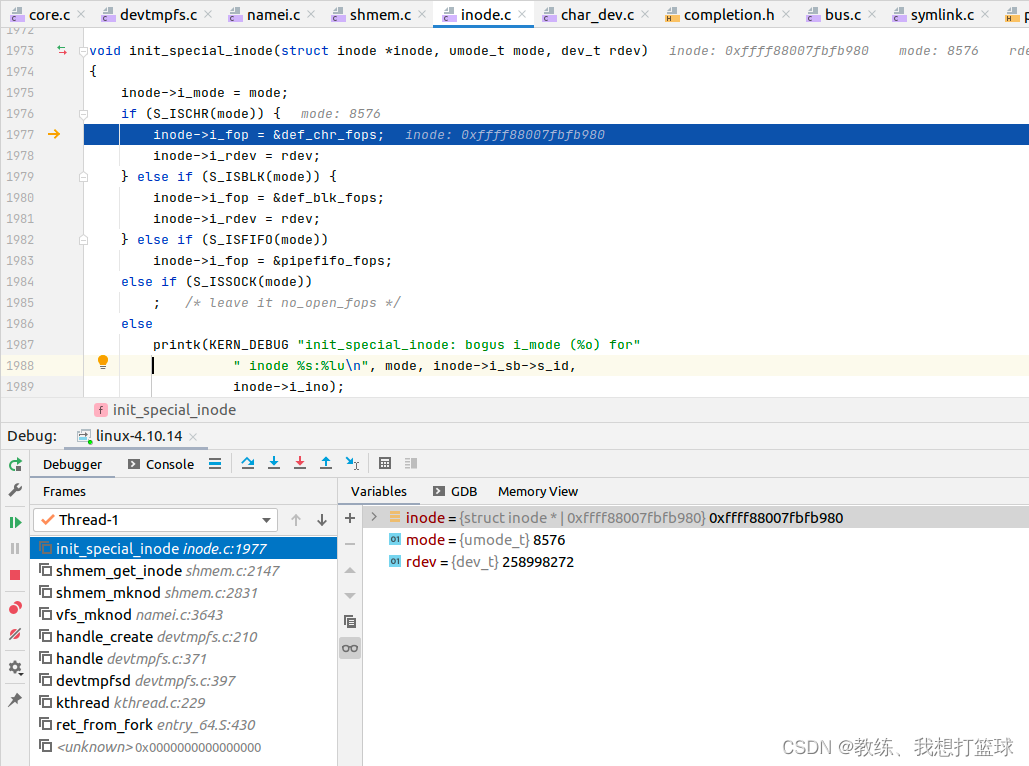
创建的设备文件对应的 inode 的 f_ops 初始化如下
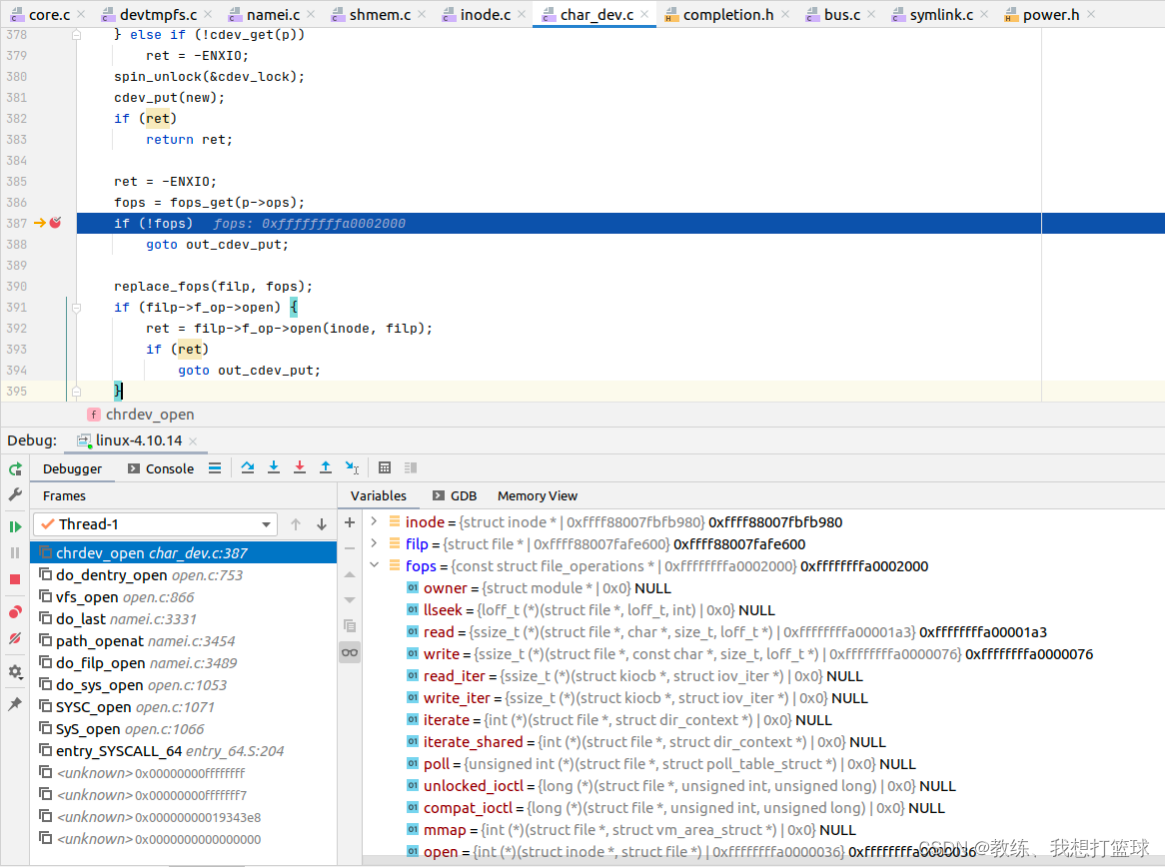
open 函数为 chrdev_open
device 设备文件的使用
然后 open 的时候, 会获取到 dev 对应的 cdev, 进而获取到 cdev->ops[驱动中注册的 example_fops]
然后 替换掉 file 中的 f_ops, 作为 真实业务读写的 f_ops
这里可以对比一下 上面 cdev_init 初始化的时候, 传入的 example_fops 的地址信息, 发现 差不多是能够对上的, 地址有一些差异 主要是 两次截图的调试不是在同一个 insmod 但是实际上这里获取到的 f_ops 就是 cdev_init 的时候传入的 example_fops
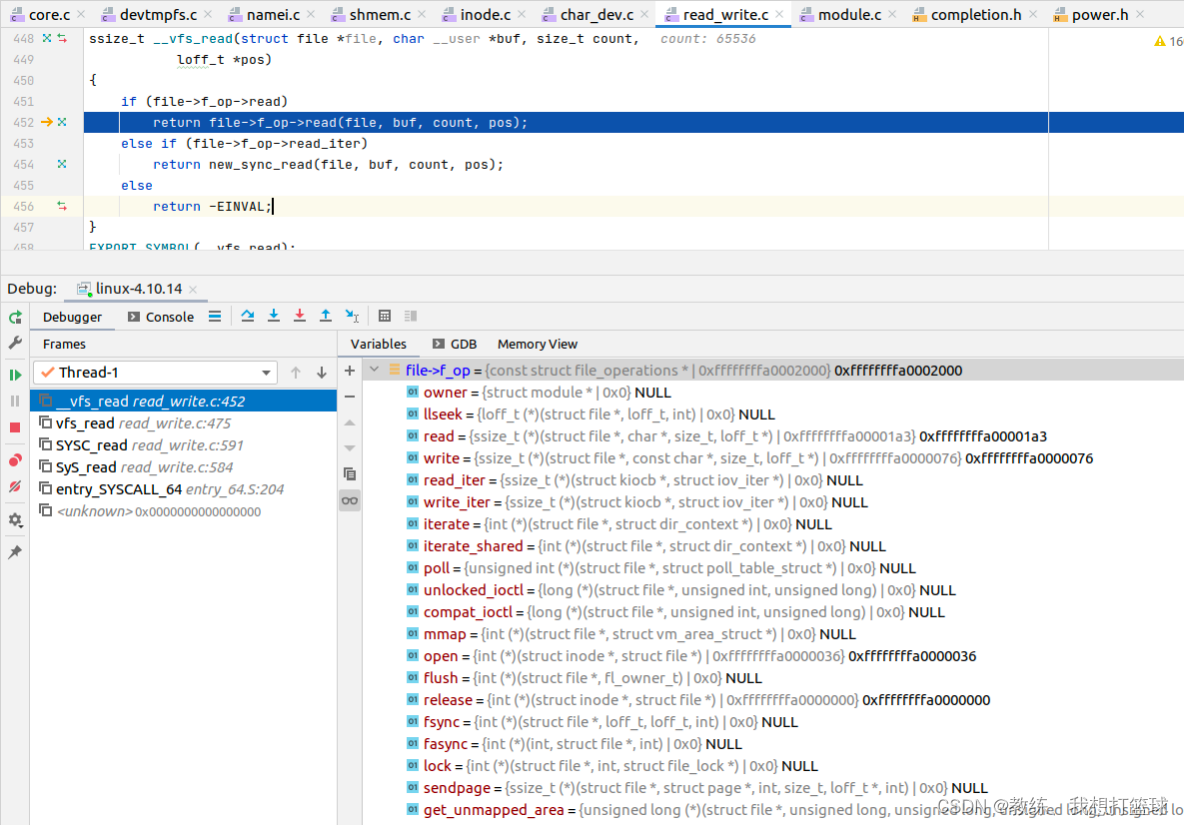
代理了一层之后, 使用代理的 f_ops->open 再处理了一次
其后, read, write, ioctl 就是基于代理的 f_ops 来进行处理了
这里以 read 为例来进行调试
完