文章目录
- 项目地址
- 一、OpenTelemetry
- 1.1 配置OpenTelemetry
- 1. 服务添加
- 2. 添加服务标识
- 3. 添加请求的标识
- 4. 添加中间价
- 二、Rabbit MQ
- 2.1 配置Rabbit MQ
- 1. docker-compose
- 2. 添加Rabbit MQ的Connect String
- 2.2 替换成Rabbit MQ
-
- 三、API Gateways
- 3.1 创建Gateway
- 1. 配置docker-compose
- 2. 添加各种服务
- 3. 添加jwt配置
- 4. 添加日志追踪
- 5. 配置appsettings
- 6. Yarp反向代理设置
项目地址
dbt
airflow
一、OpenTelemetry
1.1 配置OpenTelemetry
1. 服务添加
namespace Evently.Common.Infrastructure; 配置
services.AddOpenTelemetry().ConfigureResource(resource => resource.AddService(serviceName)).WithTracing(tracing =>{tracing.AddAspNetCoreInstrumentation().AddHttpClientInstrumentation().AddEntityFrameworkCoreInstrumentation().AddRedisInstrumentation().AddNpgsql().AddSource(MassTransit.Logging.DiagnosticHeaders.DefaultListenerName);tracing.AddOtlpExporter();});
2. 添加服务标识

- 创建服务标识
namespace Evently.Api.OpenTelemetry;public static class DiagnosticsConfig
{public const string ServiceName = "Evently.Api";
}
- program里注册
3. 添加请求的标识
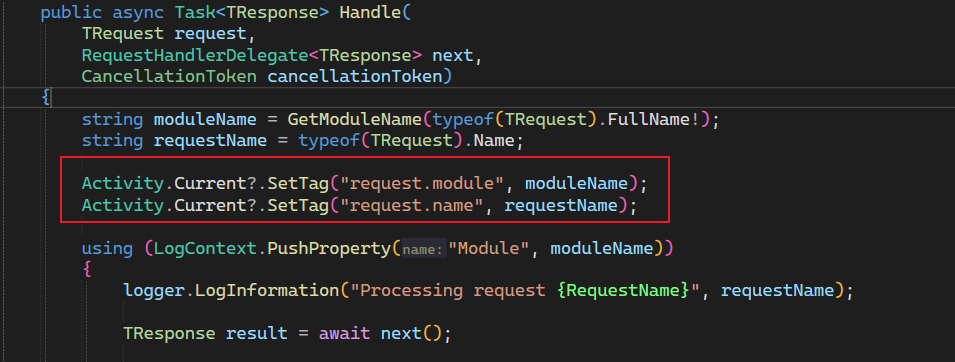
- 在RequestLoggingPipelineBehavior添加的请求和服务的标识
4. 添加中间价
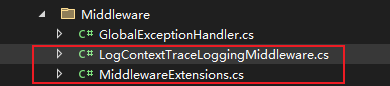
- LogContextTraceLoggingMiddleware
namespace Evently.Api.Middleware;
internal sealed class LogContextTraceLoggingMiddleware(RequestDelegate next)
{public Task Invoke(HttpContext context){string traceId = Activity.Current?.TraceId.ToString();using (LogContext.PushProperty("TraceId", traceId)){return next.Invoke(context);}}
}
- MiddlewareExtensions 用于将自定义日志追踪中间件 LogContextTraceLoggingMiddleware 添加到 ASP.NET Core 的中间件管道中。
namespace Evently.Api.Middleware;
internal static class MiddlewareExtensions
{internal static IApplicationBuilder UseLogContextTraceLogging(this IApplicationBuilder app){app.UseMiddleware<LogContextTraceLoggingMiddleware>();return app;}
}
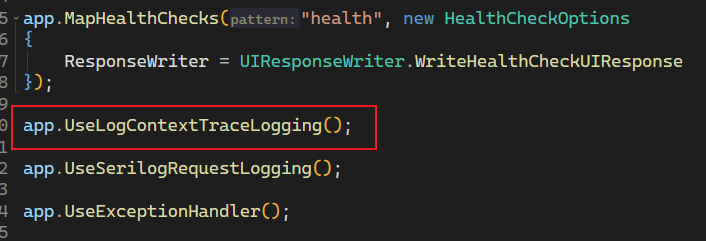
- 中间件添加
二、Rabbit MQ
2.1 配置Rabbit MQ
1. docker-compose
evently.queue:image: rabbitmq:management-alpinecontainer_name: Evently.Queuehostname: evently-queuevolumes:- ./.containers/queue/data/:/var/lib/rabbitmq- ./.containers/queue/log/:/var/log/rabbitmqenvironment:RABBITMQ_DEFAULT_USER: guestRABBITMQ_DEFAULT_PASS: guestports:- 5672:5672- 15672:15672
2. 添加Rabbit MQ的Connect String
"ConnectionStrings": {"Database": "Host=evently.database;Port=5432;Database=evently;Username=postgres;Password=postgres;Include Error Detail=true","Cache": "evently.redis:6379","Queue": "amqp://evently-queue:5672"},
2.2 替换成Rabbit MQ
1. 安装所需要的包
<PackageReference Include="AspNetCore.HealthChecks.Rabbitmq" Version="8.0.1" /><PackageReference Include="MassTransit.RabbitMQ" Version="8.2.1" />
- 创建MQ配置文件
namespace Evently.Common.Infrastructure.EventBus;
public sealed record RabbitMqSettings(string Host, string Username = "guest", string Password = "guest");
2. 使用
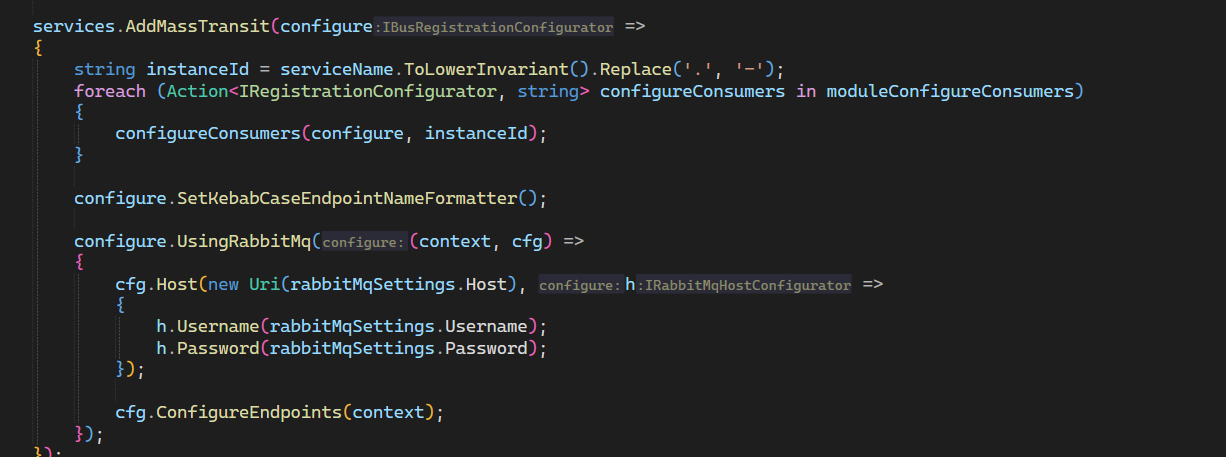
- 修改MassTransit,将内存改为MQ
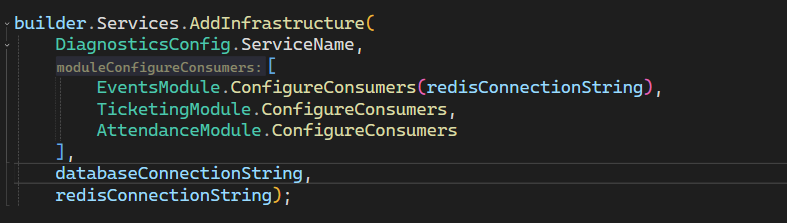
- 注册Ticketing的消费者
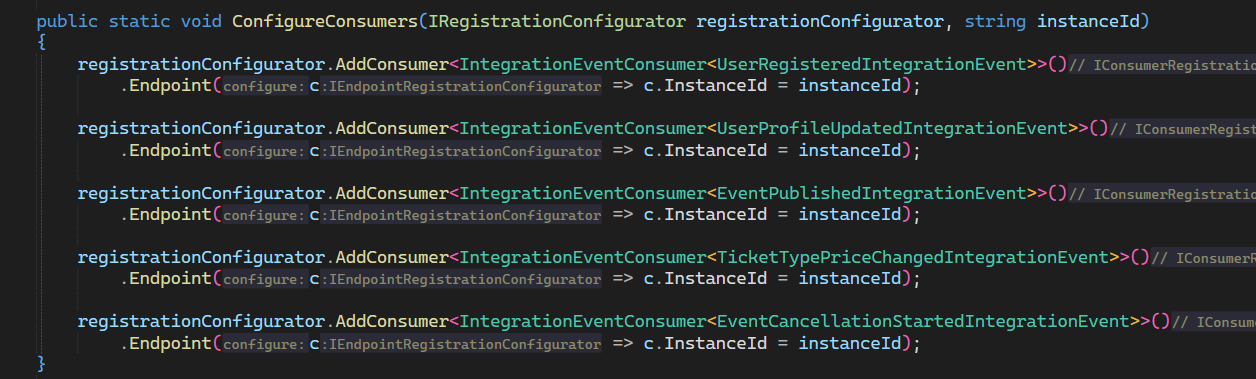
- 注册Event的消费者

- Program里注册

三、API Gateways
3.1 创建Gateway
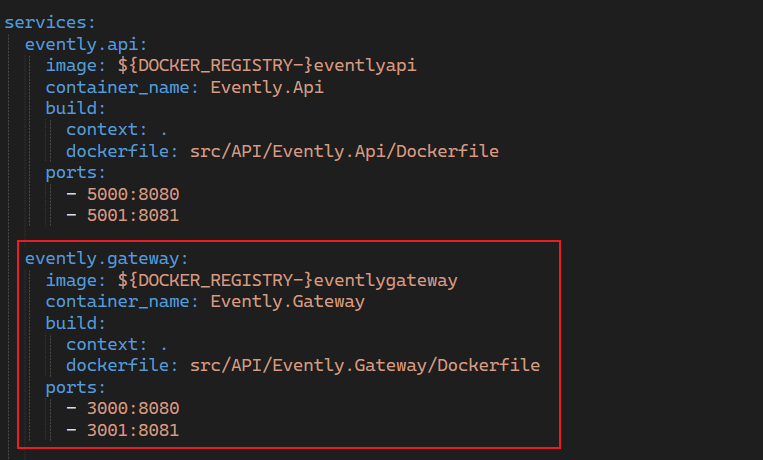
1. 配置docker-compose
2. 添加各种服务
WebApplicationBuilder builder = WebApplication.CreateBuilder(args);
builder.Host.UseSerilog((context, loggerConfig) => loggerConfig.ReadFrom.Configuration(context.Configuration));
builder.Services.AddReverseProxy().LoadFromConfig(builder.Configuration.GetSection("ReverseProxy"));builder.Services.AddOpenTelemetry().ConfigureResource(resource => resource.AddService(DiagnosticsConfig.ServiceName)).WithTracing(tracing =>{tracing.AddAspNetCoreInstrumentation().AddHttpClientInstrumentation().AddSource("Yarp.ReverseProxy");tracing.AddOtlpExporter();});builder.Services.AddAuthorization();
builder.Services.AddAuthentication().AddJwtBearer();
builder.Services.ConfigureOptions<JwtBearerConfigureOptions>();
WebApplication app = builder.Build();
app.UseLogContextTraceLogging();
app.UseSerilogRequestLogging();
app.UseAuthentication();
app.UseAuthorization();
app.MapReverseProxy();
app.Run();
3. 添加jwt配置
namespace Evently.Gateway.Authentication;
internal sealed class JwtBearerConfigureOptions(IConfiguration configuration): IConfigureNamedOptions<JwtBearerOptions>
{private const string ConfigurationSectionName = "Authentication";public void Configure(JwtBearerOptions options){configuration.GetSection(ConfigurationSectionName).Bind(options);}public void Configure(string? name, JwtBearerOptions options){Configure(options);}
}
4. 添加日志追踪
- 添加日志追踪
using System.Diagnostics;
using Serilog.Context;
namespace Evently.Gateway.Middleware;
internal sealed class LogContextTraceLoggingMiddleware(RequestDelegate next)
{public Task Invoke(HttpContext context){string traceId = Activity.Current?.TraceId.ToString();using (LogContext.PushProperty("TraceId", traceId)){return next.Invoke(context);}}
}
- 注册
namespace Evently.Gateway.Middleware;
internal static class MiddlewareExtensions
{internal static IApplicationBuilder UseLogContextTraceLogging(this IApplicationBuilder app){app.UseMiddleware<LogContextTraceLoggingMiddleware>();return app;}
}
5. 配置appsettings
{"Authentication": {"Audience": "account","TokenValidationParameters": {"ValidIssuers": [ "http://evently.identity:8080/realms/evently", "http://localhost:18080/realms/evently" ]},"MetadataAddress": "http://evently.identity:8080/realms/evently/.well-known/openid-configuration","RequireHttpsMetadata": false},"Serilog": {"Using": ["Serilog.Sinks.Console","Serilog.Sinks.Seq"],"MinimumLevel": {"Default": "Information","Override": {"Microsoft": "Information"}},"WriteTo": [{ "Name": "Console" },{"Name": "Seq","Args": { "serverUrl": "http://evently.seq:5341" }}],"Enrich": [ "FromLogContext", "WithMachineName", "WithThreadId" ],"Properties": {"Application": "Evently.Gateway"}},"OTEL_EXPORTER_OTLP_ENDPOINT": "http://evently.jaeger:4317",
}
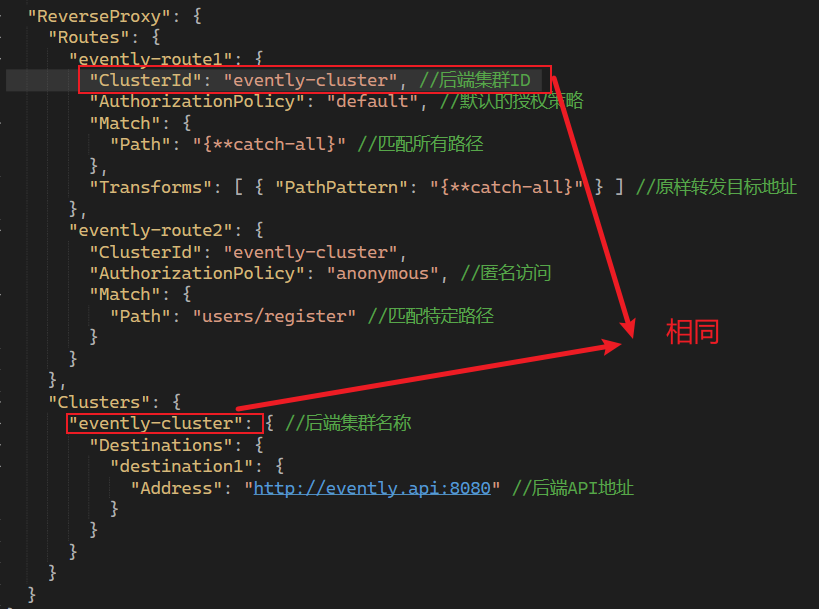
6. Yarp反向代理设置