【回眸】香橙派zero2 阿里云机器视觉分拣系统
前言
项目愿景:
环境搭建:
Python特点
Python基础学习
字典嵌套
字典格式
字典嵌套
C语言直接调用Python语句
调用无参python函数
调用有参python函数
接入阿里云识别方案
创建AccessKey
安装pip
安装图像识别SDK
配置环境变量
编辑
文件在本地或可访问的URL
封装示例代码成函数
香橙派使用USB摄像头
查找摄像头命令
安装 fswebcam
使用 mjpg-streamer 测试 USB 摄像头
修改启动摄像头脚本
运行摄像头脚本
创建 抓取图片脚本
使用智能公元及SU-03T配置语音模块
使用语音模块和摄像头在香橙派上做智能分类识别
【项目优化】增加垃圾桶开关盖功能
写一个shell脚本用于杀死运行的进程
【项目优化】添加oled模块
【项目优化】增加网络控制功能
后记
前言
新开一个项目的坑,阿里云机器视觉分拣系统项目,希望在1-2周内完成这个项目.
项目愿景:
1.语音接入控制识别,并触发设备的开关盖
2.回顾Linux内核Socket编程,实现Sockect发送指令远程控制识别,并触发设备的开关盖
3.图像识别分类功能
4.语音播报物品类型
5.OLED显示物品类型
6.根据物品类型开关不同类型的桶
7.图像处理使用阿里SDK支持Python和Java接口,目的是引入C语言的Python调用。
8.此接口是人工智能接口,阿里云识别模型是通过训练后的模型
环境搭建:
自带python3.10
dpkg -l | grep libpython3
需要额外安装python3 dev
sudo apt install libpython3.10-dev 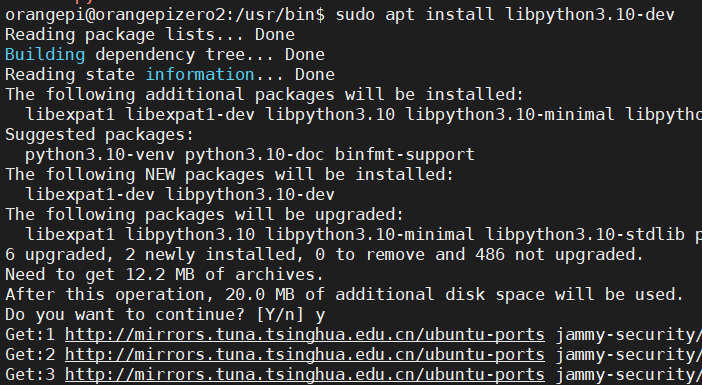
pip3 验证一下是否ok
Python特点
1.Python使用C语言开发,但是Python不再有C语言中的指针等复杂的数据类型。
2.Python具有很强的面向对象特性,而且简化了面向对象的实现。它消除了保护类型、抽象类、接口等面向对象的元素。
3.Python代码块使用空格或制表符缩进的方式分隔代码。
4.Python仅有31个保留字,而且没有分号、begin、end等标记。
5.Python是强类型语言,变量创建后会对应一种数据类型,出现在统一表达式中的不同类型的变量需要做类型转换。
Python基础学习
此部分具体看Python基础专栏
字典嵌套
字典格式
dict = {key1 : value1, key2 : value2 }字典嵌套
garbage_dict = {'Data': {'Elements': [{'Category': '干垃圾', 'CategoryScore':
0.8855999999999999, 'Rubbish': '', 'RubbishScore': 0.0}], 'Sensitive': False},
'RequestId': '1AB9E813-3781-5CA2-95A0-1EA334E80663'}
示例:
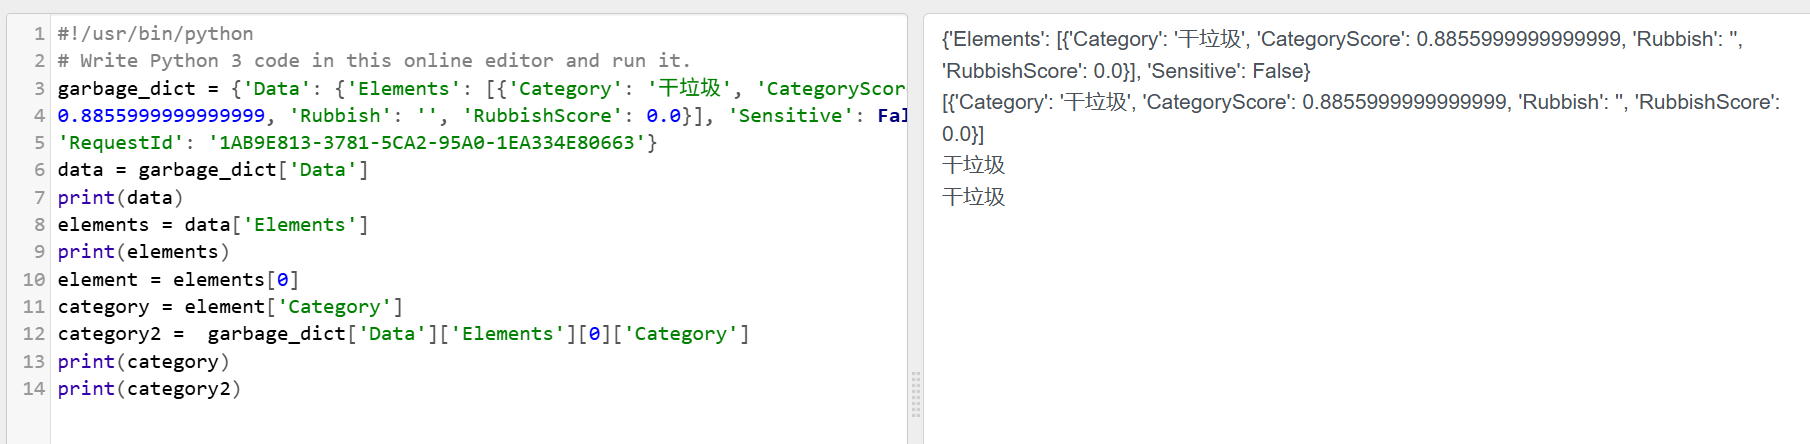
garbage_dict = {'Data': {'Elements': [{'Category': '干垃圾', 'CategoryScore':
0.8855999999999999, 'Rubbish': '', 'RubbishScore': 0.0}], 'Sensitive': False},
'RequestId': '1AB9E813-3781-5CA2-95A0-1EA334E80663'}
data = garbage_dict['Data']
print(data)
elements = data['Elements']
print(elements)
element = elements[0]
category = element['Category']
category2 =  garbage_dict['Data']['Elements'][0]['Category']
print(category)
print(category2)
结果:
C语言直接调用Python语句
pythonTest.c
#include "Python.h"
int main()
{
Py_Initialize(); // 初始化
PyRun_SimpleString("print ('funny')");
Py_Finalize(); //释放资源
}
dpkg -l 查看python版本

编译执行
gcc pythonTest.c -o pythonTest -I /usr/include/python3.10 -l python3.10
./pythonTest
结果:

调用无参python函数
nopara.py
#!/usr/bin/python3
def say_funny():print('funny')1、包含Python.h头文件,以便使用Python API。
2、使用void Py_Initialize()初始化Python解释器,
3、使用PyObject *PyImport_ImportModule(const char *name)和PyObject
*PyObject_GetAttrString(PyObject *o, const char *attr_name)获取sys.path对象,并利用int PyList_Append(PyObject *list, PyObject *item)将当前路径.添加到sys.path中,以便加载当前的Python模块(Python文件即python模块)。
4、使用PyObject *PyImport_ImportModule(const char *name)函数导入Python模块,并检查是否有错误。
5、使用PyObject *PyObject_GetAttrString(PyObject *o, const char *attr_name)函数获取Python函数对象,并检查是否可调用。
6、使用PyObject *PyObject_CallObject(PyObject *callable, PyObject *args)函数调用
Python函数,并获取返回值。
7、使用void Py_DECREF(PyObject *o)函数释放所有引用的Python对象。
8、结束时调用oid Py_Finalize()函数关闭Python解释器。
相关的函数参数说明参考网站(网站左上角输入函数名即可开始搜索):
https://docs.python.org/zh-cn/3/c-api/import.html
nopara.c
#include <Python.h>
int main()
{Py_Initialize();PyObject *sys = PyImport_ImportModule("sys");PyObject *path = PyObject_GetAttrString(sys, "path");PyList_Append(path, PyUnicode_FromString("."));// 导入nopara模块PyObject *pModule = PyImport_ImportModule("nopara");if (!pModule){PyErr_Print();printf("ERROR: failed to load nopara.py\n");return 1;}// 获取say_funny函数对象PyObject *pFunc = PyObject_GetAttrString(pModule, "say_funny");if (!pFunc || !PyCallable_Check(pFunc)){PyErr_Print();printf("ERROR: function say_funny not found or not callable\n");return 1;}// 调用say_funny函数并获取返回值PyObject *pValue = PyObject_CallObject(pFunc, NULL);if (!pValue){PyErr_Print();printf("ERROR: function call failed\n");return 1;}// 释放所有引用的Python对象Py_DECREF(pValue);Py_DECREF(pFunc);Py_DECREF(pModule);// 关闭Python解释器Py_Finalize();return 0;
}
编译运行:
gcc -o nopara nopara.c -I /usr/include/python3.10/ -l python3.10
./nopara
调用有参python函数
para.py
#!/usr/bin/python3
def say_funny(category):print(category)return category
para.c
#include <Python.h>
int main()
{Py_Initialize();PyObject *sys = PyImport_ImportModule("sys");PyObject *path = PyObject_GetAttrString(sys, "path");PyList_Append(path, PyUnicode_FromString("."));// 导入nopara模块PyObject *pModule = PyImport_ImportModule("para");if (!pModule){PyErr_Print();printf("ERROR: failed to load nopara2.py\n");return 1;}// 获取say_funny函数对象PyObject *pFunc = PyObject_GetAttrString(pModule, "say_funny");if (!pFunc){PyErr_Print();printf("Error: failed to load say_funny\n");}// 创建一个字符串作为参数char *category = "comedy";PyObject *pArgs = Py_BuildValue("(s)", category);// 调用say_funny函数并获取返回值PyObject *pValue = PyObject_CallObject(pFunc, pArgs);if (!pValue){PyErr_Print();printf("Error: function call failed\n");}// 将返回值转换为C类型char *result = NULL;if (!PyArg_Parse(pValue, "s", &result)){PyErr_Print();printf("Error: parse failed\n");}// 打印返回值printf("pValue=%s\n", result);// 释放所有引用的Python对象Py_DECREF(pValue);Py_DECREF(pFunc);Py_DECREF(pModule);// 关闭Python解释器Py_Finalize();return 0;
}
编译运行
gcc para.c -o para -I /usr/include/python3.10 -l python3.10
./para
接入阿里云识别方案
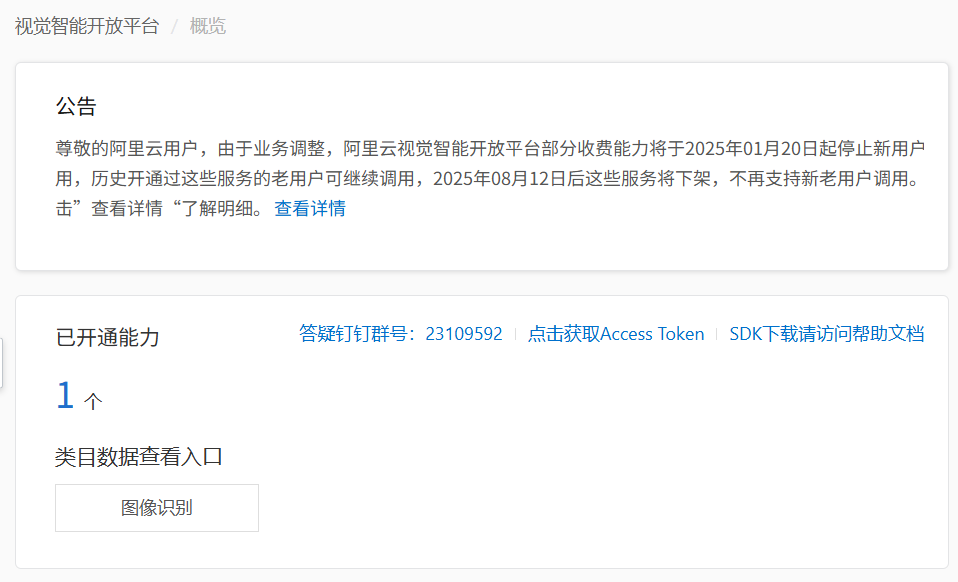
通义实验室视觉智能开放平台
搜索 垃圾分类
可以看到开发文档。
根据开发文档,在产品控制台->点击获取Acce Token获取
创建AccessKey

生成 AccessKey ID和AccessKey Secret
建立一个软链接专门指向python3.10
sudo ln -s /usr/bin/python3.10 /usr/bin/python安装pip
sudo apt-get install aptitude
sudo aptitude install python3-pip
安装图像识别SDK
图像识别:
pip install alibabacloud_imagerecog20190930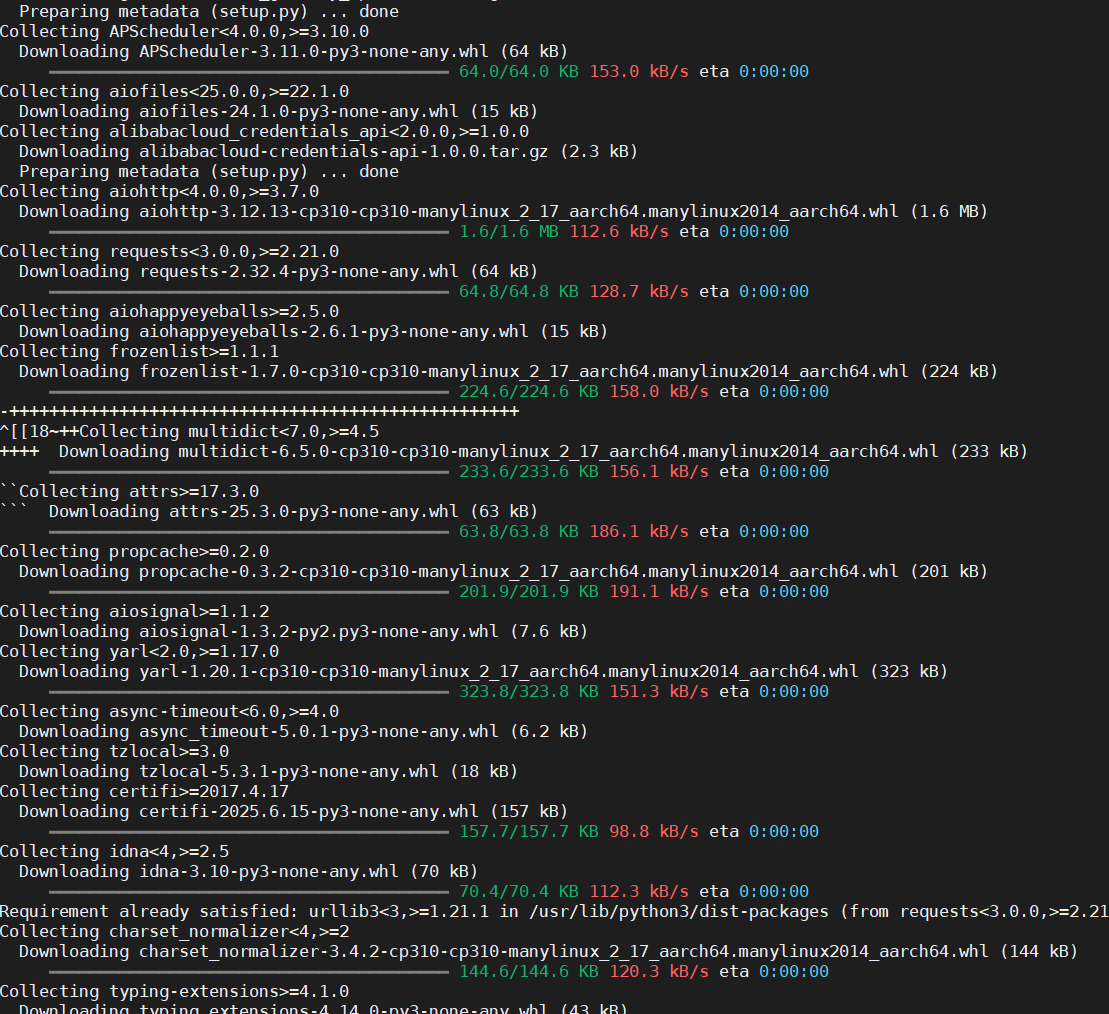
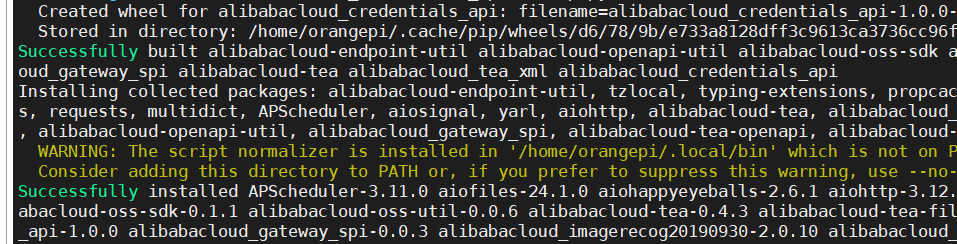
安装成功。
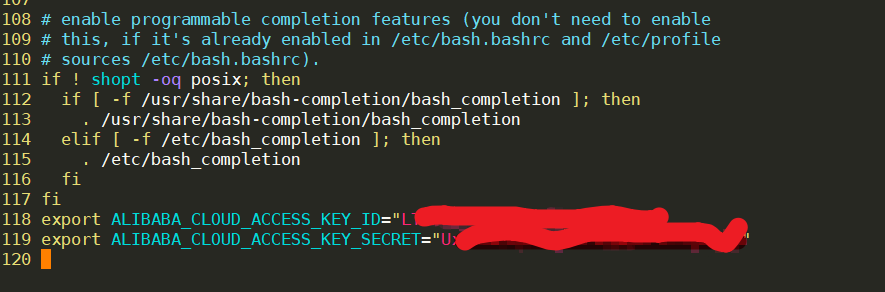
配置环境变量
vi ~/.bashrc
export ALIBABA_CLOUD_ACCESS_KEY_ID=<access_key_id>
export ALIBABA_CLOUD_ACCESS_KEY_SECRET=<access_key_secret>
文件在本地或可访问的URL
garbage.py
# -*- coding: utf-8 -*-
# 引入依赖包
# pip install alibabacloud_imagerecog20190930import os
import io
from urllib.request import urlopen
from alibabacloud_imagerecog20190930.client import Client
from alibabacloud_imagerecog20190930.models import ClassifyingRubbishAdvanceRequest
from alibabacloud_tea_openapi.models import Config
from alibabacloud_tea_util.models import RuntimeOptionsconfig = Config(# 创建AccessKey ID和AccessKey Secret,请参考https://help.aliyun.com/document_detail/175144.html。# 如果您用的是RAM用户的AccessKey,还需要为RAM用户授予权限AliyunVIAPIFullAccess,请参考https://help.aliyun.com/document_detail/145025.html# 从环境变量读取配置的AccessKey ID和AccessKey Secret。运行代码示例前必须先配置环境变量。access_key_id=os.environ.get('ALIBABA_CLOUD_ACCESS_KEY_ID'),access_key_secret=os.environ.get('ALIBABA_CLOUD_ACCESS_KEY_SECRET'),# 访问的域名endpoint='imagerecog.cn-shanghai.aliyuncs.com',# 访问的域名对应的regionregion_id='cn-shanghai'
)
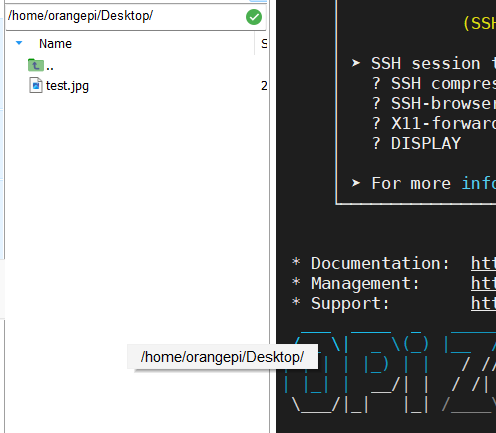
#场景一:文件在本地
img = open(r'/home/orangepi/Desktop/test.jpg', 'rb')
#场景二:使用任意可访问的url
#url = 'http://viapi-test.oss-cn-shanghai.aliyuncs.com/viapi-3.0domepic/imagerecog/ClassifyingRubbish/ClassifyingRubbish1.jpg'
#img = io.BytesIO(urlopen(url).read())
classifying_rubbish_request = ClassifyingRubbishAdvanceRequest()
classifying_rubbish_request.image_urlobject = img
runtime = RuntimeOptions()
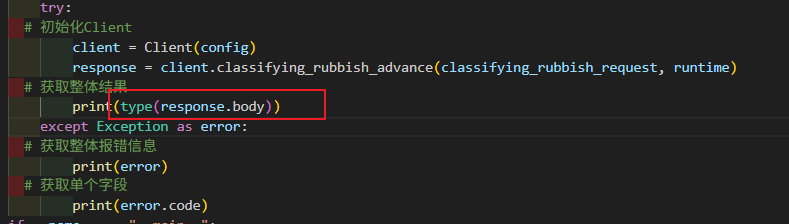
try:# 初始化Clientclient = Client(config)response = client.classifying_rubbish_advance(classifying_rubbish_request, runtime)# 获取整体结果print(response.body)
except Exception as error:# 获取整体报错信息print(error)# 获取单个字段print(error.code)上传 test.jpg到香橙派
代码运行结果:
python garbage.py
![]()
封装示例代码成函数
# -*- coding: utf-8 -*-
# 引入依赖包
# pip install alibabacloud_imagerecog20190930import os
import io
from urllib.request import urlopen
from alibabacloud_imagerecog20190930.client import Client
from alibabacloud_imagerecog20190930.models import ClassifyingRubbishAdvanceRequest
from alibabacloud_tea_openapi.models import Config
from alibabacloud_tea_util.models import RuntimeOptionsconfig = Config(# 创建AccessKey ID和AccessKey Secret,请参考https://help.aliyun.com/document_detail/175144.html。# 如果您用的是RAM用户的AccessKey,还需要为RAM用户授予权限AliyunVIAPIFullAccess,请参考https://help.aliyun.com/document_detail/145025.html# 从环境变量读取配置的AccessKey ID和AccessKey Secret。运行代码示例前必须先配置环境变量。access_key_id=os.environ.get('ALIBABA_CLOUD_ACCESS_KEY_ID'),access_key_secret=os.environ.get('ALIBABA_CLOUD_ACCESS_KEY_SECRET'),# 访问的域名endpoint='imagerecog.cn-shanghai.aliyuncs.com',# 访问的域名对应的regionregion_id='cn-shanghai'
)
def alibaba_garbage():
#场景一:文件在本地img = open(r'/tmp/test.jpg', 'rb')
#场景二:使用任意可访问的url
#url = 'http://viapi-test.oss-cn-shanghai.aliyuncs.com/viapi-3.0domepic/imagerecog/ClassifyingRubbish/ClassifyingRubbish1.jpg'
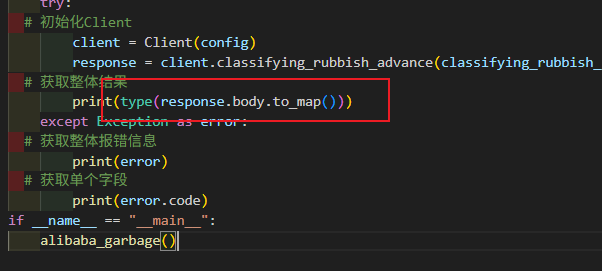
#img = io.BytesIO(urlopen(url).read())classifying_rubbish_request = ClassifyingRubbishAdvanceRequest()classifying_rubbish_request.image_urlobject = imgruntime = RuntimeOptions()try:# 初始化Clientclient = Client(config)response = client.classifying_rubbish_advance(classifying_rubbish_request, runtime)# 获取整体结果print(response.body)except Exception as error:# 获取整体报错信息print(error)# 获取单个字段print(error.code)
if __name__ == "__main__":alibaba_garbage()代码运行结果:

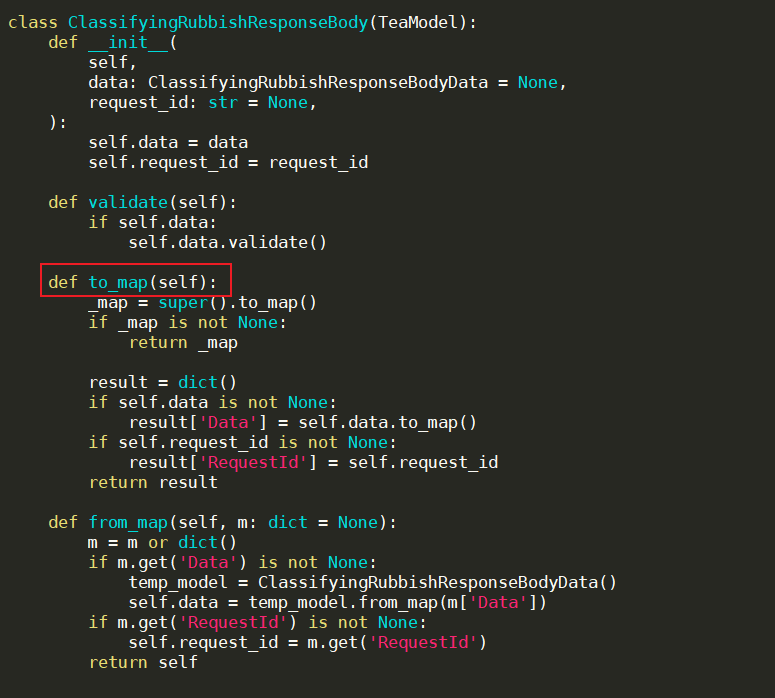
cd /home/orangepi/.local/lib/python3.10/site-packages
grep -r ClassifyingRubbishResponseBody
sudo vi alibabacloud_imagerecog20190930/models.py
garbage.py
# -*- coding: utf-8 -*-
# 引入依赖包
# garbage.py
# pip install alibabacloud_imagerecog20190930
import os
import io
import json
from urllib.request import urlopen
from alibabacloud_imagerecog20190930.client import Client
from alibabacloud_imagerecog20190930.models import ClassifyingRubbishAdvanceRequest
from alibabacloud_tea_openapi.models import Config
from alibabacloud_tea_util.models import RuntimeOptions
config = Config(
# 创建AccessKey ID和AccessKey Secret,请参考https://help.aliyun.com/document_detail/175144.html。
# 如果您用的是RAM用户的AccessKey,还需要为RAM用户授予权限AliyunVIAPIFullAccess,请参考https://help.aliyun.com/document_detail/145025.html
# 从环境变量读取配置的AccessKey ID和AccessKey Secret。运行代码示例前必须先配置环境变量。
access_key_id=os.environ.get('ALIBABA_CLOUD_ACCESS_KEY_ID'),
access_key_secret=os.environ.get('ALIBABA_CLOUD_ACCESS_KEY_SECRET'),
# 访问的域名
endpoint='imagerecog.cn-shanghai.aliyuncs.com',
# 访问的域名对应的region
region_id='cn-shanghai'
)
def alibabacloud_garbage():
#场景一:文件在本地img = open(r'/tmp/test.jpg', 'rb')
#场景二:使用任意可访问的url
#url = 'https://viapi-test-bj.oss-cn-beijing.aliyuncs.com/viapi-3.0domepic/imagerecog/ClassifyingRubbish/ClassifyingRubbish1.jpg'
#img = io.BytesIO(urlopen(url).read())classifying_rubbish_request = ClassifyingRubbishAdvanceRequest()classifying_rubbish_request.image_urlobject = imgruntime = RuntimeOptions()try:
# 初始化Clientclient = Client(config)response = client.classifying_rubbish_advance(classifying_rubbish_request,runtime)print(response.body)return response.body.to_map()['Data']['Elements'][0]['Category']except Exception as error:print(type('获取失败'))return '获取失败'
garbage.c
#include <stdio.h>
#include <string.h>
#include <stdlib.h>
#include <stddef.h>
#include <Python.h>void garbage_init(void)
{Py_Initialize();PyObject *sys = PyImport_ImportModule("sys");PyObject *path = PyObject_GetAttrString(sys, "path");PyList_Append(path, PyUnicode_FromString("."));
}
void garbage_final(void)
{Py_Finalize();
}
char *garbage_category(char *category)
{PyObject *pModule = PyImport_ImportModule("garbage");if (!pModule){PyErr_Print();printf("Error: failed to load garbage.py\n");goto FAILED_MODULE;}PyObject *pFunc = PyObject_GetAttrString(pModule, "alibabacloud_garbage");if (!pFunc){PyErr_Print();printf("Error: failed to load alibabacloud_garbage\n");goto FAILED_FUNC;}PyObject *pValue = PyObject_CallObject(pFunc, NULL);if (!pValue){PyErr_Print();printf("Error: function call failed\n");goto FAILED_VALUE;}char *result = NULL;if (!PyArg_Parse(pValue, "s", &result)){PyErr_Print();printf("Error: parse failed");goto FAILED_RESULT;}category = (char *)malloc(sizeof(char) * (strlen(result) + 1));memset(category, 0, (strlen(result) + 1));strncpy(category, result, (strlen(result) + 1));
FAILED_RESULT:Py_DECREF(pValue);
FAILED_VALUE:Py_DECREF(pFunc);
FAILED_FUNC:Py_DECREF(pModule);
FAILED_MODULE:return category;
}
garbage.h
#ifndef __GARBAGE__H
#define __GARBAGE__H
void garbage_init(void);
void garbage_final(void);
char *garbage_category(char *category);
#endif
garbagetest.c
#include <stdio.h>
#include <stdlib.h>
#include "garbage.h"
int main()
{char *category = NULL;garbage_init();category = garbage_category(category);printf("category=%s\n", category);garbage_final();free(category);return 0;
}
运行结果
香橙派使用USB摄像头
查找摄像头命令
lsmod | grep uvcvideo | grep -v grep uvcvideo 106496 0
sudo apt update
sudo apt install -y v4l-utils
v4l2-ctl --list-devices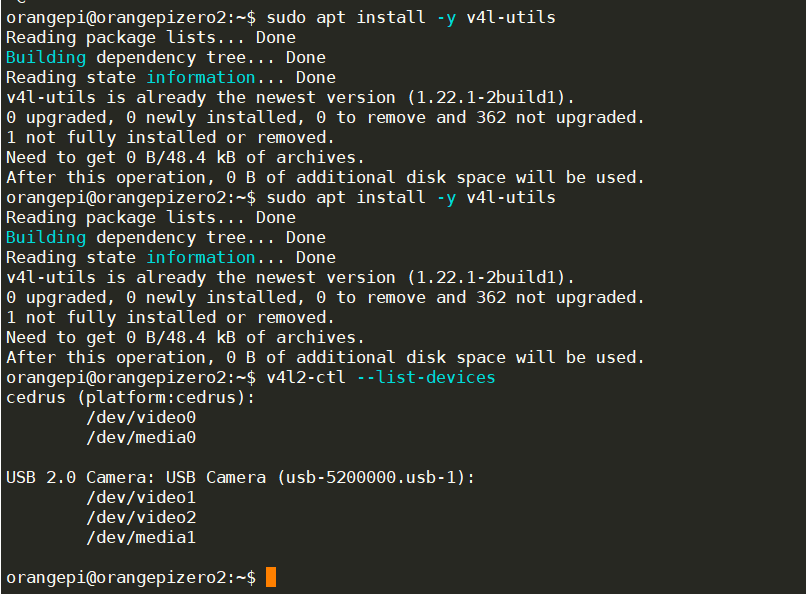
可以看到信息为/dev/video1 和/dev/video2,实际使用的是video2
安装 fswebcam
sudo apt update
sudo apt-get install -y fswebcam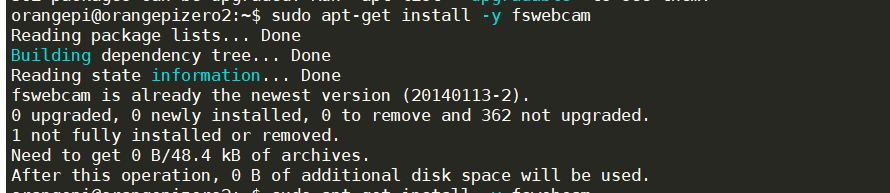
使用 mjpg-streamer 测试 USB 摄像头
下载 mjpg-streamer
git clone https://gitee.com/leeboby/mjpg-streamersudo apt-get install -y cmake libjpeg8-dev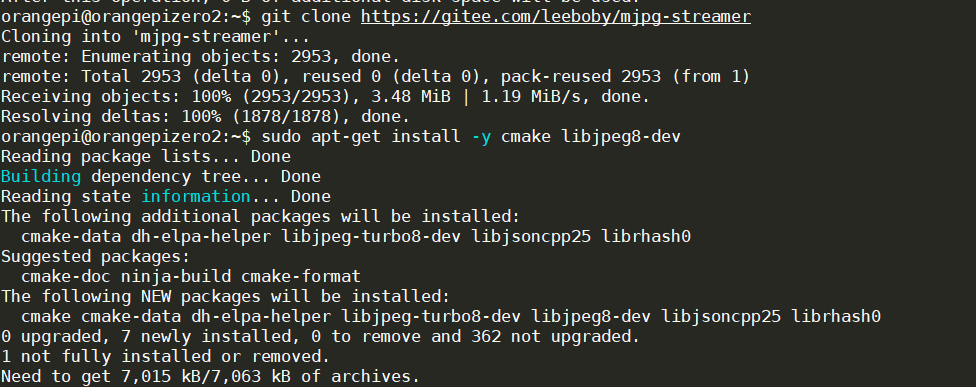
编译安装 mjpg-streamer
cd mjpg-streamer/mjpg-streamer-experimental
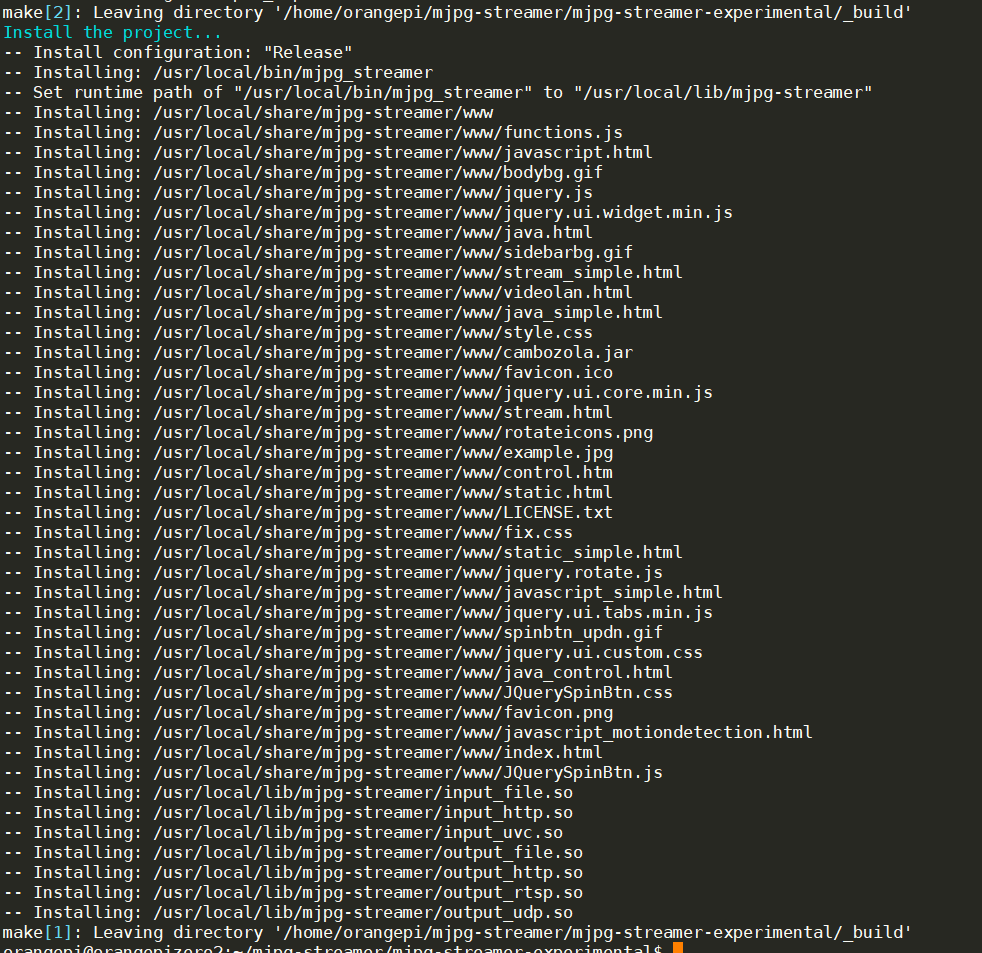
make -j4
sudo make install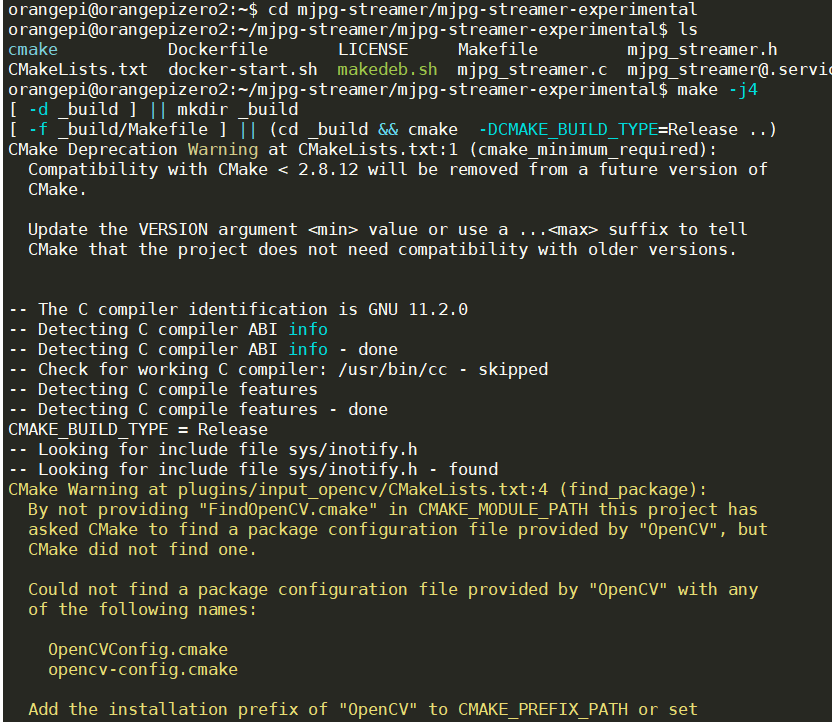
修改启动摄像头脚本
cd mjpg-streamer/mjpg-streamer-experimental
sudo vim start.sh
将第30行内容修改内容为 ./mjpg_streamer -i "./input_uvc.so -d /dev/video2 -u -f 30" -o "./output_http.so -w ./www",注意这里的videox要根据实际情况进行相应的修改
./mjpg_streamer -i "./input_uvc.so -d /dev/video2 -u -f 30" -o "./output_http.so -w ./www"![]()
修改好后保存退出
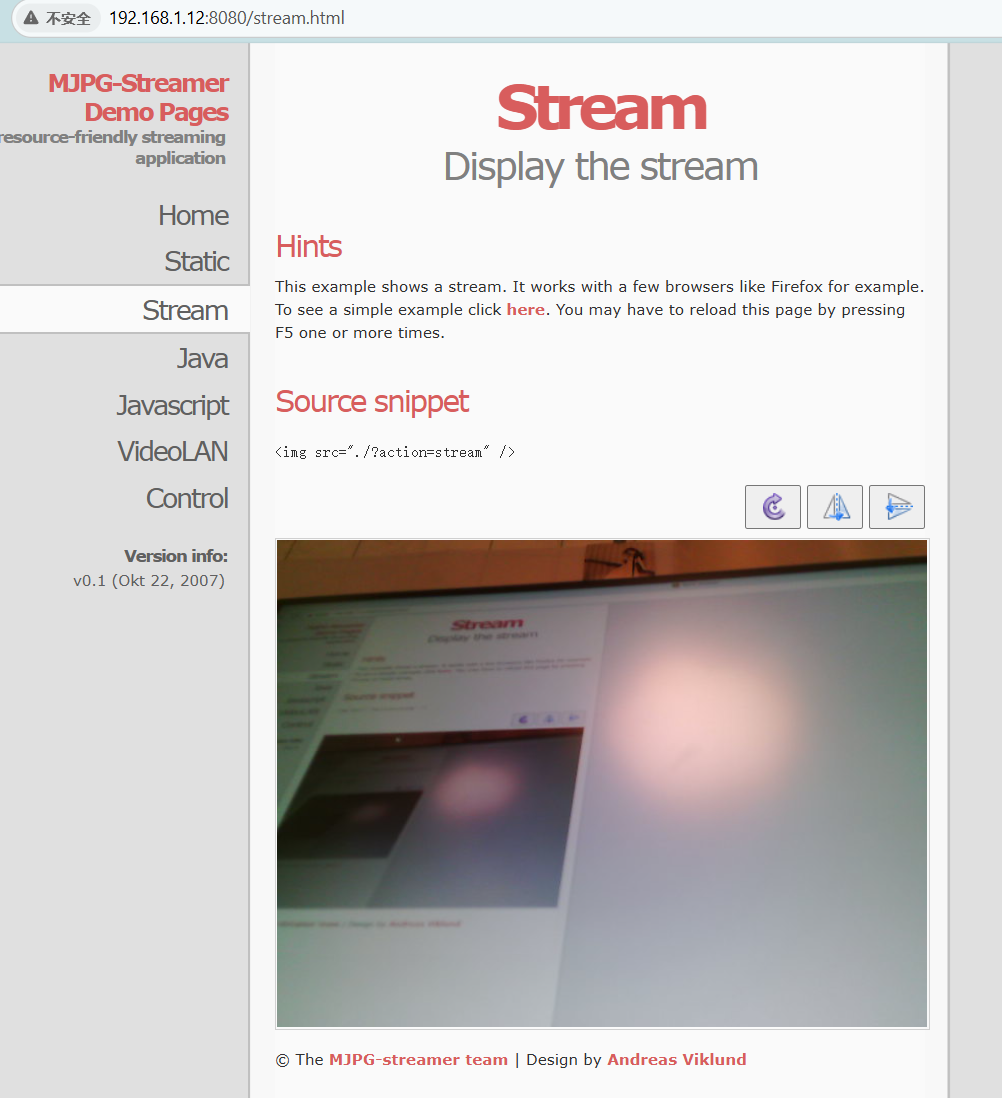
运行摄像头脚本
./start.sh在与开发板同一局域网下的PC上打开浏览器输入开发板的IP地址:8080
例如:
192.168.1.12:8080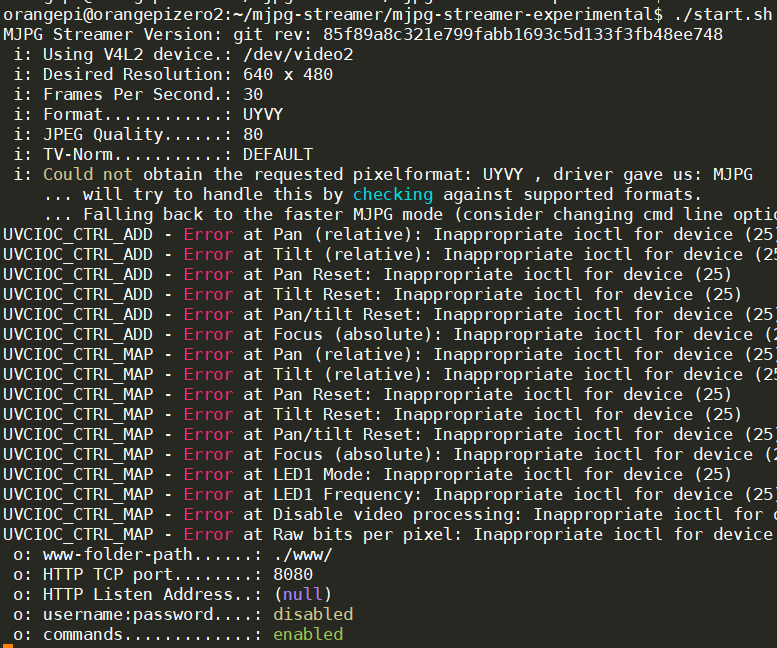
可以在浏览器的Stream里看到视频流。

创建 抓取图片脚本
cd ~
touch mjpg.sh
sudo vim mjpg.sh
输入脚本内容
 #!/bin/bashcd mjpg-streamer/mjpg-streamer-experimental
./start.sh
给新建的脚本加可执行权限
chmod +x mjpg.sh
添加mjpg抓取脚本至开机自启动
cd /etc/xdg/autostart/
sudo cp im-launch.desktop mjpg.desktop
sudo vim mjpg.desktop
mjpg.desktop脚本内容
[Desktop Entry]
Name=mjpg
Exec=/bin/bash/home/orangepi/mjpg.sh
Type=Application
NoDisplay=true
重启后查看mjpg脚本是否开机正常执行,视频流是否正常。
ps ax | grep mjpg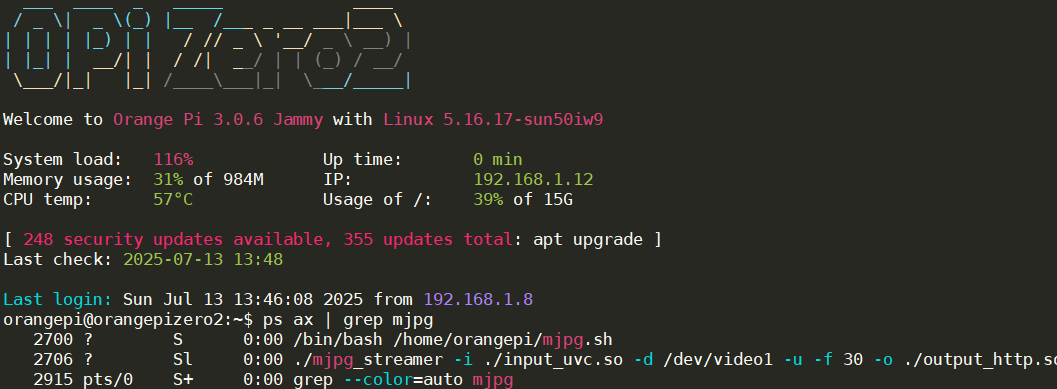
这里我第一次做的时候发现服务没有被启动,后面找到原因是vediox变化了,在重启或者重新插拔后vediox可能会有变化。
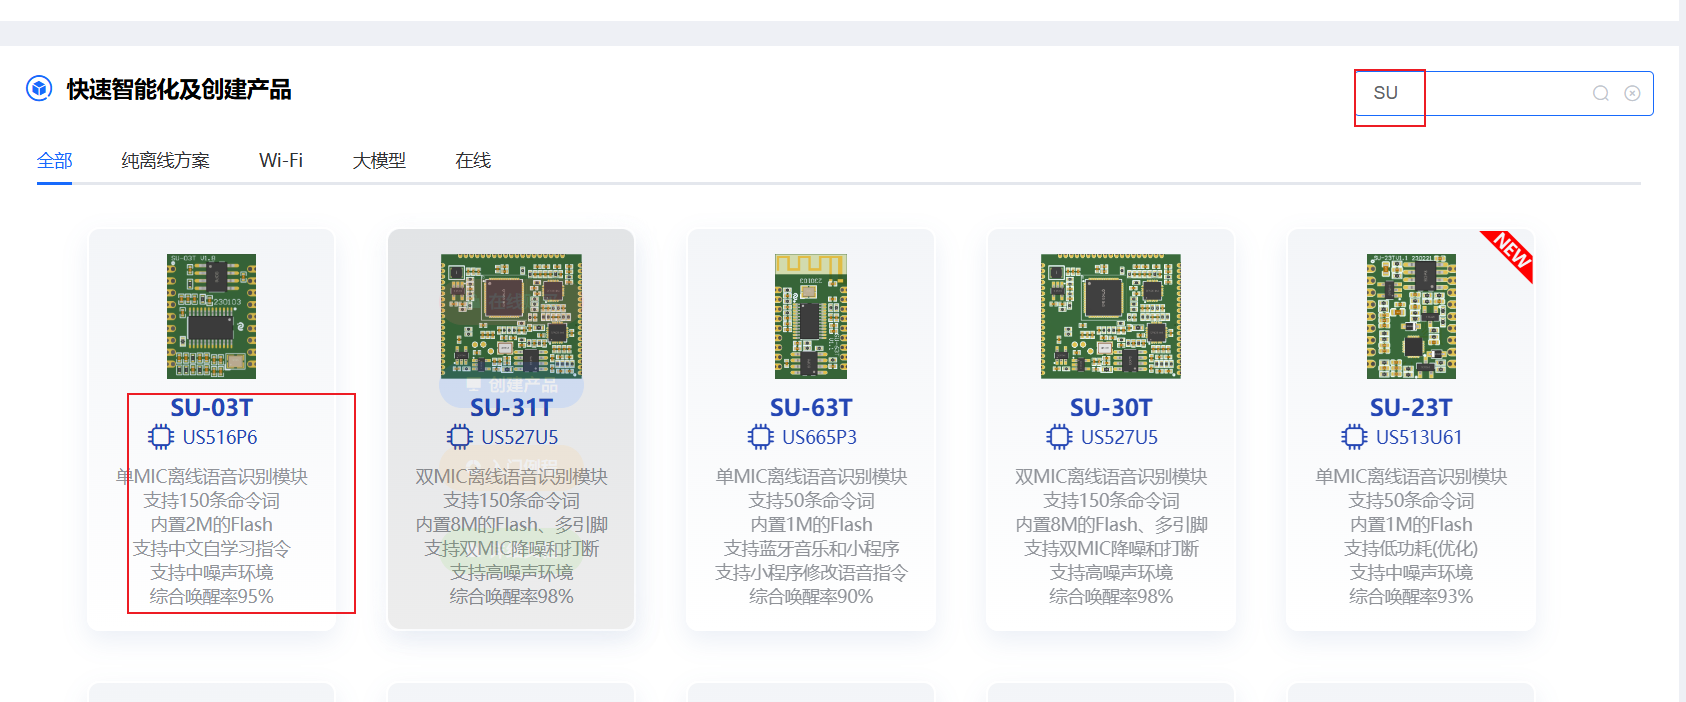
使用智能公元及SU-03T配置语音模块
进入智能公元官网,选择SU-03T产品
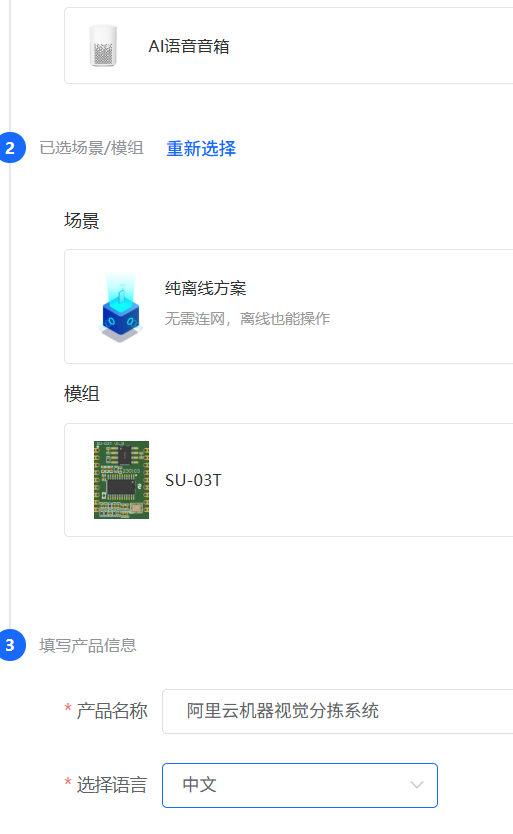
创建产品,选择AI语音音箱
勾选麦克风配置及距离识别

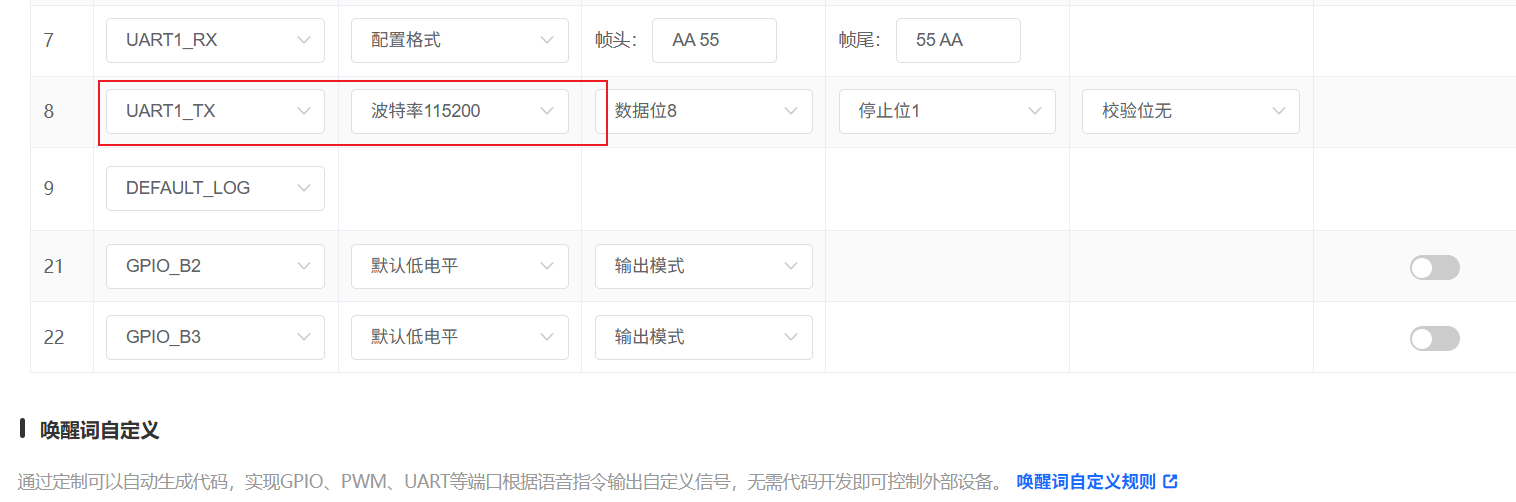
修改第七、八行为Uart1_RX ,波特率115200
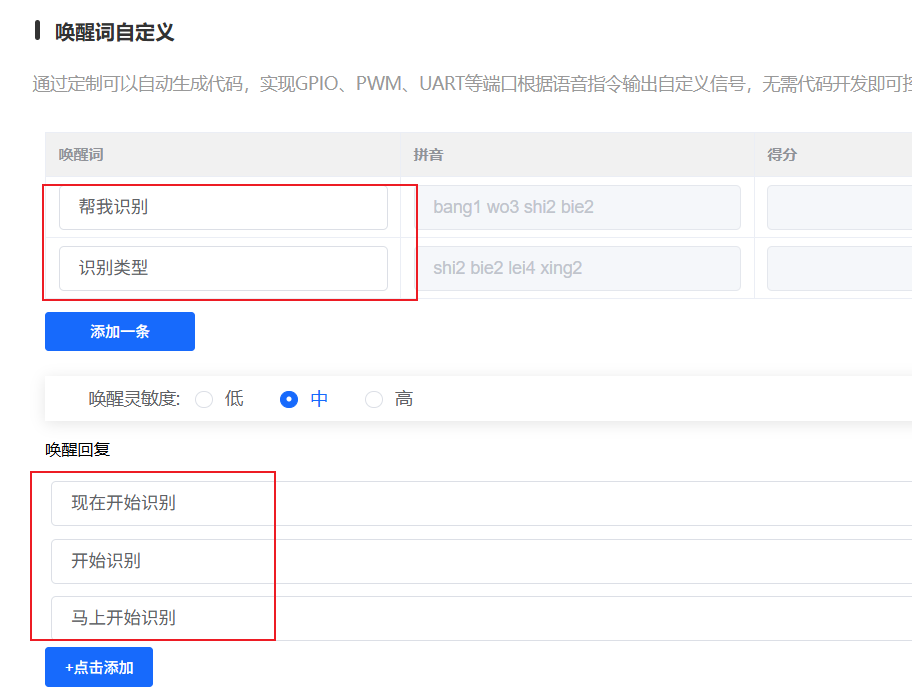
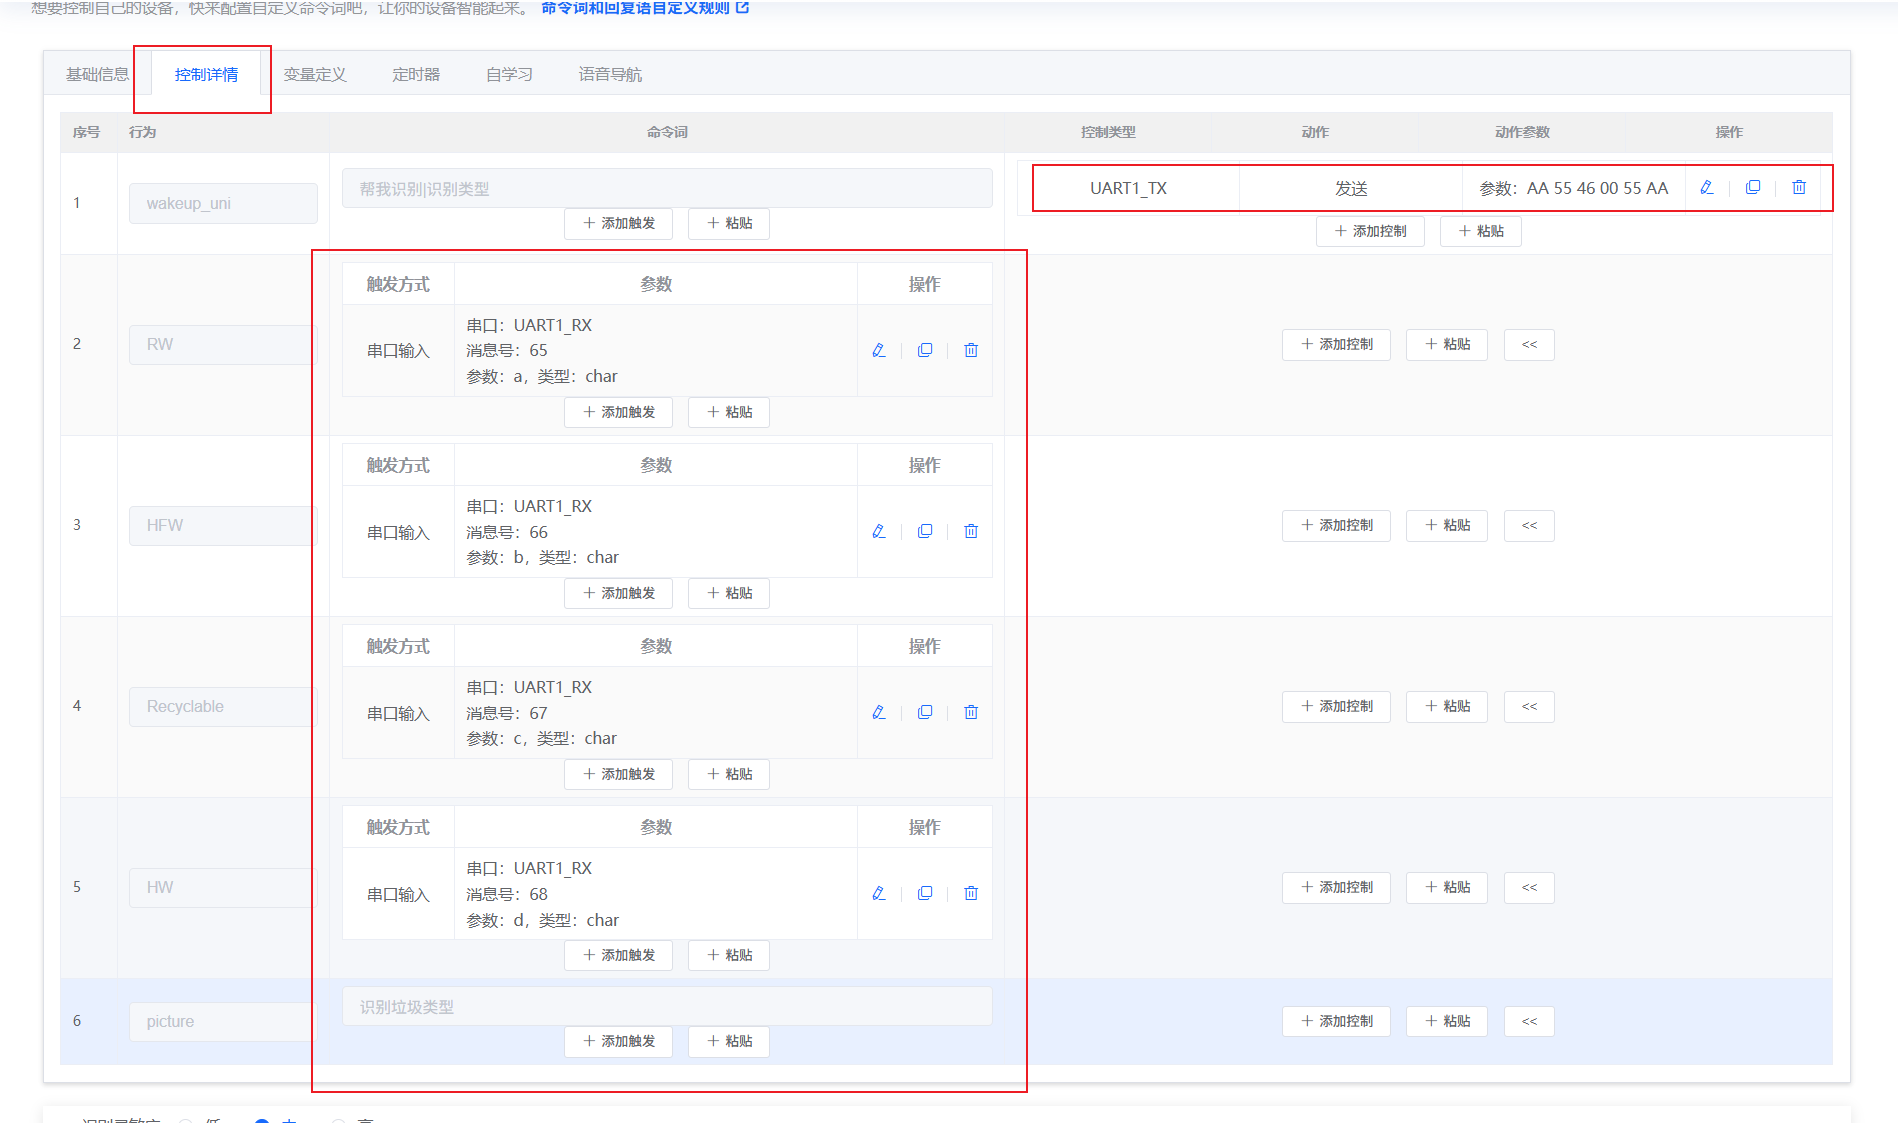
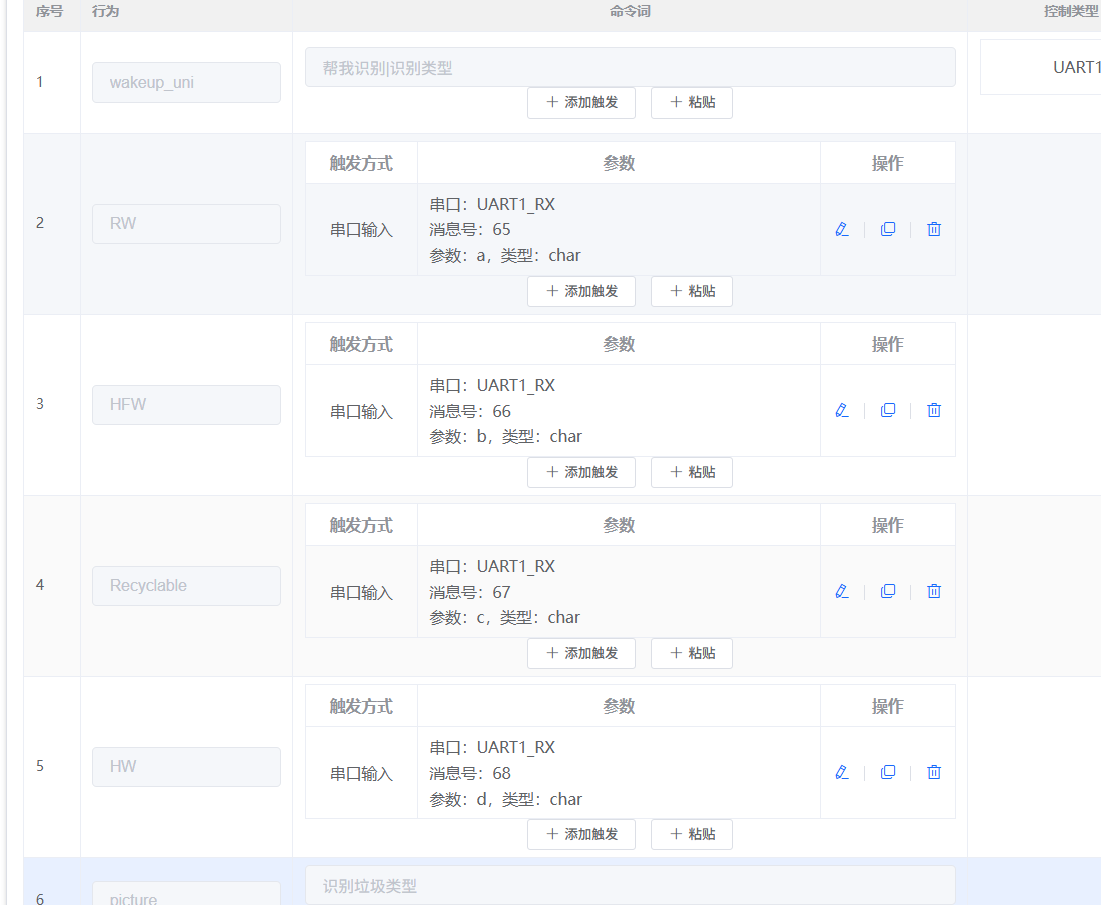
输入唤醒词及唤醒词回复
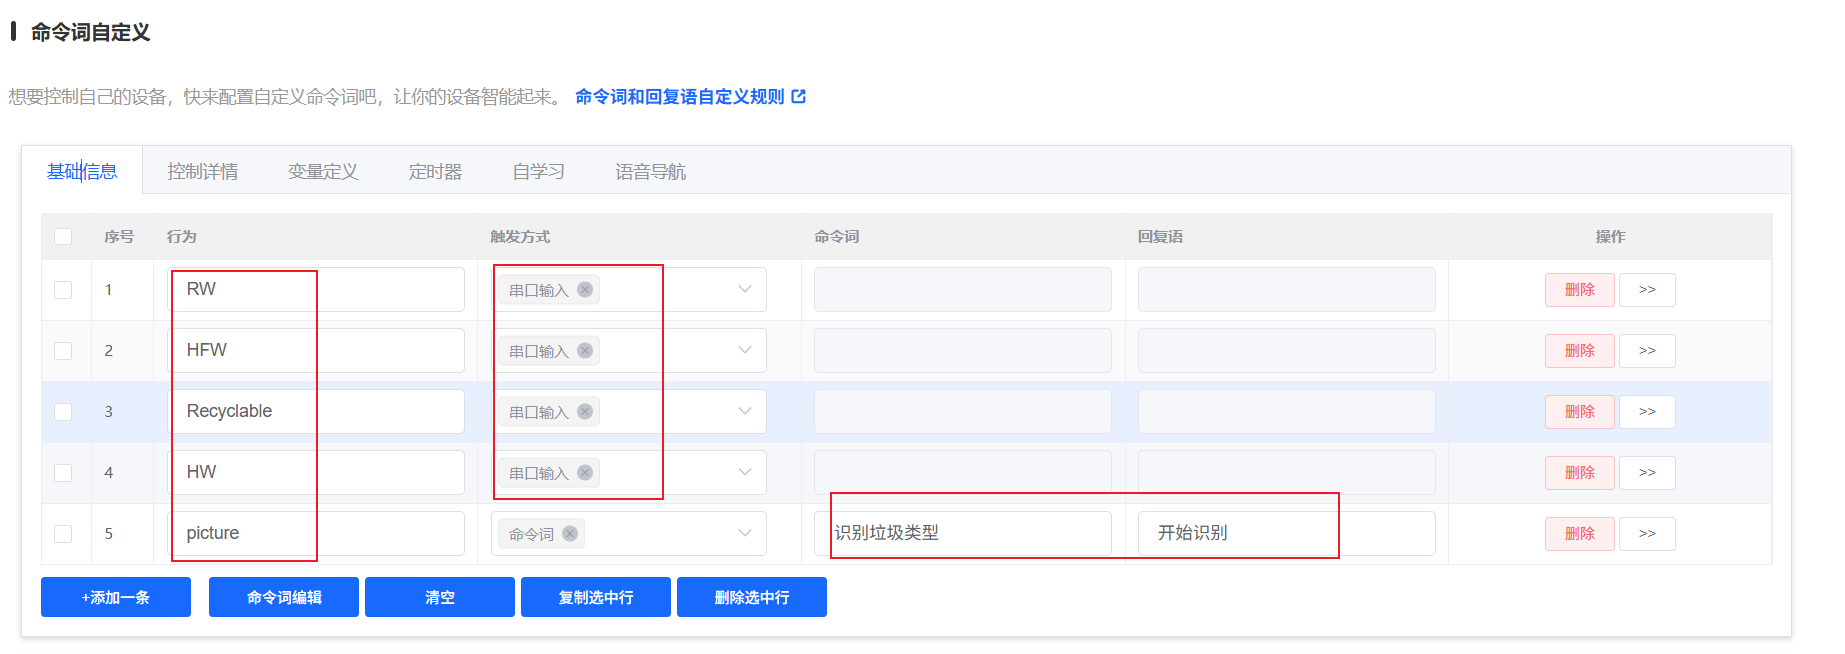
输入命令词的基础信息,设置触发方式前四个为串口输入,行为分别为 干垃圾、湿垃圾、可回收垃圾、有害垃圾、未识别
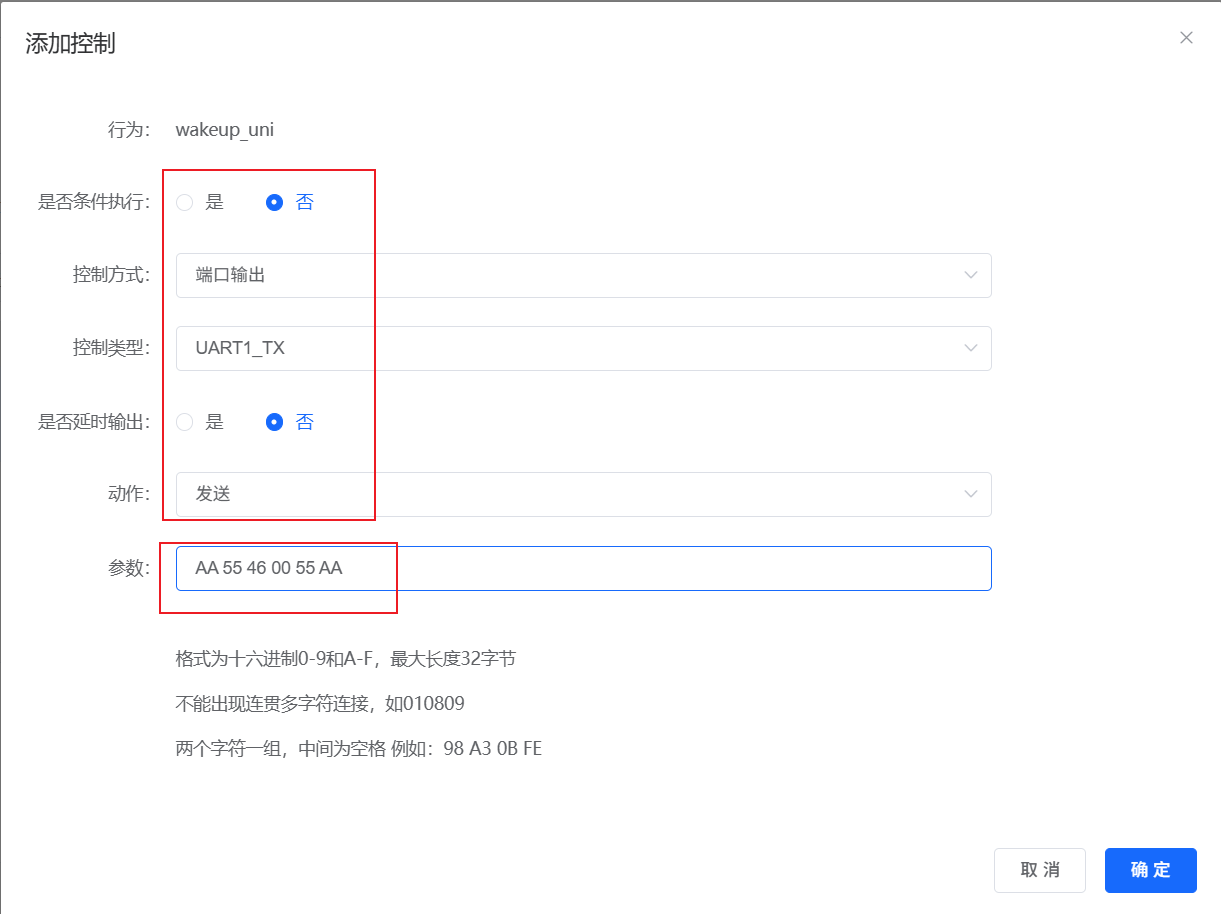
设定唤醒词控制详情为端口输出,发送AA 55 46 00 55 AA
干垃圾、湿垃圾、可回收垃圾、有害垃圾的控制详情分别设置为参数 a、b、c、d,设置测试值均为00,类型均为char

选择免唤醒词及音色音量

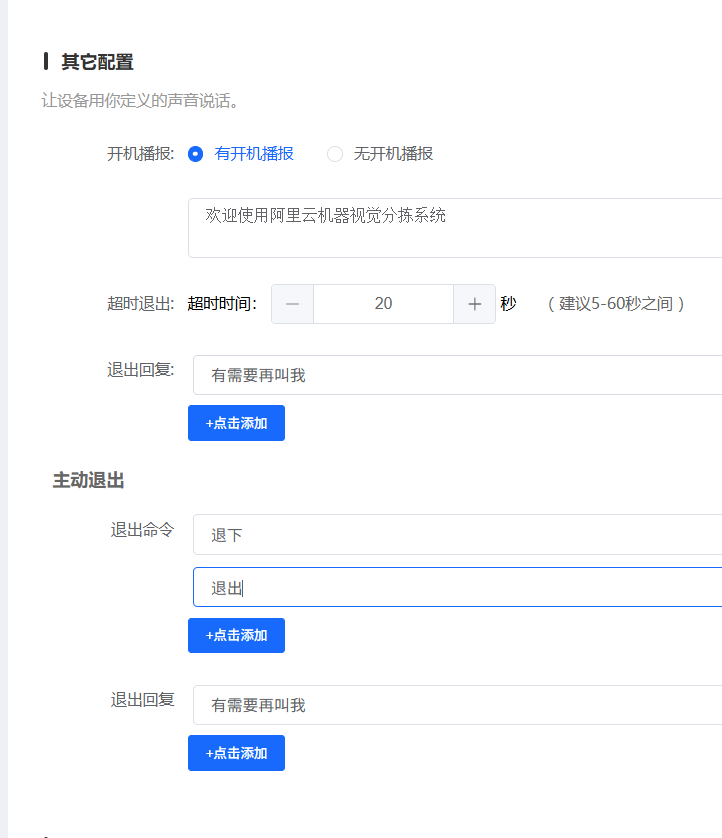
选择 有开机播报
选择发布版本
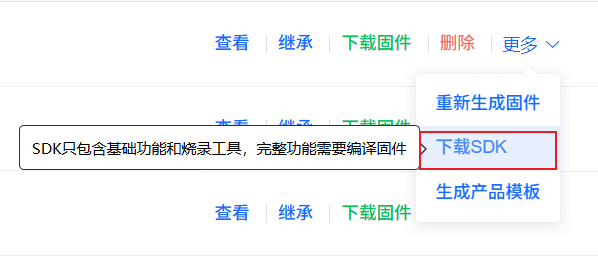
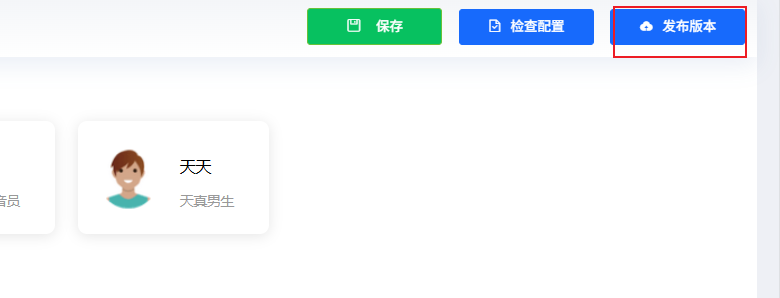 选择快速发布版,点击确定,等待10-20分钟可以下载sdk
连接SU-03T及USB转TTL模块,烧录语音模块的配置文件。
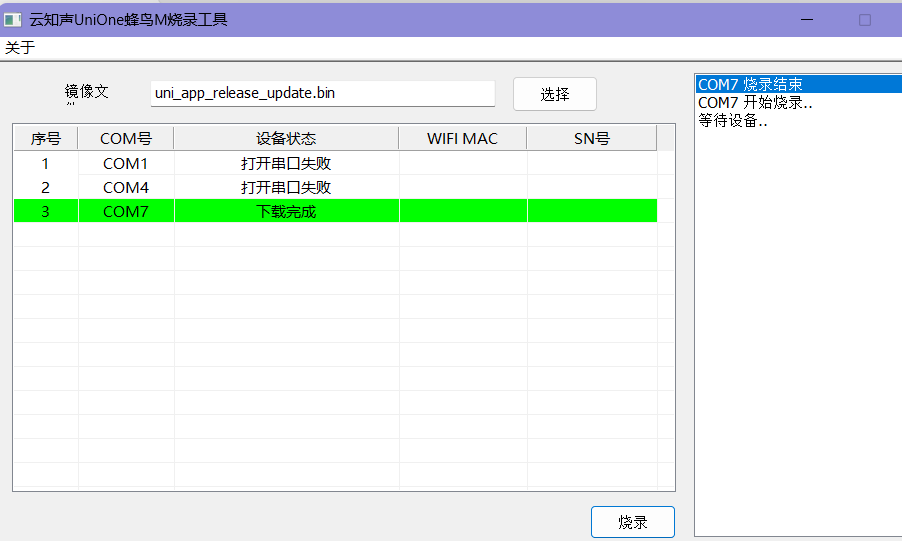
可以使用串口调试助手验证下载是否正确
使用语音模块和摄像头在香橙派上做智能分类识别
将语音模块接到香橙派开发板的UART5的位置上5v接5V,GND接GND,香橙派的RX与SU03T的TX相连,香橙派的TX与RX相连
并且将USB摄像头插到香橙派开发板的USB接口上,确认已经运行了mjpg-streamer服务
ps ax | grep mjpg
garbage3.py
#代码name:tuxiangTest2.py
# -*- coding: utf-8 -*-
# 引入依赖包
# pip install alibabacloud_imagerecog20190930import os
import io
from urllib.request import urlopen
from alibabacloud_imagerecog20190930.client import Client
from alibabacloud_imagerecog20190930.models import ClassifyingRubbishAdvanceRequest
from alibabacloud_tea_openapi.models import Config
from alibabacloud_tea_util.models import RuntimeOptionsconfig = Config(# 创建AccessKey ID和AccessKey Secret,请参考https://help.aliyun.com/document_detail/175144.html。# 如果您用的是RAM用户的AccessKey,还需要为RAM用户授予权限AliyunVIAPIFullAccess,请参考https://help.aliyun.com/document_detail/145025.html# 从环境变量读取配置的AccessKey ID和AccessKey Secret。运行代码示例前必须先配置环境变量。access_key_id=os.environ.get('ALIBABA_CLOUD_ACCESS_KEY_ID'),access_key_secret=os.environ.get('ALIBABA_CLOUD_ACCESS_KEY_SECRET'),# 访问的域名endpoint='imagerecog.cn-shanghai.aliyuncs.com',# 访问的域名对应的regionregion_id='cn-shanghai'
)def alibabacloud_garbage():                                                        #定义函数#场景一:文件在本地img = open(r'/tmp/garbage.jpg', 'rb')                                       #打开图片文件#场景二:使用任意可访问的url#url = 'https://viapi-test-bj.oss-cn-beijing.aliyuncs.com/viapi-3.0domepic/imagerecog/ClassifyingRubbish/ClassifyingRubbish1.jpg'#img = io.BytesIO(urlopen(url).read())classifying_rubbish_request = ClassifyingRubbishAdvanceRequest()classifying_rubbish_request.image_urlobject = imgruntime = RuntimeOptions()try:# 初始化Clientclient = Client(config)response = client.classifying_rubbish_advance(classifying_rubbish_request, runtime)# 获取整体结果#print(response.body)# 获取单个字段print(response.body.to_map()['Data']['Elements'][0]['Category'])                        #获取垃圾种类   return response.body.to_map()['Data']['Elements'][0]['Category']                        #返回垃圾种类except Exception as error:# 获取整体报错信息#print(error)print(type('获取失败'))                                                                   #返回失败信息return '获取失败'           # 获取单个字段#print(error.code)if __name__ == '__main__':                                                                  #主函数alibabacloud_garbage()                                                                         #调用函数
garbage.c
#include <stdio.h>
#include <string.h>
#include <stdlib.h>
#include <stddef.h>
#include <Python.h>// garbage.c
void garbage_init(void)
{Py_Initialize();PyObject *sys = PyImport_ImportModule("sys");PyObject *path = PyObject_GetAttrString(sys, "path");PyList_Append(path, PyUnicode_FromString("."));
}
void garbage_final(void)
{Py_Finalize();
}
char *garbage_category(char *category)
{PyObject *pModule = PyImport_ImportModule("garbage");if (!pModule){PyErr_Print();printf("Error: failed to load garbage.py\n");goto FAILED_MODULE;}PyObject *pFunc = PyObject_GetAttrString(pModule, "alibabacloud_garbage");if (!pFunc){PyErr_Print();printf("Error: failed to load alibabacloud_garbage\n");goto FAILED_FUNC;}PyObject *pValue = PyObject_CallObject(pFunc, NULL);if (!pValue){PyErr_Print();printf("Error: function call failed\n");goto FAILED_VALUE;}char *result = NULL;if (!PyArg_Parse(pValue, "s", &result)){PyErr_Print();printf("Error: parse failed");goto FAILED_RESULT;}category = (char *)malloc(sizeof(char) * (strlen(result) + 1));memset(category, 0, (strlen(result) + 1));strncpy(category, result, (strlen(result) + 1));
FAILED_RESULT:Py_DECREF(pValue);
FAILED_VALUE:Py_DECREF(pFunc);
FAILED_FUNC:Py_DECREF(pModule);
FAILED_MODULE:return category;
}
garbage.h
/* garbage.h */
#ifndef __GARBAGE__H
#define __GARBAGE__Hvoid garbage_init();                    // 初始化函数
void garbage_destroy();                 // 销毁函数
char *garbage_category(char *category); // 分类函数#define WGET_CMD "wget http://192.168.1.13:8080/?action=snapshot -O /tmp/garbage.jpg" // 拍照指令
#define GARBAGE_FILE "/tmp/garbage.jpg"                                            // 照片路径#endif
serialTest.c
#include <stdio.h>
#include <stdlib.h>
#include <stdint.h>
#include <stdarg.h>
#include <string.h>
#include <termios.h>
#include <unistd.h>
#include <fcntl.h>
#include <sys/ioctl.h>
#include <sys/types.h>
#include <sys/stat.h>int mySerialOpen (const char *device, const int baud)
{struct termios options ;speed_t myBaud ;int     status, fd ;switch (baud){case    9600:	myBaud =    B9600 ; break ;case  115200:	myBaud =  B115200 ; break ;default:return -2 ;}if ((fd = open (device, O_RDWR | O_NOCTTY | O_NDELAY | O_NONBLOCK)) == -1)return -1 ;fcntl (fd, F_SETFL, O_RDWR) ;// Get and modify current options:tcgetattr (fd, &options) ;cfmakeraw   (&options) ;cfsetispeed (&options, myBaud) ;cfsetospeed (&options, myBaud) ;options.c_cflag |= (CLOCAL | CREAD) ;options.c_cflag &= ~PARENB ;options.c_cflag &= ~CSTOPB ;options.c_cflag &= ~CSIZE ;options.c_cflag |= CS8 ;options.c_lflag &= ~(ICANON | ECHO | ECHOE | ISIG) ;options.c_oflag &= ~OPOST ;options.c_cc [VMIN]  =   0 ;options.c_cc [VTIME] = 100 ;	// Ten seconds (100 deciseconds)tcsetattr (fd, TCSANOW, &options) ;ioctl (fd, TIOCMGET, &status);status |= TIOCM_DTR ;status |= TIOCM_RTS ;ioctl (fd, TIOCMSET, &status);usleep (10000) ;	// 10mSreturn fd ;
}int mySerialGetString (const int fd,char *buffer)
{int nread;nread = read(fd,buffer,32);    return nread;
}
void mySerialSendString (const int fd, const char *s)
{int ret;ret = write (fd, s, strlen (s));if (ret < 0)printf("Serial Puts Error\n");
}
serialTest.h
#ifndef __SERIALTEST_H__
#define __SERIALTEST_H__int myserialOpen(const char *device, const int baud);void serialSendstring(const int fd, const unsigned char *str, int len);int serialGetstring(const int fd, unsigned char *buffer);#define SERIAL_DEV "/dev/ttyS5" /* 串口设备名称 */
#define SERIAL_BAUD 115200      /* 串口波特率 */#endif
main.c
#include <stdio.h>  // 包含标准输入输出库,用于基本的输入输出操作
#include <stdlib.h> // 包含标准库,用于内存分配等操作
#include <string.h> // 包含字符串操作库,用于字符串处理
#include <unistd.h> // 包含unistd库,用于系统调用#include "garbage.h"    // 包含自定义的垃圾回收库,用于内存管理
#include "serialTest.h" // 包含自定义的串口工具库,用于串口通信/*判断进程是否在运行*/
static int detect_process(const char *process_name)
{int n = -1;FILE *strm;char buf[128] = {0};// 构造命令字符串,通过ps命令查找进程sprintf(buf, "ps -ax | grep %s|grep -v grep", process_name);// 使用popen执行命令并读取输出if ((strm = popen(buf, "r")) != NULL){if (fgets(buf, sizeof(buf), strm) != NULL){n = atoi(buf); // 将进程ID字符串转换为整数}}else{return -1; // popen失败}pclose(strm); // 关闭popen打开的文件流return n;
}int main(int argc, char **argv)
{int ret;                                                        // 函数返回值int len = 0;                                                    // 串口数据长度int serial_fd;                                                  // 串口文件描述符unsigned char buffer[6] = {0x00, 0x00, 0x00, 0x00, 0x00, 0x00}; // 发送数据char *category = NULL;                                          // 垃圾分类结果garbage_init(); // 初始化垃圾分类器ret = detect_process("mjpg_streamer"); // 检测mjpg_streamer是否在运行if (ret == -1){printf("USB摄像头未连接或mjpg_streamer未启动\n");goto END; // 未启动则退出}serial_fd = myserialOpen(SERIAL_DEV, SERIAL_BAUD); // 打开串口if (serial_fd == -1){printf("打开串口失败\n");goto END; // 打开串口失败则退出}while (1){len = serialGetstring(serial_fd, buffer);                                                                                                                                                                        // 读取串口数据printf("len = %d,buffer[0]=0x%x,buffer[1]=0x%x,buffer[2]=0x%x,buffer[3]=0x%x,buffer[4]=0x%x,buffer[5]=0x%x,buffer[6]=0x%x\n", len, buffer[0], buffer[1], buffer[2], buffer[3], buffer[4], buffer[5], buffer[6]); // 打印串口数据if (len > 0 && buffer[2] == 0x46){buffer[2] = 0x00; // 置0x46为0x00printf("使用wget拍照中...\n");system(WGET_CMD); // 执行wget命令拍照printf("拍照完成\n");printf("len2 = %d,buffer[0]=0x%x,buffer[1]=0x%x,buffer[2]=0x%x,buffer[3]=0x%x,buffer[4]=0x%x,buffer[5]=0x%x,buffer[6]=0x%x\n", len, buffer[0], buffer[1], buffer[2], buffer[3], buffer[4], buffer[5], buffer[6]);if (access(GARBAGE_FILE, F_OK) == 0){                                          // 判断垃圾分类文件是否存在category = garbage_category(category); // 分类垃圾if (strstr(category, "干垃圾")){buffer[2] = 0x41; // 识别为干垃圾}else if (strstr(category, "湿垃圾")){buffer[2] = 0x42; // 识别为湿垃圾printf("len3 = %d,buffer[0]=0x%x,buffer[1]=0x%x,buffer[2]=0x%x,buffer[3]=0x%x,buffer[4]=0x%x,buffer[5]=0x%x,buffer[6]=0x%x\n", len, buffer[0], buffer[1], buffer[2], buffer[3], buffer[4], buffer[5], buffer[6]);}else if (strstr(category, "可回收垃圾")){buffer[2] = 0x43; // 识别为可回收垃圾printf("len4 = %d,buffer[0]=0x%x,buffer[1]=0x%x,buffer[2]=0x%x,buffer[3]=0x%x,buffer[4]=0x%x,buffer[5]=0x%x,buffer[6]=0x%x\n", len, buffer[0], buffer[1], buffer[2], buffer[3], buffer[4], buffer[5], buffer[6]);}else if (strstr(category, "有害垃圾")){buffer[2] = 0x44; // 识别为有害垃圾}else{buffer[2] = 0x45; // 未识别到垃圾类型}}else{buffer[2] = 0x45; // 识别失败}serialSendstring(serial_fd, buffer, 6); // 发送数据buffer[2] = 0x00;                       // 置0x00为0x46remove(GARBAGE_FILE);                   // 删除垃圾分类文件}}END:garbage_final(); // 销毁垃圾分类器return 0;
}
编译运行
gcc *.c *.h -o test -I /usr/include/python3.10 -l python3.10		//编译代码
./test																//运行程序
【项目优化】增加垃圾桶开关盖功能
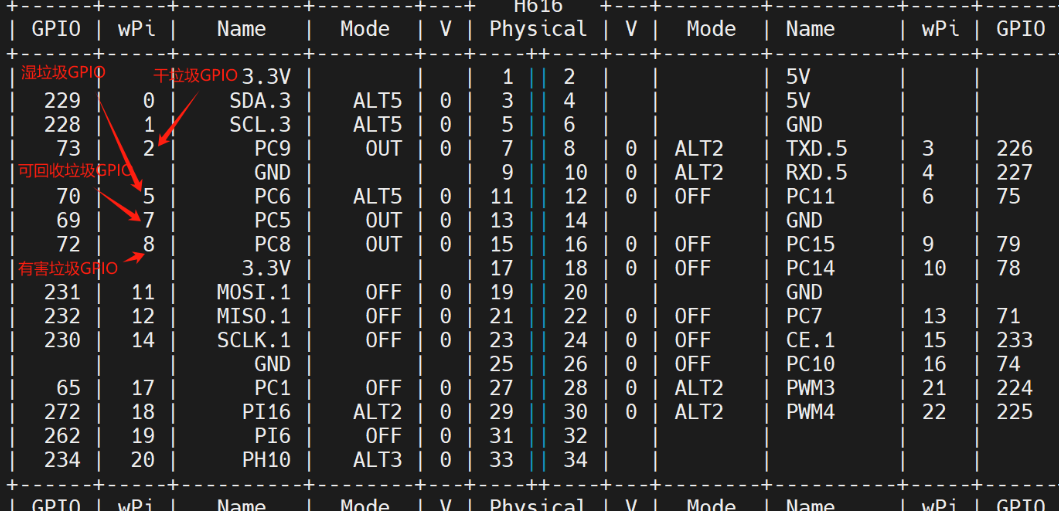
接上用于开关盖的舵机,当前代码里用了4个舵机用于示例代码的编写,用于区分4垃圾类型,接线位置如下:
四个垃圾桶的舵机的PWM引脚都接到了全志H616的开发板上了,由于我们的开发板上面的电源引脚有限,把四个舵机的VCC和GND分别接到DC-DC电源模块的5V引脚
pwm.c
#include <wiringPi.h>
#include <softPwm.h>void pwm_write(int pwm_pin)
{pinMode(pwm_pin, OUTPUT);                                       // 设置pwm_pin引脚为输出模式softPwmCreate(pwm_pin, 0, 200);                                 // 设置pwm_pin的占空比为0,占空比范围为0-200softPwmWrite(pwm_pin, 20);                                      // 设置pwm_pin的占空比为10,即5%,1ms,45%delay(1000);                                                    softPwmStop(pwm_pin);                                            // 停止pwm_pin的占空比输出
}void pwm_stop(int pwm_pin)
{pinMode(pwm_pin, OUTPUT);                                       // 设置pwm_pin引脚为输出模式softPwmCreate(pwm_pin, 0, 200);                                 // 设置pwm_pin的占空比为0,占空比范围为0-200softPwmWrite(pwm_pin, 5);                                       // 设置pwm_pin的占空比为5,0.5ms,0°delay(1000);                                                    softPwmStop(pwm_pin);                                            // 停止pwm_pin的占空比输出
}
pwm.h
#ifndef __PWM_H__
#define __PWM_H__#define GanGarbage_SG90_PIN 2                                           //干垃圾GPIO引脚
#define ShiGarbage_SG90_PIN 5                                           //湿垃圾GPIO引脚
#define KeGarbage_SG90_PIN  7                                           //可回收垃圾GPIO引脚
#define YouGarbage_SG90_PIN 8                                           //有害垃圾GPIO引脚void pwm_write(int pwm_pin);                                            //设置PWM占空比
void pwm_stop(int pwm_pin);                                             //停止PWM占空比#endif
main.c
#include <stdio.h>          // 包含标准输入输出库,用于基本的输入输出操作
#include <stdlib.h>         // 包含标准库,用于内存分配等操作
#include <string.h>         // 包含字符串操作库,用于字符串处理
#include <unistd.h>         // 包含unistd库,用于系统调用
#include <wiringPi.h>       // 包含wiringPi库,用于GPIO控制#include "garbage.h"        // 包含自定义的垃圾回收库,用于内存管理
#include "serialTool.h"     // 包含自定义的串口工具库,用于串口通信
#include "pwm.h"            // 包含自定义的PWM库,用于控制舵机/*判断进程是否在运行*/
static int detect_process(const char * process_name)
{int n = -1;FILE *strm;char buf[128] = {0};// 构造命令字符串,通过ps命令查找进程sprintf(buf, "ps -ax | grep %s|grep -v grep", process_name);// 使用popen执行命令并读取输出if ((strm = popen(buf, "r")) != NULL) {if (fgets(buf, sizeof(buf), strm) != NULL) {n = atoi(buf); // 将进程ID字符串转换为整数}}else {return -1; // popen失败}	pclose(strm); // 关闭popen打开的文件流return n;
}int main(int argc, char **argv)
{int ret;                                                                // 函数返回值int len = 0;                                                            // 串口数据长度int serial_fd;                                                          // 串口文件描述符unsigned char buffer[6] = {0x00, 0x00, 0x00, 0x00, 0x00, 0x00};         // 发送数据char *category = NULL;                                                  // 垃圾分类结果wiringPiSetup();                                                         // 初始化wiringPi库garbage_init();                                                         // 初始化垃圾分类器ret = detect_process("mjpg_streamer");                                  // 检测mjpg_streamer是否在运行if(ret == -1){              printf("USB摄像头未连接或mjpg_streamer未启动\n");goto END;                                                           // 未启动则退出}serial_fd = mySerialOpen(SERIAL_DEV, SERIAL_BAUD);                      // 打开串口if(serial_fd == -1){printf("打开串口失败\n");goto END;                                                           // 打开串口失败则退出}while(1){len = mySerialReadString(serial_fd, buffer);                        // 读取串口数据printf("len = %d, buffer[2] = 0x%x\n",len, buffer[2]);              // 打印串口数据if(len > 0 && buffer[2] == 0x46){buffer[2] = 0x00;                                              // 置0x46为0x00printf("使用wget拍照中...\n");system(WGET_CMD);                                              // 执行wget命令拍照printf("拍照完成\n");if(access(GARBAGE_FILE, F_OK) == 0){                           // 判断垃圾分类文件是否存在category = garbage_category(category);                      // 分类垃圾if(strstr(category, "干垃圾")){buffer[2] = 0x41;                                      // 识别为干垃圾}else if(strstr(category, "湿垃圾")){buffer[2] = 0x42;                                      // 识别为湿垃圾}else if(strstr(category, "可回收垃圾")){buffer[2] = 0x43;                                      // 识别为可回收垃圾}else if(strstr(category, "有害垃圾")){buffer[2] = 0x44;                                      // 识别为有害垃圾}else{buffer[2] = 0x45;                                      // 未识别到垃圾类型}}else{buffer[2] = 0x45;                                          //识别失败}//发送分类结果到串口mySerialSendString(serial_fd, buffer, 6);                       // 发送数据if(buffer[2] == 0x41){                                                      // 识别为干垃圾pwm_stop(GanGarbage_SG90_PIN);                                      delay(2000);                                                            // 延时2秒pwm_write(GanGarbage_SG90_PIN);                                     }else if(buffer[2] == 0x42){                                                // 识别为湿垃圾pwm_stop(ShiGarbage_SG90_PIN);                                      delay(2000);                                                            // 延时2秒pwm_write(ShiGarbage_SG90_PIN);                                     }else if(buffer[2] == 0x43){                                                // 识别为可回收垃圾pwm_stop(KeGarbage_SG90_PIN);                                      delay(2000);                                                            // 延时2秒pwm_write(KeGarbage_SG90_PIN);                                     }else if(buffer[2] == 0x44){                                                // 识别为有害垃圾pwm_stop(YouGarbage_SG90_PIN);                                      delay(2000);                                                            // 延时2秒pwm_write(YouGarbage_SG90_PIN);                                     }buffer[2] = 0x00;                                              // 置0x00为0x46  remove(GARBAGE_FILE);                                          // 删除垃圾分类文件  }}END:garbage_destroy();                                      // 销毁垃圾分类器return 0;
}
修改main.c文件,优化调整代码
main.c
#include <stdio.h>          // 包含标准输入输出库,用于基本的输入输出操作
#include <stdlib.h>         // 包含标准库,用于内存分配等操作
#include <string.h>         // 包含字符串操作库,用于字符串处理
#include <unistd.h>         // 包含unistd库,用于系统调用
#include <wiringPi.h>       // 包含wiringPi库,用于GPIO控制
#include <pthread.h>        // 包含pthread库,用于线程控制#include "garbage.h"        // 包含自定义的垃圾回收库,用于内存管理
#include "serialTool.h"     // 包含自定义的串口工具库,用于串口通信
#include "pwm.h"            // 包含自定义的PWM库,用于控制舵机int serial_fd;                                                          // 串口文件描述符
pthread_mutex_t mutex;                                                  // 互斥锁,用于线程之间的互斥访问
pthread_cond_t cond;                                                    // 条件变量,用于线程之间的条件同步/*判断进程是否在运行*/
static int detect_process(const char * process_name)
{int n = -1;FILE *strm;char buf[128] = {0};// 构造命令字符串,通过ps命令查找进程sprintf(buf, "ps -ax | grep %s|grep -v grep", process_name);// 使用popen执行命令并读取输出if ((strm = popen(buf, "r")) != NULL) {if (fgets(buf, sizeof(buf), strm) != NULL) {n = atoi(buf); // 将进程ID字符串转换为整数}}else {return -1; // popen失败}	pclose(strm); // 关闭popen打开的文件流return n;
}/*语音识别线程*/
void* SU03T_func(void* arg)
{   unsigned char buffer[6] = {0xAA, 0x55, 0x00, 0x00, 0x55, 0xAA};             // 发送数据int len = 0;                                                                // 串口数据长度if(serial_fd == -1){printf("%s|%s|%d:串口未打开\n", __FILE__, __func__, __LINE__);         pthread_exit(NULL);                                                     // 线程退出}while(1){len = mySerialReadString(serial_fd, buffer);                            // 读取串口数据 printf("len = %d, buffer[2] = 0x%x\n",len, buffer[2]);                  // 打印串口数据//检测到垃圾分类数据,唤醒阿里云交互线程if(len > 0 && buffer[2] == 0x46){pthread_mutex_lock(&mutex);                                         // 加互斥锁buffer[2] = 0x00;                                                   // 置0x46为0x00pthread_cond_signal(&cond);                                         // 唤醒阿里云交互线程pthread_mutex_unlock(&mutex);                                       // 解互斥锁}}pthread_exit(0);                                                            // 线程退出
}/* 语音播报线程 */
void* yuyin_func(void* arg)
{pthread_detach(pthread_self());                                             // 使线程成为守护线程unsigned char *buffer = (unsigned char *)arg;                               // 接收到的数据if(serial_fd == -1){printf("%s|%s|%d:串口未打开\n", __FILE__, __func__, __LINE__);         pthread_exit(NULL);                                                     // 线程退出}if(buffer != NULL){                                                         // 判断是否接收到数据printf("开始播报语音...\n");mySerialSendString(serial_fd, buffer, 6);                               // 发送数据printf("播报语音结束\n");}pthread_exit(0);                                                            // 线程退出
}/* SG90舵机线程 */
void* SG90_func(void* arg)
{pthread_detach(pthread_self());                                       //分离线程,使其在退出时能够自动释放资源unsigned char *buffer = (unsigned char *)arg;                               // 接收到的数据if(buffer[2] == 0x41){                                                      // 识别为干垃圾pwm_stop(GanGarbage_SG90_PIN);                                      delay(2000);                                                            // 延时2秒pwm_write(GanGarbage_SG90_PIN);                                     }else if(buffer[2] == 0x42){                                                      // 识别为湿垃圾pwm_stop(ShiGarbage_SG90_PIN);                                      delay(2000);                                                            // 延时2秒pwm_write(ShiGarbage_SG90_PIN);                                     }else if(buffer[2] == 0x43){                                                      // 识别为可回收垃圾pwm_stop(KeGarbage_SG90_PIN);                                      delay(2000);                                                            // 延时2秒pwm_write(KeGarbage_SG90_PIN);                                     }else if(buffer[2] == 0x44){                                                      // 识别为有害垃圾pwm_stop(YouGarbage_SG90_PIN);                                      delay(2000);                                                            // 延时2秒pwm_write(YouGarbage_SG90_PIN);                                     }pthread_exit(0);                                                            // 线程退出
}/*阿里云交互线程*/
void* aliyun_func(void* arg)
{unsigned char buffer[6] = {0xAA, 0x55, 0x00, 0x00, 0x55, 0xAA};             // 发送数据char *category = NULL;                                                      // 垃圾分类结果pthread_t SG90_thread_id;                                                   // 定义SG90舵机线程IDpthread_t yuyin_thread_id;                                                 // 定义播报线程IDwhile(1){pthread_mutex_lock(&mutex);                                             // 加互斥锁pthread_cond_wait(&cond, &mutex);                                       // 等待SU03T线程发送垃圾分类数据pthread_mutex_unlock(&mutex);                                         // 解互斥锁buffer[2] = 0x00;                                                      // 置0x00为0x46 printf("使用wget拍照中...\n");system(WGET_CMD);                                                      // 执行wget命令拍照printf("拍照完成\n");if(access(GARBAGE_FILE, F_OK) == 0){                                    // 判断垃圾分类文件是否存在    category = garbage_category(category);                              // 分类垃圾if(strstr(category,"干垃圾")){buffer[2] = 0x41;                                              // 识别为干垃圾}else if(strstr(category, "湿垃圾")){buffer[2] = 0x42;                                              // 识别为湿垃圾}else if(strstr(category, "可回收垃圾")){buffer[2] = 0x43;                                              // 识别为可回收垃圾}else if(strstr(category, "有害垃圾")){     buffer[2] = 0x44;                                              // 识别为有害垃圾}else{buffer[2] = 0x45;                                              // 未识别到垃圾类型}  }else{buffer[2] = 0x45;                                                  // 识别失败}//创建开垃圾桶线程pthread_create(&SG90_thread_id, NULL, SG90_func, (void *)buffer);      // 创建SG90舵机线程//创建语音播报线程pthread_create(&yuyin_thread_id, NULL, yuyin_func, (void *)buffer);     // 创建播报线程remove(GARBAGE_FILE);                                                   // 删除垃圾分类文件                              }pthread_exit(NULL);                                                   // 线程退出
}int main(int argc, char **argv)
{int ret;pthread_t SU03T_thread_id;                                              // 定义SU03T线程IDpthread_t aliyun_thread_id;                                             // 定义阿里云交互线程IDwiringPiSetup();                                                         // 初始化wiringPi库garbage_init();                                                         // 初始化垃圾分类器ret = detect_process("mjpg_streamer");                                  // 检测mjpg_streamer是否在运行if(ret == -1){              printf("USB摄像头未连接或mjpg_streamer未启动\n");goto END;                                                           // 未启动则退出}serial_fd = mySerialOpen(SERIAL_DEV, SERIAL_BAUD);                      // 打开串口if(serial_fd == -1){printf("打开串口失败\n");goto END;                                                           // 打开串口失败则退出}//创建语音线程pthread_create(&SU03T_thread_id, NULL, SU03T_func, NULL);                // 创建SU03T线程//创建阿里云交互线程pthread_create(&aliyun_thread_id, NULL, aliyun_func, NULL);              // 创建阿里云交互线程pthread_join(SU03T_thread_id, NULL);                                    // 等待SU03T线程结束pthread_join(aliyun_thread_id, NULL);                                   // 等待阿里云交互线程结束pthread_mutex_destroy(&mutex);                                           // 销毁互斥锁pthread_cond_destroy(&cond);                                             // 销毁条件变量close(serial_fd);                                                      // 关闭串口END:garbage_destroy();                                                    // 销毁垃圾分类器return 0;
}
编译运行
gcc *.c *.h -o test -I /usr/include/python3.10 -l python3.10 -l pthread -l wiringPi
sudo -E ./test
写一个shell脚本用于杀死运行的进程
当你运行程序时,shell脚本可以使用ps命令查找到特定进程的PID并使用kill命令杀死该进程。 以下是一个简单的Shell脚本示例,假设你的程序名为test
kill.sh
#!/bin/bash# 查找进程PID
PID=$(ps aux | grep './test' | grep -v grep | awk '{print $2}')if [ -n "$PID" ]; then# 杀死进程kill -SIGKILL $PIDecho "Process ./test (PID $PID) killed."
elseecho "Process ./test not found."
fi
添加可执行权限
chmod +x kill_test.sh【项目优化】添加oled模块
myOLED.c
/* myOLED.c */
#include <errno.h>
#include <string.h>
#include <stdio.h>
#include <stdlib.h>
#include <time.h>
#include <stdint.h>
#include "oled.h"
#include "font.h"#include "myOLED.h" #define FILENAME "/dev/i2c-3"                                               //设备文件名
static struct display_info disp;                                           //显示信息结构体int oled_show(void *arg)                                                   //显示垃圾信息
{unsigned char *buffer = (unsigned char *)arg;                            //获取垃圾信息oled_putstrto(&disp, 0, 0, "Garbage type:");     disp.font = font2;switch(buffer[2])                                                     //根据垃圾类型显示垃圾名称{case 0x41:oled_putstrto(&disp, 0, 20, "Gan Garbage");                       //干垃圾break;case 0x42:oled_putstrto(&disp, 0, 20, "Shi Garbage");                         //湿垃圾break;case 0x43:oled_putstrto(&disp, 0, 20, "KeHuiShou Garbage");                    //可回收垃圾break;case 0x44:oled_putstrto(&disp, 0, 20, "YouHai Garbage");                      //有害垃圾break;case 0x45:oled_putstrto(&disp, 0, 20, "Not Garbage");                         //未识别到垃圾类型break;}disp.font = font2;                                                          //选择字体oled_send_buffer(&disp);                                                   //发送显示缓冲区     return 0;
}int myoled_init(void)                                                           //初始化OLED屏幕
{int e;                                                                       //错误码   disp.address = OLED_I2C_ADDR;                                               //设置OLED地址disp.font = font2;                                                           //选择字体e = oled_open(&disp, FILENAME);                                             //打开OLED设备  e = oled_init(&disp);                                                       //初始化OLED屏幕return  e;
}
myOLED.h
/* myOLED.h*/
#ifndef __MYOLED__H
#define __MYOLED__Hint myoled_init(void);                      //初始化OLED
int oled_show(void *arg);                   //显示OLED#endif
main.c
/* main.c */
#include <stdio.h>          // 包含标准输入输出库,用于基本的输入输出操作
#include <stdlib.h>         // 包含标准库,用于内存分配等操作
#include <string.h>         // 包含字符串操作库,用于字符串处理
#include <unistd.h>         // 包含unistd库,用于系统调用
#include <wiringPi.h>       // 包含wiringPi库,用于GPIO控制
#include <pthread.h>        // 包含pthread库,用于线程控制#include "garbage.h"        // 包含自定义的垃圾回收库,用于内存管理
#include "serialTool.h"     // 包含自定义的串口工具库,用于串口通信
#include "pwm.h"            // 包含自定义的PWM库,用于控制舵机
#include "myOLED.h"         // 包含自定义的OLED库,用于显示屏控制int serial_fd;                                                          // 串口文件描述符
pthread_mutex_t mutex;                                                  // 互斥锁,用于线程之间的互斥访问
pthread_cond_t cond;                                                    // 条件变量,用于线程之间的条件同步/*判断进程是否在运行*/
static int detect_process(const char * process_name)
{int n = -1;FILE *strm;char buf[128] = {0};// 构造命令字符串,通过ps命令查找进程sprintf(buf, "ps -ax | grep %s|grep -v grep", process_name);// 使用popen执行命令并读取输出if ((strm = popen(buf, "r")) != NULL) {if (fgets(buf, sizeof(buf), strm) != NULL) {n = atoi(buf); // 将进程ID字符串转换为整数}}else {return -1; // popen失败}	pclose(strm); // 关闭popen打开的文件流return n;
}/*语音识别线程*/
void* SU03T_func(void* arg)
{   unsigned char buffer[6] = {0xAA, 0x55, 0x00, 0x00, 0x55, 0xAA};             // 发送数据int len = 0;                                                                // 串口数据长度if(serial_fd == -1){printf("%s|%s|%d:串口未打开\n", __FILE__, __func__, __LINE__);         pthread_exit(NULL);                                                     // 线程退出}while(1){len = mySerialReadString(serial_fd, buffer);                            // 读取串口数据 printf("len = %d, buffer[2] = 0x%x\n",len, buffer[2]);                  // 打印串口数据//检测到垃圾分类数据,唤醒阿里云交互线程if(len > 0 && buffer[2] == 0x46){pthread_mutex_lock(&mutex);                                         // 加互斥锁buffer[2] = 0x00;                                                   // 置0x46为0x00pthread_cond_signal(&cond);                                         // 唤醒阿里云交互线程pthread_mutex_unlock(&mutex);                                       // 解互斥锁}}pthread_exit(0);                                                            // 线程退出
}/* 语音播报线程 */
void* yuyin_func(void* arg)
{pthread_detach(pthread_self());                                        //分离线程,使其在退出时能够自动释放资源unsigned char *buffer = (unsigned char *)arg;                               // 接收到的数据if(serial_fd == -1){printf("%s|%s|%d:串口未打开\n", __FILE__, __func__, __LINE__);         pthread_exit(NULL);                                                     // 线程退出}if(buffer != NULL){                                                         // 判断是否接收到数据printf("开始播报语音...\n");mySerialSendString(serial_fd, buffer, 6);                               // 发送数据printf("播报语音结束\n");}pthread_exit(0);                                                            // 线程退出
}/* SG90舵机线程 */
void* SG90_func(void* arg)
{pthread_detach(pthread_self());                                        //分离线程,使其在退出时能够自动释放资源unsigned char *buffer = (unsigned char *)arg;                               // 接收到的数据if(buffer[2] == 0x41){                                                      // 识别为干垃圾pwm_stop(GanGarbage_SG90_PIN);                                      delay(2000);                                                            // 延时2秒pwm_write(GanGarbage_SG90_PIN);                                     }else if(buffer[2] == 0x42){                                                      // 识别为湿垃圾pwm_stop(ShiGarbage_SG90_PIN);                                      delay(2000);                                                            // 延时2秒pwm_write(ShiGarbage_SG90_PIN);                                     }else if(buffer[2] == 0x43){                                                      // 识别为可回收垃圾pwm_stop(KeGarbage_SG90_PIN);                                      delay(2000);                                                            // 延时2秒pwm_write(KeGarbage_SG90_PIN);                                     }else if(buffer[2] == 0x44){                                                      // 识别为有害垃圾pwm_stop(YouGarbage_SG90_PIN);                                      delay(2000);                                                            // 延时2秒pwm_write(YouGarbage_SG90_PIN);                                     }pthread_exit(0);                                                            // 线程退出
}/* OLED显示线程 */
void* OLED_func(void* arg)
{pthread_detach(pthread_self());                                        //分离线程,使其在退出时能够自动释放资源myoled_init();                                                              //OLED初始化oled_show(arg);                                                           //OLED显示垃圾信息  pthread_exit(0);                                                            // 线程退出
}/*阿里云交互线程*/
void* aliyun_func(void* arg)
{unsigned char buffer[6] = {0xAA, 0x55, 0x00, 0x00, 0x55, 0xAA};             // 发送数据char *category = NULL;                                                      // 垃圾分类结果pthread_t SG90_thread_id;                                                   // 定义SG90舵机线程IDpthread_t yuyin_thread_id;                                                 // 定义播报线程IDpthread_t OLED_thread_id;                                                  // 定义OLED显示线程IDwhile(1){pthread_mutex_lock(&mutex);                                             // 加互斥锁pthread_cond_wait(&cond, &mutex);                                       // 等待SU03T线程发送垃圾分类数据pthread_mutex_unlock(&mutex);                                         // 解互斥锁buffer[2] = 0x00;                                                      // 置0x00为0x46 printf("使用wget拍照中...\n");system(WGET_CMD);                                                      // 执行wget命令拍照printf("拍照完成\n");if(access(GARBAGE_FILE, F_OK) == 0){                                    // 判断垃圾分类文件是否存在    category = garbage_category(category);                              // 分类垃圾if(strstr(category,"干垃圾")){buffer[2] = 0x41;                                              // 识别为干垃圾}else if(strstr(category, "湿垃圾")){buffer[2] = 0x42;                                              // 识别为湿垃圾}else if(strstr(category, "可回收垃圾")){buffer[2] = 0x43;                                              // 识别为可回收垃圾}else if(strstr(category, "有害垃圾")){     buffer[2] = 0x44;                                              // 识别为有害垃圾}else{buffer[2] = 0x45;                                              // 未识别到垃圾类型}  }else{buffer[2] = 0x45;                                                  // 识别失败}//创建开垃圾桶线程pthread_create(&SG90_thread_id, NULL, SG90_func, (void *)buffer);      // 创建SG90舵机线程//创建语音播报线程pthread_create(&yuyin_thread_id, NULL, yuyin_func, (void *)buffer);     // 创建播报线程//OLED显示垃圾分类结果线程pthread_create(&OLED_thread_id, NULL, OLED_func, (void *)buffer);     // 创建OLED显示线程remove(GARBAGE_FILE);                                                   // 删除垃圾分类文件                              }pthread_exit(NULL);                                                   // 线程退出
}int main(int argc, char **argv)
{int ret;pthread_t SU03T_thread_id;                                              // 定义SU03T线程IDpthread_t aliyun_thread_id;                                             // 定义阿里云交互线程IDwiringPiSetup();                                                         // 初始化wiringPi库garbage_init();                                                         // 初始化垃圾分类器ret = detect_process("mjpg_streamer");                                  // 检测mjpg_streamer是否在运行if(ret == -1){              printf("USB摄像头未连接或mjpg_streamer未启动\n");goto END;                                                           // 未启动则退出}serial_fd = mySerialOpen(SERIAL_DEV, SERIAL_BAUD);                      // 打开串口if(serial_fd == -1){printf("打开串口失败\n");goto END;                                                           // 打开串口失败则退出}//创建语音线程pthread_create(&SU03T_thread_id, NULL, SU03T_func, NULL);                // 创建SU03T线程//创建阿里云交互线程pthread_create(&aliyun_thread_id, NULL, aliyun_func, NULL);              // 创建阿里云交互线程pthread_join(SU03T_thread_id, NULL);                                    // 等待SU03T线程结束pthread_join(aliyun_thread_id, NULL);                                   // 等待阿里云交互线程结束pthread_mutex_destroy(&mutex);                                           // 销毁互斥锁pthread_cond_destroy(&cond);                                             // 销毁条件变量close(serial_fd);                                                      // 关闭串口END:garbage_destroy();                                                    // 销毁垃圾分类器return 0;
}
【项目优化】增加网络控制功能
心跳包就是服务器定时向客户端发送查询信息,如果客户端有回应就代表连接正常,类似于linux系统的看门狗机制。心跳包的机制有一种方法就是采用TCP_KEEPALIVE机制,它是一种用于检测TCP连接是否存活的机制,它的原理是在一定时间内没有数据往来时,发送探测包给对方,如果对方没有响应,就认为连接已经断开。TCP_KEEPALIVE机制可以通过设置一些参数来调整,如探测时间间隔、探测次数等。
Linux内核提供了通过sysctl命令查看和配置TCP KeepAlive参数的方法。
查看当前系统的TCP KeepAlive参数
sysctl net.ipv4.tcp_keepalive_time
sysctl net.ipv4.tcp_keepalive_probes
sysctl net.ipv4.tcp_keepalive_intvl
修改TCP KeepAlive参数
sysctl net.ipv4.tcp_keepalive_time=3600socket.h
/* socket.h */
#ifndef __SOCKET_H__
#define __SOCKET_H__#include <stdio.h>
#include <stdlib.h>
#include <string.h>
#include <sys/types.h>          /* See NOTES */
#include <sys/socket.h>
#include <netinet/in.h>
#include <arpa/inet.h>
#include <netinet/tcp.h>
#include <errno.h>
#include <unistd.h>#define IPADDR "192.168.31.249"         // IP地址
#define IPPORT "8192"                   // 端口号
#define BUF_SIZE 6                      // 缓冲区大小int socket_init(const char *ipaddr, const char *port);#endif
socket.c
/* socket.c */
#include "socket.h"int socket_init(const char *ipaddr, const char *port)
{int s_fd;                                                                   //套接字文件描述符int ret;struct sockaddr_in server_addr;                                              //服务器地址结构体memset(&server_addr, 0, sizeof(server_addr));                                //清零服务器地址结构体s_fd = socket(AF_INET, SOCK_STREAM, 0);                                     //创建TCP/IP套接字if(s_fd == -1){printf("创建套接字失败!\n");perror("socket");return -1;}server_addr.sin_family = AF_INET;                                        //设置服务器地址结构体的地址族为IPv4server_addr.sin_port = htons(atoi(port));                                    //设置服务器地址结构体的端口号inet_aton(ipaddr, &server_addr.sin_addr);                                   // 设置服务器IP地址ret = bind(s_fd, (struct sockaddr *)&server_addr, sizeof(server_addr));    //绑定IP地址和端口号if(ret == -1){printf("绑定IP地址和端口号失败!\n");   perror("bind");return -1;  }ret = listen(s_fd, 1);                                                      //监听套接字if(ret == -1){printf("监听套接字失败!\n");perror("listen");return -1;}return s_fd;                                                               //返回套接字文件描述符
}
修改后的main.c
/* main.c */
#include <stdio.h>          // 包含标准输入输出库,用于基本的输入输出操作
#include <stdlib.h>         // 包含标准库,用于内存分配等操作
#include <string.h>         // 包含字符串操作库,用于字符串处理
#include <unistd.h>         // 包含unistd库,用于系统调用
#include <wiringPi.h>       // 包含wiringPi库,用于GPIO控制
#include <pthread.h>        // 包含pthread库,用于线程控制#include "garbage.h"        // 包含自定义的垃圾回收库,用于内存管理
#include "serialTool.h"     // 包含自定义的串口工具库,用于串口通信
#include "pwm.h"            // 包含自定义的PWM库,用于控制舵机
#include "myOLED.h"         // 包含自定义的OLED库,用于显示屏控制
#include "socket.h"         // 包含自定义的socket库,用于网络通信int serial_fd;                                                          // 串口文件描述符
pthread_mutex_t mutex;                                                  // 互斥锁,用于线程之间的互斥访问
pthread_cond_t cond;                                                    // 条件变量,用于线程之间的条件同步/*判断进程是否在运行*/
static int detect_process(const char * process_name)
{int n = -1;FILE *strm;char buf[128] = {0};// 构造命令字符串,通过ps命令查找进程sprintf(buf, "ps -ax | grep %s|grep -v grep", process_name);// 使用popen执行命令并读取输出if ((strm = popen(buf, "r")) != NULL) {if (fgets(buf, sizeof(buf), strm) != NULL) {n = atoi(buf); // 将进程ID字符串转换为整数}}else {return -1; // popen失败}	pclose(strm); // 关闭popen打开的文件流return n;
}/*语音识别线程*/
void* SU03T_func(void* arg)
{   unsigned char buffer[6] = {0xAA, 0x55, 0x00, 0x00, 0x55, 0xAA};             // 发送数据int len = 0;                                                                // 串口数据长度if(serial_fd == -1){printf("%s|%s|%d:串口未打开\n", __FILE__, __func__, __LINE__);         pthread_exit(NULL);                                                     // 线程退出}while(1){len = mySerialReadString(serial_fd, buffer);                            // 读取串口数据 printf("len = %d, buffer[2] = 0x%x\n",len, buffer[2]);                  // 打印串口数据//检测到垃圾分类数据,唤醒阿里云交互线程if(len > 0 && buffer[2] == 0x46){pthread_mutex_lock(&mutex);                                         // 加互斥锁buffer[2] = 0x00;                                                   // 置0x46为0x00pthread_cond_signal(&cond);                                         // 唤醒阿里云交互线程pthread_mutex_unlock(&mutex);                                       // 解互斥锁}}pthread_exit(0);                                                            // 线程退出
}/* 语音播报线程 */
void* yuyin_func(void* arg)
{pthread_detach(pthread_self());                                        //分离线程,使其在退出时能够自动释放资源unsigned char *buffer = (unsigned char *)arg;                               // 接收到的数据if(serial_fd == -1){printf("%s|%s|%d:串口未打开\n", __FILE__, __func__, __LINE__);         pthread_exit(NULL);                                                     // 线程退出}if(buffer != NULL){                                                         // 判断是否接收到数据printf("开始播报语音...\n");mySerialSendString(serial_fd, buffer, 6);                               // 发送数据printf("播报语音结束\n");}pthread_exit(0);                                                            // 线程退出
}/* SG90舵机线程 */
void* SG90_func(void* arg)
{pthread_detach(pthread_self());                                        //分离线程,使其在退出时能够自动释放资源unsigned char *buffer = (unsigned char *)arg;                               // 接收到的数据if(buffer[2] == 0x41){                                                      // 识别为干垃圾pwm_stop(GanGarbage_SG90_PIN);                                      delay(2000);                                                            // 延时2秒pwm_write(GanGarbage_SG90_PIN);                                     }else if(buffer[2] == 0x42){                                                      // 识别为湿垃圾pwm_stop(ShiGarbage_SG90_PIN);                                      delay(2000);                                                            // 延时2秒pwm_write(ShiGarbage_SG90_PIN);                                     }else if(buffer[2] == 0x43){                                                      // 识别为可回收垃圾pwm_stop(KeGarbage_SG90_PIN);                                      delay(2000);                                                            // 延时2秒pwm_write(KeGarbage_SG90_PIN);                                     }else if(buffer[2] == 0x44){                                                      // 识别为有害垃圾pwm_stop(YouGarbage_SG90_PIN);                                      delay(2000);                                                            // 延时2秒pwm_write(YouGarbage_SG90_PIN);                                     }pthread_exit(0);                                                            // 线程退出
}/* OLED显示线程 */
void* OLED_func(void* arg)
{pthread_detach(pthread_self());                                        //分离线程,使其在退出时能够自动释放资源myoled_init();                                                              //OLED初始化oled_show(arg);                                                           //OLED显示垃圾信息  pthread_exit(0);                                                            // 线程退出
}/*阿里云交互线程*/
void* aliyun_func(void* arg)
{unsigned char buffer[6] = {0xAA, 0x55, 0x00, 0x00, 0x55, 0xAA};             // 发送数据char *category = NULL;                                                      // 垃圾分类结果pthread_t SG90_thread_id;                                                   // 定义SG90舵机线程IDpthread_t yuyin_thread_id;                                                 // 定义播报线程IDpthread_t OLED_thread_id;                                                  // 定义OLED显示线程IDwhile(1){pthread_mutex_lock(&mutex);                                             // 加互斥锁pthread_cond_wait(&cond, &mutex);                                       // 等待SU03T线程发送垃圾分类数据pthread_mutex_unlock(&mutex);                                         // 解互斥锁buffer[2] = 0x00;                                                      // 置0x00为0x46 printf("使用wget拍照中...\n");system(WGET_CMD);                                                      // 执行wget命令拍照printf("拍照完成\n");if(access(GARBAGE_FILE, F_OK) == 0){                                    // 判断垃圾分类文件是否存在    category = garbage_category(category);                              // 分类垃圾if(strstr(category,"干垃圾")){buffer[2] = 0x41;                                              // 识别为干垃圾}else if(strstr(category, "湿垃圾")){buffer[2] = 0x42;                                              // 识别为湿垃圾}else if(strstr(category, "可回收垃圾")){buffer[2] = 0x43;                                              // 识别为可回收垃圾}else if(strstr(category, "有害垃圾")){     buffer[2] = 0x44;                                              // 识别为有害垃圾}else{buffer[2] = 0x45;                                              // 未识别到垃圾类型}  }else{buffer[2] = 0x45;                                                  // 识别失败}//创建开垃圾桶线程pthread_create(&SG90_thread_id, NULL, SG90_func, (void *)buffer);      // 创建SG90舵机线程//创建语音播报线程pthread_create(&yuyin_thread_id, NULL, yuyin_func, (void *)buffer);     // 创建播报线程//OLED显示垃圾分类结果线程pthread_create(&OLED_thread_id, NULL, OLED_func, (void *)buffer);     // 创建OLED显示线程remove(GARBAGE_FILE);                                                   // 删除垃圾分类文件                              }pthread_exit(NULL);                                                   // 线程退出
}/* 网络交互线程 */
void* socket_func(void* arg)
{int s_fd;                                                               // 网络通信文件描述符 int c_fd;                                                               // 客户端文件描述符struct sockaddr_in client_addr;                                          // 客户端地址char buffer[6];                                                         // 接收到的数据char n_read;                                                            // 读取到的字符 memset(&client_addr, 0, sizeof(client_addr));                            // 客户端地址清零s_fd = socket_init(IPADDR, IPPORT);                                   // 初始化网络通信if(s_fd == -1){printf("初始化网络通信失败\n");pthread_exit(NULL);                                                 // 线程退出}else{printf("初始化网络通信成功\n");}int client_len = sizeof(client_addr);                                    // 客户端地址长度while(1){c_fd = accept(s_fd, (struct sockaddr *)&client_addr, &client_len);    // 接收客户端连接// 配置 TCP KeepAlive 参数int keepalive = 1; 			// 开启TCP KeepAlive功能int keepidle = 5; 			// tcp_keepalive_time 3s内没收到数据开始发送心跳包int keepcnt = 3; 			// tcp_keepalive_probes 每次发送心跳包的时间间隔,单位秒int keepintvl = 3;			// tcp_keepalive_intvl 每3s发送一次心跳包setsockopt(c_fd, SOL_SOCKET, SO_KEEPALIVE, (void *)&keepalive, sizeof(keepalive));setsockopt(c_fd, SOL_TCP, TCP_KEEPIDLE, (void *)&keepidle, sizeof(keepidle));setsockopt(c_fd, SOL_TCP, TCP_KEEPCNT, (void *)&keepcnt, sizeof(keepcnt));setsockopt(c_fd, SOL_TCP, TCP_KEEPINTVL, (void *)&keepintvl, sizeof(keepintvl));if(c_fd == -1){printf("接收客户端连接失败\n");perror("accept");continue;}printf("接收客户端连接成功:%s:%d\n",inet_ntoa(client_addr.sin_addr), ntohs(client_addr.sin_port));while(1){memset(buffer, 0, sizeof(buffer));                                // 清空接收到的数据n_read = read(c_fd, buffer, sizeof(buffer));                      // 读取数据if(n_read == -1 || n_read == 0){printf("读取数据失败\n");perror("read");break;}else if(n_read > 0){                                             // 读取到数据printf("接收到数据:%s\n", buffer);if(strstr(buffer, "open")){                                     //检测到open命令pthread_mutex_lock(&mutex);                                 // 加互斥锁pthread_cond_signal(&cond);                                 // 唤醒阿里云交互线程   pthread_mutex_unlock(&mutex);                               // 解互斥锁}}}close(c_fd);                                                         // 关闭客户端连接}pthread_exit(NULL);                                                     // 线程退出
}int main(int argc, char **argv)
{int ret;pthread_t SU03T_thread_id;                                              // 定义SU03T线程IDpthread_t aliyun_thread_id;                                             // 定义阿里云交互线程IDpthread_t socket_thread_id;                                             // 定义网络交互线程IDwiringPiSetup();                                                         // 初始化wiringPi库garbage_init();                                                         // 初始化垃圾分类器ret = detect_process("mjpg_streamer");                                  // 检测mjpg_streamer是否在运行if(ret == -1){              printf("USB摄像头未连接或mjpg_streamer未启动\n");goto END;                                                           // 未启动则退出}serial_fd = mySerialOpen(SERIAL_DEV, SERIAL_BAUD);                      // 打开串口if(serial_fd == -1){printf("打开串口失败\n");goto END;                                                           // 打开串口失败则退出}//创建语音线程pthread_create(&SU03T_thread_id, NULL, SU03T_func, NULL);                // 创建SU03T线程//创建阿里云交互线程pthread_create(&aliyun_thread_id, NULL, aliyun_func, NULL);              // 创建阿里云交互线程//创建网络交互线程pthread_create(&socket_thread_id, NULL, socket_func, NULL);              // 创建网络交互线程pthread_join(SU03T_thread_id, NULL);                                    // 等待SU03T线程结束pthread_join(aliyun_thread_id, NULL);                                   // 等待阿里云交互线程结束pthread_join(socket_thread_id, NULL);                                   // 等待网络交互线程结束pthread_mutex_destroy(&mutex);                                           // 销毁互斥锁pthread_cond_destroy(&cond);                                             // 销毁条件变量close(serial_fd);                                                      // 关闭串口END:garbage_destroy();                                                    // 销毁垃圾分类器return 0;
}
后记
没想到这个项目拖延了很久很久,大家有什么可以持久自律的方法分享一下吗?